Click For Crochet Abbreviations List
WHAT DO YOU NEED
Crochet hook 2.5mm
Granny Kit cotton 2 balls of Lace, 1 ball of each: Lilac, ShaleGrey
Some yarn in colour Framboise to sew the shoes straps
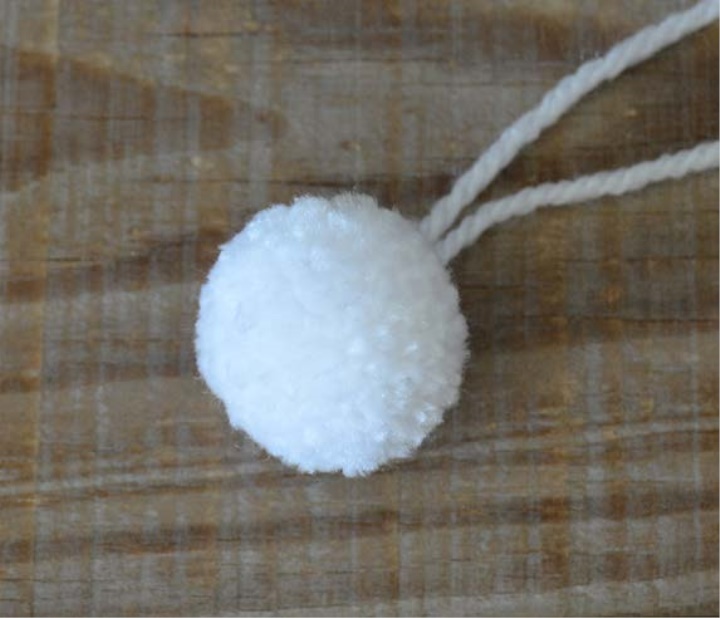
Some white acrylic or any other hairy yarn to make pompom for the tail.
2 black glass eyes - 6mm
Soft stuffing to fill in the doll
Tiny little button (not bigger than 1cm)
Tapestry needle
LEVEL
These instructions are written step by step but are good for you if you have experienced
crochet in the past and if this is not the first project you do.
You have to be familiar with the crochet abbreviations and different stitches.
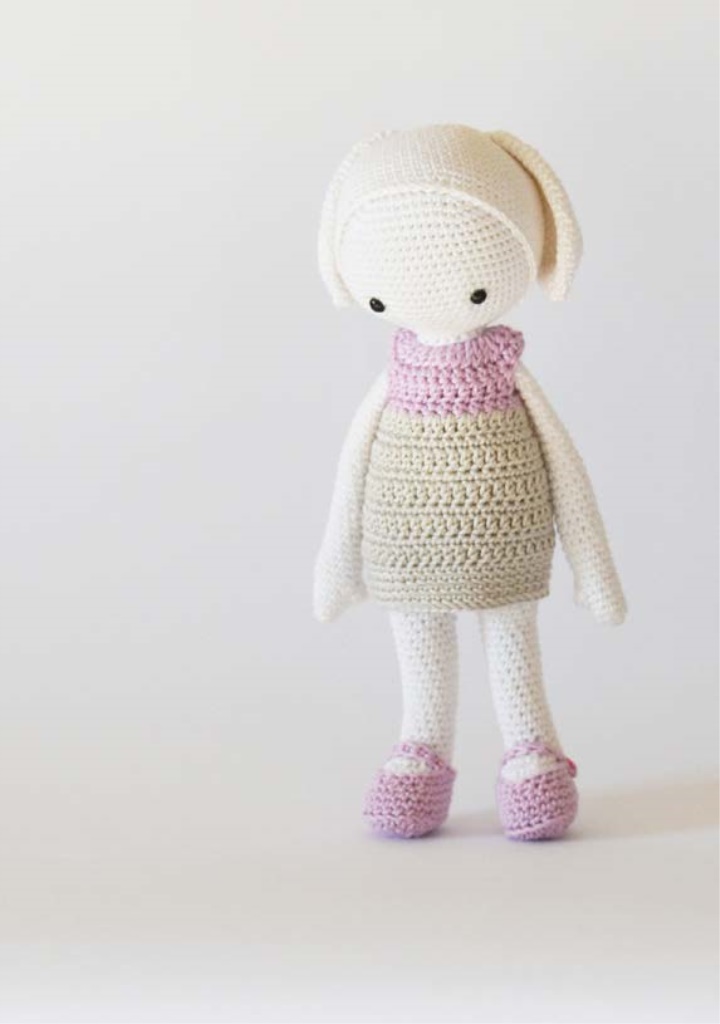
DOLL SIZE
If you use Granny Kit cotton yarn with a 2.5mm hook, your bunny will be about 26 cm height.
of course you can use any yarn you like or have in stash just note that the doll size will
change and you might need to make few changes for the dress and change the eyes size.
ABBREVIATIONS (US crochet terms)
ch = chain stitch
st(s) = stitch(s)
slst = slip stitch
sc = single crochet
hdc = half double crochet
dc = double crochet
sc2tog = single crochet crochet 2 next stitches together
sc4tog = single crochet crochet 4 next stitches together
rnd(s) = round(s)
lp(s) = loop(s)
bl = back loop
sk = skip
(...)X = repeat instructions in brackets X times
NOTE
Make sure you crochet the doll pretty tight so you don't have any stretching holes where the
stuffing material can be seen thought later, when you fill in your bunny.
When you crochet the shoes and dress you don't have to crochet very tight.
LEGS use colour Lace(make 2 of them)
To start ch6
You'll work in spiral and therefor it'll be easier for you to mark your first st each rnd.
rnd 1. sc2 into the 2nd ch from hook, sc in each of the next 3 ch, now cs4 into the last ch and
tighten the lp. Now start on the other side. sc in each of the next 3 ch, cs2 in last ch. (14 sts)
You'll work in spiral now so mark your first st in each rnd.
rnd 2. cs, sc2, sc in each of the next 3, hdc in the next, hdc2 into the next 2 sts, hdc in the
next, sc into the next 3 sts, sc2, sc in last st. (18 sts)
rnd 3. sc, sc2, sc in the next 4 sts, hdc2 in next 2, hdc in next 2, hdc2 in next 2, sc in the 4
next sts, sc2, sc. (24 sts)
rnd 4. sc to bl across (24 sts)
rnd 5+6 (2 rnds). sc across (24 sts)
rnd 7. sc in next 5, (sc2tog, cs)X5, sc in next 4 (19 sts).
rnd 8. sc in next 5 sts, (sc2tog, cs)X3, sc in next 5 (16 sts)
rnd 9. sc in next 6, sc2tog X2, sc in next 6 (14 sts)
Fill in some stuffing material into the leg now, it will be easier to do it at this point. Make sure
you stuff it very firmly.
rnd 10- 23 (14 rnds). sc across (14 sts).
rnd 24. sc in next 3 sts, sc2, sc in next 5 sts, sc2, sc in next 4. (16 sts)
rnd 25. sc across (16 sts)
rnd 26. sc in next 3 sts, sc2, sc in next 9 sts, sc2, sc in next 2. (18 sts)
Fill in some stuffing material into the leg. Break the yarn and make the second leg.
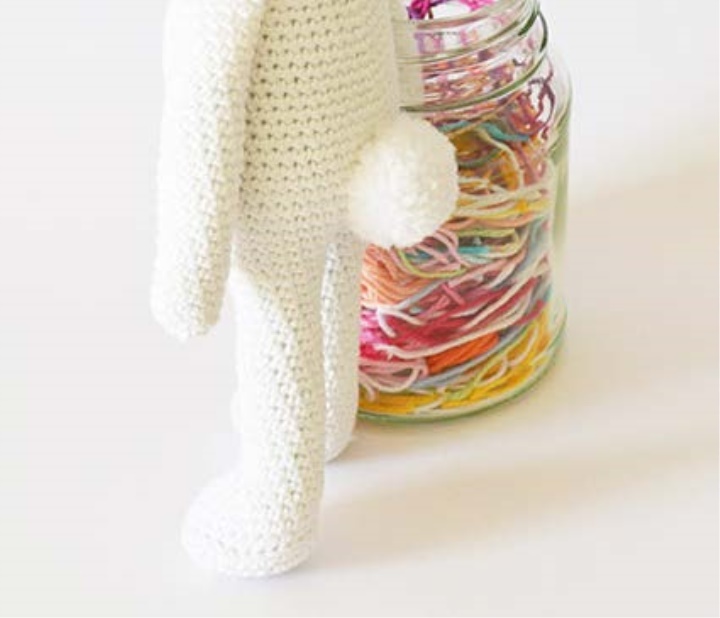
When you have both legs done, hold them side by side and sc one st from both legs together
(connect the 2 legs). see pictures below.
This sc you just made will be the starting point of the following rnds. Now work 34 sc around
both legs, ending this round at the backside. this is rnd1 of the body.
You'll work in spiral and therefor it'll be easier for you to mark your first st each rnd.

BODY use colour Lace
rnd 2. cs2 in next st, sc in next 16 sts, sc2 in the next, sc in next 16 sts. (36 sts)
rnd 3. sc across (36 sts)
rnd 4. (sc in next 8 sts, sc2) X4 (40 sts)
rnd 5. sc across (40 sts)
rnd 6. (sc in next 9 sts, sc2) X4 (44 sts)
rnd 7. sc across (44 sts)
rnd 8. (sc in next 10 sts, sc2) X4. (48 sts)
rnd 9. sc across (48 sts)
rnd 10. sc in next 15, sc2, sc in next 7, sc2, sc in next 7, sc2, sc in next 16. (51 sts)
rnd 11-14 (4 rnds). sc across (51 sts)
Fill in some stuffing material now, it will be harder later.
rnd 15. (sc2tog, sc in next 15) X3 (48 sts)
rnd 16+17 (2 rnds). sc across. (48 sts)
rnd 18. (sc2tog, sc in next 14) X3 (45 sts)
rnd 19. sc across (45 sts)
rnd 20. (sc2tog, sc in next 13) X3 (42 sts)
rnd 21. sc across (42 sts)
rnd 22. (sc2tog, sc in next 12) X3 (39 sts)
rnd 23. sc across (39 sts)
rnd 24. (sc2tog, sc in next 11) X3 (36 sts)
rnd 25. sc across (36 sts)
Now stop to fill in some stuffing material as it will be harder to do it later, make sure you fill it
firmly with the stuffing material.
rnd 26. (sc2tog, sc in next 10) X3 (33 sts)
rnd 27. (sc2tog, sc in next 9) X3 (30 sts)
Now stop to fill in some stuffing material again, as it will be harder to do it later.
rnd 28. (sc2tog, sc in next 8) X3 (27 sts)
rnd 29. (sc2tog, sc in next 7) X3 (24 sts)
rnd 30. (sc2tog, sc in next 6) X3 (21 sts)
Break the yarn and make sure you leave enough yarn to crochet the head to the body later.
Now fill in some stuffing material again, make it very firmly.
HEAD use colour Lace
To start make a magic loop. You'll work in spiral now so mark your first st in each rnd.
rnd 1. sc6 in the yarn loop and tighten the loop.
rnd 2. sc2 in each st around (12 sts)
rnd 3. (sc, sc2) X6 (18 sts)
rnd 4. (sc in next 2 sts, sc2) X6 (24 sts)
rnd 5. (sc in next 3 sts, sc2) X6 (30 sts)
rnd 6. (sc in next 4 sts, sc2) X6 (36 sts)
rnd 7. (sc in next 5 sts, sc2) X6 (42 sts)
rnd 8. (sc in next 6 sts, sc2) X6 (48 sts)
rnd 9. (sc in next 7 sts, sc2) X6 (54 sts)
rnd 10. (sc in next 8 sts, sc2) X6 (60 sts)
rnd 11. (sc in next 9 sts, sc2) X6 (66 sts)
rns 12-21 (10 rnds). sc across (66 sts)
rnd 22. (sc2tog, sc in next 9) X6 (60 sts)
rnd 23. (sc2tog, sc in next 8) X6 (54 sts)
rnd 24. (sc2tog, sc in next 7) X6 (48 sts)
rnd 25. (sc2tog, sc in next 6) X6 (42 sts)
rnd 26. (sc2tog, sc in next 5) X6 (36 sts)
rnd 27. (sc2tog, sc in next 4) X6 (30 sts)
rnd 28. (sc2tog, sc in next 3) X6 (24sts)
rnd 29. (sc2tog, sc in next 2) X6 (18 sts)
rnd 30. sc across (18 sts)
Fill in some stuffing material, make it very firmly.
Break the yarn and make sure you leave enough yarn to sew the eyes to the head later.
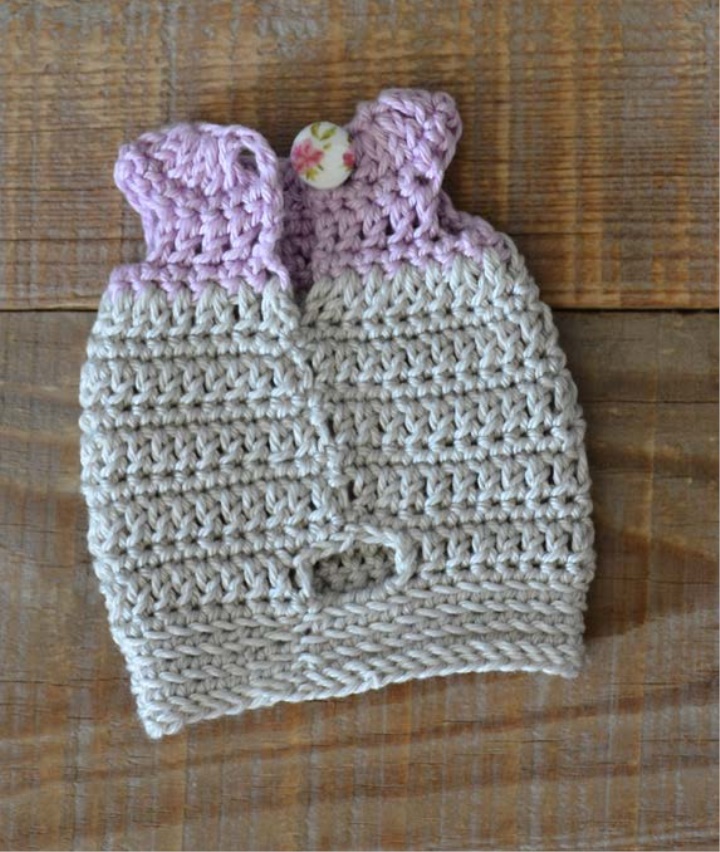
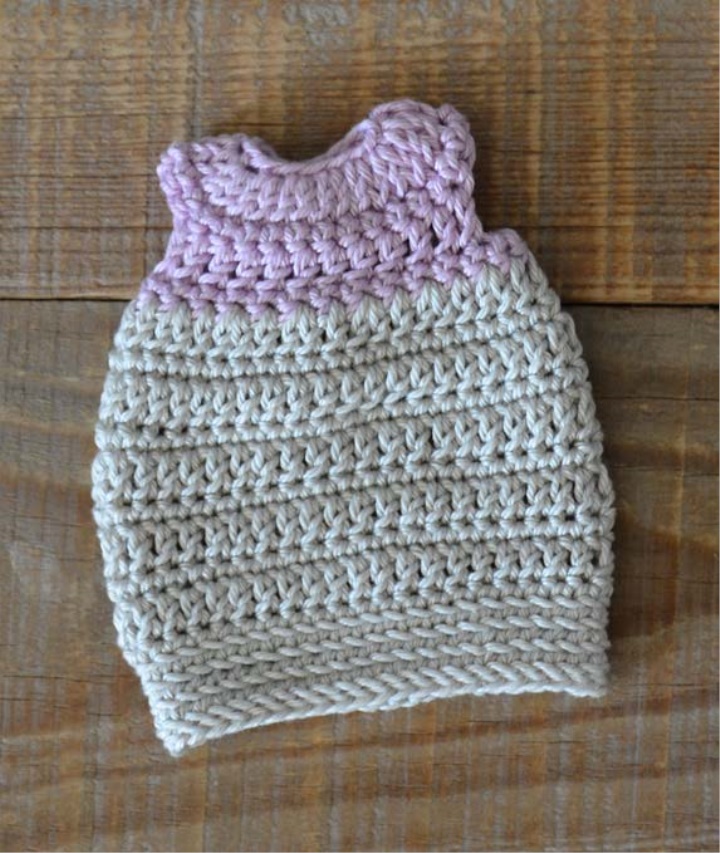
HOODY use colour Lace
To start make a magic loop. You'll work in spiral now so mark your first st in each rnd.
rnd 1. sc6 in the yarn loop and tighten the loop.
rnd 2. sc2 in each st around (12 sts)
rnd 3. (sc, sc2) X6 (18 sts)
rnd 4. (sc in next 2 sts, sc2) X6 (24 sts)
rnd 5. (sc in next 3 sts, sc2) X6 (30 sts)
rnd 6. (sc in next 4 sts, sc2) X6 (36 sts)
rnd 7. (sc in next 5 sts, sc2) X6 (42 sts)
rnd 8. (sc in next 6 sts, sc2) X6 (48 sts)
rnd 9. (sc in next 7 sts, sc2) X6 (54 sts)
rnd 10. (sc in next 8 sts, sc2) X6 (60 sts)
rnd 11. (sc in next 9 sts, sc2) X6 (66 sts)
rns 12-22 (11 rnds). (sc across (66 sts)
rnd 23. (sc2tog, sc in next 9) X6 (60 sts)
rnd 24. (sc2tog, sc in next 8) X6 (54 sts)
Break the yarn and make sure you leave enough yarn to crochet the hoody to the head later.
HANDS use colour Lace (make 2 of them)
To start make a magic loop
You'll work in spiral and therefor it'll be easier for you to mark your first st each rnd.
rnd 1. sc6 in the yarn loop and tighten the loop.
rnd 2. sc2 in each st around (12 sts)
rnd 3+4 (2 rnds). sc across (12 sts)
rnd 5. sc in 5 next sts, dc4 in next st, sc in next 6. (15 sts)
rnd 6. sc in next 5, sc4tog, ch1, sc in next 6. (13 sts)
rnd 7-14 (8 rnds). sc across (13 sts)
rnd 15. sc in next 5, sc2tog, sc in next 6. (12 sts)
rnd 16-39 (24 rnds). sc across. (12 sts)
Fill in some soft stuffing material into the hands, firmly in the lower part and loosely in the
higher half of the hands.
Fold the top of the arm and make sure the thumbs points towards the body. Now sc the sts
together (6 sts), break the yarn and make sure you leave enough yarn to sew the hand to the
body later.
EARS use colour Lace (make 2 of them)
To start make a magic loop
You'll work in spiral and therefor it'll be easier for you to mark your first st each rnd.
rnd 1. sc4 in the yarn loop and tighten the loop.
rnd 2. sc2 in each st around (8 sts)
rnd 3. (sc, sc2) X4 (12 sts)
rnd 4. sc, sc2 in next, (sc in next 2, sc2 in next) X3, sc (16 sts)
rnd 5. (sc in next 3 sts, sc2) X4 (20 sts)
rnd 6. sc in next 2, sc2 in next, (sc in next 4, sc2 in next)X3, sc in next 2 (24 sts)
rnd 7. (sc in next 5 sts, sc2) X4 (28 sts)
rnds 8-14 (7 rnds). sc across (28 sts)
rnd 15. (sc2tog, sc in next 12) X2 (26 sts)
rnd 16-18 (3 rnds). sc across (26 sts)
rnd 19. (sc2tog, sc in next 11) X2 (24 sts)
rnd 20+21 (2 rnds). sc across (24 sts)
rnd 22. (sc2tog, sc in next 10) X2 (22 sts)
rnd 23. sc across (22 sts)
rnd 24. (sc2tog, sc in next 9) X2 (20 sts)
rnd 25. fold the top of the ear, sc the sts together (9 sts).
Break the yarn and leave enough yarn to sew the ear onto the hood & head later.
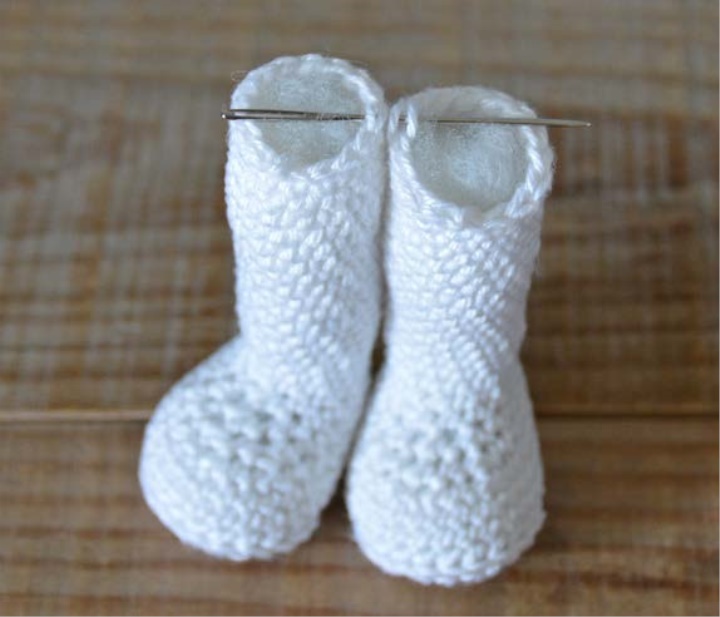
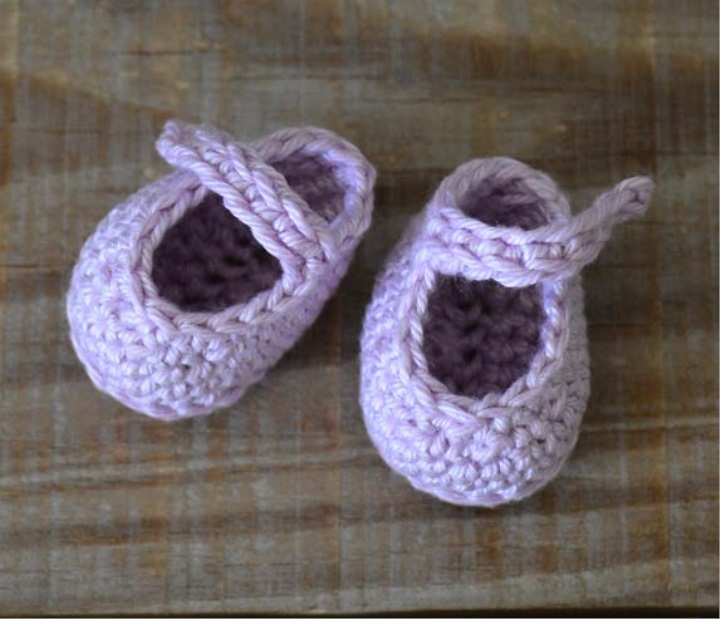
SHOES use colour Lilac (make 2 of them)
To start ch6
You'll work in spiral and therefor it'll be easier for you to mark your first st each rnd.
rnd 1. sc2 into the 2nd ch from hook, sc in each of the next 3 ch, cs4 into the last ch and
tighten the loop. Now start on the other side. sc in each of the next 3 ch, cs2 into the last ch.
(14 sts)
You work in spiral so it'll be easier for you to mark the first st in each rnd.
rnd 2. cs, sc2, sc in each of the next 3, hdc in the next, hdc2 in next 2 sts, hdc in the next, sc
into the next 3 sts, sc2, sc in last st. (18 sts)
rnd 3. sc , sc2, sc in the next 4 sts, hdc2 in next 2, hdc in next 2, hdc2 in next 2, sc in the 4
next sts, sc2, sc. (24 sts)
rnd 4. sc to bl across (24 sts)
rnd 5+6 (2 rnds). sc across (24 sts)
rnd 7. sc in the next 7, (sc2tog, cs) X4, sc in next 5 (20 sts).
Make the strap:
rnd 8. for right shoe: sc in next 10, sc2tog, sc in next 6, ch9, sc in 3th ch from hook, sc in 6
next ch, sc in same st you started the ch9, slst into the last 2 sts.
Break the yarn and weave in tails.
rnd 8. for left shoe: sc in next 5, ch9, sc in 3th ch from hook, sc in 6 next ch, sc in same st
you started the ch9, sc in next 5, sc2tog, sc in next 6 ,slst in last 2 sts.
Break the yarn and weave in tails.
POMPOM TAIL make a white pompom from acrylic or any other hairy yarn suitable to be a
round bunny tail, leave enough yarn to sew the tail to the bunny back later. your pompom
should be about 2 cm diameter.
DRESS start with colour Lilac
To start ch19.
rnd 1. dc in 4th ch from hook, dc2 in each remaining ch, ch1 and turn (32 sts)
rnd 2. sc in each st across, turn (32 sts)
rnd 3. ch3 (counts as first dc), dc in 4 next sts, ch3, skp 5 sts, dc in next 12 sts, ch3, skp 5 sts,
dc in next 5. ch1 and turn (22 sts + two ch3 sps)
rnd 4. sc in next 5, sc3 in ch sp, sc in next 12 sts, sc3 in ch sp, sc in next 5. (28 sts)
Break the Lilac yarn.
rnd 5. Join colour ShaleGrey into the last st from last row, where you just break your yarn,
ch3, dc in same st, work on top of your tails so you don't have to weave them in later.
*dc in next, dc2 in next* rep between ** to end, dc in last st. slst into the 3rd ch of your
initial ch3. (42 sts)
rnd 6. ch1 (counts as first sc), sc in each st around, slst in first ch made. (39 sts)
rnd 7. ch3 (counts as first dc), dc in each st around. slst in 3rd ch of your initial ch3. (42 sts)
rnd 8 - 11 (4 rnds) . rep rnds 6,7 (42 sts)
rnd 12. rep rnd 6 (42 sts)
rnd 13. slst into next 3 sts, ch3, dc in next 37 sts, ch4 and slst into the 3rd ch of your initial
ch3. we just made a hole for the bunny's pompom tail. (38 dc's and a ch4 sp)
rnd 14. ch1and sc in each st around, sc4 in the ch4 sp, slst into your initial ch1.
(42 sts)
rnd 15-17. (3 rnds) ch1 and sc to bl only in each st around, at the end of the rnd slst into the
bl of the first ch made.
rnd 18. slst into bl only of each st around. Break the yarn and weave in tail.
Now sew a little tiny button to one side of the neck at the back of the dress.
Weave in the yarn tail. To button the dress up use the dc at the opposite side of the back
opening.
JOINING ALL PIECES TOGETHER
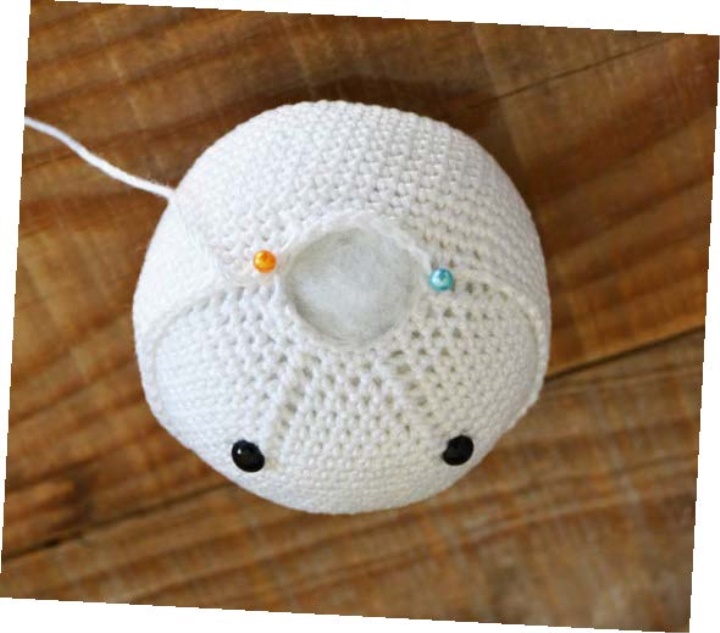
PLACE THE EYES
Put the eyes in place - place them at the same row where you made the first sc2tog.
the distance between the eyes is almost the same as the distance between 2 sc2tog at the
same row. Sew the eyes into the head using the yarn left from the head.
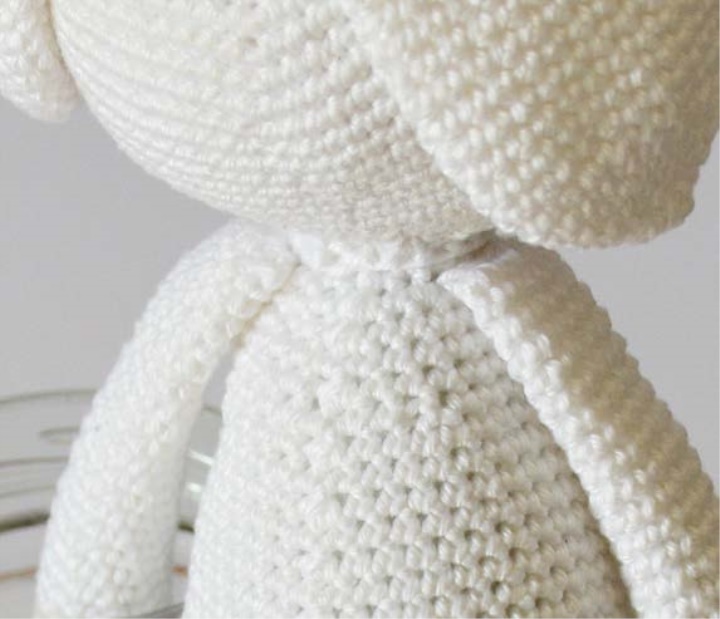
HEAD & HOODY
Now connect the hood to the head, first make sure the head is filled very firmly with the soft
stuffing. Crochet or sew 10 sts of the head together with 10 sts of the hoody as shown in
pictures.

BODY TO HEAD&HOODY
After legs and body are filled in with stuffing material very firmly and after you joined
the hoody to the head, join the head and body. Use the yarn from the body and sc or sew
together the sts from both pieces, all the way around. Make sure you place the head straight
and keep it straight all the way while you crochet or sew them together.
HANDS & BODY
Sew the arms to the sides of the body, underneath the next to last round, as shown in
pictures. make sure the thumbs points towards the body.
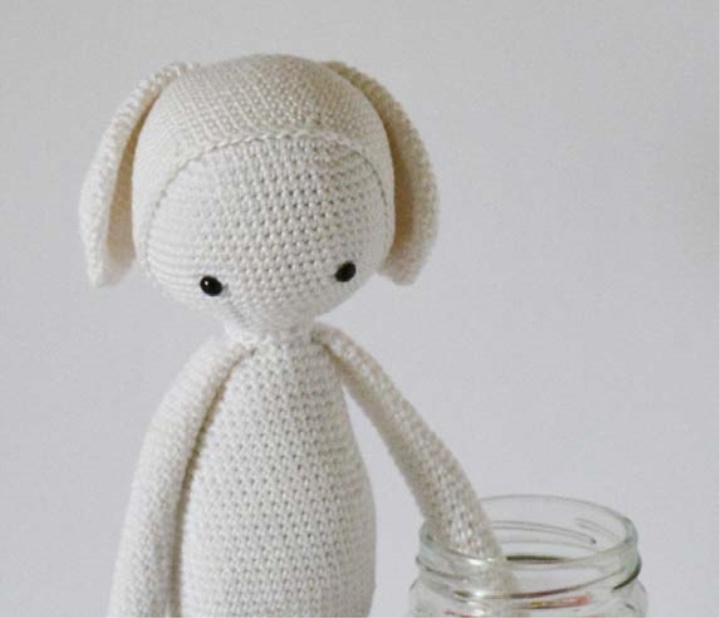
EARS TO HEAD&HOODY
Put the ears in their right place on the head&hoody, take a look at the pictures to see how I
placed them and use the yarn left from the ears to sew them to the head.
TAIL & BODY
Place the pompom at the back of the body, place it just a little higher from the row where we
connected the legs to the body. As shown in pic. sew the pompom onto the body using the
yarn left from the pompom.
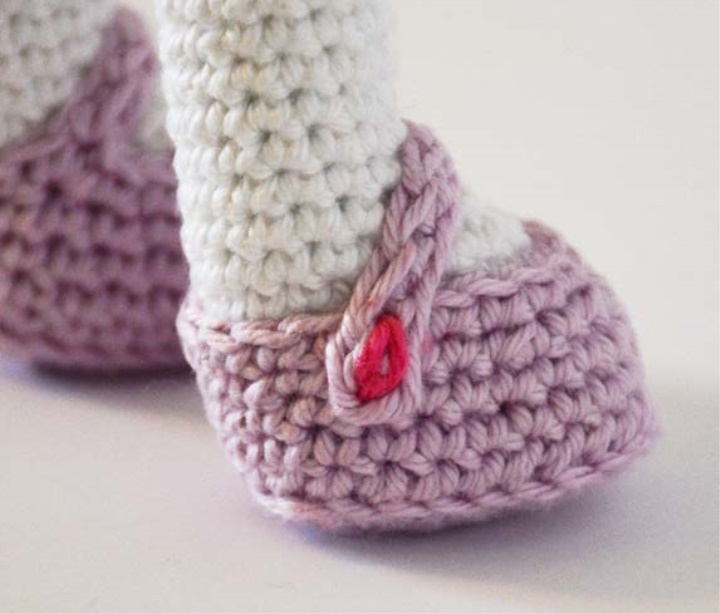
SHOES & LEGS
Put the shoes on your bunny legs, sew the strap of each shoe to the opposite side of the shoe
with a contrast colour yarn, any yarn you have in stash will make it here.
I embroidered chain st. it is hard to make it on the doll but this is the best way to close the
shoe. Weave in the yarn tails.
DRESS UP YOUR BUNNY
Put the dress on your bunny up from the legs through the neck opening. You need to push it
a little because the neck opening is too small. Be careful not to hurt the pompom tail. Push
the tail through the hole carefully. Button up the dress and here you go... say Hello to Yvonne,
make her a nice place next to you and give her a hug. She's soooo sweet.
Source : Moran
www.crochetobjet.com