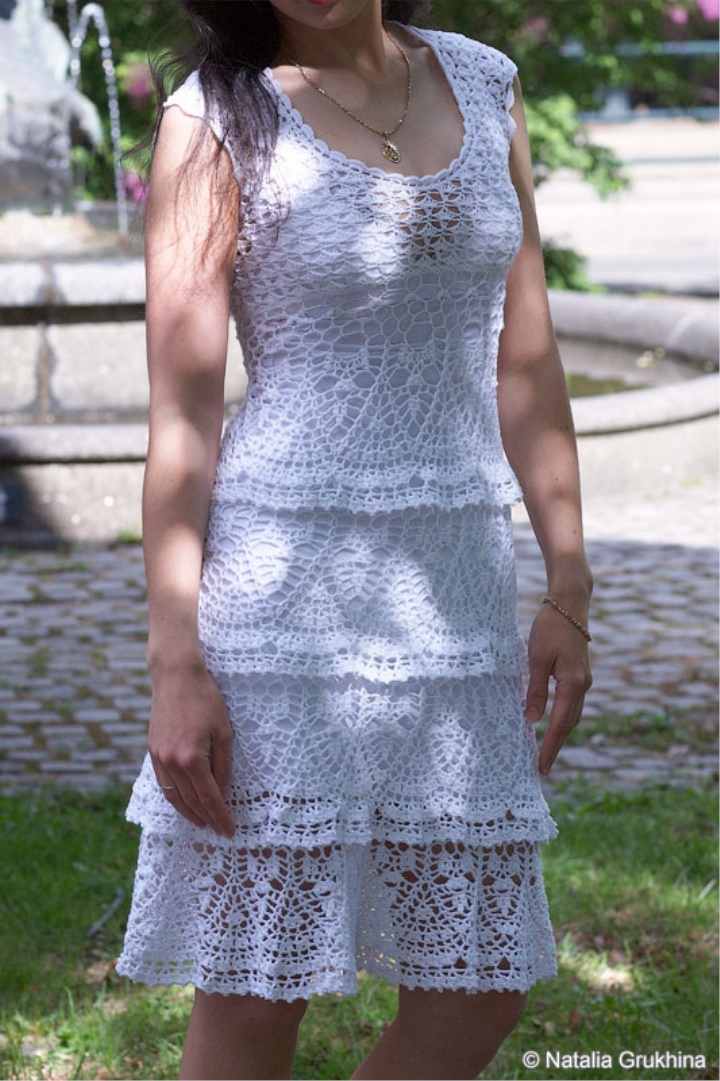
Knitted summer dress. Description of crochet. Size 44-46
White and lace are extremely relevant in this spring-summer 2011 season , so knitting a lace dress made of snow-white cotton yarn with your own hands is a great opportunity to get a unique, and also very fashionable thing.
And I decided to tie a summer dress, based on this model.
By the way, dresses, sundresses, skirts and even topics “based on” this model are knitted on-line at the Osinka forum , as well as at the Magic Knitting forum .
I'll tell you briefly about my experience of knitting this dress.
To crochet a summer dress, we need:
- White cotton yarn (100 g. = Approx. 500 m.) - approx. 300-350 g;
- hook number 1.5.
Knitting description:
This dress fits in 2 steps: first you need to knit a skirt that fits from top to bottom, and then - the upper part (bodice) - bottom up from the top edge of the skirt.
1. To calculate the number of loops of the skirt edge, it is necessary to measure the girth under the breast or the waist girth, depending on the dress model you choose.
In my case, to girth under the chest 75 cm. I dialed a chain of 160 loops (based on 10 horizontal rapports as shown in Figure 2).
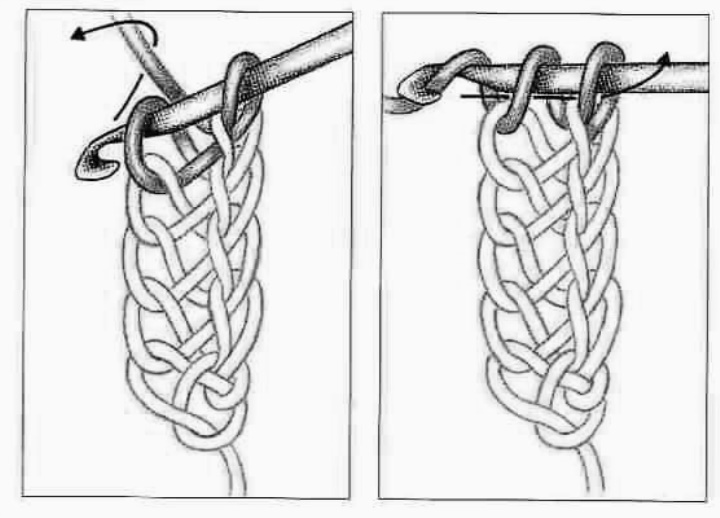
Advice: to make the composing edge elastic and not to tighten the product, I recommend to tie it with single crochets, as follows:
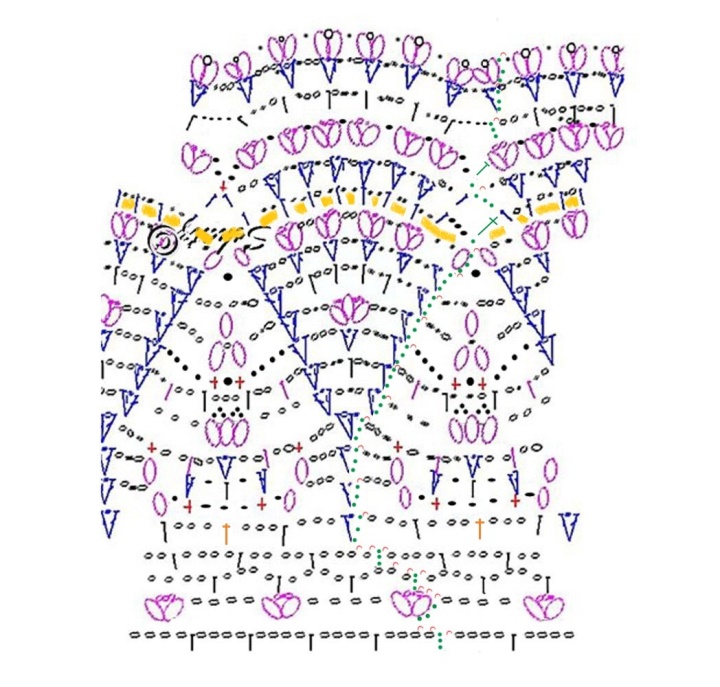
Figure 1. Diagram of a diagonal edge of crochets.
2. The number of tiers and their width (the number of horizontal rapports in each tier) may be different depending on the model of the dress and the style that suits you.
In my case, the skirt consists of 4 tiers: in the first (upper) tier 10 rapports are connected according to the scheme in Figure 2, in the second - 12, in the third - 15 and in the fourth - 18.
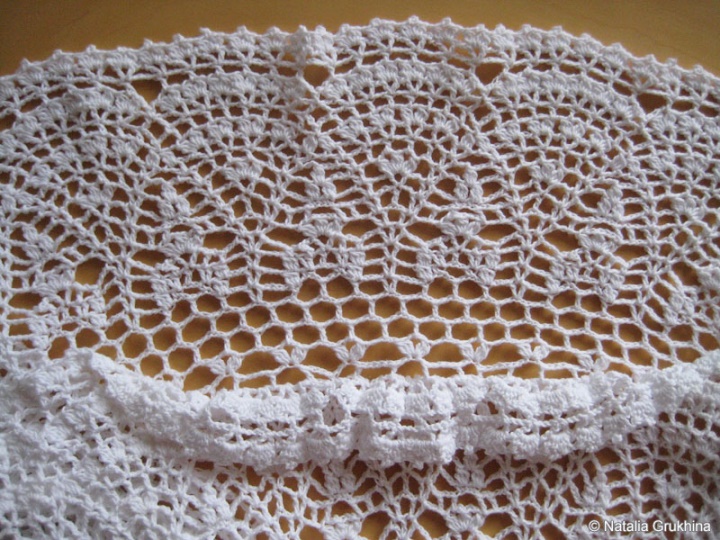
Figure 2. The pattern of knitting rapport
In this figure, the orange color indicates the changes that I made to the scheme during the knitting.
First, it seems to me that in the 5th row it is worth tying up additional crochets to avoid a large hole (these holes are visible in the first tier of my skirt, in the subsequent tiers - I excluded them).
Secondly, the orange dotted line highlights the row to which I attached the next tier, while in the original scheme the next tier is mounted 3 rows above, i.e. in the 3rd row from the edge of the tier. But it seemed to me that in this case the free edge of the tier turns out to be too narrow, despite the fact that the tier itself is too wide.
3. One of the most difficult moments when knitting such multi-tiered products is attaching the next tier to the previous one .
In fact, everything is not as difficult as it seems at first glance.
To attach the next tier, you must first position the product in front of you "to the bottom of the head", i.e. place the lower edge of the tier “away from you” so that the front side is in front of your eyes. Then it is necessary to bend the lower edge of the tier so that the row to which the next tier will be attached (marked orange in the diagram) will be on the fold (see photo below).
Next, we begin to knit the first row of the scheme (Figure 2), attaching columns to the seamy side of the marked row and alternating with double crochets and arches of 4 points. Please note that for each rapport there are 4 double crochets divided by arches of air loops.
Before you start knitting, it is necessary to calculate the required number of double crochets for the next tier:
Here is the calculation scheme that I followed:
Suppose we finished knitting the first tier, consisting of 10 rapports, and proceed to knitting the second tier of 12 rapports.
In the first row of the first tier, we knit 40 tbsp. s / n (4 columns for each rapport), separated by chains of ce, but for the second tier we need to link 48 article already. s / n (not 40) to get 12 rapports. Thus, it turns out that when attaching the next tier, we will need to add 8 double crochets, while these gains must be distributed evenly on the whole circular row.
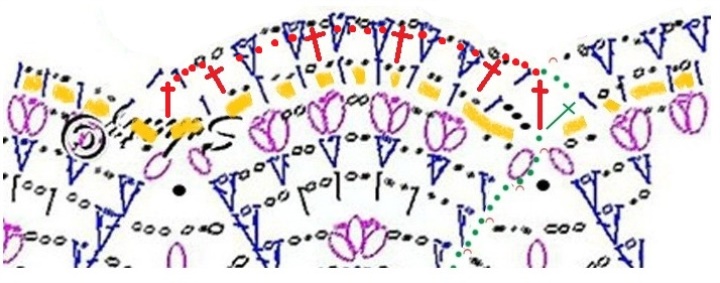
It turns out that when attaching the next tier in 8 rapports of the previous one, we need to knit 1 column more, i.e. 5 columns instead of 4 for each rapport (see Figure 3), and only 2 rapport, knit 4 columns, i.e. no change (see figure 4).
To distribute the increments evenly over the whole circle, first we knit 4 rapport, attaching 5 double crochets to them, then 1 rapport with 4 double crochets, then again 4 times 5 double crochets and 1 time 4 columns.
We check the correctness of the calculation: 4 * 5 + 1 * 4 + 4 * 5 + 1 * 4 = 48 columns. That's right!
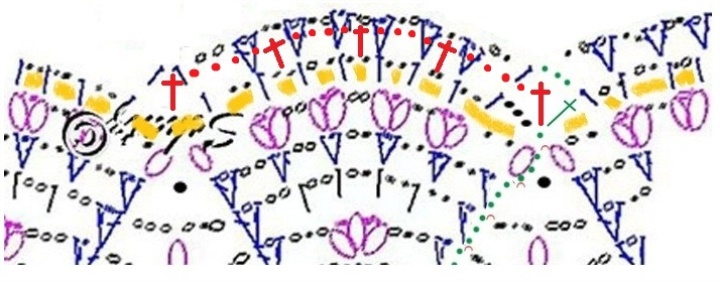
Figure 3. Attachment option of 5 double crochets for 1 rapport of the previous tier
Figure 4. Attachment option for 4 double crochets for 1 rapport of the previous tier
4. After all the tiers of the skirt are connected, we proceed to knit the upper part of the dress (bodice).
For knitting the bodice, I used the scheme shown in Figure 5. This scheme is convenient in that it can be knitted in either circular rows or straight and reverse (face and back).
In front of the bodice, I tied 13 rapports according to this scheme, and on the back - 10 rapports.
Having reached the desired level, I began to form a neckline and switched to knitting in straight and back rows. Then, on both sides, formed armholes of the sleeves, tying the right and left sides of the front apart, as well as the back, after which they connected the shoulder lines.
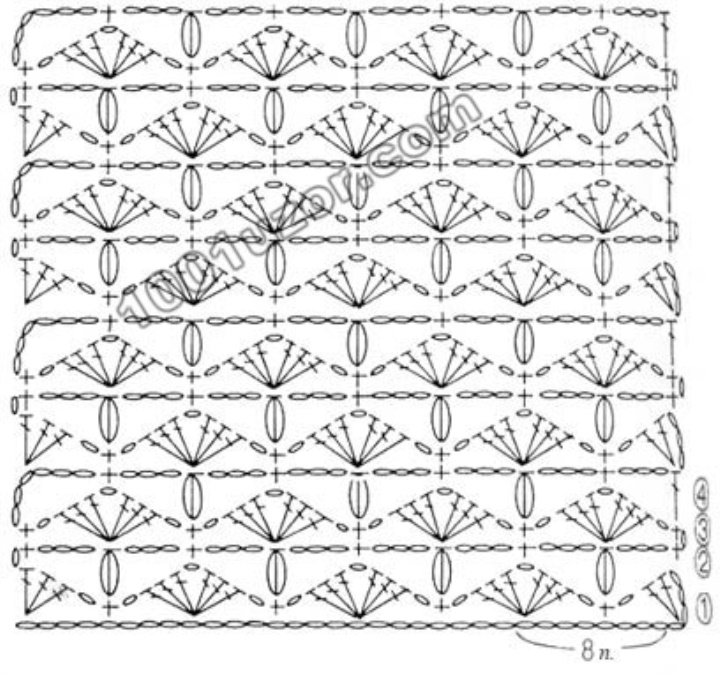
Figure 5. Pattern of knitting the top of the dress:
5. According to the scheme in Figure 5, she tied small sleeves, and then tied the neck and armhole with a double crochet of fans.
6. Before wearing a knitted product must be washed and steamed.
Knitted summer dress is ready!