The basis for the bodice will be knitted according to the scheme given below. The initial number of air loops, as well as the number of rows, can vary depending on the size.
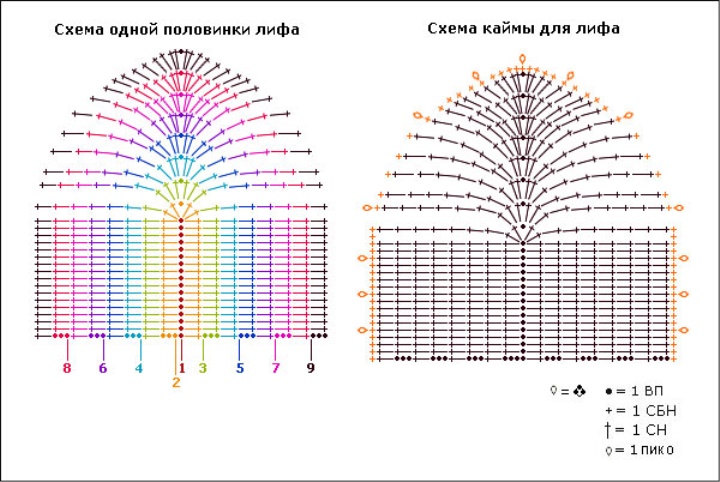
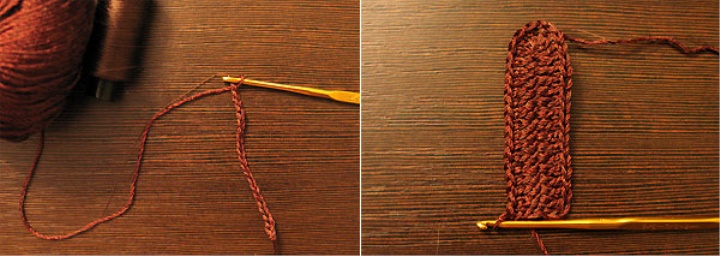
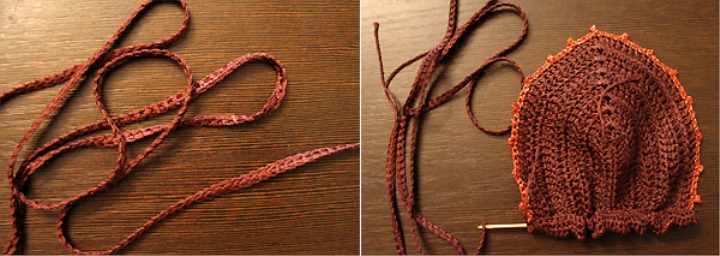
Our swimsuit we began to knit with 17 EP.
The picture below shows the process of knitting the 1st and 2nd rows.
Please note that in order for the swimsuit not to stretch when soaked, we knit it, weaving a nylon thread.
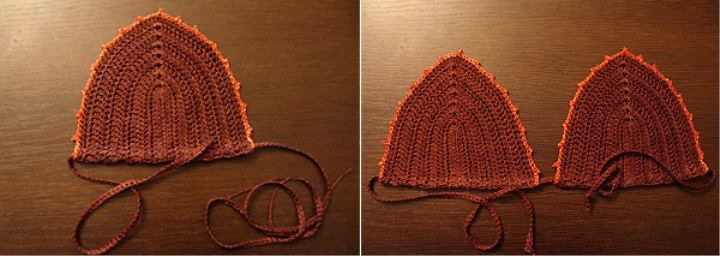
Ready basis should be tied with a red thread according to the scheme given in the beginning of the article.
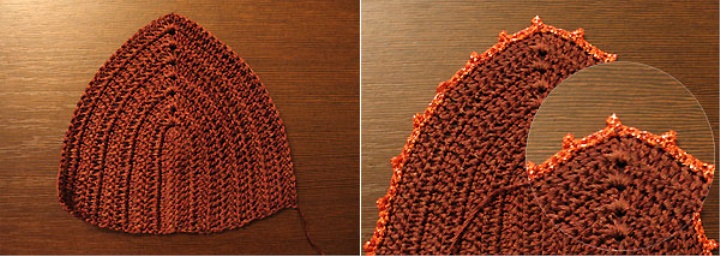
The basis of the bodice is tied with 3 rows of columns without a crochet.
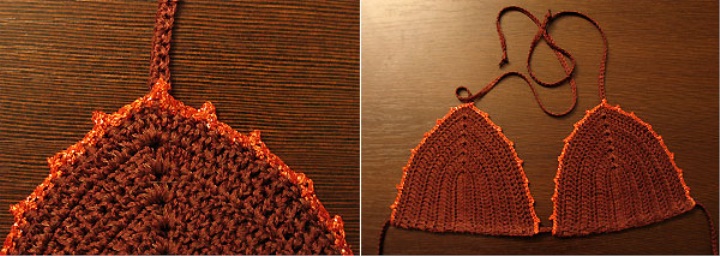
The resulting strip with a needle and thread of a suitable color is sewn to the wrong side of our bodice. Through this hollow passage afterwards we will pass the bound ribbon, which will allow to regulate the distance between the parts of the bodice.
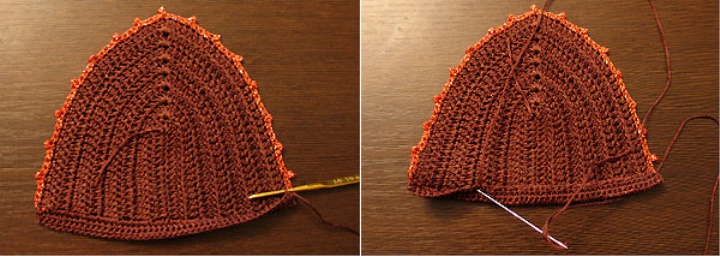
We knit the ribbon as follows: we select a chain of air loops (the number of loops = the length of our ribbon). Then we knit 1 row of columns without a crochet.
With the help of the hook we pass the finished ribbon through the hollow passage.
We do the same with the second part of our bodice.
The final touch was left - to tie and fasten the ribbons, with which our bodice will be tied around the neck.
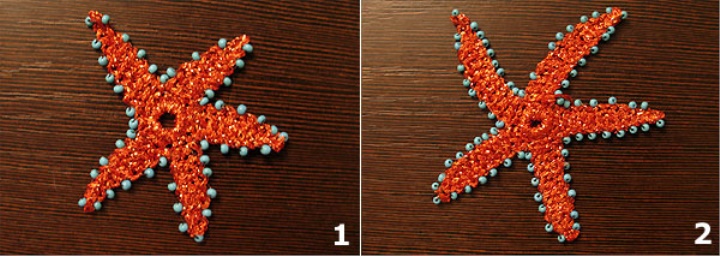
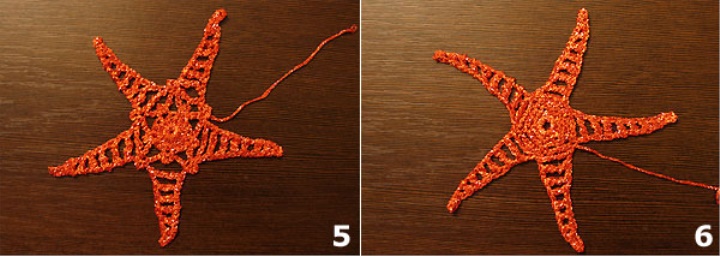
Now we will proceed to the most pleasant part: we will tie off starlets (who like what), which we will later use as decorative elements.
You can leave the starlets without additional decor, and you can decorate them with beads of any suitable color. In our case, we chose beads of sky-blue color.
The length of the legs of the asterisks can be varied: simply make chains of smaller / larger air loops.
The diagrams given below are only ideas on the basis of which you can invent something of your own.

The following pictures show variants of sea stars connected by the schemes given above.
For example, on the 1st picture an asterisk, linked by the scheme "Little Starlet".
On the 2nd - an asterisk, connected according to the same scheme, but with a large number of air loops during the formation of the stem.
On the 3rd picture there is an asterisk linked according to the "Narrow Sea Star" scheme.
On the 4th - an asterisk, connected according to the scheme "Sea star with pico"

On the 5th picture there is an asterisk, connected according to the scheme "Sea star with a complex center".
On the 6th - a star associated with the scheme "Big Starfish with a velvet middle".
On the 7th picture, an asterisk linked according to the scheme "Sea star with a flower center".
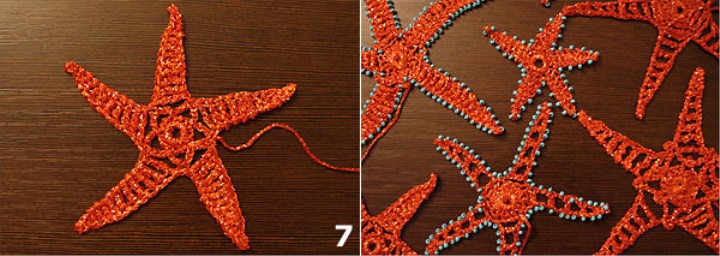
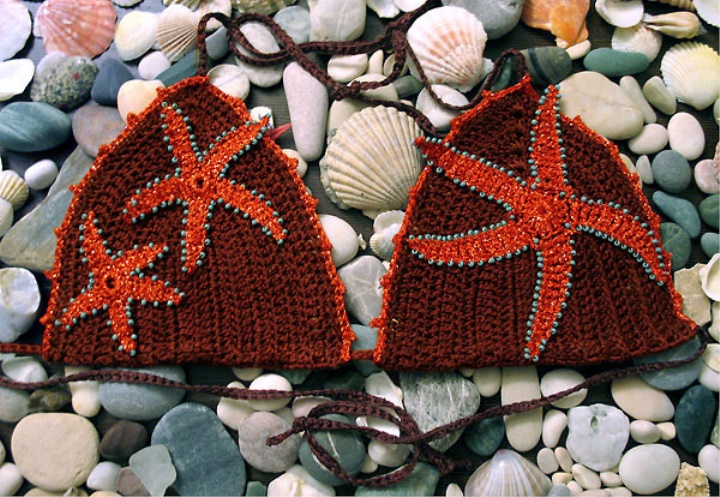
For our swimsuit, we will use the asterisks # 1, # 2 and # 4: # 1 and # 2 for the left side of the bodice, # 4 for the right side.
Spread the asterisks and fix them with a needle and thread of the right color.
Now let's start knitting. We will knit according to the scheme given below.
The number of rows (in our case there are 24 of them) can be varied depending on how much melting height you want to tie.
Crochet melts in 2 stages: first knit the back, then the front (orange and green patterns, respectively).

We tie the prepared base with a red thread in the same way as we tied the bodice (4 RLS, 5th RLS with pico, etc.).
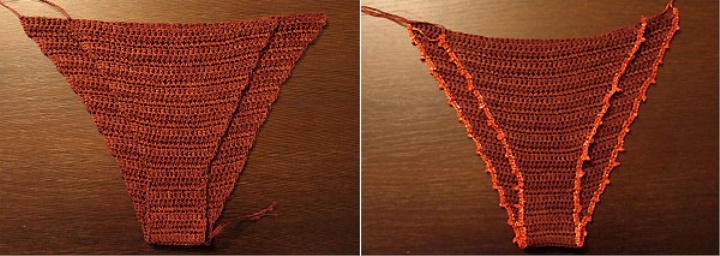
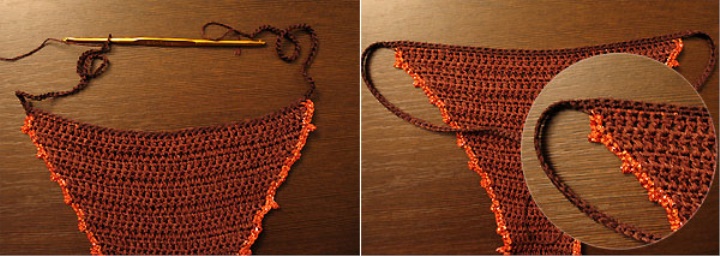
It remains to attach lateral ribbons for the front and back of our swimming trunks.
We knit them in 2 stages:
1. Make a chain of N air loops (N = the length of the right side ribbon). Further, without tearing off the thread, the top of the front / back of the trunks is tied side by side with no crochet. We finish the first stage with a set of N air loops (for the left side ribbon).
2. We chain a chain of N air loops next to the columns without a crochet. Next, the top of the front / back of the trunks is again tied next to the columns without the crochet. We finish the second stage, tying the remaining air loops with columns without a crochet.
At the ends of our ribbons we tie knots.