4 in. n. Closing the ring. In the middle of the ring knit 7 tbsp. b / n
1-19 row: Art. b / n (7 Art.)
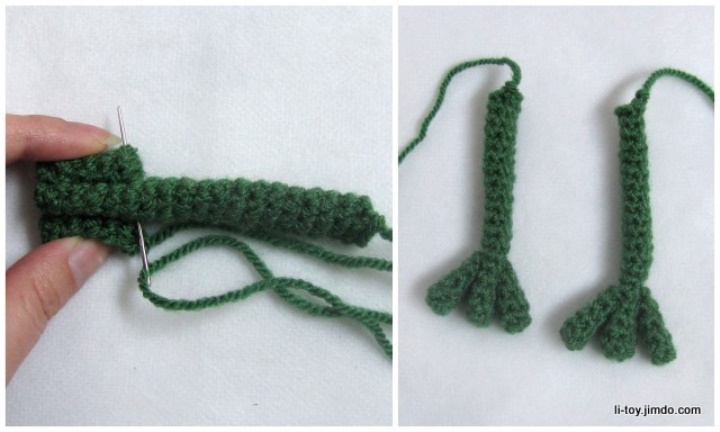
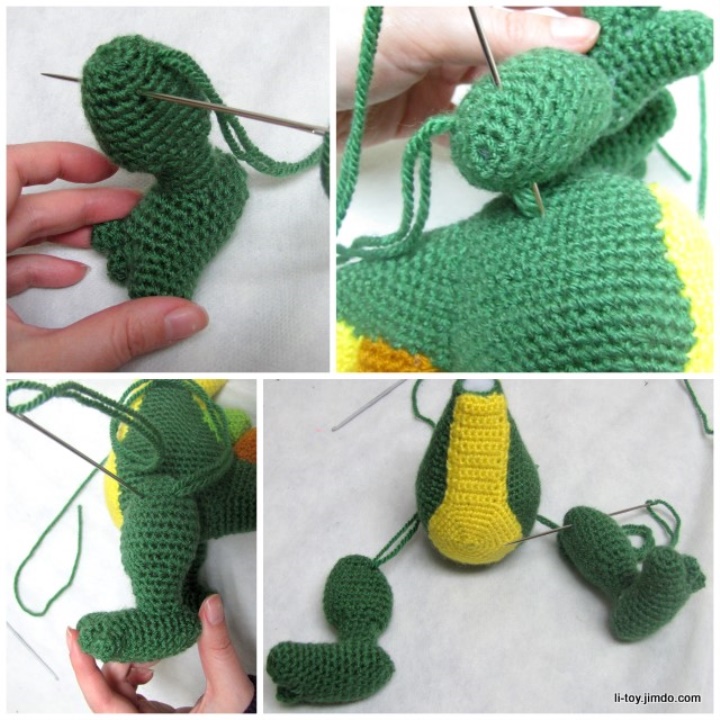
4 pcs. (for each hand, two fingers.)
4 c. n. Closing the ring. In the middle of the ring knit 6 tbsp. b / n
1-5 row: Art. b / n (6 tbsp.)
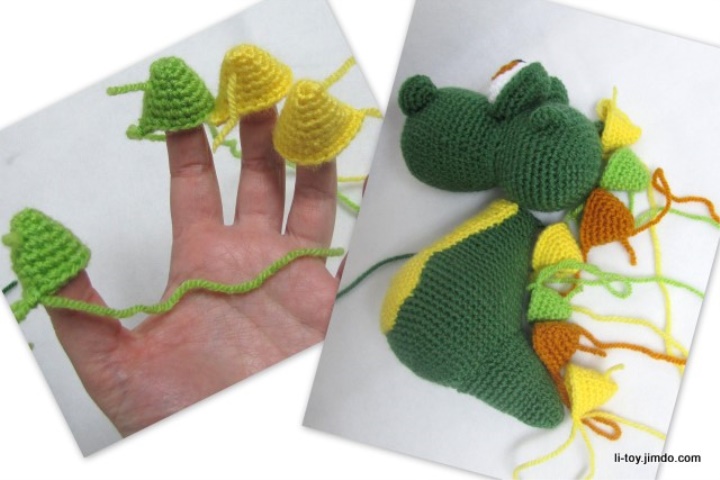
Sewing fingers to the palm. Colored mane: Knit multicolored. Only 7 pieces 4 in. n. Closing the ring. In the middle of the ring knit 6 tbsp. b / n 1st row: 2 tbsp. b / n in every second article (9 cent.) 2 row: Art. b \ n. (9th article)
3 row: 2 tbsp. b / n every third article (12 Art.)
4 row: Art. b \ n. (12 tbsp.)
Row 5: 2 tbsp. b / n in every fourth article (15 v.)
6 row: Art. b \ n. (15 tbsp.)
Cut the thread. Leaving the long end for stitching the part.
We stuff them with padding polyester and sew to the head and back of the dragon, first we
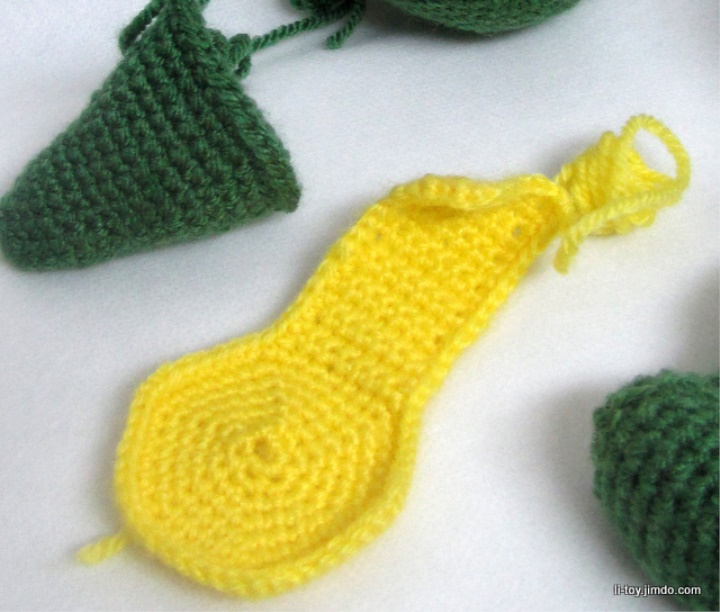
sew slightly above the dragon's forehead. Tummy: Knitting with yellow yarn. 4 in. n. Closing the ring. In the middle of the ring knit 6 tbsp. b / n 1st row: 2 tbsp. b / n in every article (12 tbsp.) 2 row: 2 tbsp. b / n in every second article (18 tbsp.) 3 row: 2 tbsp. b / n every third article (24 tbsp.) 4 row: 2 tbsp. b / n in every fourth article (30 v.)
Next, knit flat knitting, at the end of each row adding 1 ce.
lifting.
5 row: 6 st.B. + 1 incl. lifting, turn knitting.
6-21 row: knit like 5 row.
Next, we tie the resulting detail around the perimeter of art. b \ n.
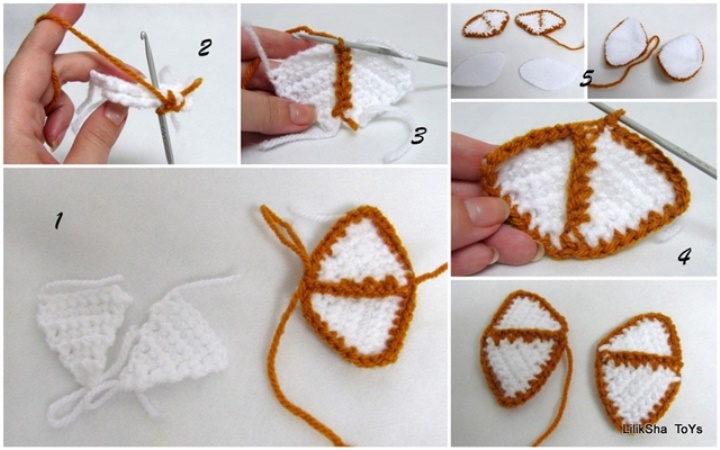
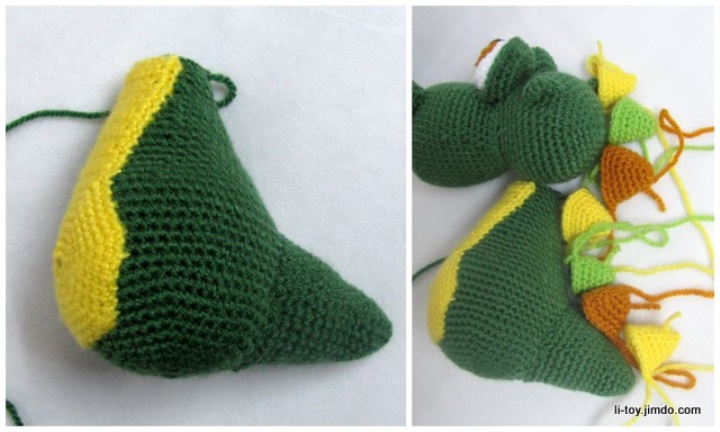
Sew the resulting tummy to the body from the throat. Wings: Each wing consists of two white triangles, which then must be connected to each other with mustard yarn. Triangle: Knit flat knitting, at the end of each row, add 1 in. to lift 1 row: dial 8 + 1 v. We knit with b \ n columns starting from the second point from the hook. (8 tbsp.) 2 row: 6 tbsp., 7 and 8 tbsp. knit together (7 Art.) 3 row: 5 Art., 6 and 7 Art. knit together (6th degree)
4 row: 4 tbsp., 5 and 6 tbsp. knit together (5 Art.)
5 number: 3 Art., 4 and 5 Art. knit together (4 tbsp.)
6 row: 2 tbsp., 3 and 4 tbsp. knit together (3 tbsp.)
7ryad: 1 tbsp., 2 and 3 tbsp. knit together (2 tbsp.)
8 row: two tbsp. knit together (1 tbsp.)
Cut the thread.
We link together the triangles of mustard yarn as shown in photos 2 and 3.
Next, we tie a wing around the perimeter of mustard yarn st. b \ n. (photo № 4)
If there is a white felt we sew it to the inside of the wing (photo № 5). Correct Eyes: And so I see that many have problems with the design of the eyes, but this is the most important stage in the toy! Spend time on it and you will be satisfied with the toy.
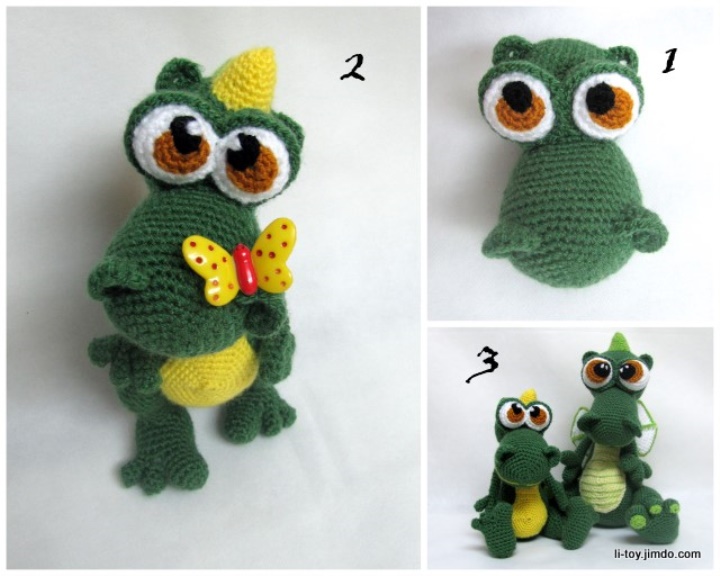
The picture number 1 shows that the eyes are simply sewn, but in my opinion, the eyes do not have a look, there are no emotions on the face, which means it is
not alive. in the picture number 2, I am satisfied with my eyes, they came to life, they became sweet, kind.
What is needed for this, first of all I sewed squirrels among themselves, this can be done in advance, even when the eyes are not sewn to the toy.
Be sure to make a sparkle in the eyes, the gloss can be different and double and large and small, and with the right and left and white thread and white beads, and even lay down.
In the picture number 3 there is another version of the eyes, there are no squirrels sewn, but the location of the eyes looks harmonious.
In general, I wish good luck!
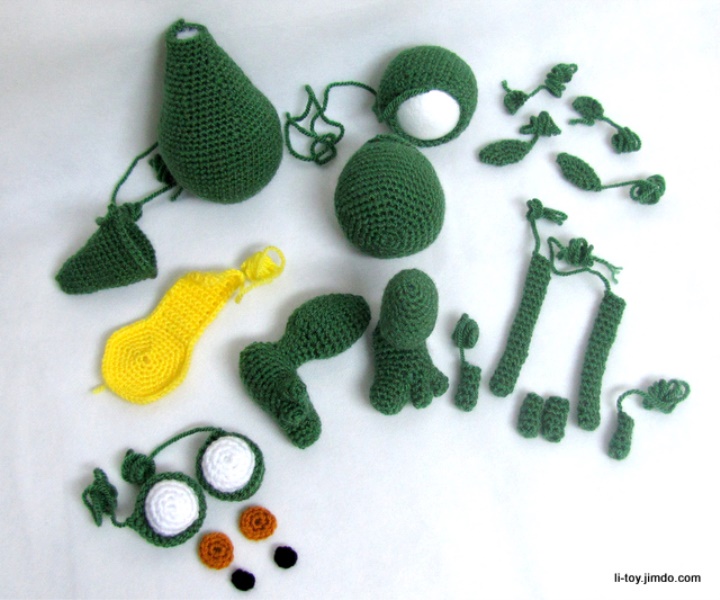
ASSEMBLY:
And so everything is ready with us 1. Sew eyes, ears and nostrils to the face. . Embroider the mouth with black yarn. I’ve already written a lot about the eyes, I’ll tell you about NOZDRI that you need to sew them in a semicircle so that they would be deployed a little to each other. 2. Sew the tummy starting at the throat. 3. Sew the BUGERS from the head, first sew slightly above the forehead, then sew in order to the tail. 4. Sew the finished legs as shown in the photo, on through the body. We sew it with several stitches so that the legs are movable and the dragon could stand and sit. 5. Sew the body to the head. 6. On the sides of the body sew handles.
Girls, lovely, it is obligatory to photograph whelps at the DAYLIGHT !!!
Straight plant a toy in front of a window or better in nature, the background is better white or Festive.
Waiting for your photos !!!
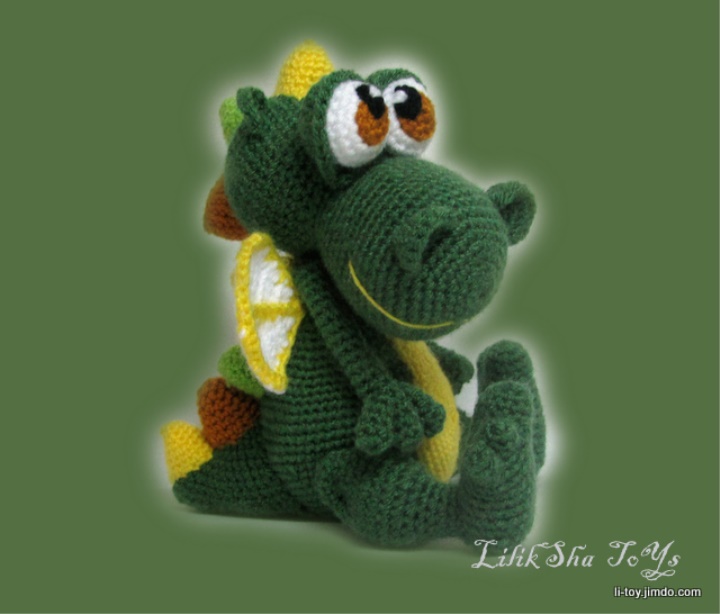
Dragon is ready !!!! Wish you luck!!!! Well, I think it's time to tell about the FAIR COUNTRY: You probably do not know, but there is a far, far away magical country in which the DRAGONS live! What they are kind and beautiful, lovely and friendly. Dragons in this fabulous country come in a variety of colors and blue and orange and crimson and even purple, and these dragons have many-colored manes, and in this fantastic country there is a wonderful tradition to call all newborn dragons edible names. Here and so are born in our TALE, rainbow dragons bringing good luck, happiness, joy and love .
Source :
https://www.liveinternet.ru/users/rybuhina/post197492776/