Click For Crochet Abbreviations List
Hello!
Today I want to present to your attention the scheme of knitting hare in jacket with a hood.
I saw this on this site, and so I liked it that did not try to link the similar was impossible.
I suggest you tie it to yourself.
In order to tie such a hare, you will need:
Threads of two colors of your choice (I have acrylic white and turquoise color)
Hook № 2
Threads floss pink or red (just a little bit)
Pair of eyes
Filler
Scissors
Needle for stitching Parts
Head (1 piece)
1st row: Make the ring Amigurumi, dial 6 loops (6)
2nd row: Raise in Each loop (12)
3rd row: (1 PRS, 1p) * 6 times (18)
4th row: (2 PRS, 1p) * 6 times (24)
5th row: (3 PRS, 1p) * 6 times (30)
6th row: (4 PRS, 1p) * 6 times (36)
7-th row: (5 prs, 1p) * 6 times (42)
8-th row: (6 prs, 1p) * 6 times (48)
9th – 13th Series: (48 prs) (48)
14th row: (6 prs, 1u) * 6 times (42)
15-th row: (5 prs, 1u) * 6 times (36)
16-th row: (4 PRS, 1u) * 6 times (30)
17th row: (3 PRS, 1u) * 6 times (24)
18th row: (2 prs, 1u) * 6 times (18)
19-th row: (1 prs, 1u) * 6 times (12)
Finishing knitting details with one connecting column.
Torso (1 piece)
1st row: Make the ring Amigurumi, dial 6 loops (6)
2nd row: Raise in Each loop (12)
3rd row: (1 PRS, 1p) * 6 times (18)
4th row: (2 PRS, 1p) * 6 times (24)
5th row: (3 PRS, 1p) * 6 times (30)
6th row: (4 PRS, 1p) * 6 times (36)
7-th row: (5 prs, 1p) * 6 times (42)
8th – 9th series: (42 PRS) (42)
Changing the yarn.
10th row: (42 prs) knit the front wall of the hinge, finish the series 1 SS and 1 Air loop for lifting.
The hinges of the row, tied behind the front wall, are deflected towards the front side of the knitting.
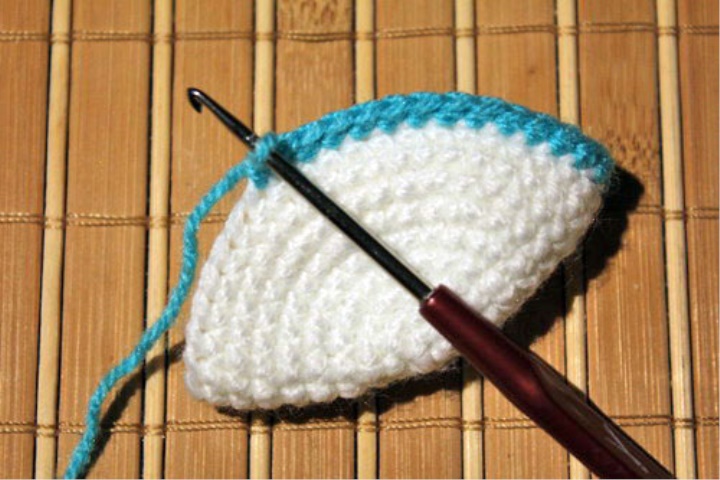
11th row: (42 prs) knit behind the back wall of the loop of the 9th row. If you otognete the edge of the part on yourself, then from the reverse side will be visible light inclined dash-this is the back walls of the hinges of the 9th row.
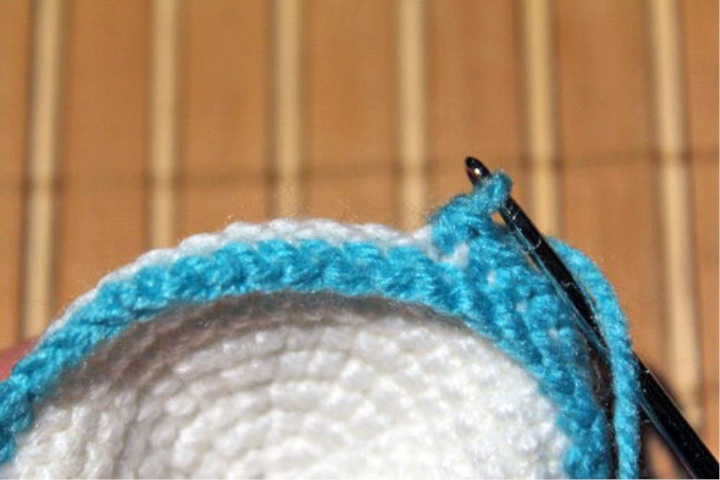
The 11th row also ends with 1 SS and 1 Air loop for lifting. On the detail turned out something like a unbent outward hem, it is the bottom cleft jackets.
12th – 14th series: (42 PRS) (42)
15-th row: (5 prs, 1u) * 6 times (36)
16-th row: (4 PRS, 1u) * 6 times (30)
17th row: (30 PRS) (30)
18th row: (3 PRS, 1u) * 6 times (24)
19th row: (24 prs) (24)
20-th row: (2 prs, 1u) * 6 times (18)
21-th row: (1 prs, 1u) * 6 times (12)
Finish knitting details 1 connecting column.
Ears (2 parts)
1st row: Make the ring Amigurumi, dial 5 loops (5)
2nd row: Raise in Each loop (10)
3-nd row: (4 PRS, 1p) * 2 times (12)
4th – 6th series: (12 PRS) (12)
7-th row: (2 prs, 1u) * 3 times (9)
8th – 9th Series: (9 PRS) (9)
Finish knitting details 1 connective column
Handles (2 parts)
1st row: Make the ring Amigurumi, dial 5 loops (5)
2nd row: Raise in Each loop (10)
3rd row: (10 prs) (10)
changing yarn
4th – 8th Series: (10 prs) (10)
Finish knitting details 1 connective column
Legs (2 parts)
1st row: Make the ring Amigurumi, dial 5 loops (5)
2nd row: Raise in Each loop (10)
3rd – 7th series: (10 prs) (10)
Finish knitting details 1 connective column
Tail (1 piece)
1st row: Make the ring Amigurumi, dial 5 loops (5)
2nd row: Raise in Each loop (10)
3rd row: (10 prs) (10)
4-th row: (3 PRS, 1u) * 2 times (8)
Finish knitting details 1 connective column
Hood (1 piece)
1st row: Make the ring Amigurumi, dial 6 loops (6)
2nd row: Raise in Each loop (12)
3rd row: (1 PRS, 1p) * 6 times (18)
4th row: (2 PRS, 1p) * 6 times (24)
5th row: (3 PRS, 1p) * 6 times (30)
6th row: (4 PRS, 1p) * 6 times (36)
7-th row: (5 prs, 1p) * 6 times (42)
8-th row: (6 prs, 1p) * 6 times (48)
9th – 17th Series: (48 prs) (48)
18th row: (48 PRSs) (48)
Finish knitting details 1 connecting column.
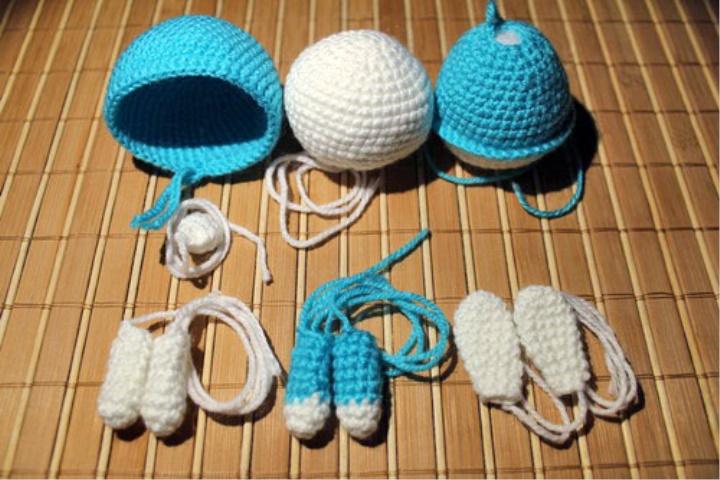
In order to make a tie on the hood, you need to prodernut the edge of the hood thread, tie 2 chains of air loops the desired length. I got 14 VP for every ponytail.
Fill the details with a sew. I first prishivala the handles, legs and tail to the torso, separately collected my head, and then Krepila head to the torso.
And at the end of the eye and embroider on the muzzle laconic cross as the nose and mouth.
The Hare is ready!