I want to share the master class in an interesting technique of crocheting - ribbon lace.
Ribbon lace is knitted in the form of a tape, the length of which depends on the length of the product, and the width - on the pattern and thickness of the threads. Then they are fastened together.
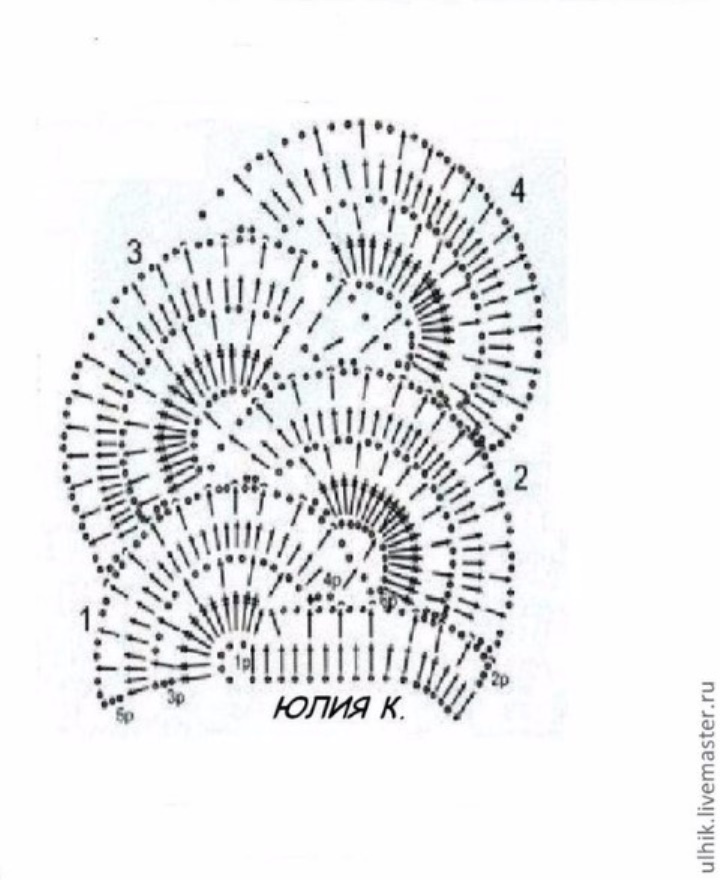
At the heart of the ribbon lace (in most cases) laced round motifs are laid, which in the process of knitting are attached to the already finished petal in one or several places.
With ribbon knitting, the thread must be torn not so often, which is very valuable.
any fine thread in which cotton is included, I specially took colored mercerized cotton (at 50 grams 330 m) to make it easier to see), hook number 1.0.
Symbols used in the description and diagram: vozd.p. - air loop (.), St.s / n - column with a crochet (T), connection. - connecting bar (+)
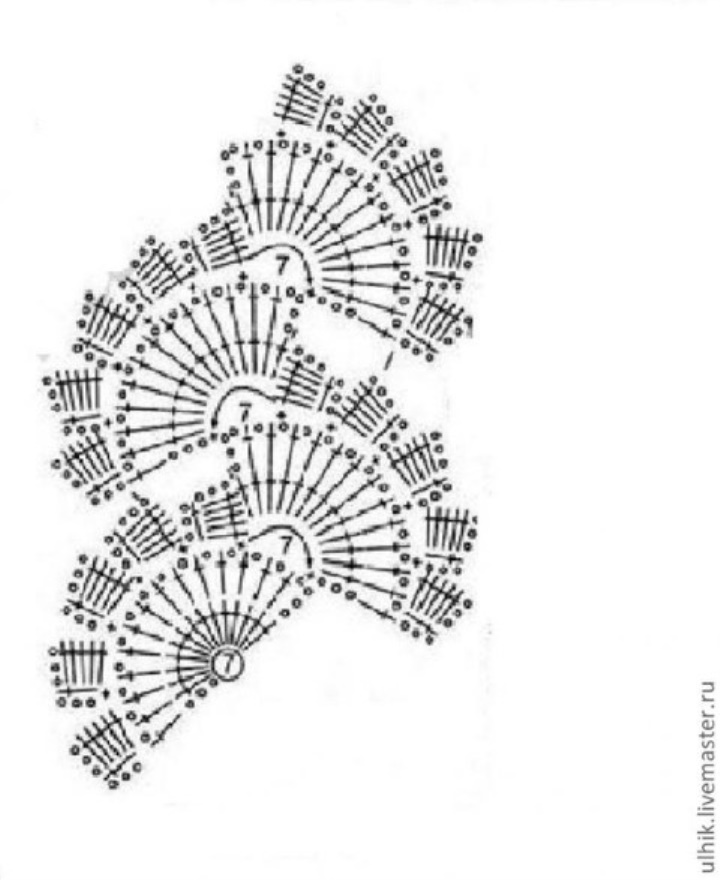
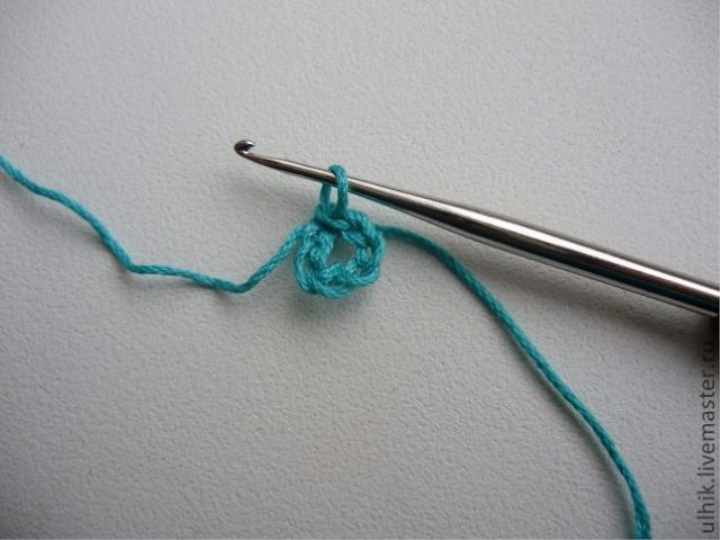
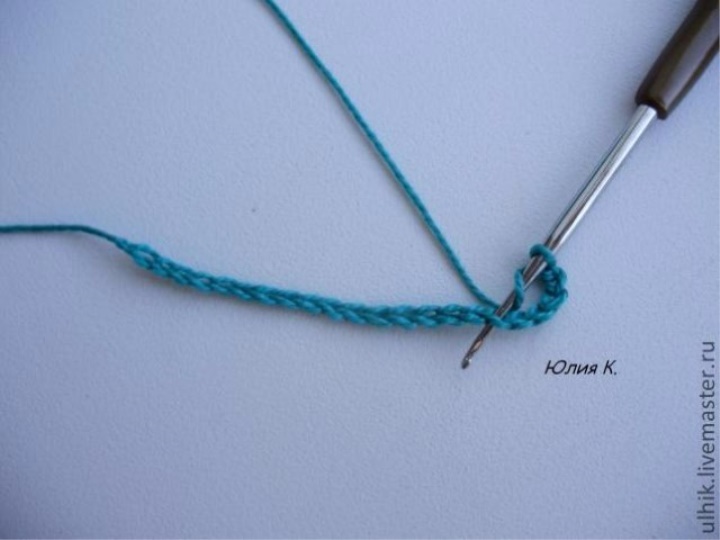
Description: We knit 7 child. and put them in a circle.
1 st row:
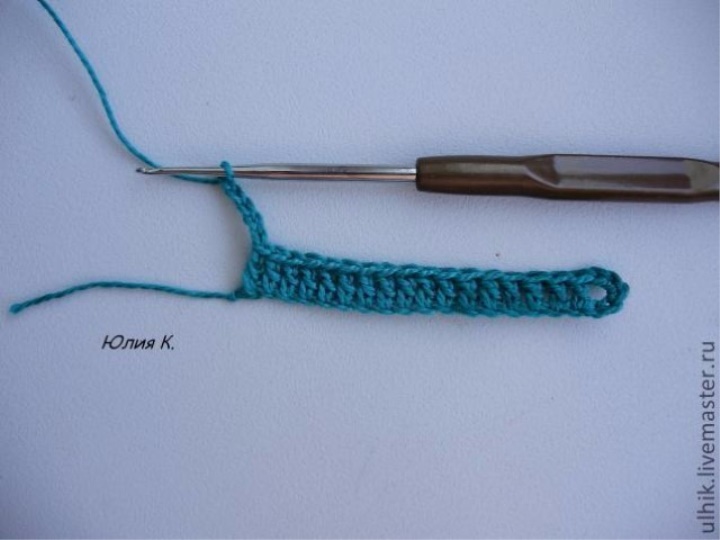
3 r.p. lifting, 14 st.s / in
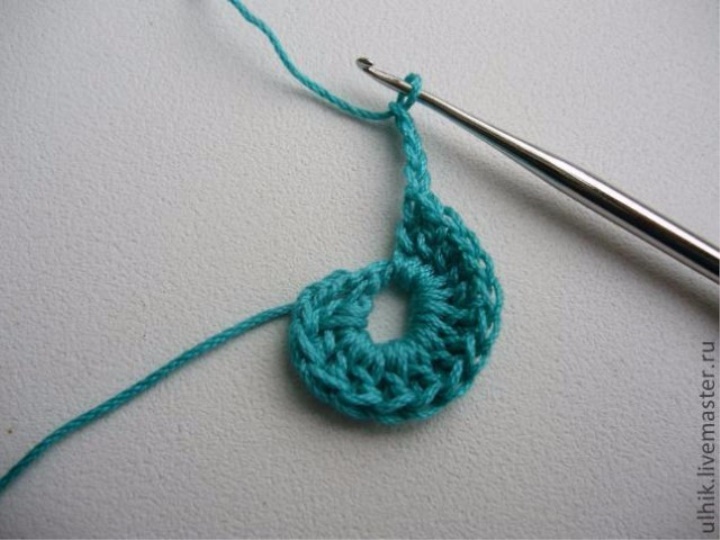
2 nd row:
4 child. (3 air lifts and 1 air flow according to the figure), then 1 st.s / in each st.s / n of the previous row and 1 air. (it should be 15 cc / n plus for each st.s./n 1 air.p.)
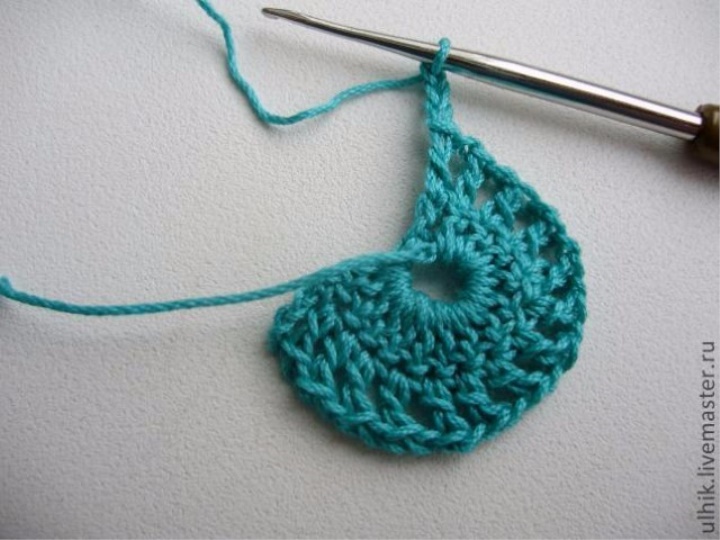
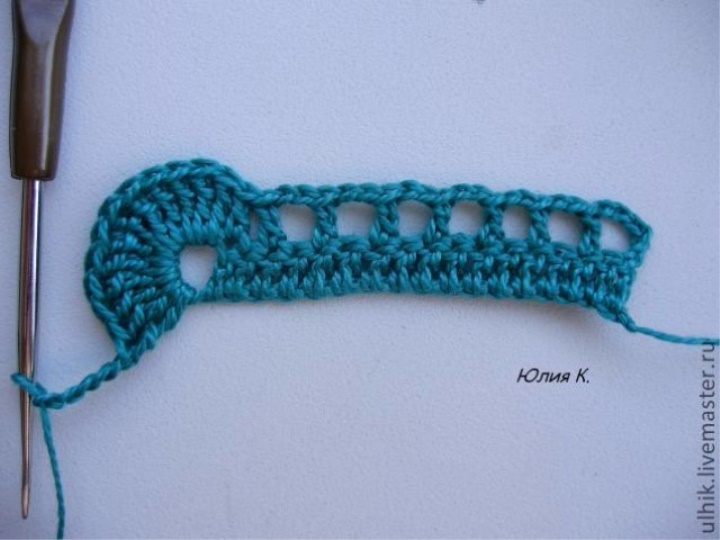
3rd row:
3 air.p., 1 st.s / n in the base of this art. with / n. Of these three air loops, a loop appeared,
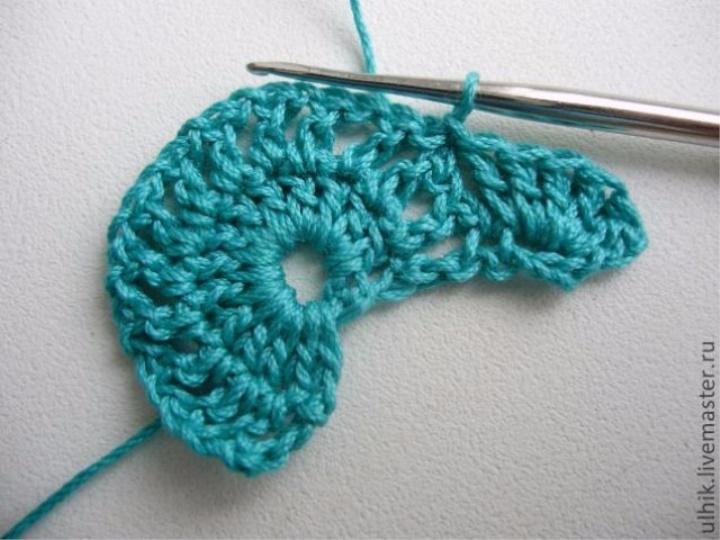
followed by 3 resp., 5 tbsp. with / n. in our sweat, connect. Art. in the air. after 3 st.s./n. of the previous series. Here's the first petal.
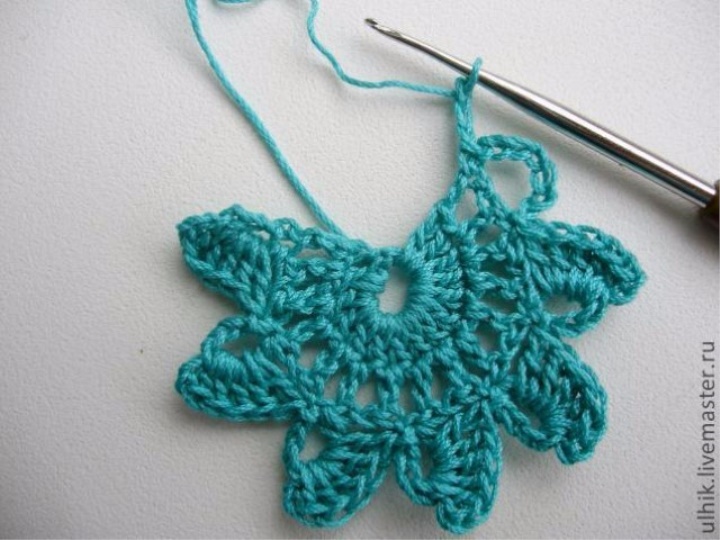
So until the end of the series (it should turn out 5 petals)
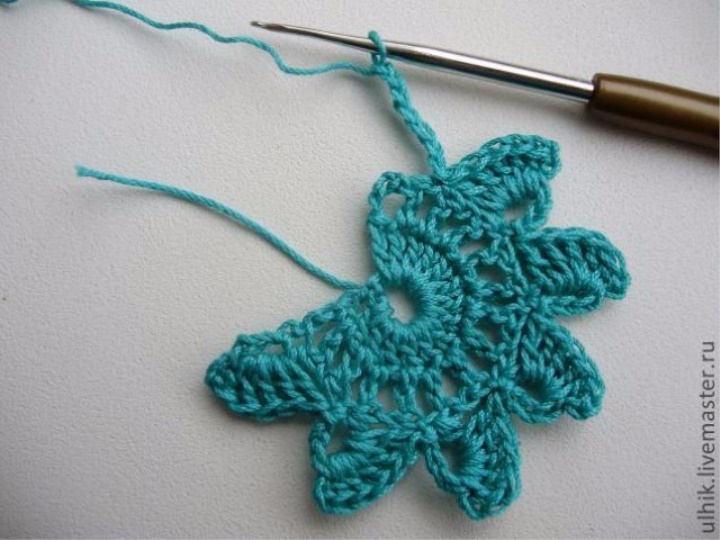
So we tied the first finished element of our lace.
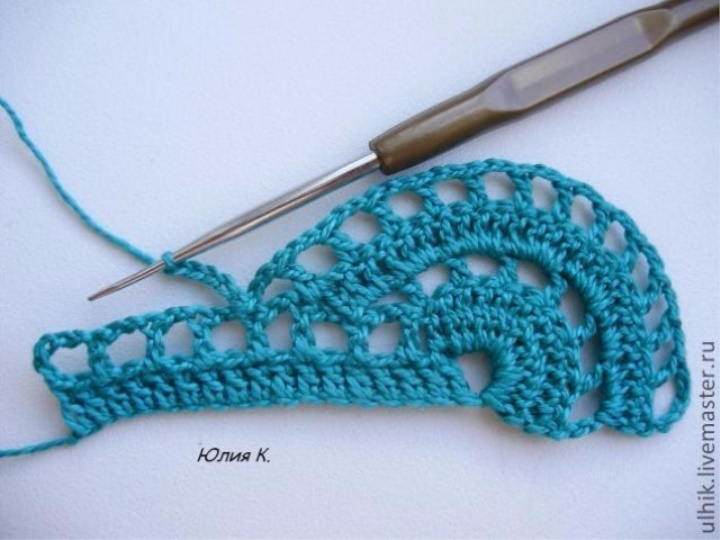
We begin to knit the following element of lace:
7 air. etc., connect. Art. in the last time. of the previous series.
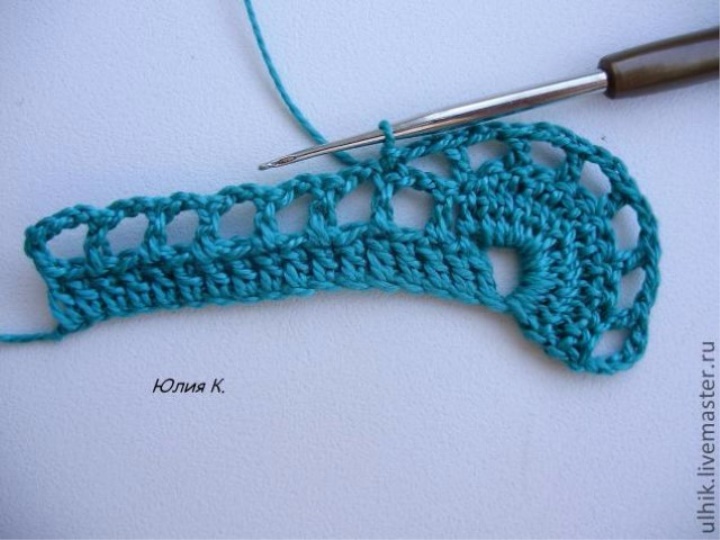
4-th row: we
knit as 1 row, only we sew 13 st.s / n., Plus s.ed. in the last (5th) petal of the first lace element.

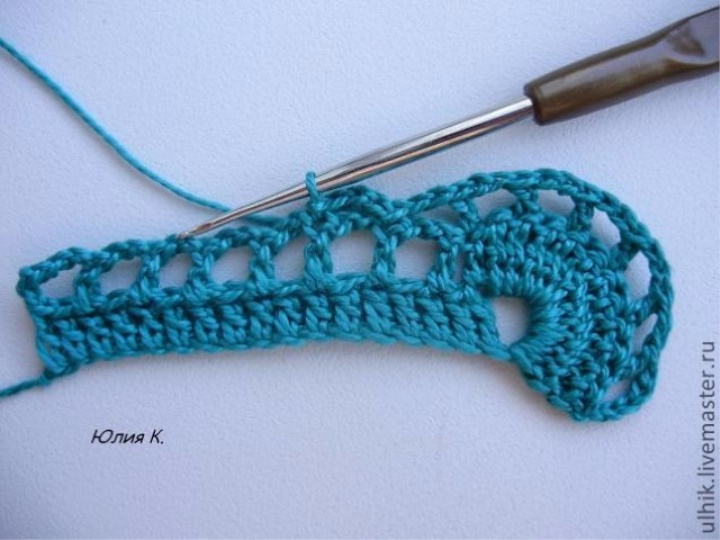
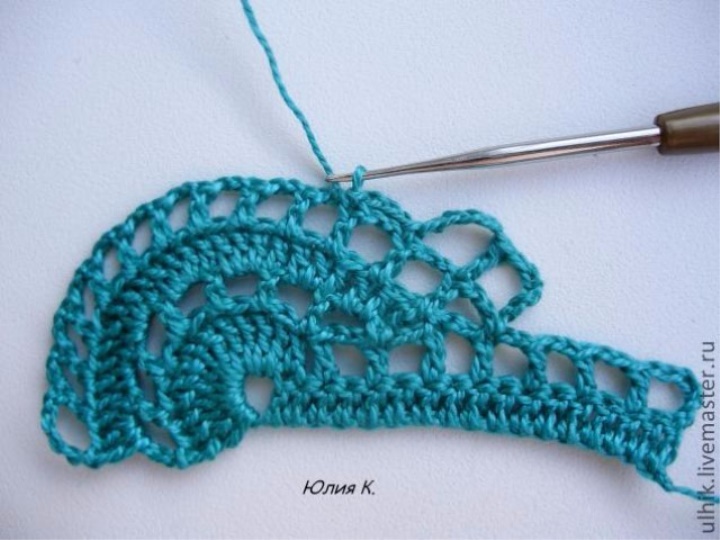
5th and 6th rows:
the 5th row is knitted as a 2-row, only it should turn out 14 st c / n.
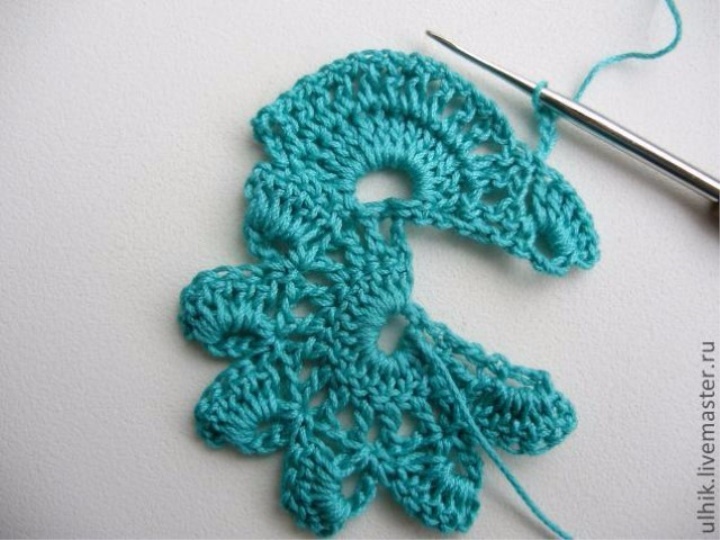
The 6th row is similar to the 3rd row.

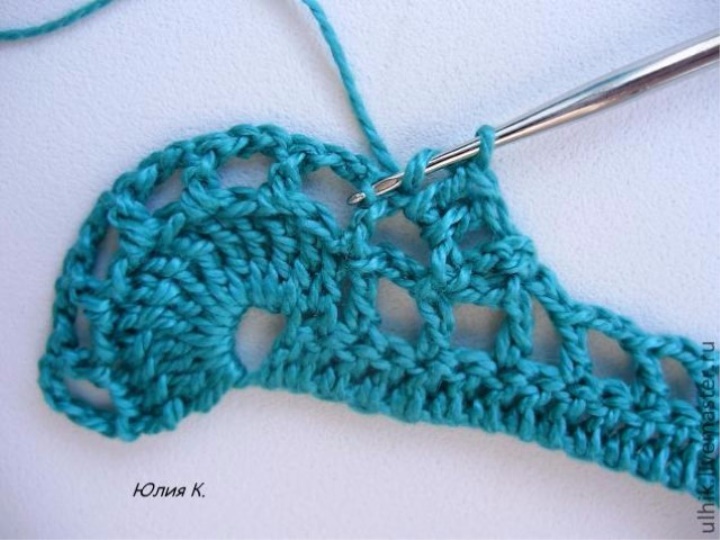
That's finished knit the 2nd element of our lace. All the subsequent series are repeated from the 4th to the 6th series.
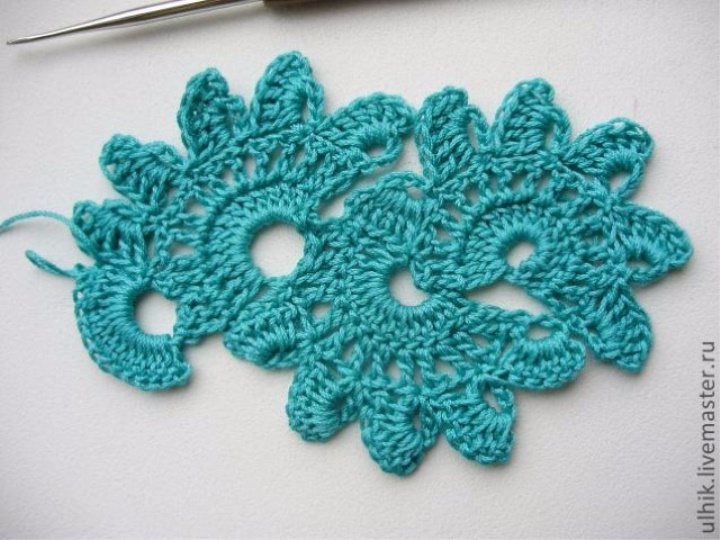
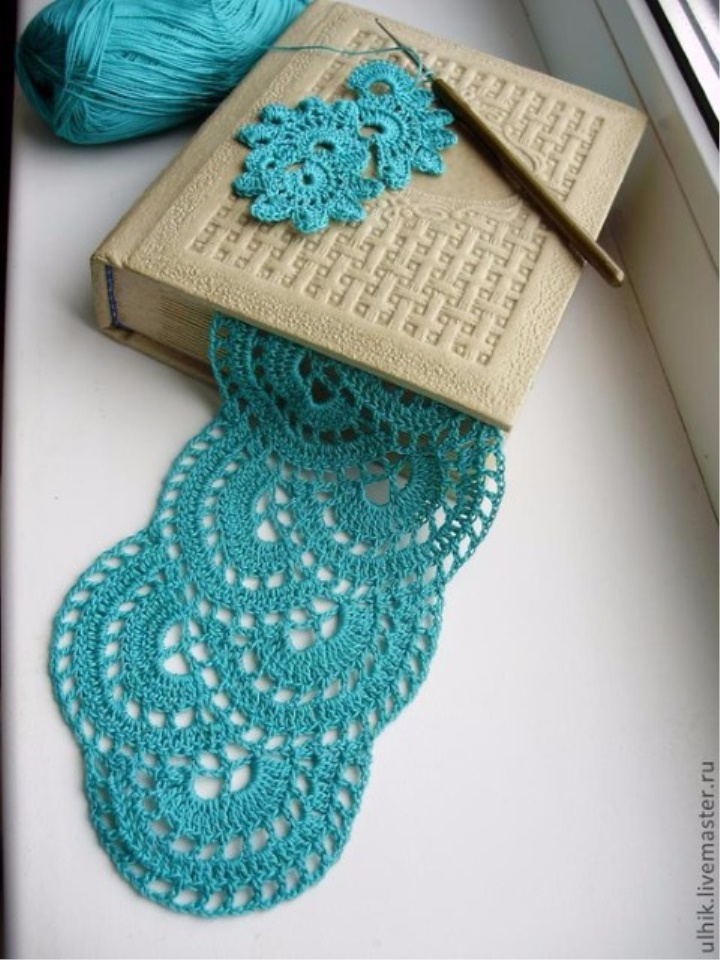
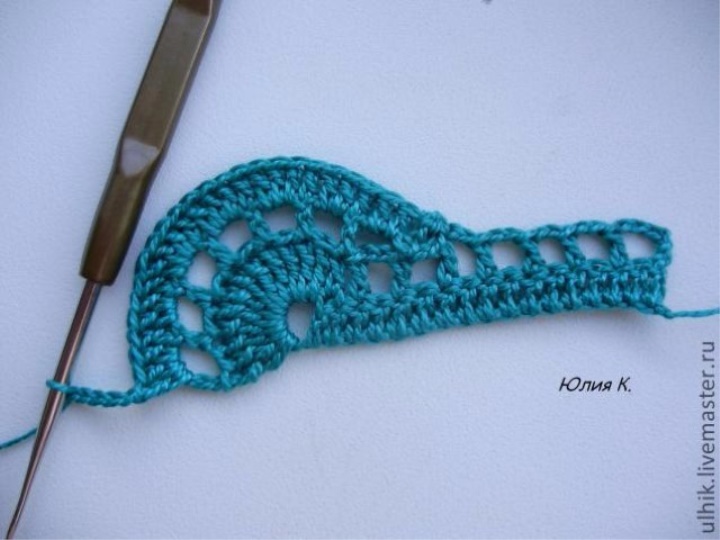
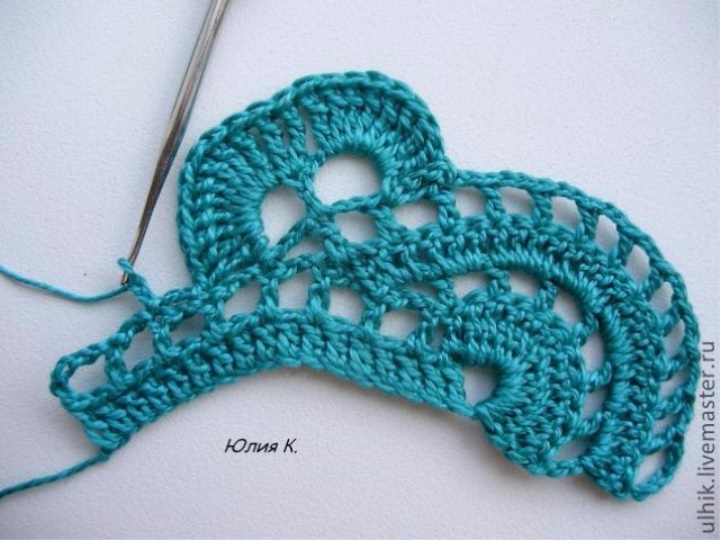
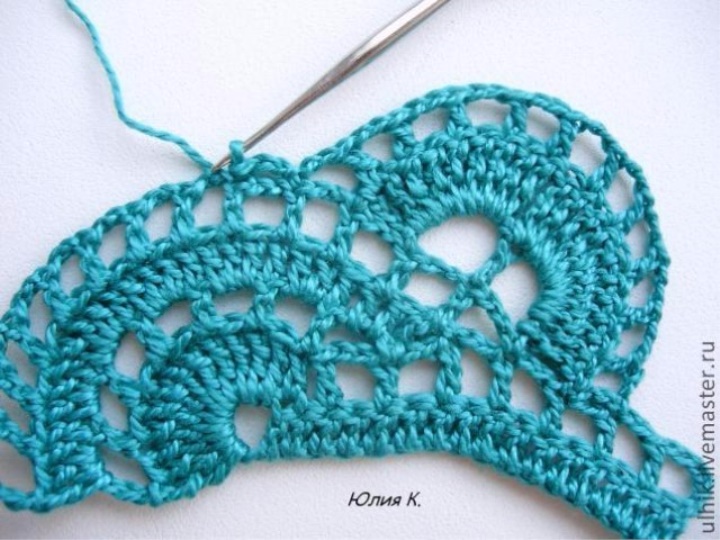
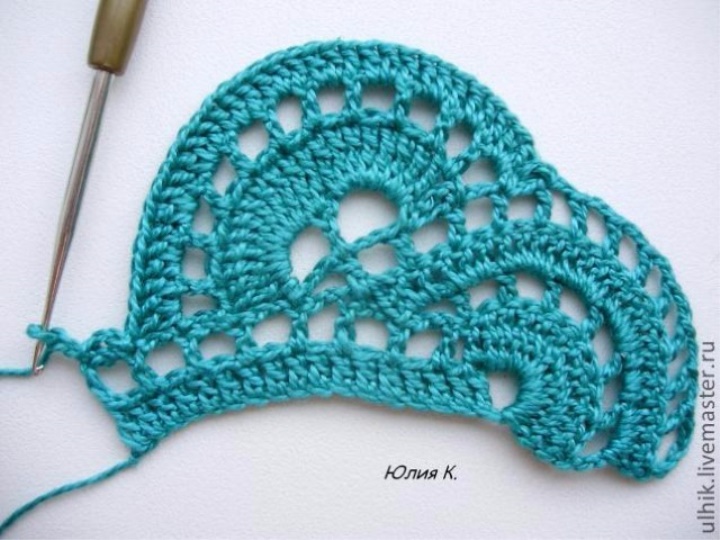
Here is such a beautiful and not complicated ribbon lace turned out ...
And two more photos with ribbon lace
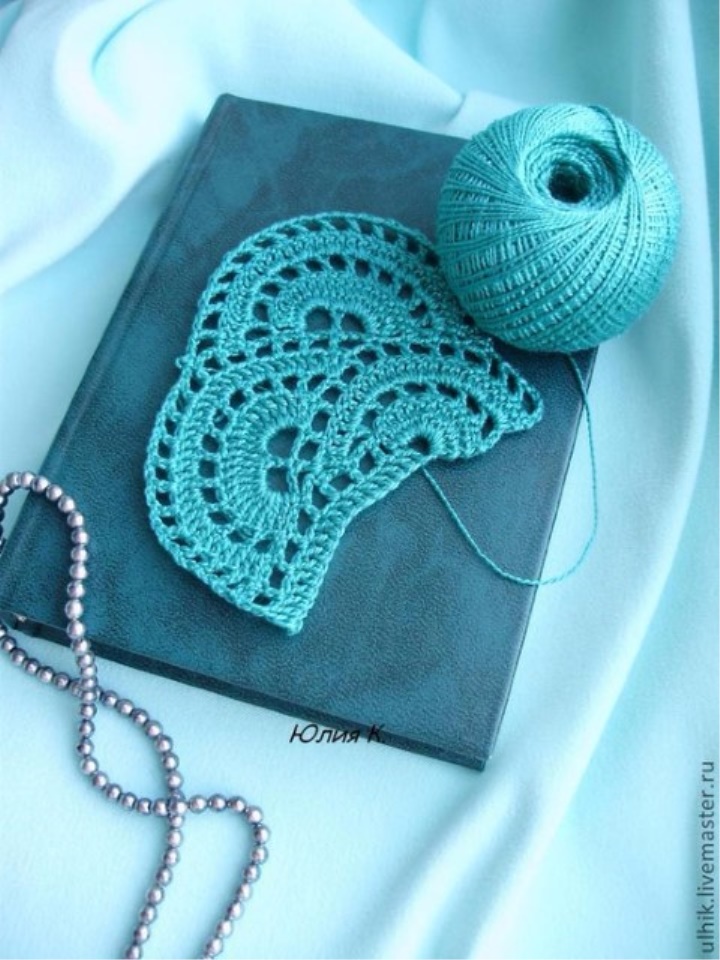
Master class number 2
16 (524x700, 401Kb)
In this master class we will learn how to crochet another very beautiful and simple ribbon lace (LK). Linked with a lace T-shirt, a skirt or a jacket with a long sleeve will decorate your wardrobe.
The conceived product can be completely executed from tapes, having arranged them along, across and even obliquely. And you can combine the elements of ribbon lace with other motifs (Irish lace, fillet knitting ..). Very beautiful looks LK in the form of the rim of the bottom of the product, the edge of the sleeve, the neckline cut or use it as a strapless product, and also decorate a very simple knitting. To decorate the interior with napkins made with ribbon lace or using elements of leather. There are many options, plus your imagination.
Materials and tools:
any thin thread in the composition of which includes cotton (in the sample we used threads "Iris" and hook №1,0). The thinner the thread, the lace looks more effective.
Symbols used in the description and diagram: vozd.p. - an air loop (.), St.s / n - a column with a crochet (T), art. with 2 / n. - a column with two crochets, soy.st. - connecting column (
Description: we knit 5 + 17 = 22 resp
., 1st row:
we make a ring from 5 airs and we sew 17 items of s / n in the remaining 17 cases
of the second row:
3 air-lifts and 2 air-ways according to the figure, 1 st.s.n. in 3 st.s / n of the previous row.Therefore, to tie another 5 items of s / n with 2 air-ways, then 1 item s / n without 2 air and another 1 st.s / n (note the photo will be the letter A between these columns).

further 12 tbsp. with 2 / n. in the arch of the 5 th row of the previous row.
3 rd row:
5 resp., 1 st.s / n in the base of the 3rd st. s / n previous row and 2 air. etc. Thus, we sew another 5 tbsp. with / n. with 2 air. etc. and do it together. Art. Another 2 air. and so on. Art.
4th row:
turn knitting and knit the whole series of st.s / n as follows:
2 st.s / n in the first arch of the 2 rd.p. the previous series, 1 tbsp. with / n. in the basis of the first st.s / n of the previous series,
2 st.s / n. of the second arch of the 2 episodes. the previous series and 1 tbsp. s / n in the base of the second st.s / n of the previous series,
3 st.s / n. in the third arch of the 2 rdp. the previous series, 1 tbsp. with / n. in the base of the third st.s / n of the previous series,
3 st.s./N. in the fourth arch of the 2 rdp. the previous series, 1 tbsp. with / n. in the base of the 4th st.s / n of the previous row,
2 st.s / n. in the fifth arch of the 2 rdp. the previous series and 1 tbsp. s / n in the base of the 5th st.s / n of the previous series,
2 st.s / n. in the sixth arch of the 2 rdp. the previous series and 1 tbsp. s / n in the base of the 6th st.s / n of the previous row,
3 st.s / in. in the last arch from r.p. of the previous series. This is how the fourth row was finished
the 5th row: we
knit the 5th row as a 3rd row, only it should turn out to be 13 st / s. with 2 rd.p., then the co.d.
So we tied the first finished element of our lace.
Begin to knit the second element of the lace:
6th row:
5 air. n, 1 st.s / n. in the base of Art. s / n previous row, 5 air. etc., co-ordinate, 2 air. etc., connect. Art
7th row:
8 st.s. 2 / n. of the arch of 5 episodes. previous row, 2 st.s. 2 / n. in the base of Art. s / n previous row, 9 tbsp. with 2 / n. In the second arch of the previous row, connect. item, 2 air. etc., connect.
8th row: we
knit as the 3rd row, but it should be 10 st. with / n. with 2 air. after each art. с / н., соед.ст.
9th row: we
knit similarly to the 4th row, but we are tying 2 st.s / n into each arch. and 1 st.s / n in the base st.s / n of the previous row.
The 10th row: we
knit as the 5th row, but 16 st.s./N and 2.p. after each art. с / н., соед.п.
That's finished knit the 2nd element of our lace. All the subsequent series we repeat from the 6th to the 10th series.
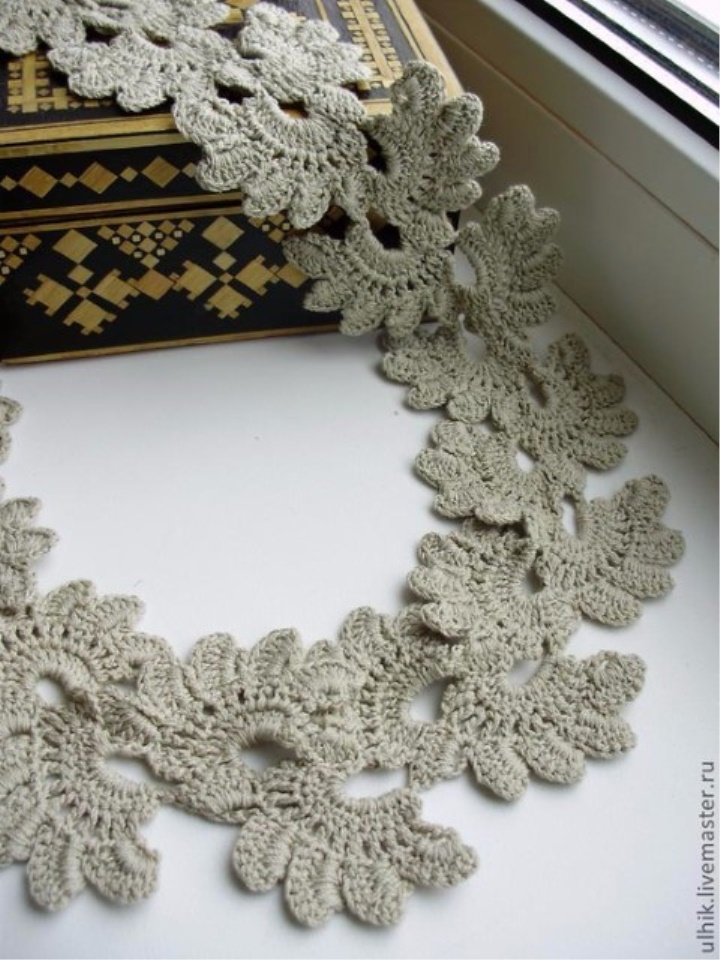
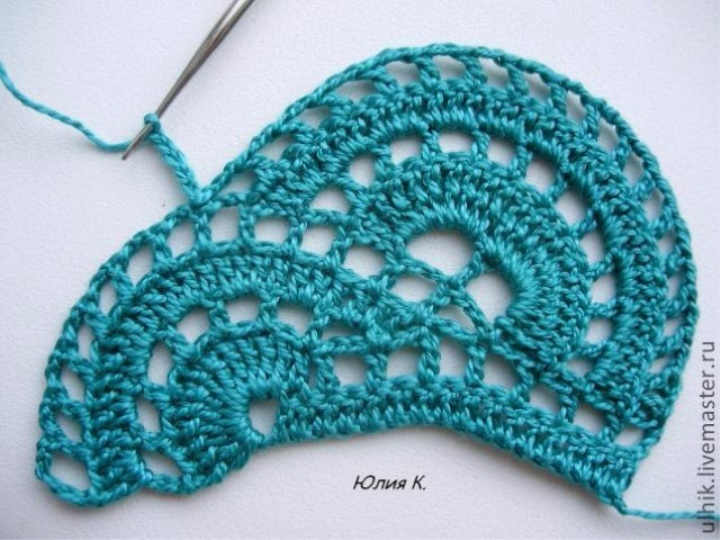
Here is such a beautiful and not complicated ribbon lace turned out ...

And two more photos with ribbon lace for my new model