1. Yarn Kamteks Cotton Travertine (KHT) 1 coil gray and a half-turquoise color. A bit of pink cotton on the ears.
2. Hook under your yarn (I have a gamma of 2.5)
3. The eyes are 12mm glass.
4. I have a plastic artifact (baked), you can take any to which you are accustomed.
5. Colors acrylic or oily.
6. Clear transparent varnish (acrylic or for nails).
7. Cotter pins and disks. Wire for the frame.
8. Filler, scissors, needles, sewing threads, brushes thin.
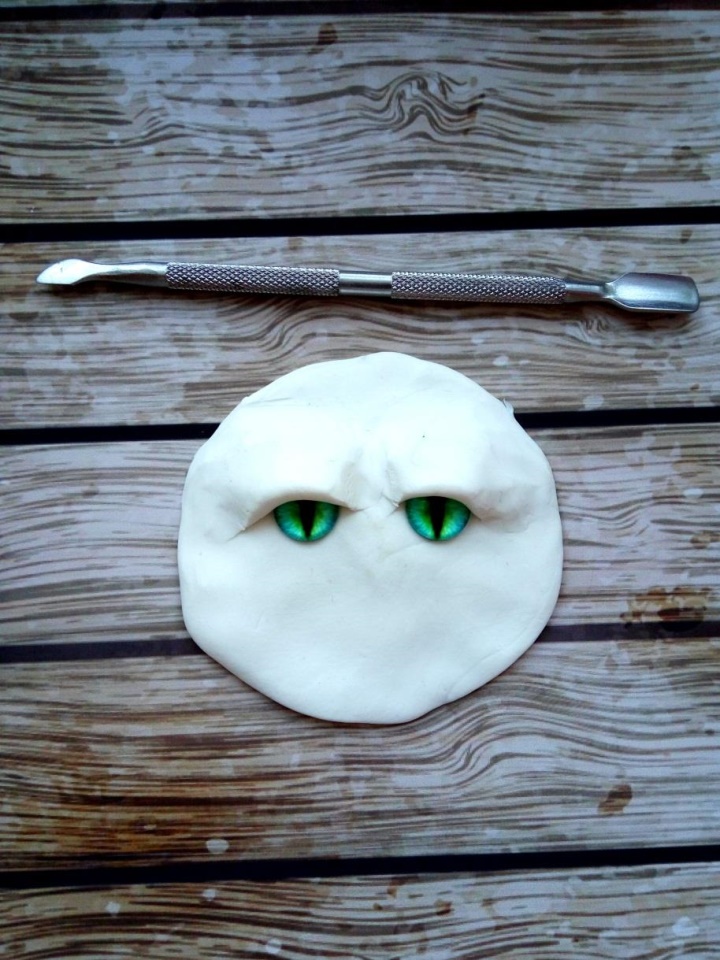
9. Manicure stick (iron, where from one edge - a scapula, and from another "knife" in the photo shows a nail polish, which I use).
10. Good mood!
KA is the Amigurumi ring.
V.p. - air loop.
Sb. - a column without a crochet.
Ss. - connecting loop.
Ssn. - column with crochet
Etc. - an increase (from a single loop, 2bn)
PSN. - half-shell with crochet
PS - bias loop
A PR from pss. - to unfasten from one loop two half-columns.
ub of Psns. - 2 half-columns with crochet knitted together.
Уб. - reduction (tie 2bn together)
(2sbn, 1pr) x 3 time - this means that this action must be repeated 3 times, i.e. knit: 2sbn, 1prib, 2sbn, 1prib, 2sbn, 1prib.
If the description indicates that the marker should be monitored, then in cases where the marker is deflected, tie the ps. In the description, I will indicate my offset loops, since the knitting density is different for all, then the offset happens in different ways, you can make offset loops like me or make your own, to achieve the desired marker position.
Let's get started!
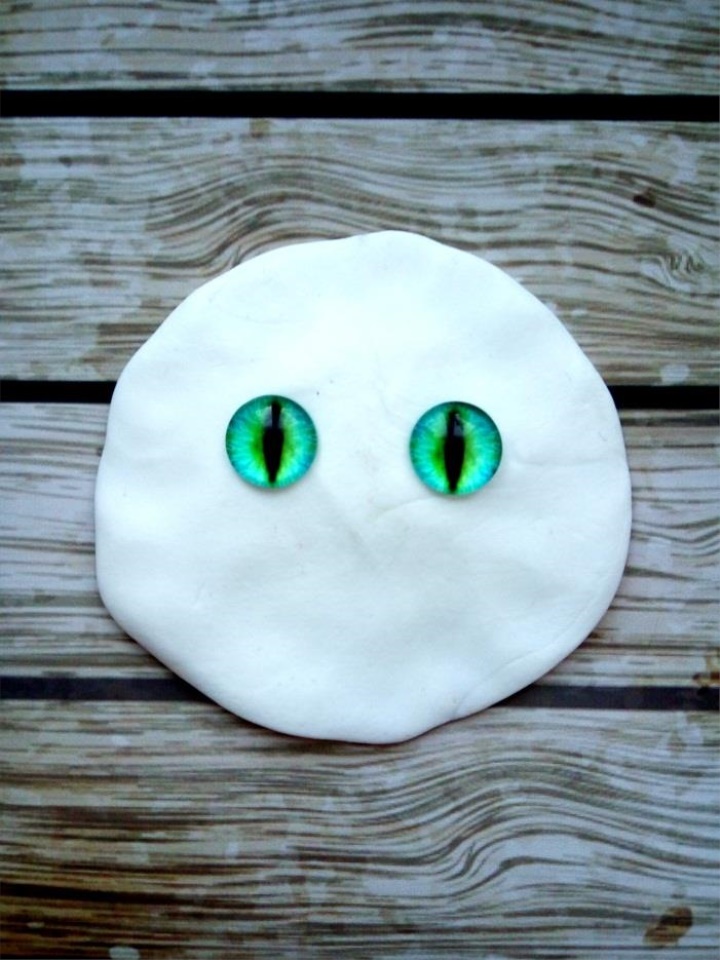
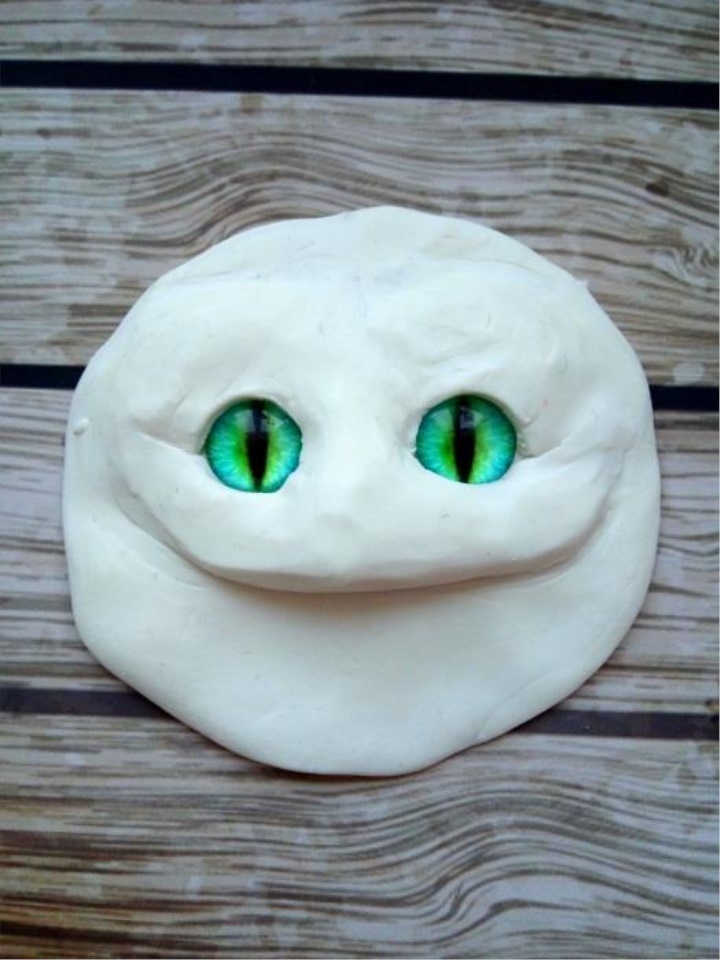
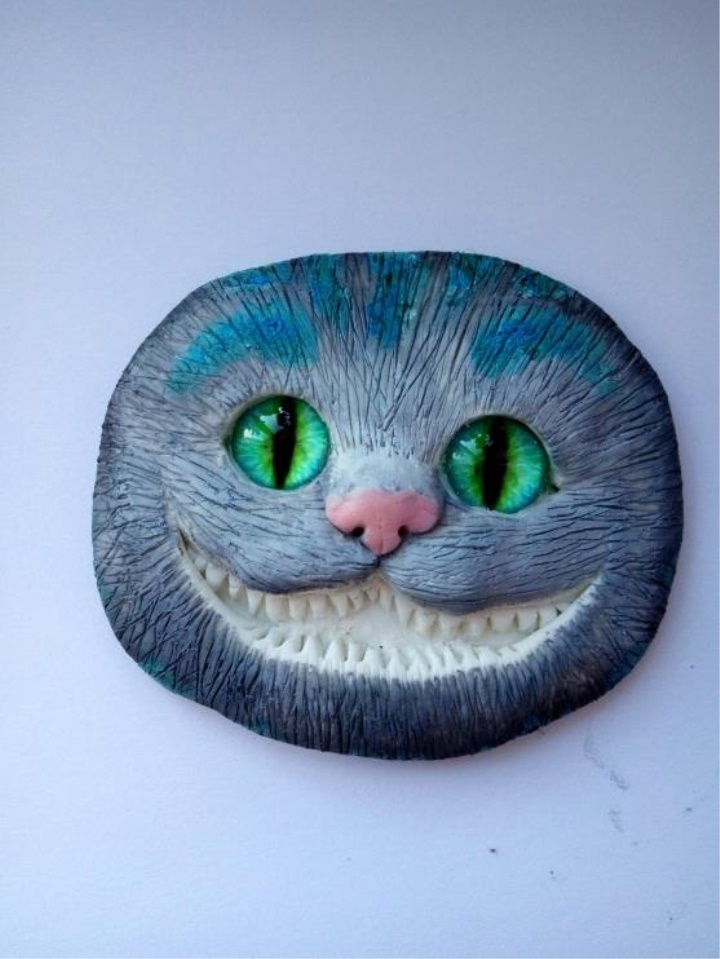
We knead our plastic in the hands to the condition of plasticine. We make a circle in a thickness of 4-5mm, in diameter 7cm, the edges of our flat cakes are made more thin 3-4mm. Then immediately press our eyes a little above the middle of the circle, pressing in not deeply, so that they simply fixed well. The distance from the bottom to the lower border of the eye is 3.5cm, at the sides: from the edge to the lateral borders of 1.8cm, between the eyes is 10cm.
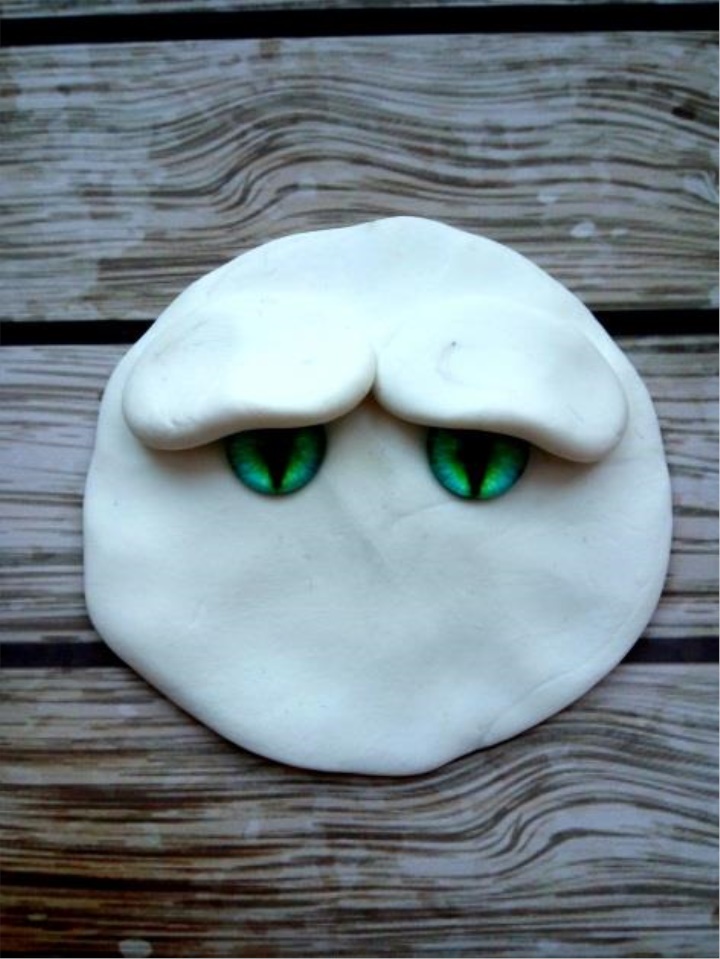
We sculpt our eyebrows:
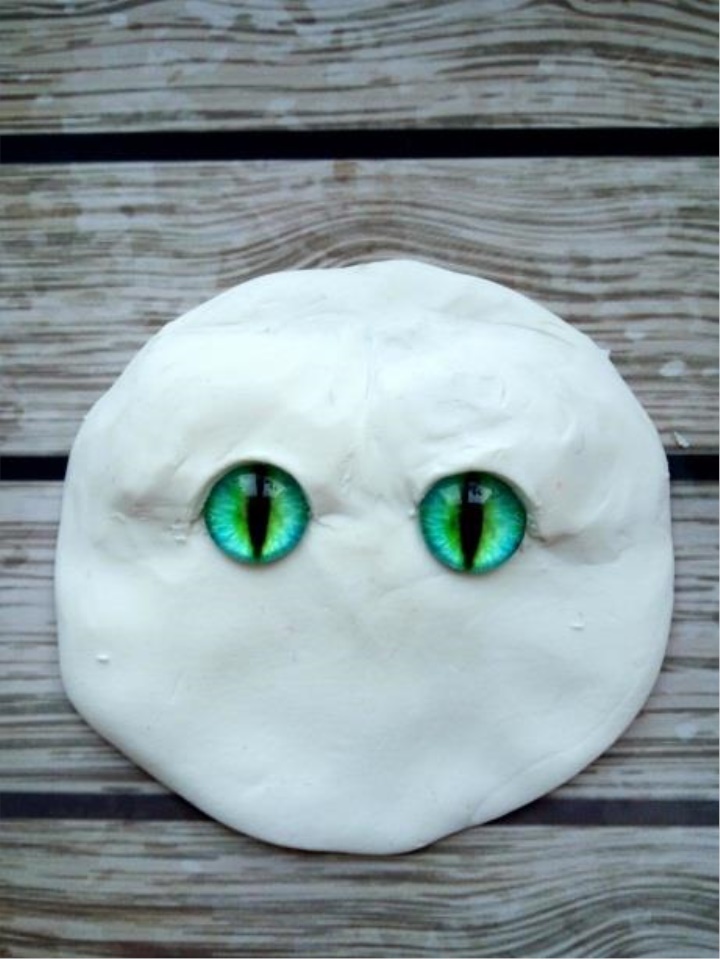
We roll 2 balls, 8-9 mm in diameter, knead well and make 2 cakes out of them. We sculpt them on the upper parts of the eyes for 2/3 of the eye and with the help of a nail polish we glue and smooth the eyelids, attaching them to the snout. Further we lift eyelids, te we do or make eyes more open with the help of manicure. We reject the sticks, we move the plastic parts gradually, pushing it upwards in the direction of the forehead. We twist the detail so that the parts are the same from the pupil's side.

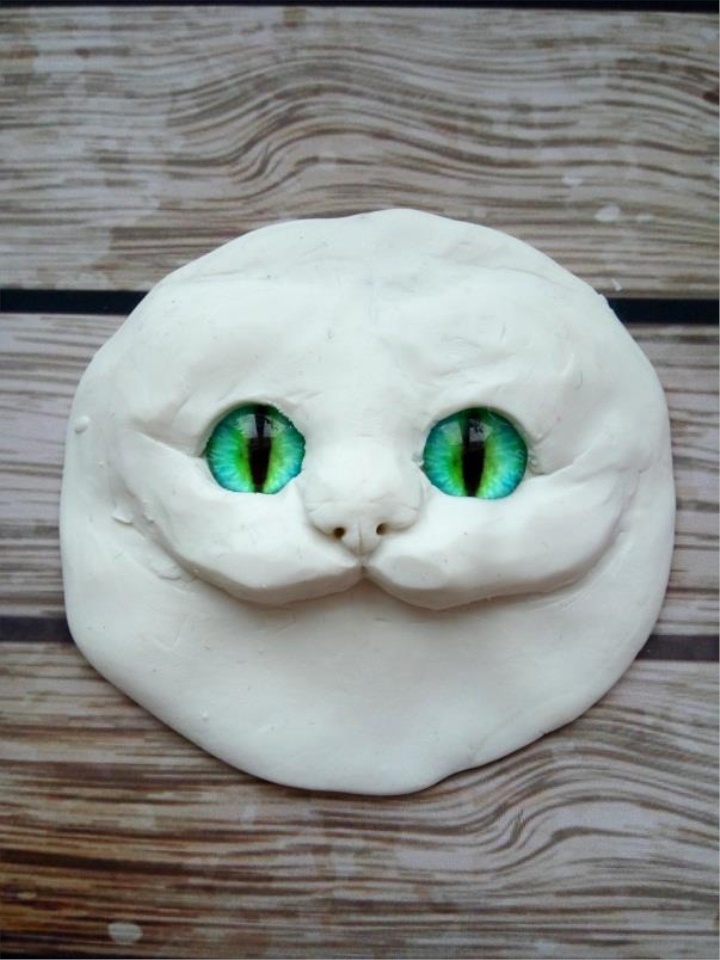
We sculpt the nose. We sculpt a figure with three rays. We start from the center, the upper beam is 1.5cm, the side beam is 2.5cm.
Apply the shape with the rays to the detail with the eyes, so that the shortest beam is between the eye and the side under the eyes. We start to connect - to smooth manic. stick all the places of contact of parts, with smoothing, the lateral rays are folded by repeating the shape of the eyes and smooth.
We make a nose on the same detail. With the help of manicure. chopsticks make a sketch of the spout (see photo), outline its borders, and then leave the target area, and at the edges press. We make a notch under the nose. From the bridge of the nose slightly we drive the plastic in the direction of the spout, we form the spout, we put the nostrils with the needle and the needle thread sew the line between the nostrils.
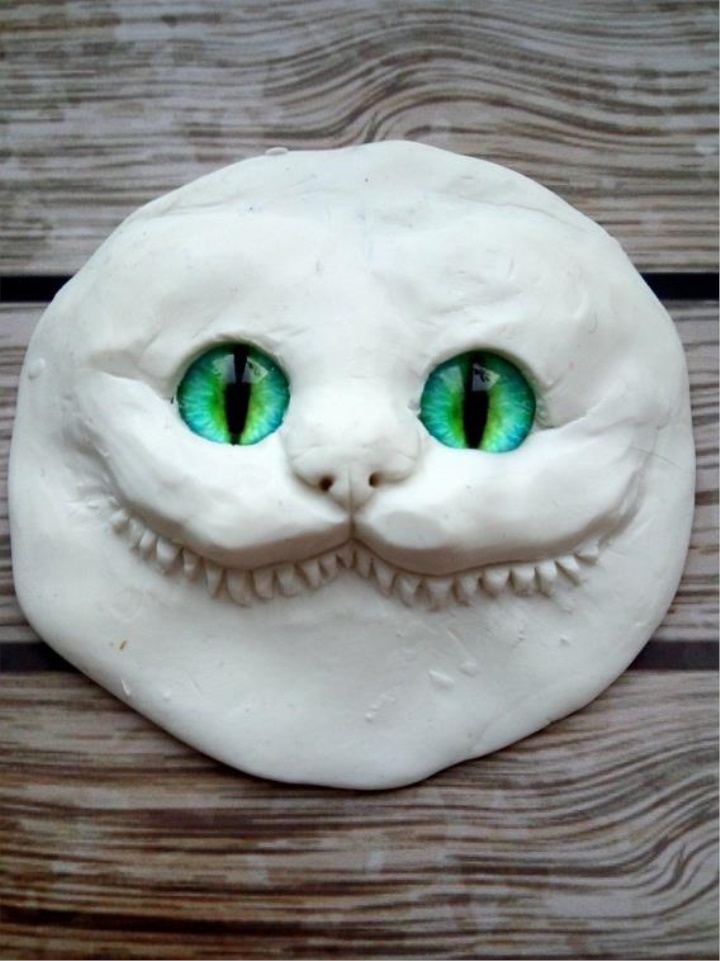
We make teeth. We roll a thin strip for the teeth, about 3 mm in the cut. We apply a strip to the upper jaw, smooth it around the edges and in the middle we press it to the nozzle, we cut the teeth. We start to smooth the teeth, at the same time sharpening them, ie after cutting they are square, and now we form triangles from them taking the plastic from the edges of the tooth and smearing it.
We sculpt the lower jaw. We roll sausage 5-6 mm in a cut, we cut it along the edges. Apply it in such a way that a smile is produced, while the length of the sausage should be enough to allow the edges to reach the level of the middle of the eyes (see photo). Smooth the part from the outside of the lip, then the side parts. From the inside, we cut the teeth and begin the same way as on the upper jaw to smooth the teeth tapering them.
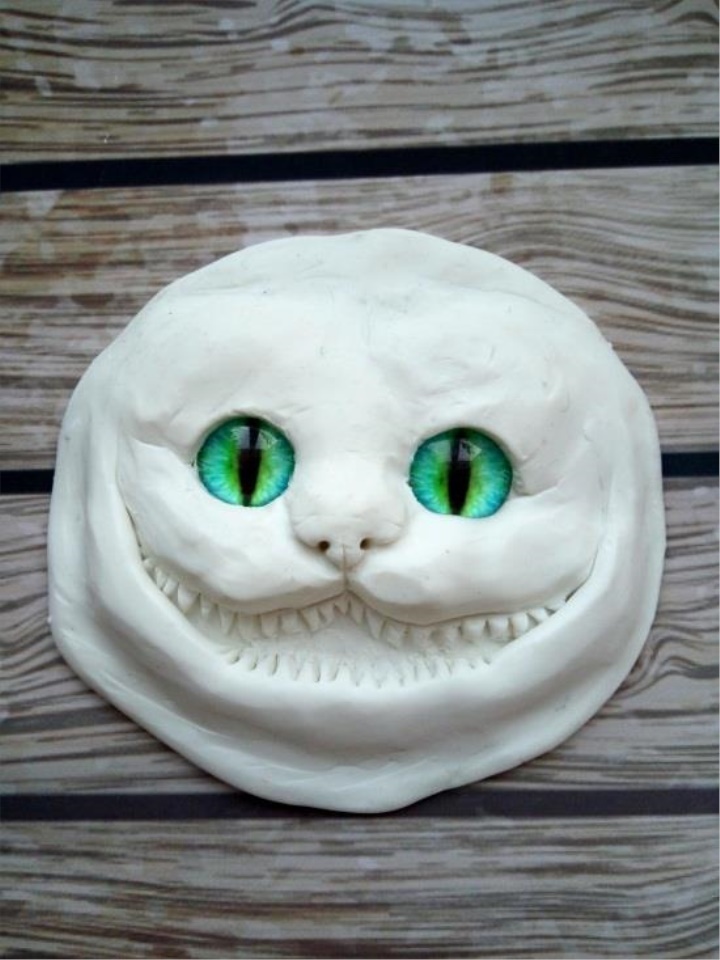
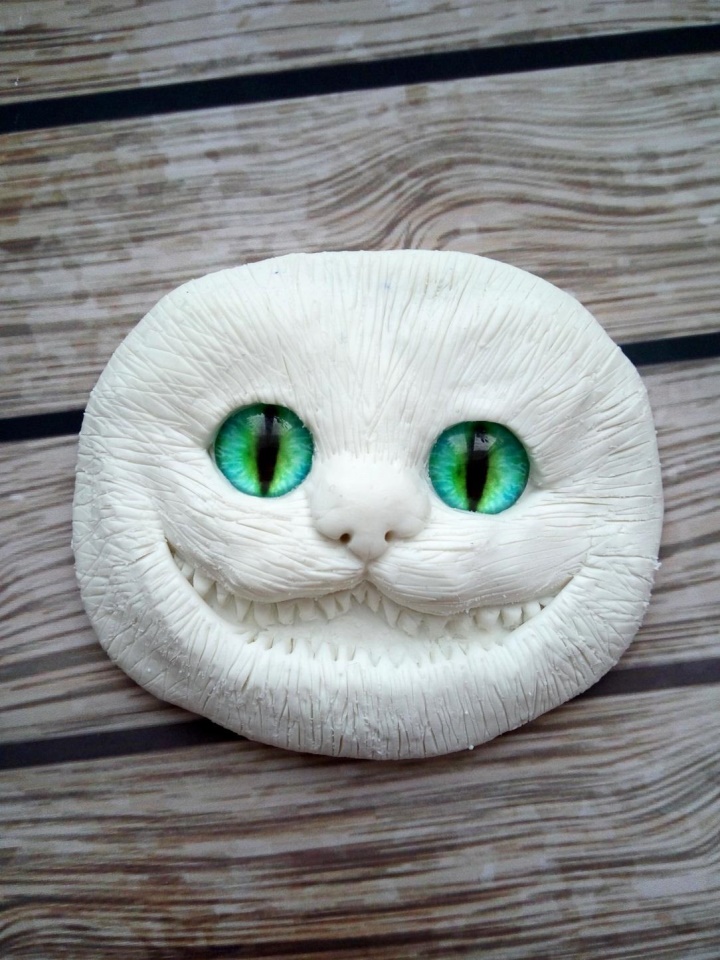
We make the finishing touch, we twist the part and look from different angles so that everything is the same everywhere and evenly. The needle is applied to the villi by the growth of the coat, we do not touch the spout
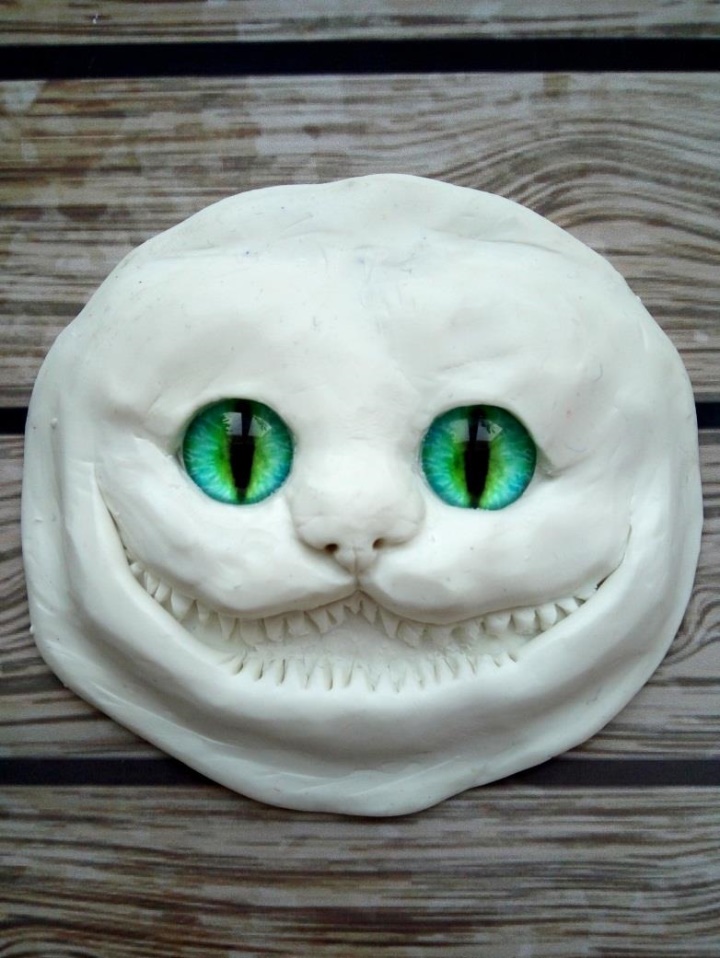
Here such detail we should get, thin edges accurately wrap (like rolls) and we send baked, about how it is necessary to bake it is possible to read on your plastic, I have 130C for 10min.
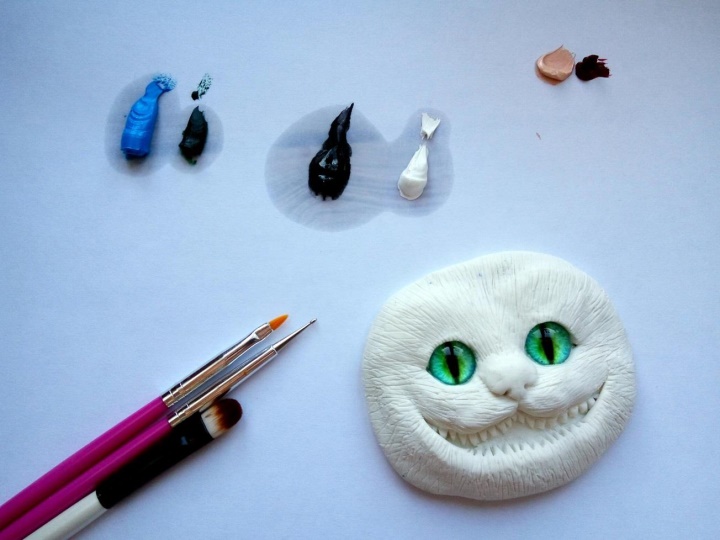
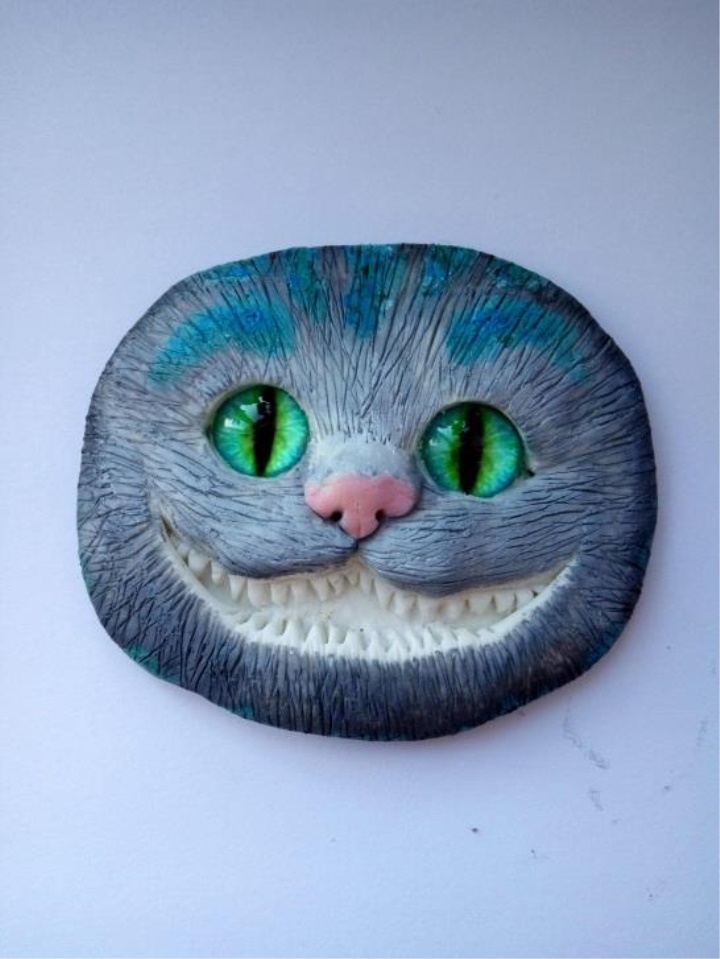
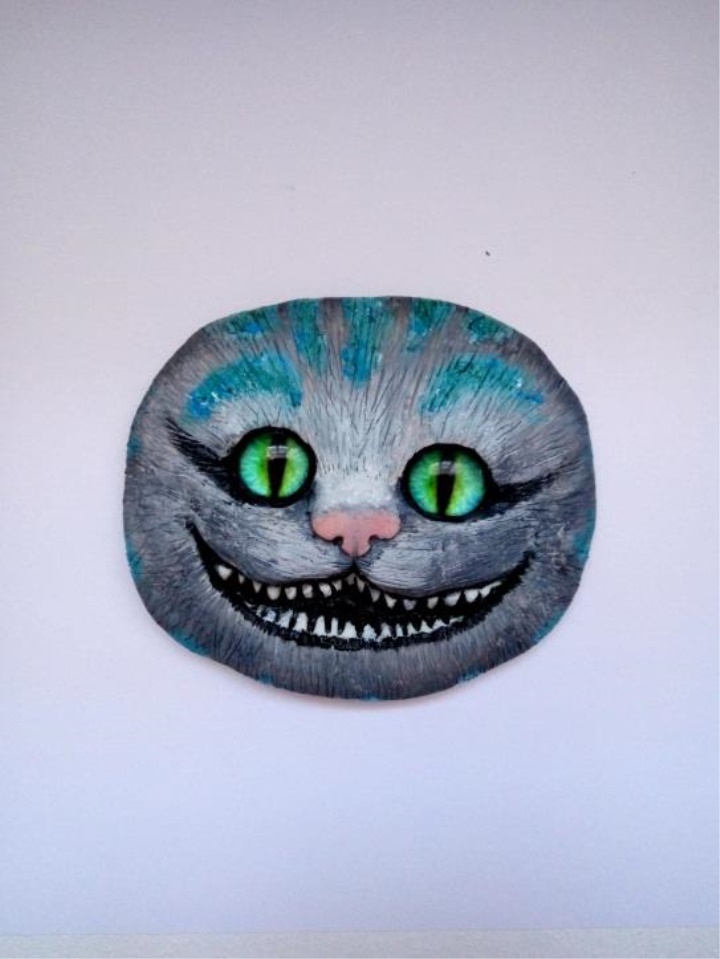
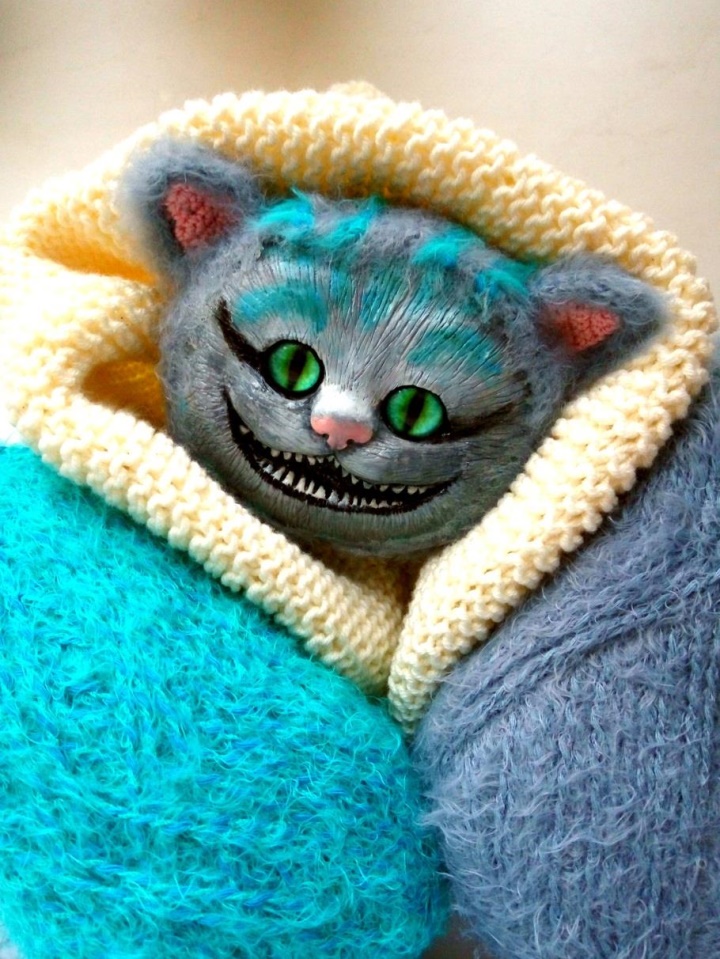
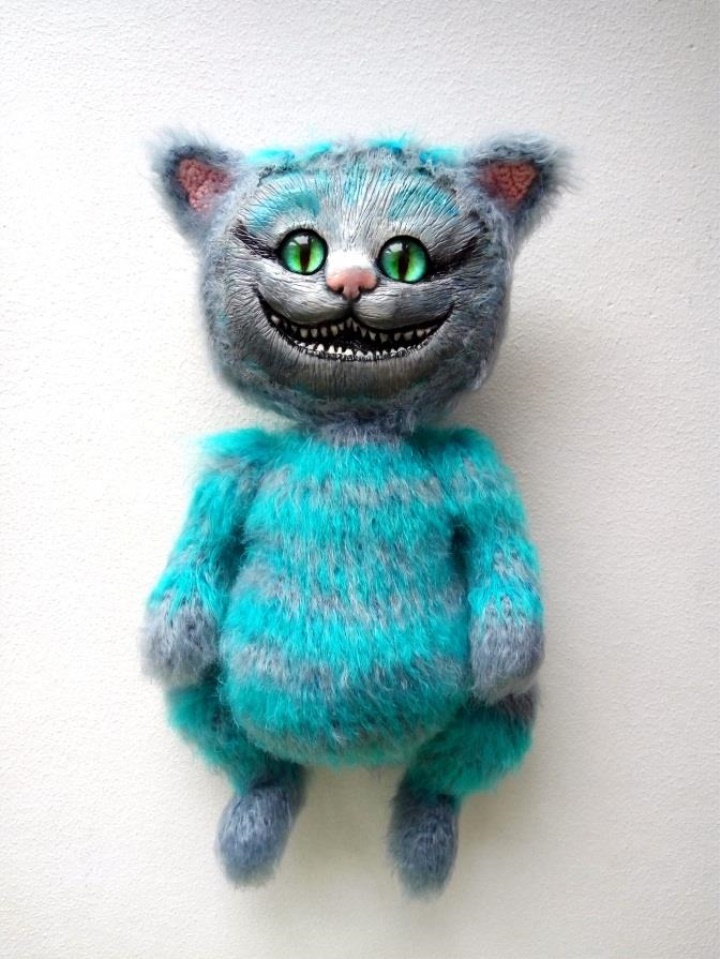
Muzzle painting. On the leaves squeeze out the colors of the desired colors. I have oil paints: black, white, green, pink and blue. I will mix them with each other to get the right shades, you can also do with acrylic paints.
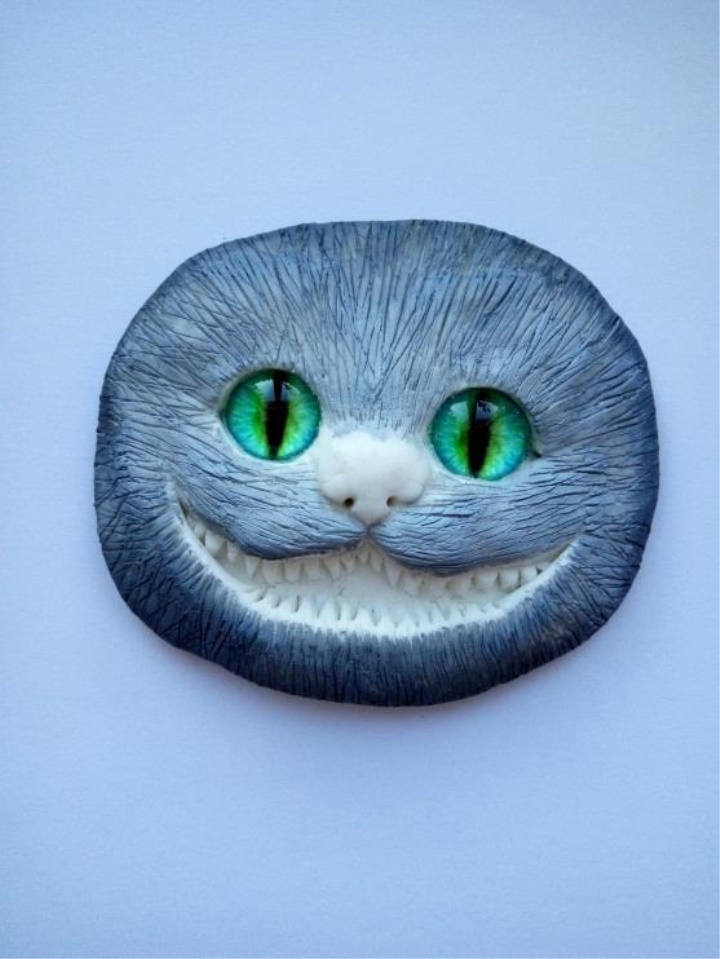
The first layer is mixed white and black and paint the part in gray, except for the spout and mouth. At the edge of the shade make the shade darker, and closer to the nozzle lighter. Add the turquoise bars and lines on the forehead. With a fine brush, paint the inner part of the mouth and the lip of the lips very, very gently with black paint. If you hit the tooth with black paint, you can paint it after the paint with white paint. We paint with black paint around the eyes and arrows. We paint a pink nose with pink. Leave mordahu dry for 2 days (if you used acrylic paint, then 2-3 hours will be enough). Cover with a clear varnish.
1p - 6sbn, in the spacecraft (6)
2p - 6pr (12)
3p - (1cbn, 1pr) x 6p (18)
4p - 1sbn, 1pr, (2cb, 1pr) x 5 times, 1sbn (24)
5p - (3sbn, 1pr) x 6 times (30)
6p - 2sbn, 1pr, (4sbn, 1pr) x 5 times, 2sbn (36)
7p - (5bn, 1pr) x 6 times (42)
8р - 3сбн, 1пр, (6сбн, 1пр) х 5раз, 3сбн (48)
9p - (7sbn, 1pr) x 6 times (54)
10p - 4sbn, 1pr, (8cbn, 1pr) x 5 times, 4sbn (60)
11p - (9cbn, 1pr) x 6 times (66)
12р - 21р - 66сбн (66) 10charges.
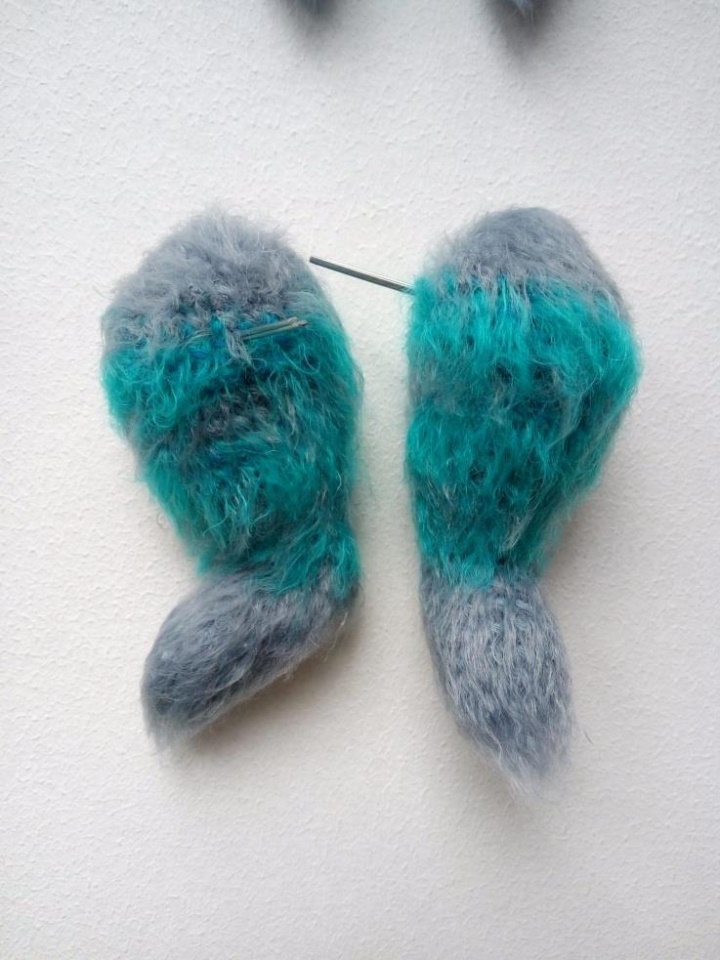
22p - (9сбн, 1уб) х 6раз (60) to try on the part to the molded part from plastic, which should very tightly enter the knitted part, if it comes in easily, then tie another row with discounts (8сбн, 1уб) х 6раз (54 ).
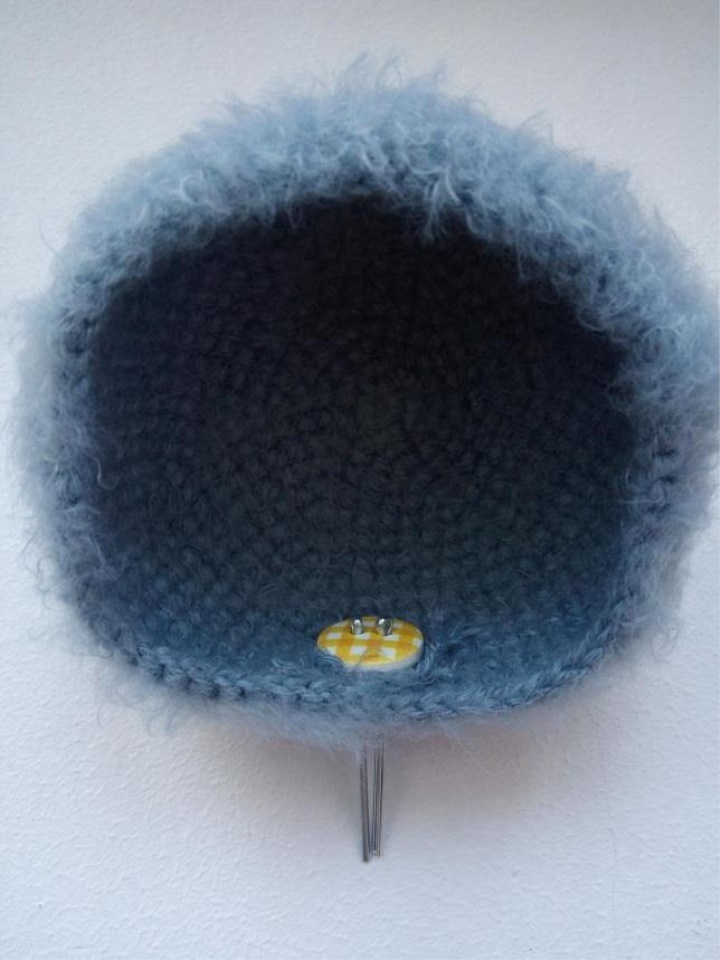
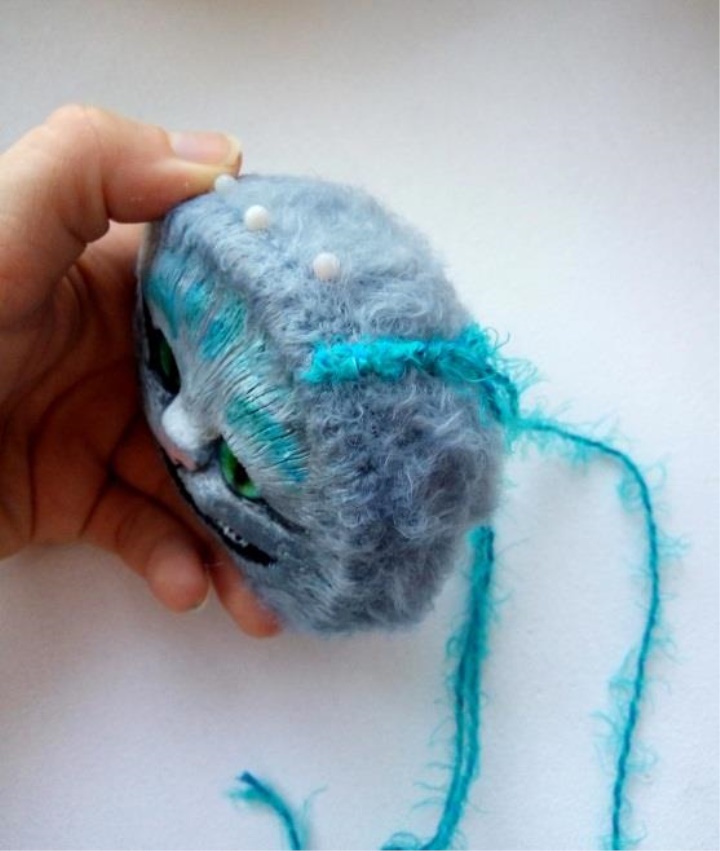
We turn out the detail and carefully comb it. Count on the marker line 4p back and insert cotter pins with a 15mm disc (insert between 4 and 5 rows). We fill it tightly and we paste the part from the plastic (we need to glue the knitted fabric and the villi), we let the parts dry. Then we mark with needles 3-4 lines from the forehead to the nape and embroider with a turquoise string of the line. We brush the part again.
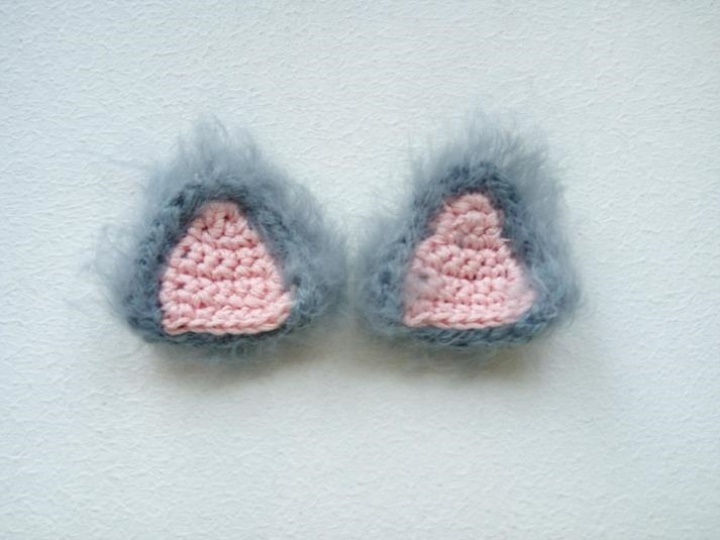
We knit with pink color 2 details. The thread for pink details should be half as thin as gray.
We knit with turning rows, starting with 1Bn in 2y from the hook loop.
1p - 3sb in the spacecraft (3)
2p - 1in, 1pr, 2sbn (4)
3p - 1in, 1pr, 3sbn (5)
4p - 1in, 1pr, 4cbn (6)
5p - 6p - 6sbn (6), then tie around the perimeter of sbn, at the corners knit 3sbn.
We knit with turning rows, starting with 1Bn in 2y from the hook loop.
We knit 2 details in gray
1p - 3sb in the spacecraft (3)
2p - 1in, 1pr, 2sbn (4)
3p - 1in, 1pr, 3sbn (5)
4p - 1in, 1pr, 4cbn (6)
5p - 6p - 6sbn (6), we do not break the thread, but we attach the pink part, we tie round the perimeter of the sbn, into the corners 3sb, the base of the eyelet is not tied.
We sew the ears to the head in the desired place.
Gray color
1p - 6sb in the spacecraft
2p - (2pr, 1cbn) x 2p (10)
3p - (2cbn, 1pr, 2cbn) x 2p (12)
4p - 6p - 12sbn (12) (3 times)
We start to alternate colors every 2
series.
7p - 1pr, 3cb, 2ub, 3sbn, 1pr (12) (fold)
8p - 11p = 12sbn (12) (4parts) + 1pc in 11p
12p - 11sbn, 1pr (13)
13р - 1уб, 3сбн, 2пр, 4сбн, 1уб (13)
14p - 1pr, 5bn, 2pr, 4cbn, 1pr (17)
15p - 8sbn, 1pr, 8bn (18)
16р - 19р - 18сбн, we insert a skeleton of the handle and шплинт with a disk on 1р below.
We fill the part.
20p - (1сбн, 1уб) х 6раз (12)
21р - 6уб, finish knitting the last 3 rows with a turquoise thread.
To comb the parts.
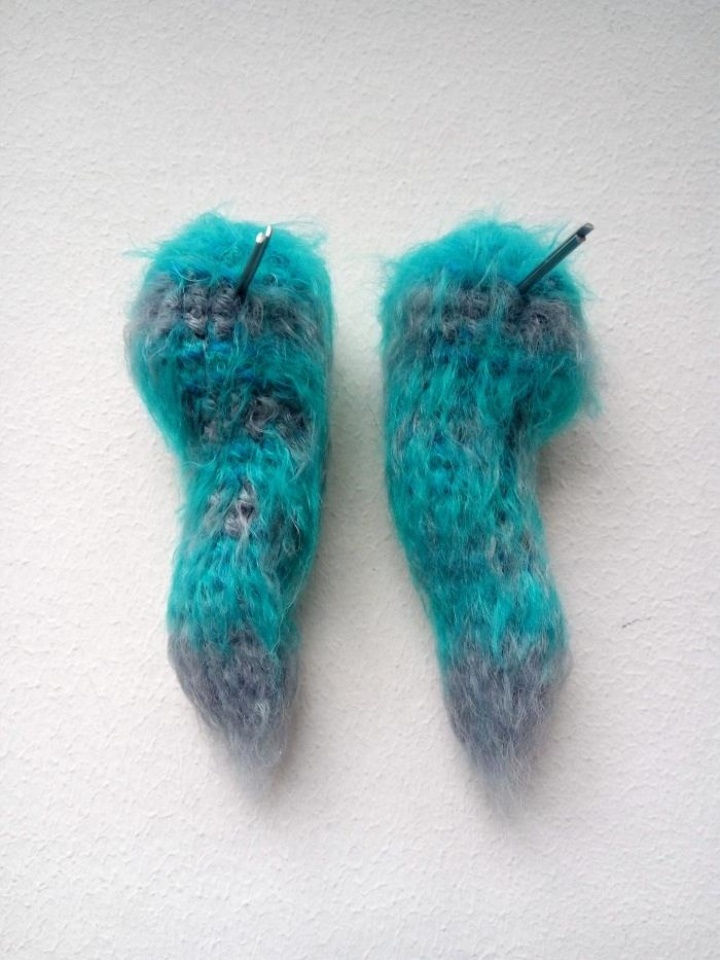
Gray color
1p - 6sb in the spacecraft
2p - (2pr, 1cbn) x 2p (10)
3p - (2cbn, 1pr, 2cbn) x 2p (12)
4p - 7p - 12sbn (12) (3-rd)
8p - 2pss, 8ss, 2pss (12)
9p - 3pssn, 6ss, 3pss (12)
10р - 1уб from пссн, 3сбн, 2пр, 3сбн, 1уб from
psn (12)
11p-12sbn (12)
We put the frame and continue knitting
alternating colors every 2 rows.
We fill in the course of knitting.
12p - (1pr, 5cbn) x 2p (14)
13p - (6sbn, 1pr) x 2p (16)
14p - (1pr, 7cbn) x 2p (18)
15р - (8 сбн, 1пр) х 2р (20)
16p - (1pr, 9cbn) x 2p (22)
17р - 22р - 22сбн (22) 6charges.
We put the cotter pin 1p lower.
23p - (4cb, 1ub, 3cb, 1ub) x 2p (18)
24p - (1cb, 1ub) x 6p (12)
25р - 6уб, pull off, cut off the thread.
Gray color. We fill in the course of knitting.
1p-6sb in the spacecraft (6)
2p - 6pr (12)
3p - (1sbn, 1pr) x 6 times (18)
4p - (2sbn, 1pr) x 6 times (24)
5p - 24sbn (24)
We start to alternate colors every 2 rows.
6p - (3sbn, 1pr) x 6p (30)
7p - 8p - 30sbn (30)
We fasten the head.
9p - (4sbn, 1pr) x 6 times (36)
10р - 13р - 36сбн (36)

handles on 4p above.
14р - 15р - 36сбн (36)
16p - (5sbn, 1pr) x 6 times (42)
17r - 42bn (42)
18p - (6sbn, 1pr) x 6 times (48)
19р - 25р - 48сбн (48) 7рядов. We fasten the legs to 2p higher.
26p - (6sbn, 1ub) x 6 times (42)
27р - (5сбн, 1уб) х 6раз (36)
28p - (4cb, 1ub) x 6 times (30)
29р - (3сбн, 1уб) х 6раз (24)
30p - (2cb, 1ub) x 6 times (18)
31p - (1сбн, 1уб) х 6раз (12)
32p - 6уб, pull off the remaining threads.
Gray color. We fill in the course of knitting.
1p-6sb in the spacecraft (6)
2p - 6pr (12)
3p - 4p - 12cb (12)
We start to alternate colors every 2 rows.
5p - 36p - 12sbn (12) 32days.
We insert a wire frame. We comb the part and sew it in the desired place after fitting.
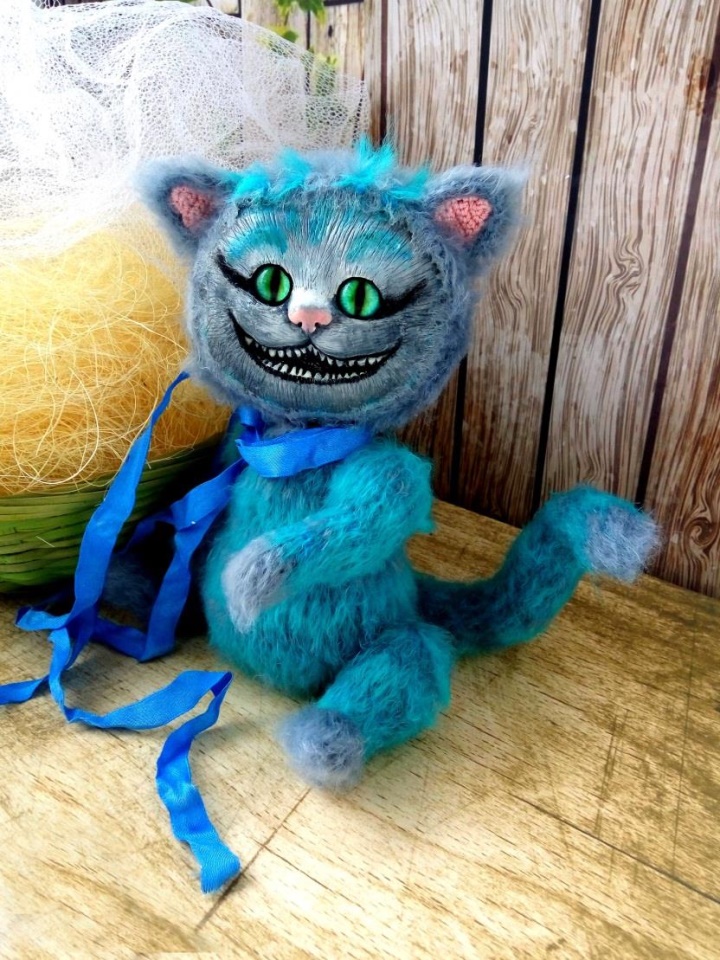
I hope the master class was interesting to you and you learned something new and interesting!