Click For Crochet Abbreviations List
You will need:
Yarn dark and light green color (I used Schachenmayr Bravo, 100% Acrylic, 133 m/50 g)
Little Yellow Yarn
A little bit of fine yarn type iris for Reed
Hooks № 4 or № 3.5 and № 1.5 (for Reed)
Beads
A piece of felt for the crown
Wire (preferably in a Hank)
Filler (in this case it is best to use cotton wool)
Thread for the design of the muzzle
Shades of pink or blush for toning
A couple of important components required to create a positive toy: friendly, positive attitude and good mood!
Designations used in the description of knitting:
VP-Air Loop
Non-lime
C-Column with scale
PSG-semi-stacked with scale
SS-Connecting Column
Add-2 column without the scale in one loop
PRSPs-2 half-column with scale in one loop
Ubava-to skip 1 column of the previous row, to get 1 SBN
Head:
1 row: 2 VP strands of dark green color, lock in the ring, then knit in a circle 6 SBN [= 6];
2 row: 6 increments [= 12]
3 row: (increment, 1 sbn) * 6 times [= 18]
4 row: (Increment, 2 SBN) * 6 times [= 24]
5-6 Series: 24 SBN [= 24]
We turn to the expansion of the head (formation of convex cheeks):
7 row: 2 SBN, 3 increments, 9 SBN, 3 increments, 7 SBN [= 30]. The additions should be arranged symmetrically, on opposite sides of a head.
8 row: 3 SBN, 1 PRSPs, a raise from PRSPs, 1 PRSPs, a raise from PRSPs, 1 PRSPs, 3 SBN, 4 SS, 2 SBN, 1 PRSPs, a raise from PRSPs, 1 PRSPs, a raise from PRSPs, 1 PRSPs, 8 SBN [= 34]. The additions in this row should be placed strictly above the additions of the previous row.
Next we turn to knitting of light-green yarn and Projazat columns of the next row, capturing only the back half-loop of columns of 8 rows.
9-10 Series: 34 SBN [= 34].
11 row: 3 SBN, 3 ubcaps, 11 SBN, 3 ubcaps, 8 SBN [= 28]. The ubavki of this row should be located in the area of cheeks, i.e. where there were additions in the 7th and 8th rows.
12 row: (2 SBN, Ubavka) * 7 times [= 21]
13 row: (1 SBN, Ubavka) * 7 times [= 14]
Attach the filler to the head. Try to fill the head so that to give it the necessary form, i.e. for giving volume to invest a little more filler in the area of cheeks.
14 row: (1 SBN, Ubavka) * 4 times [= 10]
Leave the opening of the head open.
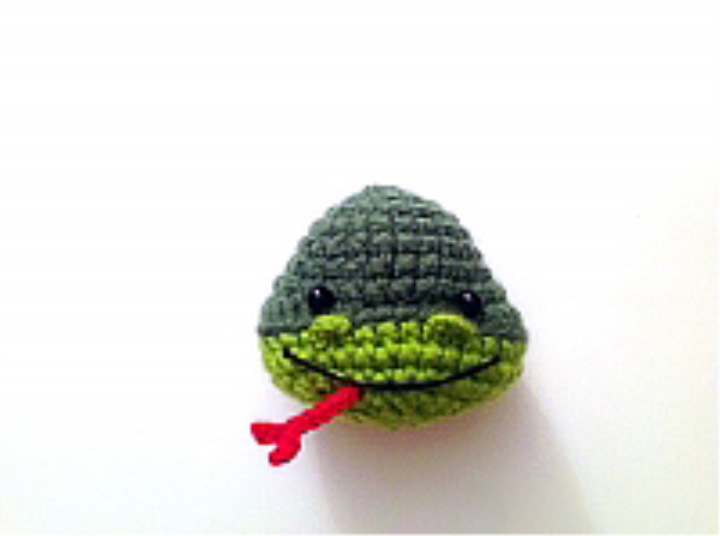
We design face snake (though it can be done and then, when all the details will be connected and the toy will be collected):
-For nostrils knit 2 chains of 4 VP light green color. Use a thin hook for this, for example, № 2 or even № 1.5, so that the chains of the VP are quite dense.
We have the nostrils in the right place (see the picture), enter the free ends of the chains inside the head and sewing the nostrils to the head with a thread of the appropriate color;
-Knit a forked reed from a very thin yarn: for this we dial a chain of 7 VP (the base of the reed), then dial another 3 VP (the first tip), the connecting column in the second loop from the hook, then another 2 SS in the subsequent loops of the chain. Knit the second tip: 3 VP and again 3 connecting bars in the loops of this chain, then knit connecting posts to the end of the reed;
-Stick the eyes-beads. I recommend first to outline where the eyes will be located, and then fasten them with a single outline thread so that the ends of this thread came out in the back of the bottom of the head. Pulling the loose ends of the threads, you can slightly drown eyes in the head of the snake.
-For the rotor make a big stitch black thread, ie enter and output thread in the right places, and the ends are deduced from the back side of the head at the bottom, in order to be able to adjust the length (or, so to speak, the bending of the mouth). Then lubricate the thread on one side with glue (I used a simple clerical glue-pencil) and glue. If the thread is a little slack, you can tighten it by pulling the ends. In general, the thread of the mouth can also be picked up with a thin thread in several places, but I have a mouth and without it well kept. If it is supposed that the toy will be actively used by children, it is better to fix a ROTK in several places with an additional thread.
Here's the muzzle I got:
Torso:
1 row: 2 VP, lock into the ring, then knit in a circle 4 SBN [= 4];
2nd row: Add, 3 SBN [= 5]
3 row: Raise, 4 SBN [= 6]
4th row: Add, 5 SBN [= 7]
5 row: Raise, 6 SBN [= 8]
6 row: Raise, 7 SBN [= 9]
7th row: Raise, 8 SBN [= 10]
8 row: Raise, 9 SBN [= 11]
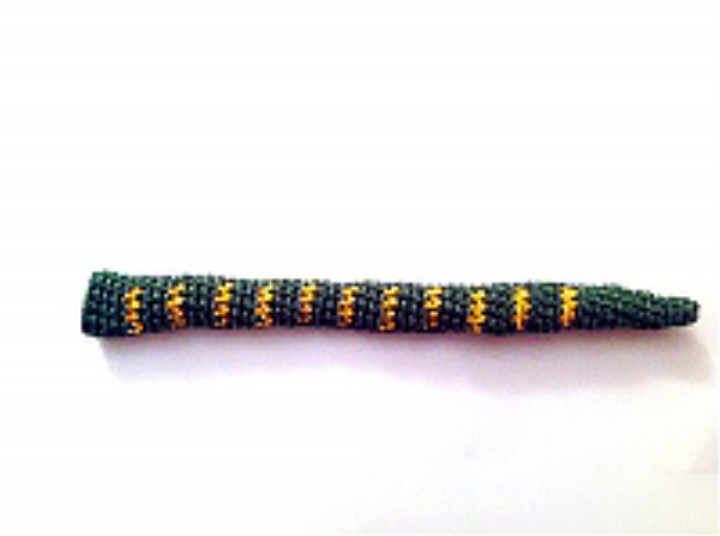
On the resulting workpiece visually outline where the back of the snake will be located, and where the tummy. Then to form a picture of a backrest in each 4-th row to tie 4 columns without a yellow color.
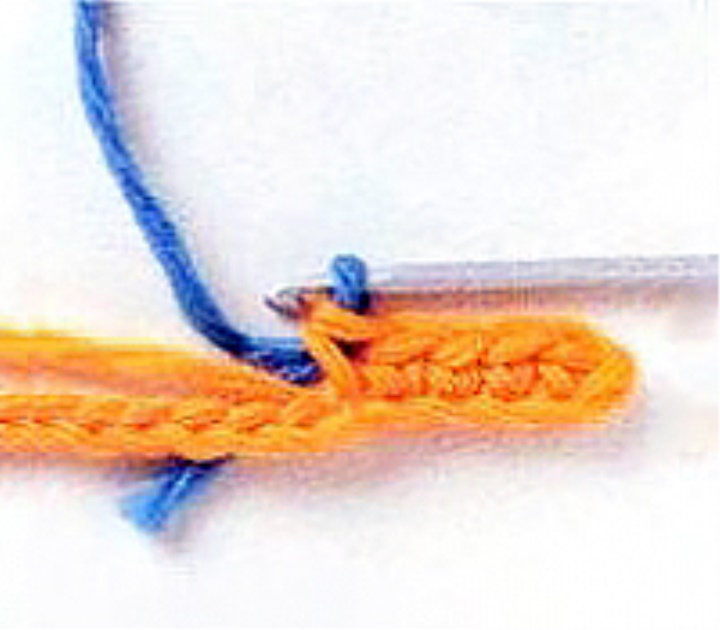
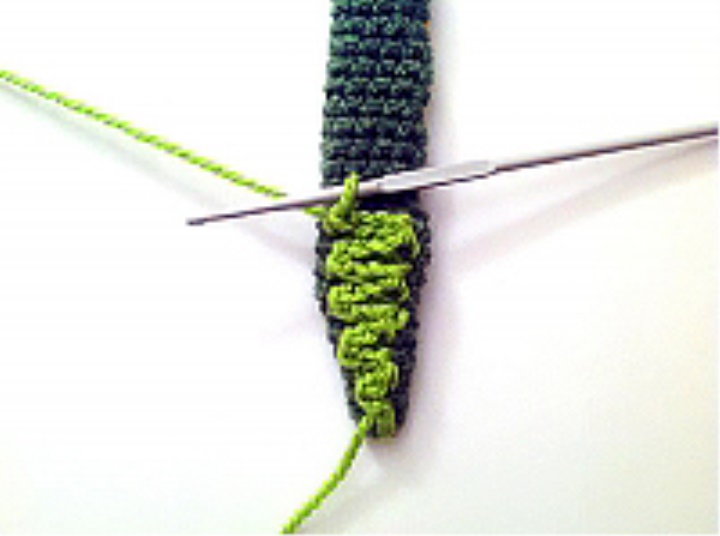
Tip: To make the transition from one color to smooth, the last column without a single color should be finished with a thread of another color, as shown in the picture:
Also make sure that the yellow stripes do not move to the sides.
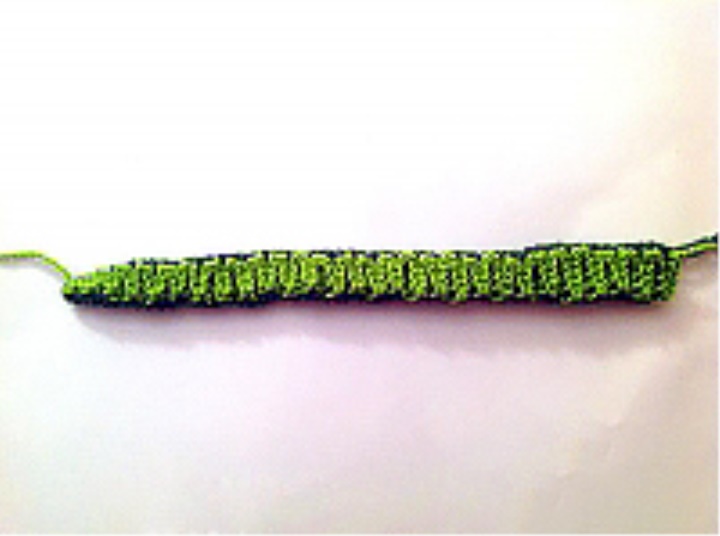
Then we continue to knit the torso in a circle to the desired length.
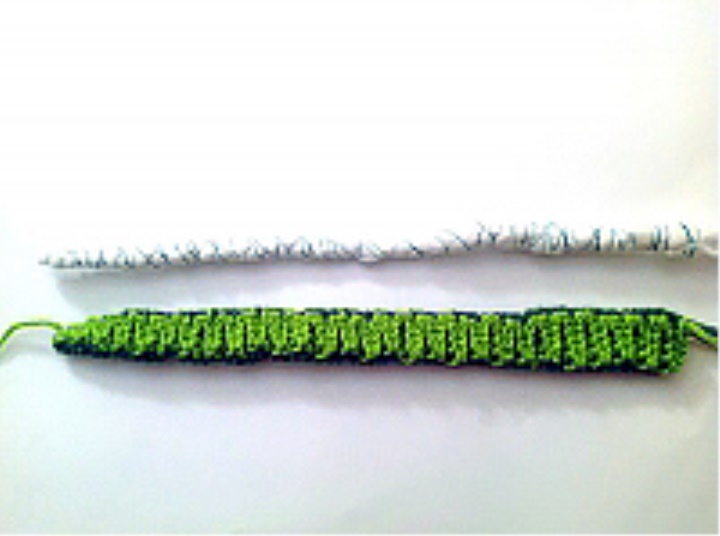
The upper part of the trunk (backrest) looks like this:
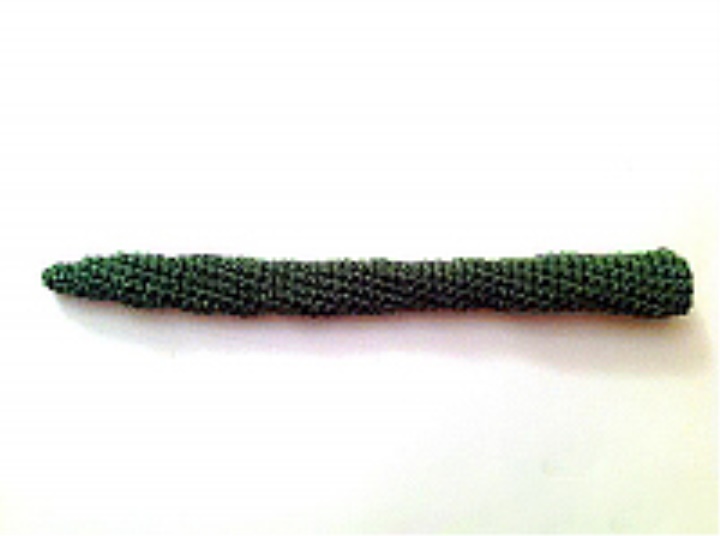
And so the inner side (tummy):
That the snake could take any form and position, inside of a trunk it is necessary to insert a wire. The ends of the wire must first be bent, so that in case the wire gets out of the toy, it would not damage the toy itself, nor those who use it. Wire it is necessary to wrap a cotton wool (or other filler), and from above to fix a filler a thread:
Tip: It is best to insert the wire at the beginning of the knitting trunk and continue knitting around the wire. I inserted the wire into the already finished torso length of about 30 cm, believe me-this task is not simple. I had to torment myself.
After the body of the snake is connected to the desired length, proceed to the Vyvyazyju light green tummy. For this purpose knit columns without a scale directly on top of a ready trunk:
In the widest part of the trunk (where in the circular row we have been able to handle 11 SBN), we are able to hook up 4 SBN, catching them on the one circular row of the trunk, then move on to the next circular row and knit 4 on the columns of this series, etc. to the end of the snake's trunk. This is what the snake's torso looks like:
It remains quite a little-to collect the snake and give it the right position. Cut off the wire, leaving the end length of 5-6 cm. Bend the end of the wire and insert the wire frame into the head. Inside the head the wire must be bent so that the end of the wire, placed in the head, would be at an angle to the carcass in the torso. This is necessary to ensure that the carcass does not fall out of its head on its own. The head is nailed and the right position is attached to the snake.
That's kind of all. The positive snake is ready!