1. Yarn for the snake. Do not take too fat. I have YARNART Begonia 100% cotton - 50 gr / 169m
2. The filler.
3. Wire. Hardness choose yourself. I have a harder wire - 30cm.
4. Beads for peepholes - 2pcs.
5. The floss for tongue. (Red)
6. Thread for sewing eye.
1. Hook under your yarn. I took 1,5
2. Needle for closing the holes, sewing on the peephole.
3. Scissors.
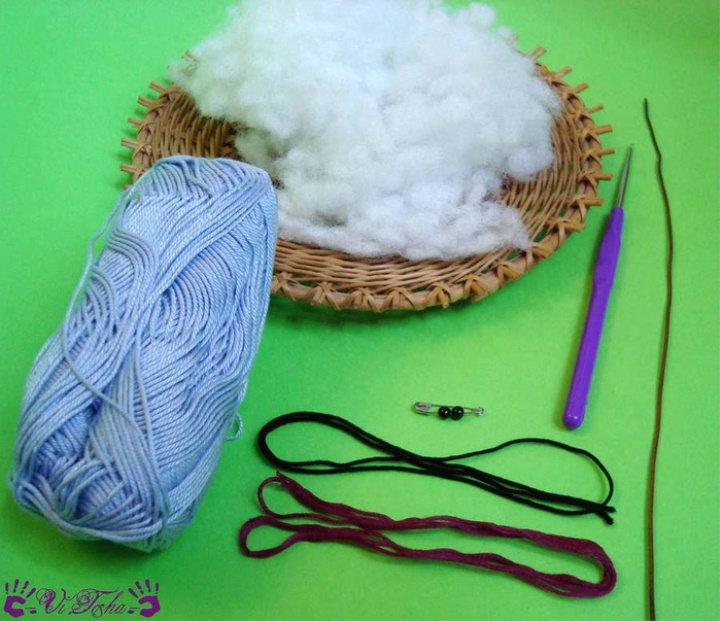
Legend:
VP - air loop
ss - connecting stub
sbn - column without nakida
slaughter
pr - increase
The snake will be whole. You do not need to stitch anything!
1p. 6sbn amigurumi ring
2p. 6pr (= 12)
3r. 6 times (sbn, pr) (= 18)
4p. 6 times (2sbn, pr) (= 24)
5p. 6 times (3sbn, pr) (= 30)
6p. 6 times (4sbn, pr) (= 36)
7-8 p. 36sbn
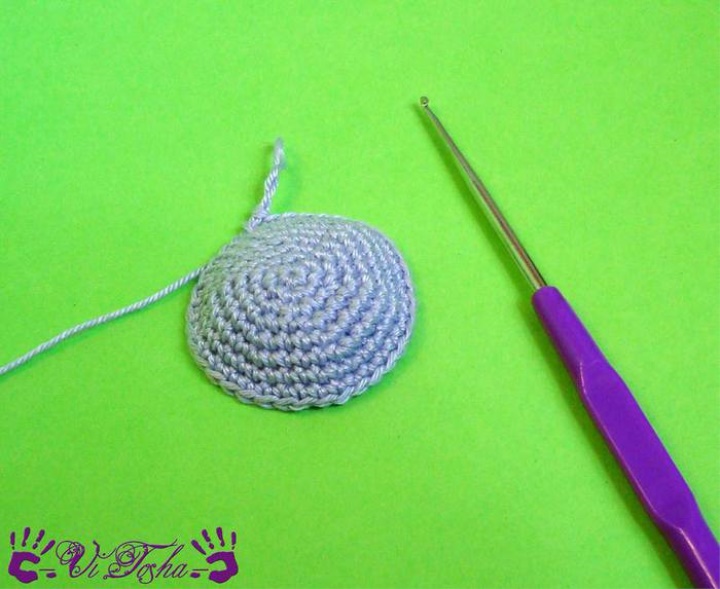
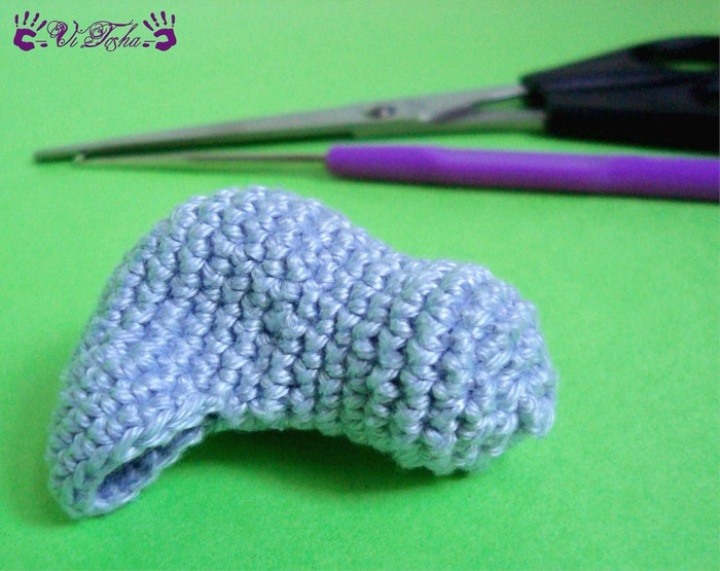
Now divide the knitting on the head and body of the snake. It turns out 1-8 rows is the crown.
9r. 24sbn, ss in the first loop
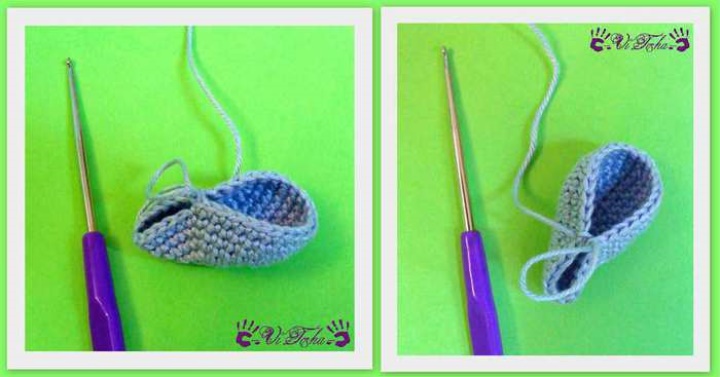
It turned out two circles. One 24sbn, the second 12sbn. From the first we will knit the head, from the second - the body of a snake.
HEAD:
Knit in a larger circle (= 24sbn)
10p. 24th day
11 p. 6 times (2sbn, ub) (= 18)
12-15 p. 18sbn
16p. 6 times (2sbn, pr) (= 24)
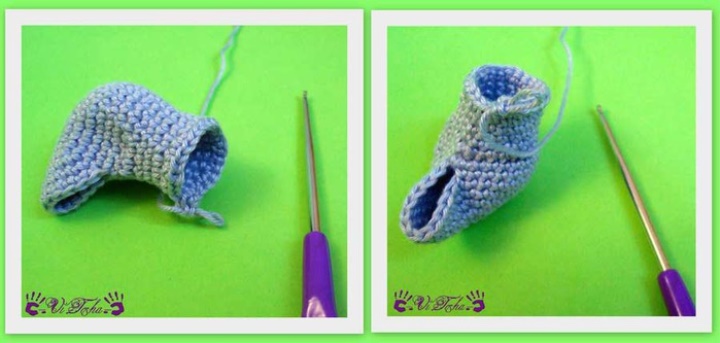
17r. 24th day
18r. 6 times (2sbn, ub) (= 18)
19r. 6 times (sb, s) (= 12)
20r. 6ub (= 6)
Connecting post to the next loop. Thread to fasten and cut. There will be a small hole. There will be a tongue.
LANGUAGE:
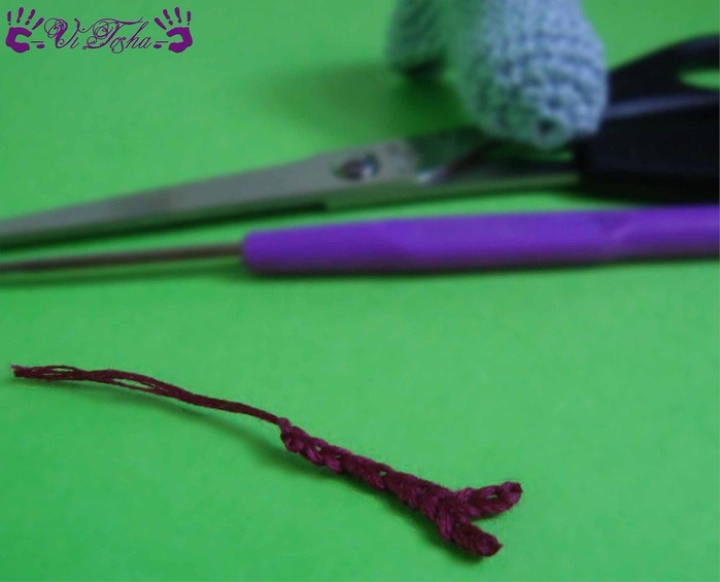
Take the thread of red, I floss. I took the hook "1". You pick up your thread. It is advisable to knit tightly, so that the tongue was without holes and not very large.
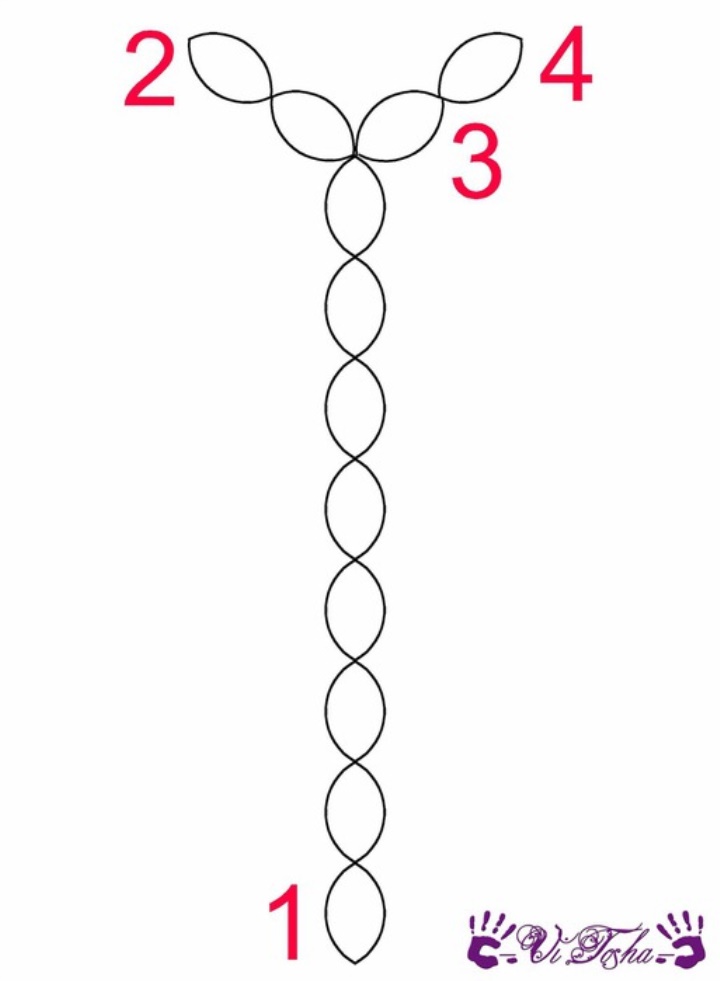
1. Dial a chain of 11 air loops.
2. Secure the thread and cut.
3. Attach the thread to the 8 air loop of the chain.
4. Dial 3 air loops. Secure the thread and cut.
In the picture, the eyelets are less by one, since fixing the thread, one eyelet disappears. Long tongue. Sewing it to your head you can adjust the size. Unnecessary loops just hide in the hole for the tongue.
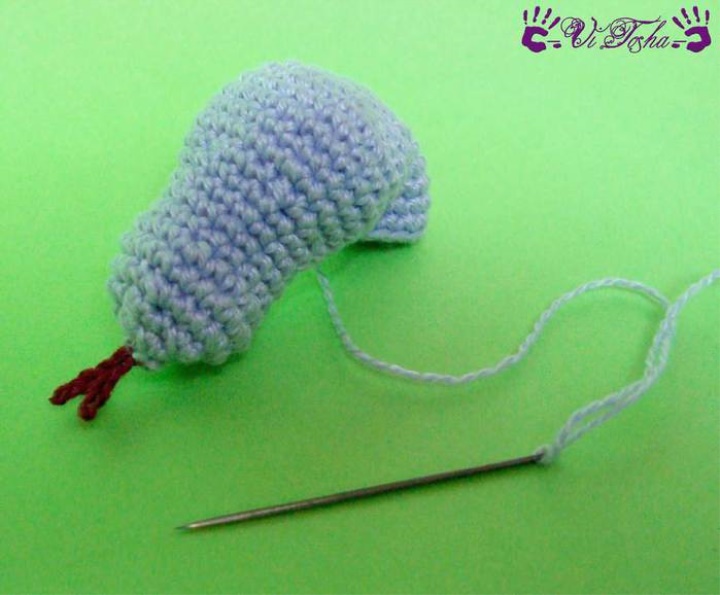
Sewing tongue. With the help of the hole left adjustable length.
The tip of the wire slightly bent. It turns out a loop. The wire itself is also slightly bent in order to insert snakes into the head.
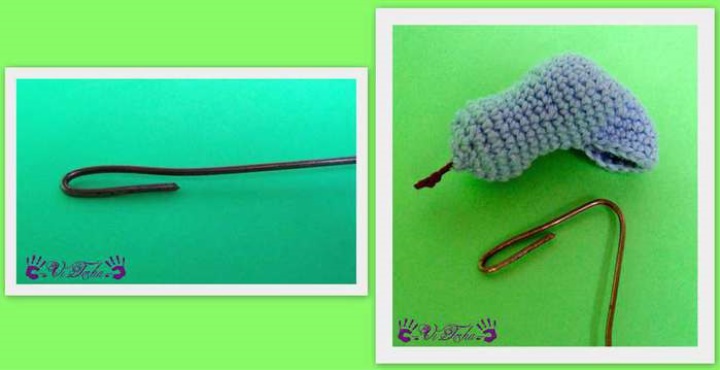
If you want your snake to easily stand, take a tighter wire.
Now fill the head with holofiber. Not very tight, closer to the tongue. Insert the workpiece from the wire. We look to be smooth. Add filler.
Stuffing her head tightly, we approach the eyes. Before sewing beads attach them to your head. I pin with needles, then sew exactly. My snake eyes close together. So she looks more funny :)
My nostrils are embroidered with the same floss thread as the tongue. Just stitches in the right places.
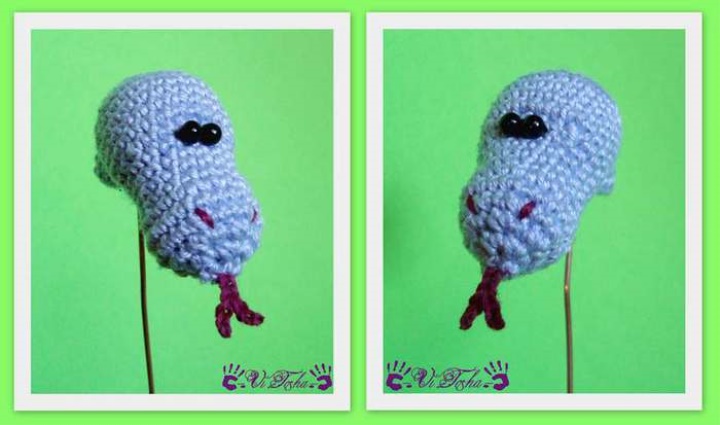
Now go to the last stage - the body of the snake . Attach the thread to the last 12sbn. In the place that is closer to the chin, I make one increase. It turns out 13sbn. Then knit in a spiral. I do not count the number of rows. You can tie a snake longer and twist it several times.
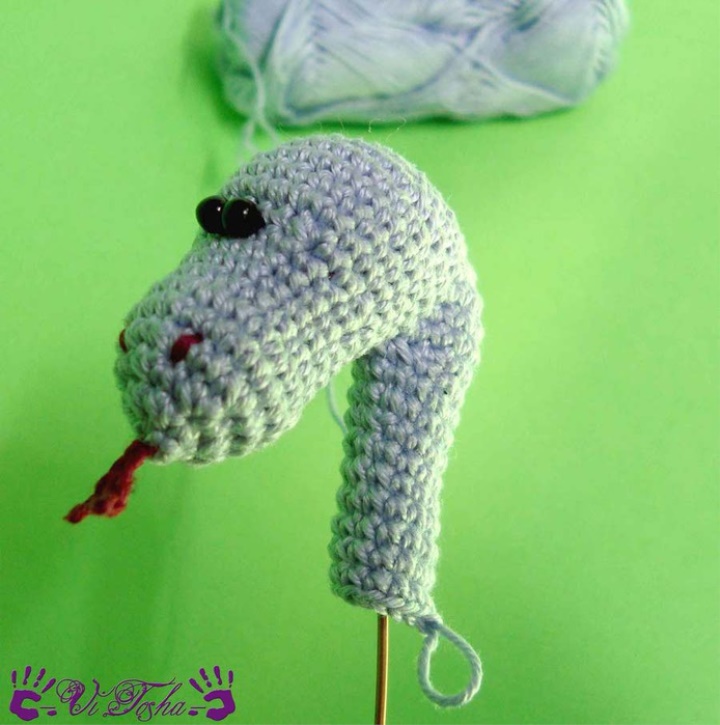
In the process of knitting, the part needs to be filled centimeter by centimeter, otherwise it will be more difficult to do this later. Fill around the wire from all sides - evenly! If you have a roll filler, you can cut off the stripes and wind them around the wire during knitting. As the torso is knitted, push the filler further from knitting so that it does not interfere and climb into the new loops. At the end of knitting, fold the wire with an eyelet, as at the beginning and tie it all the way down.
Need to knit carefully: sticking wire all the time tries to please the eye :)
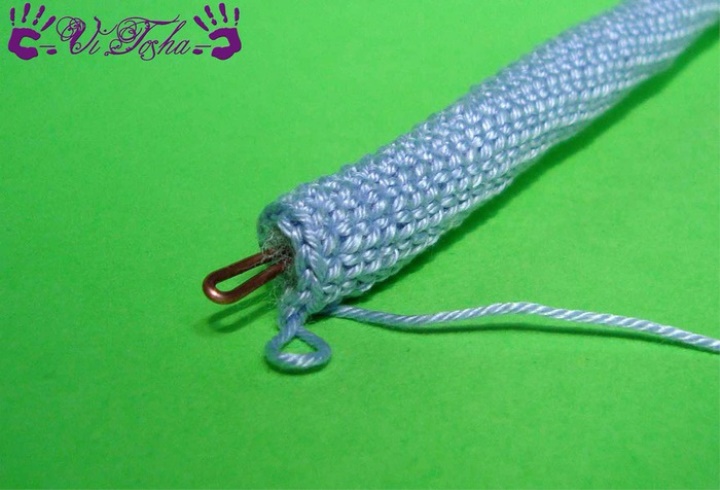
Pull off the hole with a needle, cut the thread. The tip can be hidden inside the canvas.
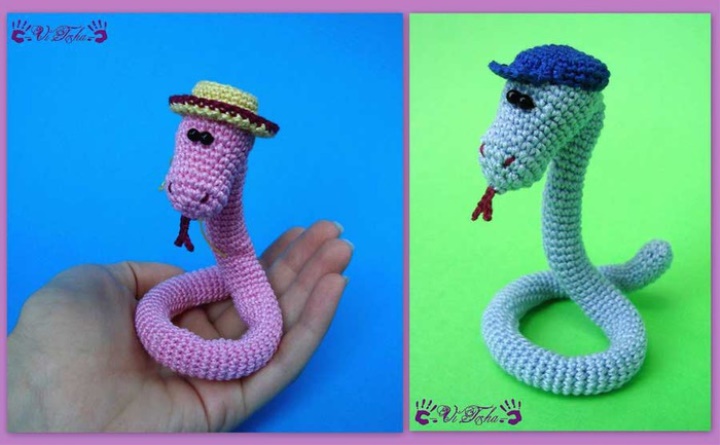
That's all! Have a nice knitting! Throw in the comments can credit for their snakes, related in my description. It will be very interesting for me to admire :)
I hope MK is useful to you! If you have any questions - write, try to help.