If you do not know how to tie a sleeveless jacket for a baby, then today you will get an answer to this question. ;)I will share with you how to tie a sleeveless shirt with a pattern of "large cells" , a description of which was given here .
"Sleeveless that I linked to his granddaughter Sasha, SIZE her - 80/86 , which means that it will warm the child more than a year!" - I wrote originally. Oh, how wrong I was! :-DAlready by winter it will be too little for my granddaughter! Here's the kids grow up!:)
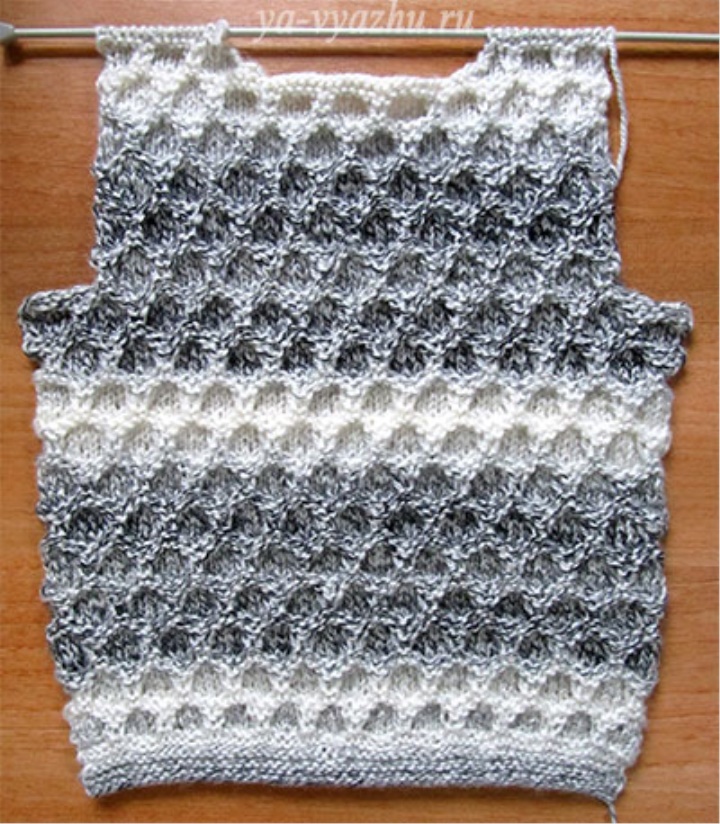
For knitting a tank top for a baby I used:
150 grams (1.5 bunks) of semi-wool sectional yarn in color gray meringue Super Excellence trademark "MAGIC" (100 grams - 228 m), purchased by me in the online store "Coudel" ;
spokes number 3 and number 4;
stocking knitting needles №3.
To trim the underside of the sleeveless jacket, the armhole and throat picked up a kerchief - she most approached the pattern of "large cells" , thanks to the removed loops of which the sleeveless shirt was dense and warm, but not rigid at all.
Well, now we proceed directly to the resolution of the question
How to tie a sleeveless jacket for a toddler
How to tie a back:
On the spokes №3 recruit 62 loops and knit 5 rows in garter stitch , adding uniformly in the last row of 10 loops (the spokes - 72 loops).
Next, go to the spokes number 4 and continue knitting patterned "large cells" . Having drunk 23 cm from the beginning of work, we proceed to reduce the loops for the formation of the armhole.
To do this, on both sides, first close the 4 loops, then in each second row 1 time in 2 loops and 1 time in 1 loop (at the spokes - 58 loops). Next, continue to knit until the length of the back is 33 cm .
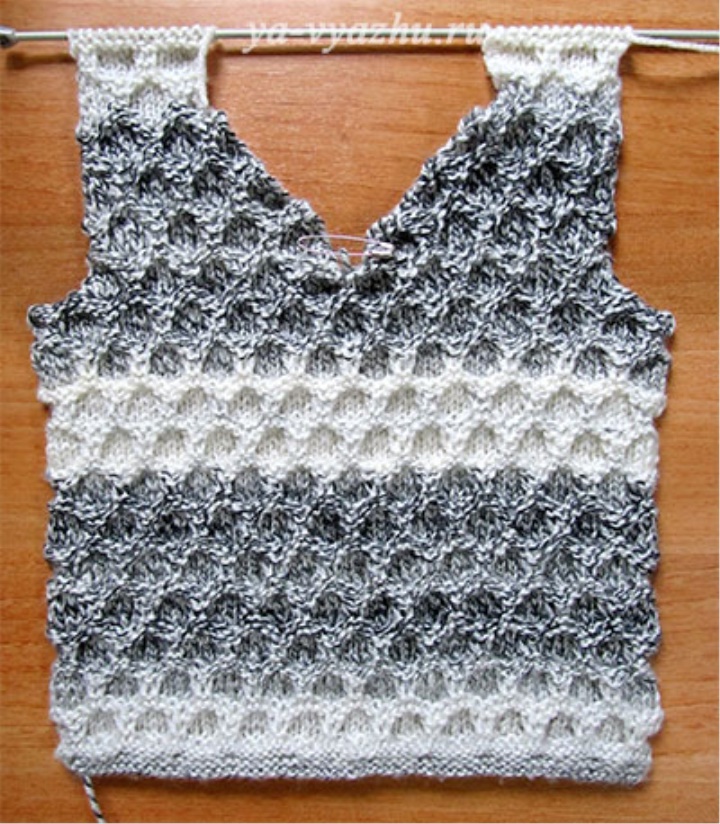
Then, to form the cutout of the neck, close the middle 18 loops, and then on both sides for the rounding of the cut, we close in each second row first 3 loops, then 2 , and then 1 loop ( 14 loops for each arm remain on the spokes ).
We do not close the shoulder loops and go to knitting the front of the tank top.
How to bind before:
Before we start knitting just like the back, only in the pattern of "large cells" after the 2nd row, I started knitting from the 11th , and not from the 3rd row, so that when the side seams are made, the docking of the "pieces" of the cell looks nicer .
We do it as we did when knitting the back. After 2 cm from the armhole line 2 , we will fasten the middle loops together and retake this loop onto the pin, after which both sides of the V-shaped cut will be finished separately.
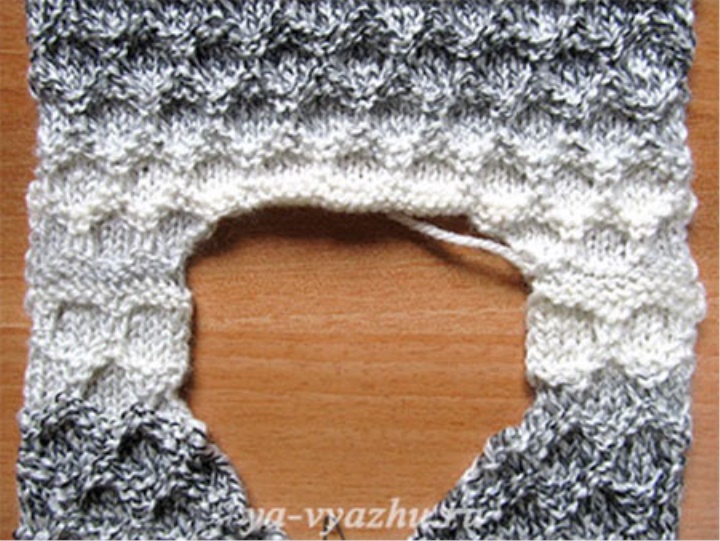
In each second row, we will cover 1 loop from the inner edge until 14 loops remain on the spokes . After that, we simply tie both sides to the height of the back. We do not close the shoulder hinges.
Product assembly:
Fold in front of the back and sleeveless top right. On an additional needle we shall reseat, alternating on one, 14 loops of a shoulder of a back and 14 loops of a shoulder transfer, on a spoke - 28 loops.
We close the hinges of the shoulder, pretending 2 hinges along the front behind the rear walls.
The same is done with the loops of the second shoulder. As I already wrote here , the lines of the shoulder with this method of connecting the back and the transmission turn out to be even and almost imperceptible.
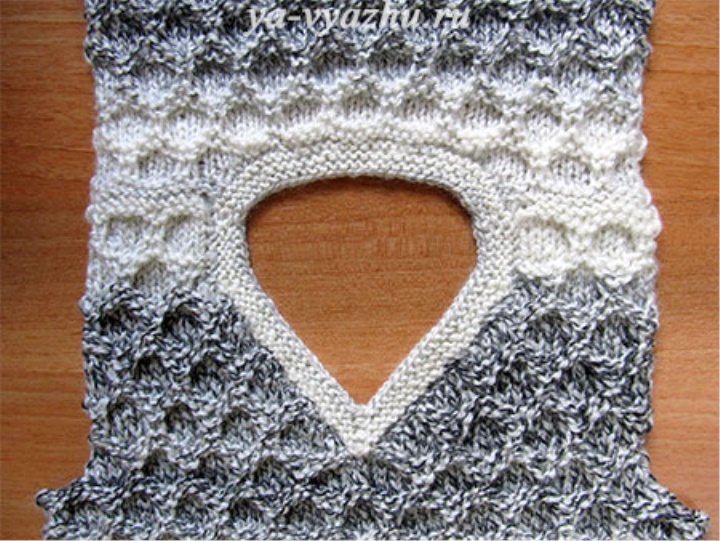
With stock knitting needles No. 3 , we pick up 113 loops along the neckline ( 42 loops - from the back side, on 35 loops - the neckline, 1 loop - from the pin) and start knitting on the front side:
the first circular series - facial loops;
the second circular row - with the backs, sewing 2 loops along the wrong side every 5 loops and 3 loops together in the wrong way - in the vise of the V-shaped cutout;
the third circular series - facial loops;
the fourth circular series - by purl, as in the second circular row;
fifth round row - facial loops;
the sixth circular row is bypassed, tearing together only the 3 loops of the cape;
in the seventh round row - we close not the remaining 78 loops.
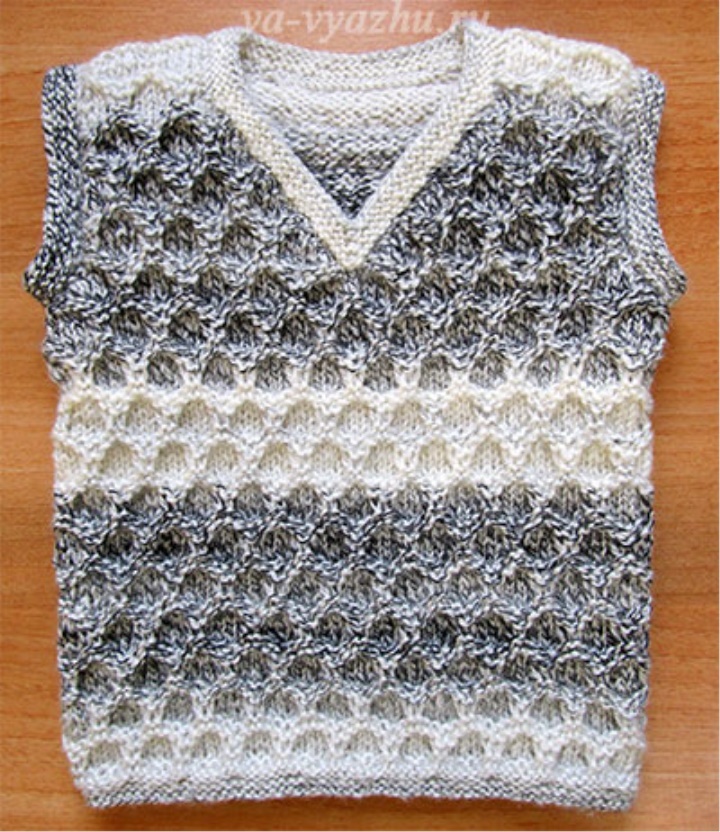
We sew 60 loops on the armhole armhole and weave 6 rows of garter stitching, while tying in the 6th row 3 times 2 loops together front (at the beginning, middle and end of the row) so that the garter trim does not stick out so strongly.
In the 7th row, all 57 loops are closed. Just make out the second armhole. We carry out side seams.
Now you know how to tie a sleeveless jacket for a baby with a pattern of "large cells". As you can see, this is not really difficult.
"Well, when the product reaches the consumer, I will definitely show you how the sleeveless looks on my granddaughter, so if you are interested, subscribe to receive new blog articles, especially since an interesting mini-contest will start here soon!" was originally written. Now you see how beautiful this sleeveless shirt is sitting on my granddaughter, so knit, you will not regret!
Well, the mini-contest is coming to its end! Hurry to participate in it!
Source: http://ya-vyazhu.ru/vyazanie-spitsami-dlya-detey/kak-svyazat-bezrukavku-dlya-malyisha-uzorom-krupnyie-yacheyki#ixzz5RO6CdqZS