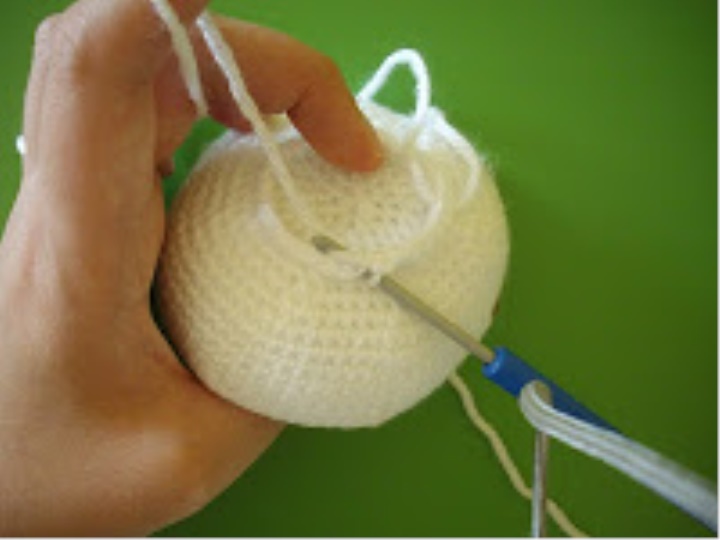
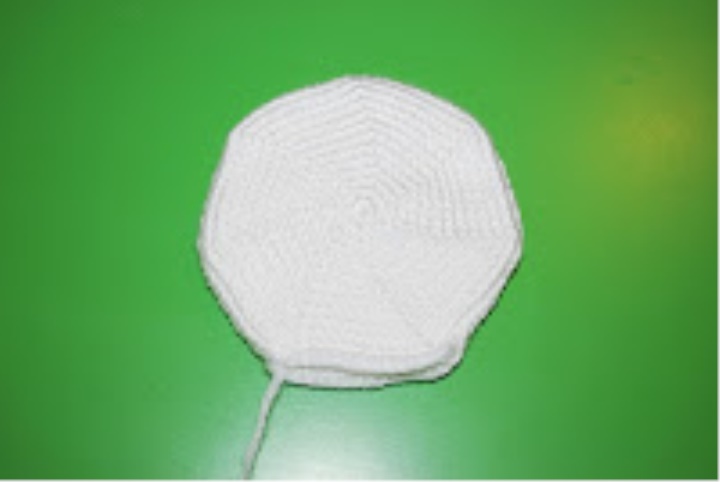
Base of the toilet bowl (in white)
Make a ring.
Rnd 1: 7 RLS in the ring (7)
Rnd 2: 2 RLS to each loop (14)
Rnd 3: * in the next RLS, 2 pcs in the next RLS * around (21)
Rnd 4: * RPS in the next 2 sc, 2 pcs in the next RLS * around (28)
Rnd 5: * RLS in the next 3 sc, 2 pcs in the next RLS * around (35)
Rnd 6: * RPS in the next 4 sc, 2 pcs in the next RLS * around (42)
Rnd 7: * RPS in the next 5 sc, 2 pcs in the next RLS * around (49)
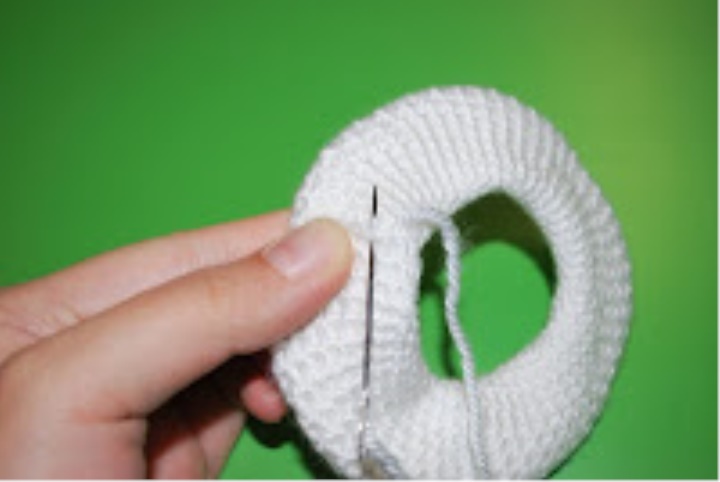
Fasten, leaving a long tail to attach. Secure some plastic granules / dried beans in some stockings and place it on the bottom of the toilet bowl. This is used instead of polyester filling to help in the toilet stand a little better. I added some extra weight, putting in a couple of coins as good, but I do not think it's necessary. Stitch the base of the toilet to the bottom of the toilet.
Tank (in white)
Instead of crocheting around the ring, the cistern is crocheted around the chain to give it a more oblong shape. Instructions for crocheting around the chain can be found here .
Network 15
Rnd 1: SC in the second cycle from the end, RLS to the next 13 loops, part 1, the turn works upside down, RLS in the next 14 loops, part 1 (30)
Rnd 2: * RLS in the next 4th, 2nd RLS to the next loop * around (36)
Rnd 3: * RPS in the next 5 sc, 2 pcs in the next RLS * around (42)
Rnd 4: * RLS in the next 6 sc, sc 2 in the next sc * around (48)
Rnd 5: * RLS in the next 7 sc, 2 pcs in the next RLS * around (54)
Rnd 6-10: RLS in each loop
Rnd 11: * RPS in the next 8 sc, 2 pcs in the next RLS * around (60)
Rnd 12-17: RLS in each loop
Rnd 18: * RPS in the next 9 sc, sc 2 in the next sc * around (66)
Rnd 19-24: RLS in each loop
Rnd 25: * RPS in the next 10 sc, sc 2 in the next sc * around (72)
Rnd 26-31: RLS to each loop
Rnd 32: * RLS in the next 11 sc, sc 2 in the next sc * around (78)
Rnd 33-40: RLS in each loop
Fasten, leaving a long tail to attach.
Cistern lid (in white)
The tank lid will also be crocheted around the chain.
Network 17
Rnd 1: SC in the second round from the end, RLS in the next 15 loops, part 1, the turn works upside down, RLS in the next 16 loops, part 1 (34)
Rnd 2: * 2 pcs for the next 2nd, sc in the next 12th, 2 sc in the next 2nd, sc in the next loop * twice (42)
Rnd 3: * in the next sc, 2 sc in the next 2 sc, sc in the next 15 sc, 2 sc in the next 2 sc, next sc * twice (50)
Rnd 4: * RN in the next 2 sc, 2 sc in the next 2 sc, sc in the next 17 sc, 2 sc in the next 2 sc, sc sc in the next 2 sc * twice (58)
Rnd 5: * RN in the next 3 sc, 2 sc in the next 2 sc, sc in the next 19 sc, 2 sc in the next 2 sc, sc in the next 3 sc * twice (66)
Rnd 6: * RLS in the next 4 scs, 2 sc in the next 2 sc, sc in the next 21 sc, 2 sc in the next 2 sc, sc sc in the next 4 sc * twice (74)
Rnd 7: * RN in the next 5 sc, 2 sc in the next 2 sc, sc in the next 23 sc, 2 sc in the next 2 sc, sc sc in the next 5 sc * twice (82)
Rnd 8: * RN in the next 6 sc, 2 sc in the next 2 sc, sc in the next 25 sc, 2 sc in the next 2 sc, sc in the next 6 sc * twice (90)
Rnd 9-14: RLS to each loop
Fasten and weave in the ends.
Seat (in white)
The place is mostly flat tubes. Working HDC and subcutaneously on opposite sides of the tube, it turns around in a circle. To avoid twisting the tube into a spiral, in which HDC and subcutaneously placed in the round is adjusted every ten rounds.
Make a ring.
Rnd 1: 8 RLS in the ring (8)
Rnd 2: 2 RLS per each (16)
Rnd 3-10: RLS in the next 8 sc, HDC in the next 8 sc scores (16)
Rnd 11-20: HDC in the next 2 ST, SC in the next 8th, HDC in the next 6th (16th)
Rnd 21-30: HDC in the next 4 ST, SC in the next 8th, HDC in the next 4th (16)
Rnd 31-40: HDC in the next 6 ST, SC in the next 8th, HDC in the next 2nd (16)
Rnd 41-50: HDC in the next 8 ST, SC in the next 8th (16)
Rnd 51-57: sc in the next 2nd, HDC in the next 8th, sc in the next 6th
Lock away. Join the ends of the tube, as shown in the photo.
Seat cover (in white)
Make a ring.
Rnd 1: 7 RLS in the ring (7)
Rnd 2: 2 RLS to each loop (14)
Rnd 3: * in the next RLS, 2 pcs in the next RLS * around (21)
Rnd 4: * RPS in the next 2 sc, 2 pcs in the next RLS * around (28)
Rnd 5: * RLS in the next 3 sc, 2 pcs in the next RLS * around (35)
Rnd 6: * RPS in the next 4 sc, 2 pcs in the next RLS * around (42)
Rnd 7: * RPS in the next 5 sc, 2 pcs in the next RLS * around (49)
Rnd 8: * RLS in the next 6 sc, sc 2 in the next sc * around (56)
Rnd 9: * RPS in the next 7 sc, 2 pcs in the next RLS * around (63)
Rnd 10: * RPS in the next 8 sc, 2 pcs in the next RLS * around (70)
Rnd 11: * RLS in the next 9 sc, sc 2 in the next sc * around (77)
Rnd 12: * RLS in the next 10 sc, sc 2 in the next sc * around (84)
Rnd 13: * RPS in the next 11 sc, sc 2 in the next sc * around (91)
Lock away. Make two , leaving behind a long tail one at a time for attachment. Place them together, the right sides against each other (the side that faces you when you crochet), and tie them together. Leave the 5cm / 2in opening and turn inside out.
Pipe (in white)
Things like you go.
Make a ring.
Rnd 1: 8 RLS in the ring (8)
Rnd 2: * RPS in the next 3 sc, 2 pcs in the next RLS * twice (10)
Rnd 3-20: RLS to each loop
Finish the filling firmly. Secure, leaving the tail to join.
Flush (Gray)
Make a ring.
Rnd 1: 5 RLS in the ring (5)
Rnd 2: 2 RLS to each loop (10)
Rnd 3: sc2tog around (5)
Rnd 4-7: RLS in each loop
Secure and close the hole. Leave the tail for attachment.
Tank stand (in white)
Make a ring.
Rnd 1: 8 RLS in the ring (8)
Rnd 2: * RPS in the next 3 sc, 2 pcs in the next RLS * twice (10)
Rnd 3: * in the next RLS, 2 pcs in the next RLS * around (15)
Rnd 4-9: RLS to each loop
Rnd 10: * RPS in the next 2 sc, 2 pcs in the next RLS * around (20)
Rnd 11: * RPS in the next 3 sc, 2 pcs in the next RLS * around (25)
Rnd 12: (work in the back loop only) * RLS in the next 3 sc, sc2tog * around (20)
Start stuffing.
Rnd 13: * RLS in the next 2 sc, sc2tog * around (15)
Rnd 14: * in the next RLS, sc2tog * around (10)
Finish stuffing.
Rnd 15: sc2tog around (5)
Secure and close the hole. Leave the tail for attachment.
Assembly
*** These are recommendations. They are guided by their own eyes at all times. ***
Fill the tank and join the tank cap. Do not stitch along the edge of the lid of the tank. Stitch through the bottom cover just above the edge.