1) two skeins of yarn - orange and black (I used Trinity yarn "Kroha", 20% wool, 80% acrylic, and the other, just so that the thread was not very thick);
2) the hook (1.9-2); beads or buttons for peepholes (I have homemade eye-beads made of plastic Fimo);
4) filler (it can be sintepon, chlorofiber, or cotton wool, but with cotton it will not be so soft);
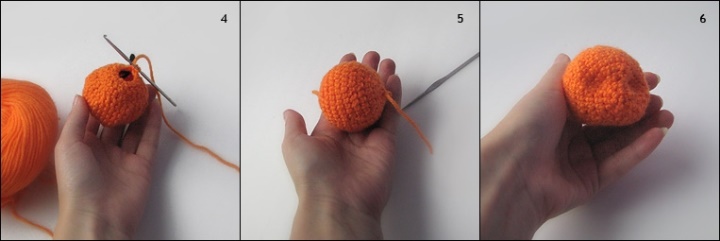
We knit an orange yarn crochet 2 mm. 4VP close in the circle ICC. 2 row: 8 СБН. 3 row: 16SBN.4 row: 28SBN (to make it more convenient to calculate the loop, I make a tag - a thread of another color, as a reference point, from which to start counting the next row). 5-8 series: 42 SBN. 9th row (3 RLS ties, we subtract, then again 3 RLS we tie, we subtract and so on in a circle): 32SBN. 10-11 rows (3BBN we are tying, we subtract, etc.): 24СБН. 12 series: (1CBN we are tying, decreasing, etc.): 13СБН. We fill and, closing the loops, close.
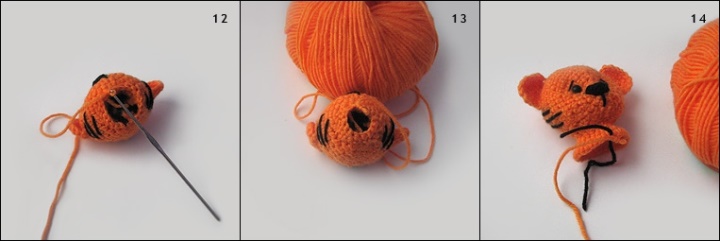
Then we hide the thread, we plan the face (we determine where the spout will be, make a hole for the eye with simple strokes) (photo 6).
Ears:
We knit an orange yarn crochet 2 mm. 5VP. 2nd row: 5SBN. 3rd row: 4SBN. 4th row: 3SBN, then we knit in a circle of RLS (it turns out a neat nice edge of the eyelet) and attach the ears the desired shape (photo 7). Or you can just tie the roundworms: 4SVP, 8SBN, 12SBN, and there, at the discretion, you can still add the RLS, tie a tinnitus tiger
Nose:
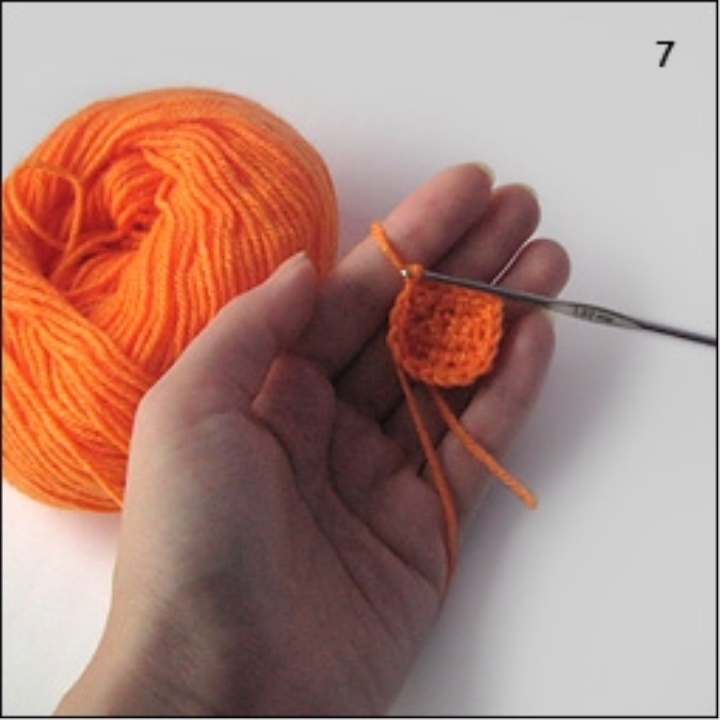
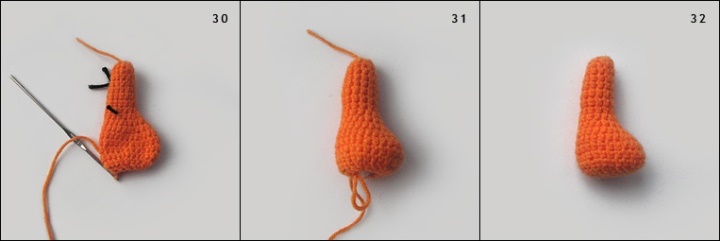
The nape can be tied up or bought ready, or molded out of plastic. It is possible more, or less. Do not be afraid to experiment. From such details depends the mood and character of your creation! I sometimes try it several times, change it, I change it and the nose and eyes ... I will impose different noses: round, oval, triangular, I will make different eyes, and then apply, I look, that it will be more suitable for the baby. So: We knit with black crochet thread 2 mm. 3VP. 2 row: 3 СБН. 3 row: 2 СБН. We make a knot, we cut off the skein. This results in a spout with two strings on the sides (photo 8). One cut off, we hide it when we sew a spout. And the second will be a mouthpiece. We extend it to the lower tip of the spout. After sewing, we hide it where the mouth ends.
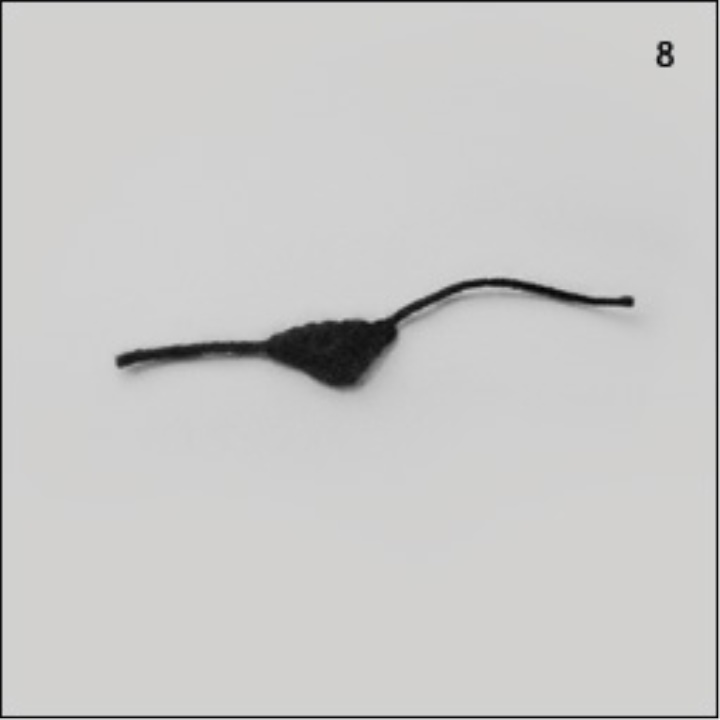
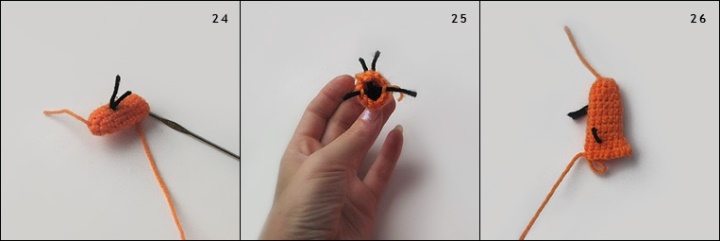
My most favorite process: we create a face. We sew ears, eyes and a nose. The bars are made of simple black threads, folded in several layers, so that they are neat. All the nodules, strings are hidden in the place where there will be a neck of a tiger cub (photo 11). I immediately made stripes of black yarn. Just stretched out crocheted.
Here's what happened:
We knit the neck and trunk: First you can figure out where the neck will be. We need to hide all the nodules and strings. I do not know how correctly a schematic description will be given ... After all, someone can get a bigger loop for someone less. For me personally, all the schemes are conditional. After all, a lot depends on the thickness of the thread, on how tight you knit. But it is possible to be guided approximately. Here's what I got:
1st row: 22BNN (photo 12). 2nd row: 15SBN (photo 13). 3rd row: 20SBN. 4th row: 25SBN (photo 14). 5 row: We try to add on the sides, where the shoulders (+ 2 loops on each side) => 29СБН, plus to this in the row on the back we sew 6СБН (from 29СБН) from the black yarn. 6th row: 29SBN. 7th row: 29SBN (on the back we bind 9SBN (from 29SBN) from black yarn) 8th row: 2 loops on each side 25SBN (photo 15). 9th row: 25SBN (on the back we sew 12SBN (from 25SBN) from black yarn). 10 row: we subtract 3 loops on the back => 22СБН. 11th row: 22СБН (on the back we are tying 6СБН (from 22СБН) from black yarn) (photo 16). 12th row: 18SBN. 13th row: 14SBN (on the back we bind 3SBN (out of 14SBN) from black yarn) (photo 17). We fill it, we cut it off one after another.
You can make a tiger cub puzatenkim, adding in front on the tummy of the loop, and knit the back without increasing

Paws-handles:
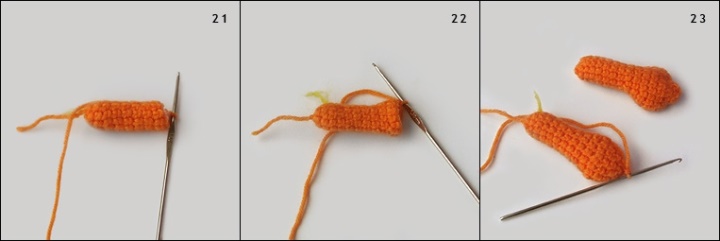
We knit an orange yarn crochet 2 mm. 4VP close in the circle ICC. 2 row: 8 СБН. 3-8 series: 11СБН (photo 21). 9th row: 12SBN. 10th row: 14SBN (photo 22). 11-12 series: 17SBN. 13th row: 13 СБН. 14th row: 10SBN. We fill and, closing the loops, close. We make fingers: we thread the orange thread through the crochet where the finger starts, tighten it tight, make 2 nodules, hide the excess threads (the reverse side of the hook). For one foot, do this 2 times. It turns out three fingers, the average should be more (photo 23).
Foot feet:
We knit an orange yarn crochet 2 mm. 4VP close in the circle ICC. 2 row: 8 СБН. 3rd row: 12SBN.4-9 rows: 13SBN. Do not forget about the tag for the landmark (photo 24). After 9 rows, we need 2 more labels. We need to determine where we will have a toe, and where a heel. Let's say that the already existing label will be on the heel (right midpoint of the heel!), We need to make 2 more labels on the sides (if we count in the eyelets, this is from the label 3 loops in one and the other side) (photo 25). That is, we divide our detail into two parts. From the side of the socks we will add hinges, and on the heel side we will tie, not adding. So, we decided where the heel would be, then 10 rows: 15СБН (we add 2 loops opposite the 1 mark, which conditionally denotes the middle of the heel, for example, added a loop, tied 1СБН, then added). 11th row: 18СБН (we add there three more loops on the nose) (photo 26). 12th row: 22СБН (+ 4 loops on the toe, add from side to side) (photo 27). 13-16 series: 27 SBN. (photo 28, 29) 17 row: 20SBN (from 1 lateral to 2 lateral marks on the nose, we start to decrease after 1SBN). 18: 12СБН (we start to reduce approximately in 2СБН on a circle) (photo 30). We fill, one after one, we close. Hide unnecessary threads (photo 31, 32).

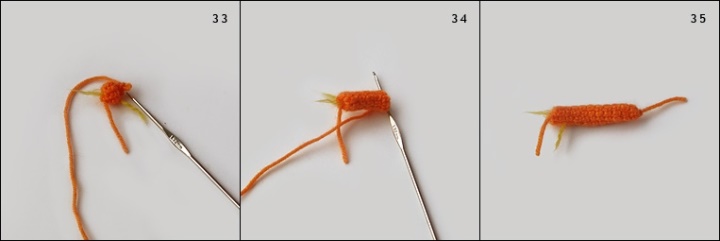
Tail:
We knit an orange yarn crochet with 2 mm. 9ВП close in the circle ICC. 2-7: 9SBN. 8 row: 6 СБН. 9 row: 4SBN Close, hide the thread.
All is ready! It remains only to make stripes tiger cub and connect all the details. The paws can be simply sewn, or fastened on a string, on a string with the help of beads, buttons, etc., so that they are mobile (information on this can easily be found on the Internet). We sew the tail.