450m, 100g. It will take about 20 grams
Yarn "Children's novelty" from "Pehorock" white, 100% acrylic, 200m, 50g.
50g. It will take about 10g
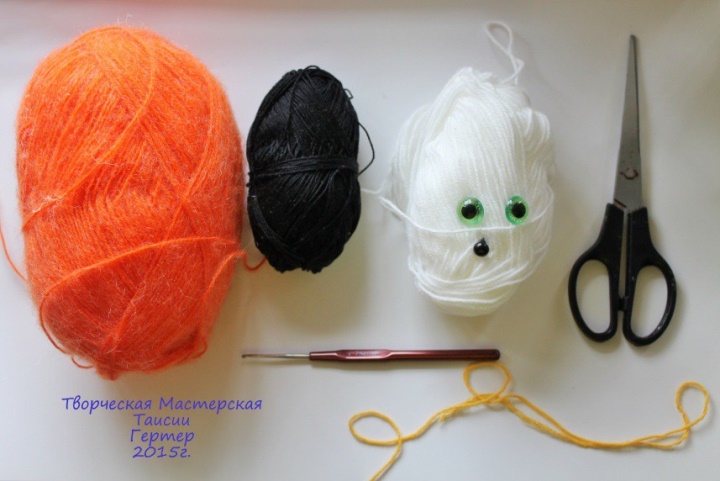
Necessary materials:
Yarn "Magic" from "Yarn from Troitsk" in orange, 30% mohair, 70% acrylic,
450m, 100g. It will take about 20 grams
Yarn "Children's novelty" from "Pehorock" white, 100% acrylic, 200m, 50g.
It will take about 10g
Yarn "Classic" from "LAMA" black, 100% cotton mercerized, 235m,
50g. It will take about 10g
Eyes and spout for toys
Filling for toys
Wire for carcass
Pliers
Threads, needle for sewing parts
Glue Moment universal transparent
Contrast thread as a marker
Shadows for toning toys (or acrylic paints)
Legend:
ka-ring amigurumi
Вп - air loop
ss - connection bar
sb - column without crochet
уб - reduction: two вбн ввмест
pr-addition: from one hinge two rolls
Difficulty: medium
It is important!
Sale of toys related to this master class
is allowed, but I ask you to add something like this to the description of the work.
text: "as described by Taisii Herter" and add an active link to the
my group: https: //m.vk.com/hand_made_by_tg
Excellent mood and light loops!
Go!
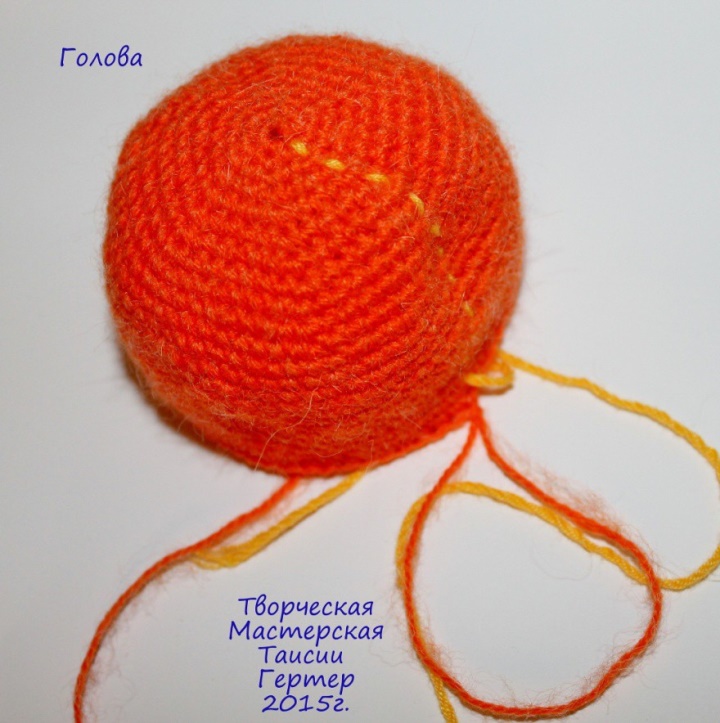
Head
Orange thread:
1 row: 6 sb in the spacecraft (6)
2 row: 6 pr (12)
We mark the beginning of the series
contrasting thread
3 row: (1 sb, 1 pr) * 6 (18)
4th row: (2 sb, 1 pr) * 6 (24)
5 row: (3 sb, 1 pr) * 6 (30)
6 row: (4 sb, 1 pr) * 6 (36)
7 series: (5 sbn, 1 pr) * 6 (42)
8 row: (6 sbn, 1 pr) * 6 (48)
9th row: (7 sb, 1 pr) * 6 (54)
10 row: (8 sb, 1 pr) * 6 (60)
11-23 series: 60 sb (60)
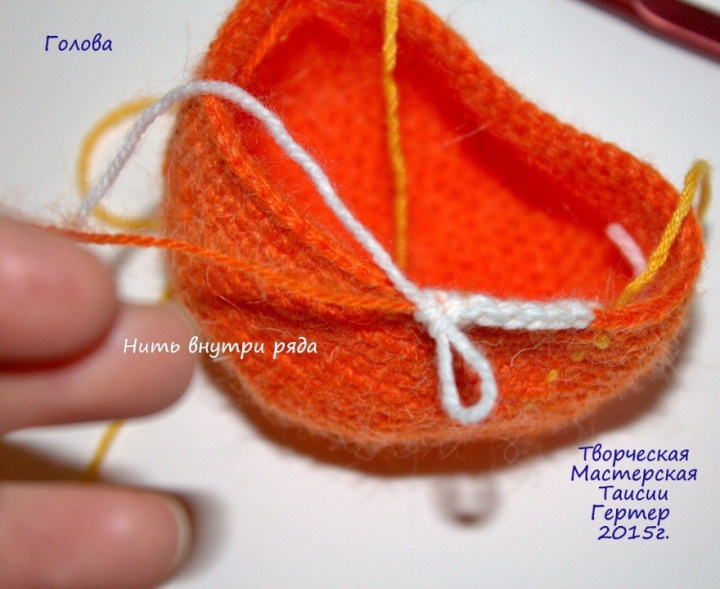
24-27 series: 28 sb white,
the remaining 32 sat in orange.
You can knit without cutting
orange thread, and "hiding" it
inside of knitting with a white thread and
on the contrary. The picture shows how
this is done. (60)
Next, white is knit under white,
orange under orange:
28 series: (9 сбн, 1 уб) * 6 (54)
29 series: (8 сбн, 1 уб) * 6 (48)
30 series: (7 сбн, 1 уб) * 6 (42)
31 series: (6 сбн, 1 уб) * 6 (36)
32 row: (5 sb, 1ub) * 6 (30)
33 series: (4 sb, 1 ub) * 6 (24)
34 row: (3 scales, 1 ub) * 6 (18)
35 row: (2 sb, 1 ub) * 6 (12)
Fill the head with a filler
36 row: (1 sb, 1 pr) * 6 (6)
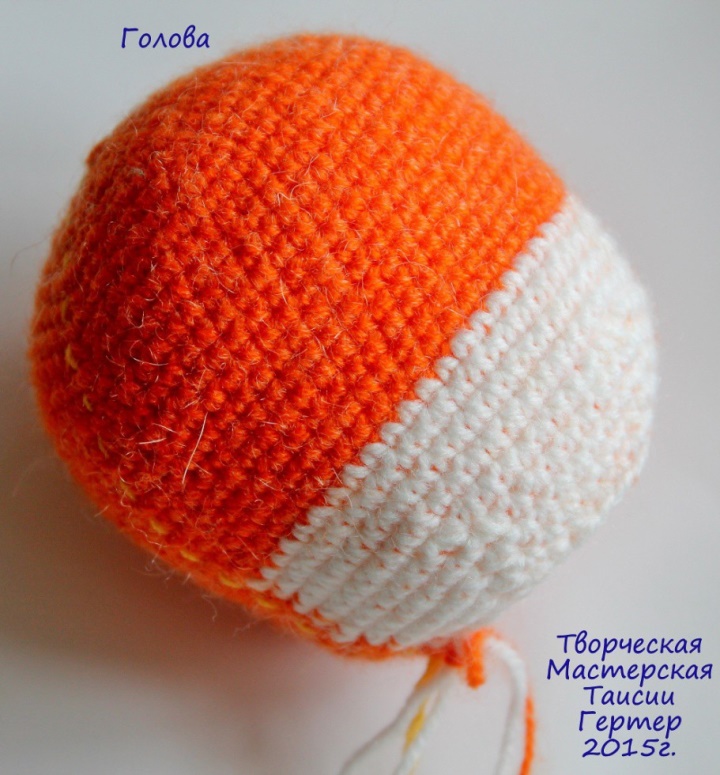
We make a frame: measure a wire of 76 cm in length (in
Depending on the threads used, the length of the wire will be
different). Bend in half, twist. At the level of 7, 5 cm
dilute to the sides (7.5 cm), then again
twist, connect and leave as is.
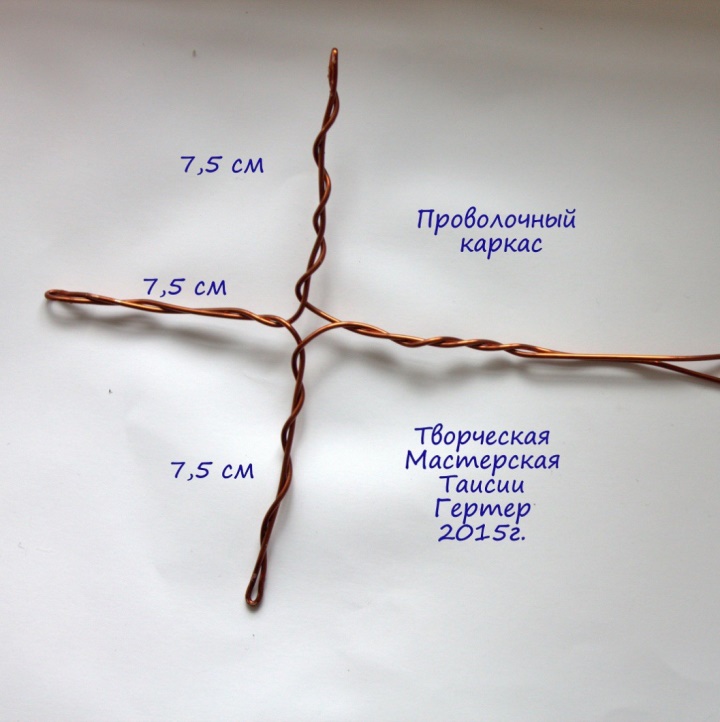
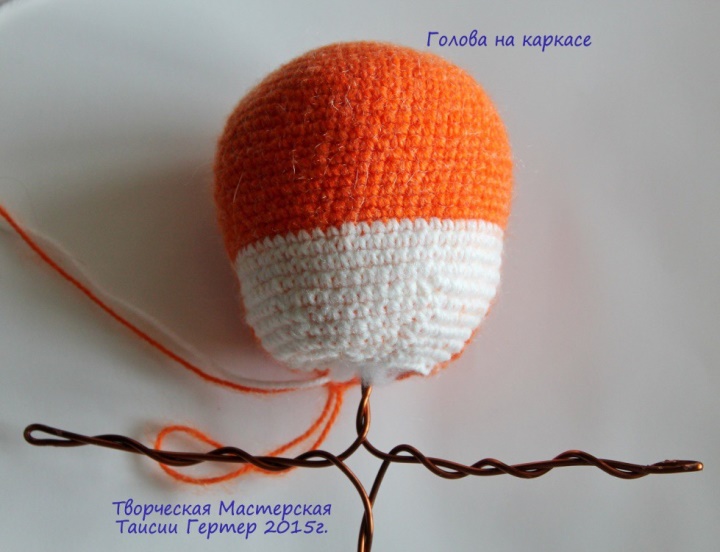
The tip of the wire frame is wrapped in a piece
: filler and insert into the head through the bottom hole
We knit the muzzle of a series of sbn in KA 2 series: 6 pr (12), 3rd row: 12
sbn (12), 4th row: 1 (sb, 1 pr) * 6 (18), 5th row: 18 sbn (18). Finish
a row of connecting column, thread secure and cut off.
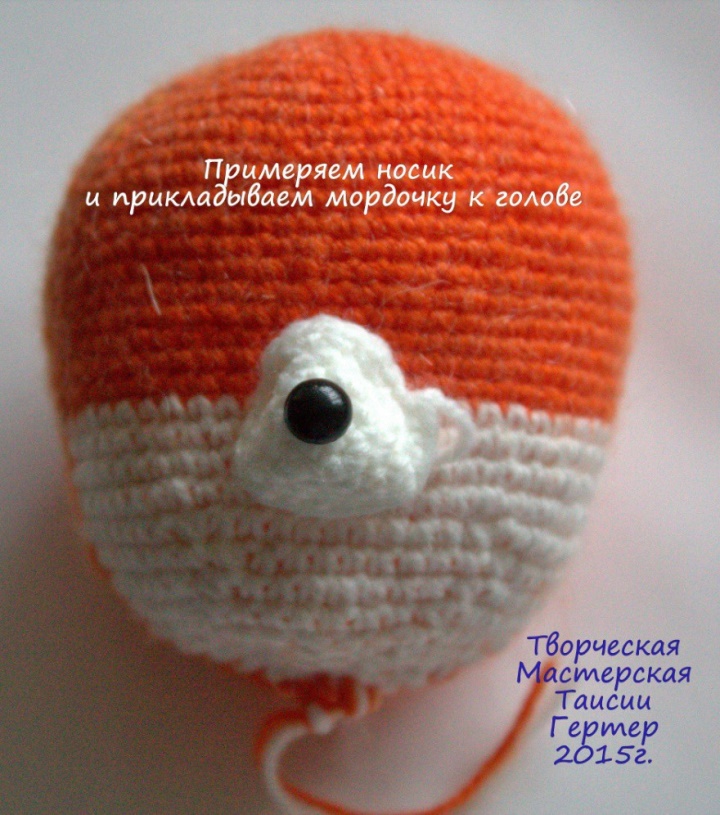
We fasten the muzzle with the needles and try on the eyes, then
note the tailor's pins selected for them.
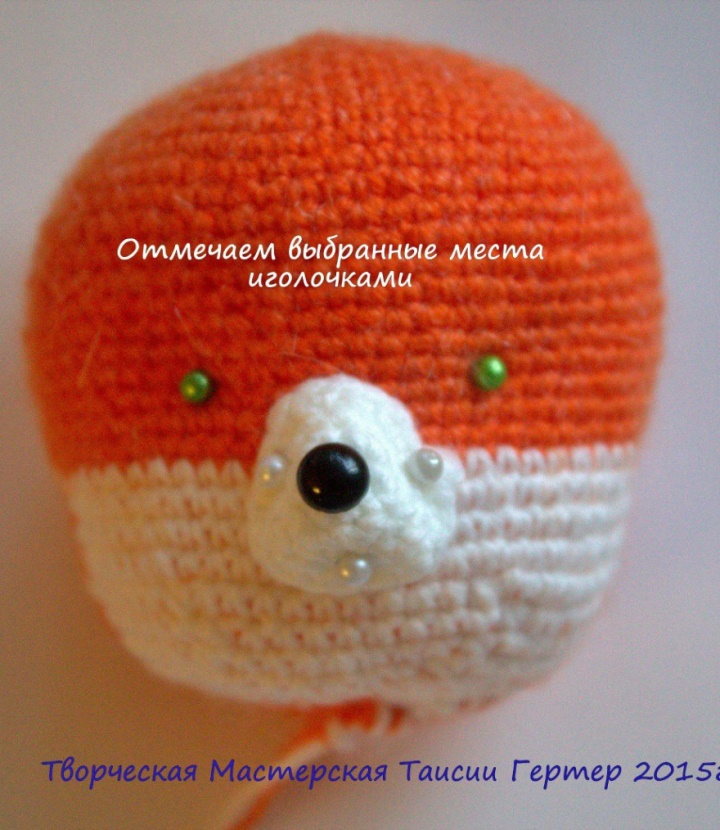
We make the tightening: to the point number 1 enter a needle with a thread,
then we bring it to point # 2, go to point # 3 and
return to the 1st point, pulling the thread is not very strong, but also not
weakly. Repeat this trajectory several times and fix the thread
next to the 1st point.
Glue the eyes with transparent glue.
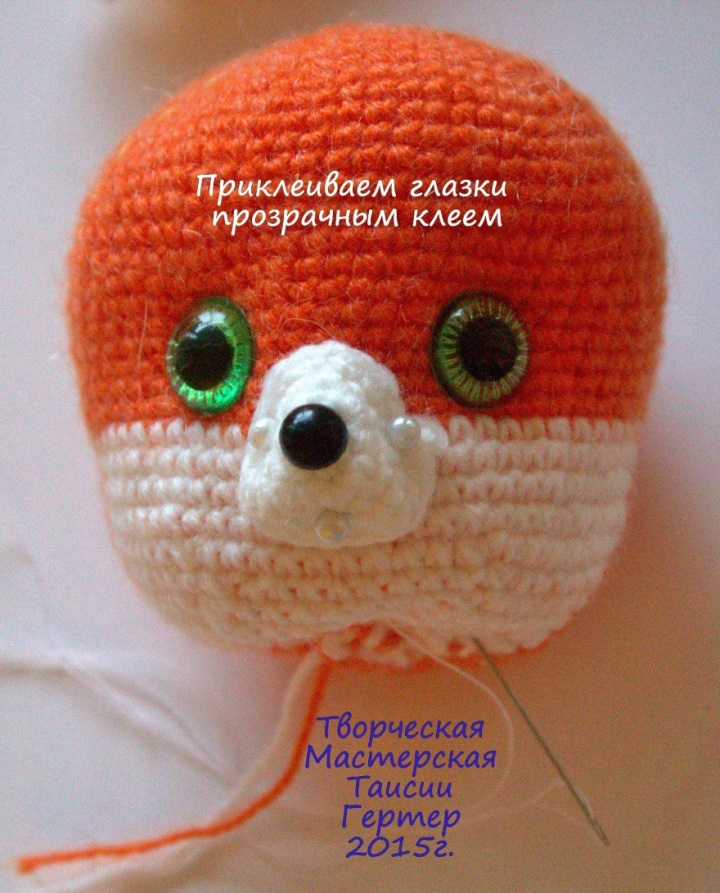
Now we'll deal with the muzzle: sew it, not forgetting at the end of it
fill with filler.
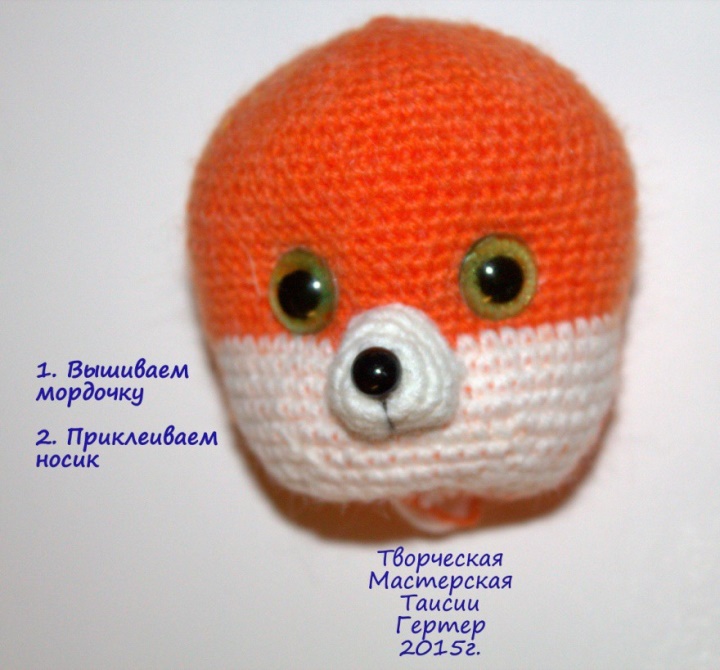
We glue the spout.
It turns out pretty pretty muzzle)
Ears (4 parts):
Orange (2 children):
1 row: 6 scales in the spacecraft
2 row: 6 pr (12)
3 rd: 12 sbn
4 series: (1 sb, 1 pr) * 6 (18)
5 - 7 series: 18 sbn
8 row: (2 sb, 1 pr) * 6 (24)
9 -10 series: 24 sbn
11th row: (3 sb, 1 pr) * 6 (30)
12th row: 30th c.
13 row: (4 sb, 1 pr) * 6 (36)
14th row: 36 sbn
15 series: (5 sb, 1 pr) * 6 (42)
16 - 17 series: 42 sbn
Row to finish ss, thread secure
White (swivel rows) 2
details:
1 row: 10 bp + 1 bp. lifting (11)
2 rd: 10 sb (at the end of each row
do not forget to make a v. lifting!)
3 series: 1 ub, 6 ubn, 1 ub (8)
4 series: 1 ub, 4 sb, 1 ub (6)
5 row: 6 sbn
6 series: 1 ub, 2 sb, 1 ub (4)
7 row: 4 sbn
8 row: 2 ub (2)
9 row: 1 ub (1)
We tie a triangle cc along
perimeter (it is possible sbn, it turns out
even more aesthetically).
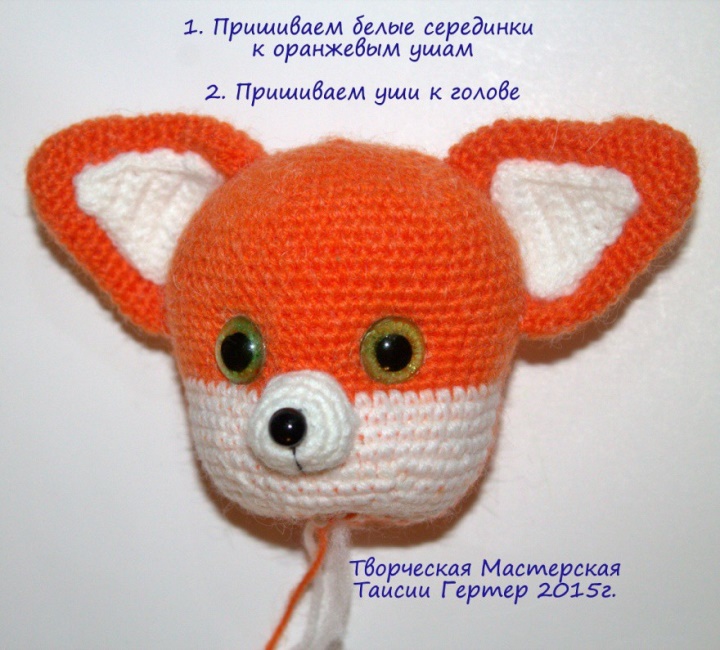
We plan places on the head, where
ears will be sewn up
Sew the details and sew the ears
to the head
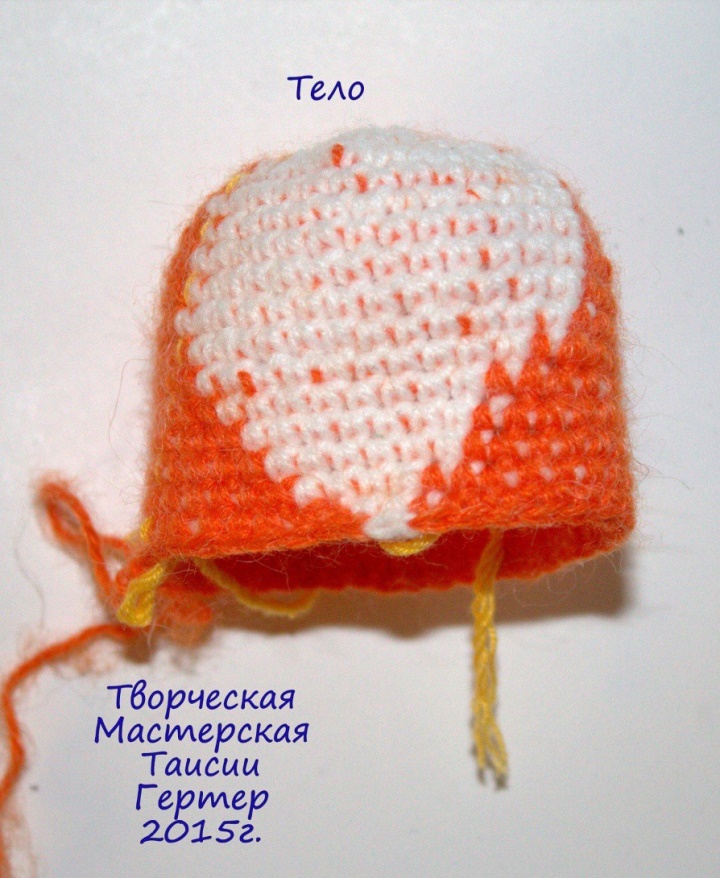
Body
1 row: 6 scales in the spacecraft
2 row: 6 pr (12)
3 series: 12 pr (24)
4 series: white thread: (1 sb, 1 pr) * 4;
orange thread: (1 sb, 1 pr) * 8
(36)
5 series: white thread: (6 sbn, 1 pr) * 2;
orange thread: (6 sbn, 1 pr) * 4
(42)
6 - 11 series: white thread: 13 sb,
orange: 29 сбн (42)
12 row: 1 sbn orange color,
11 cbn white thread, again
orange thread - 30 сбн (42)
13 series: 2 in the orange color,
9 cbn white thread, orange
thread - 31 сбн (42)
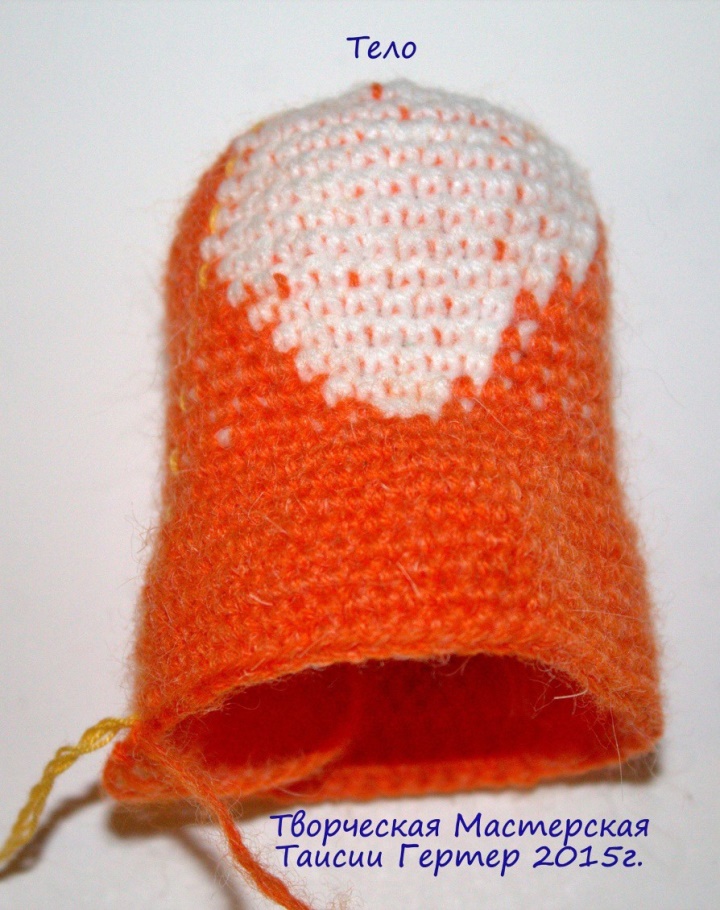
14 series: orange thread 3 sbn, 7
with a white thread, 32 сбн
orange color (42)
15 series: orange thread 4 сбн, 5
a white thread, orange
color 33 сбн (42)
16th row: with orange thread: 5 sb,
white - 3 cd, orange - 34 cbn
(42)
17 series: orange thread - 6 cbn,
white - 1 сбн, orange - 35 сбн
(42)
18 row: (7 sb, 1 pr) * 6 (48)
19 series: (8 sb, 1 pr) * 6 (54)
20 - 27 series: 54 sb (54)
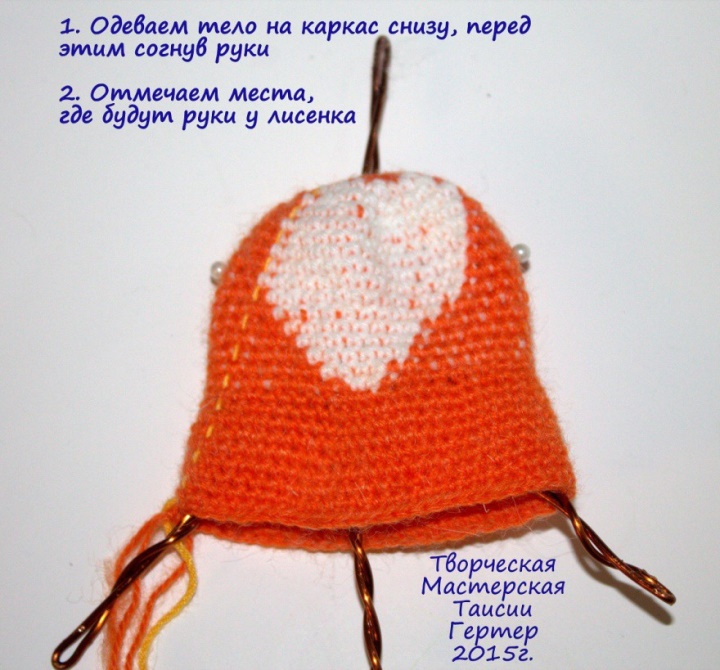
Next, we dress our body on the frame, after pressing
skeleton handles at the seams.
We mark out the places where the pens leave the pins.
We pull out the wire hands through the intended holes.
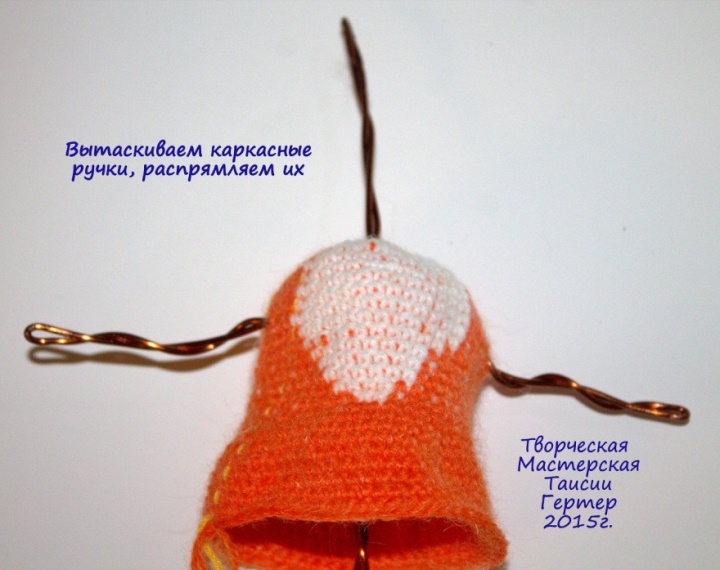
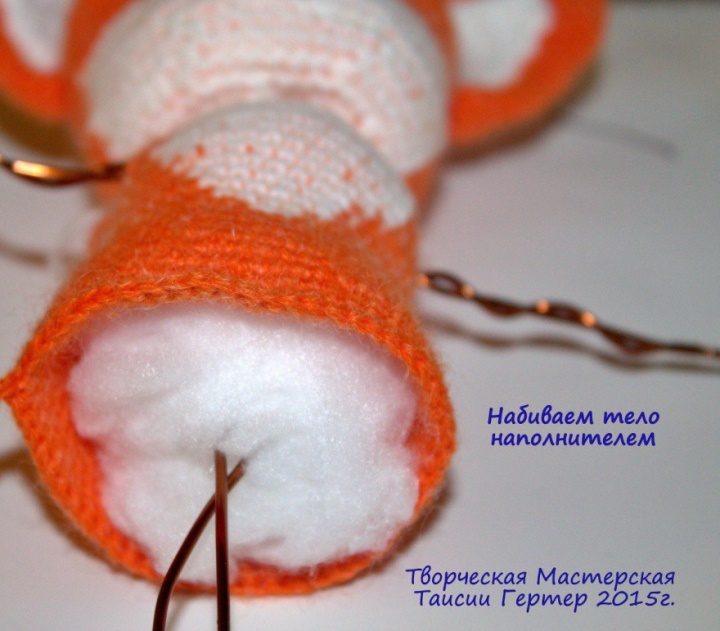
Fill the body with a synth.
We fill fairly tightly, we do not regret the filler,
loose.
We form the legs from the wire, taking into account that each of them
should reach a length of 5.5 cm (I repeat that the length depends on the
yarn you use), bend and isolate with adhesive tape or
insulating tape.
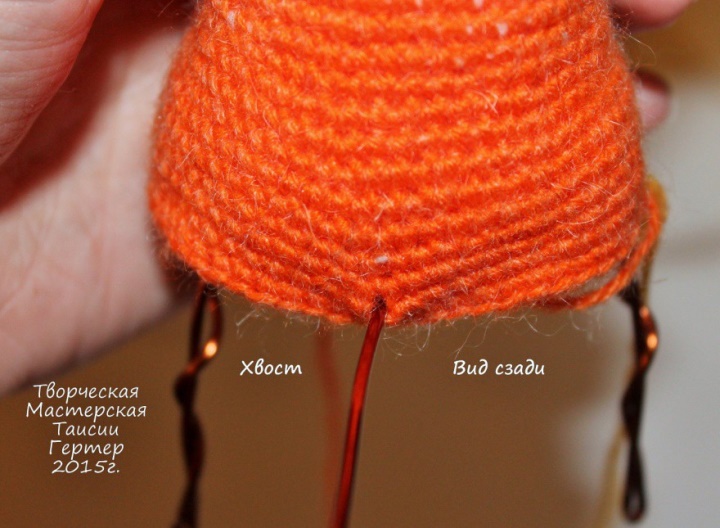
Next cut off 19 cm of wire for the tail and fastened in our
skeleton.
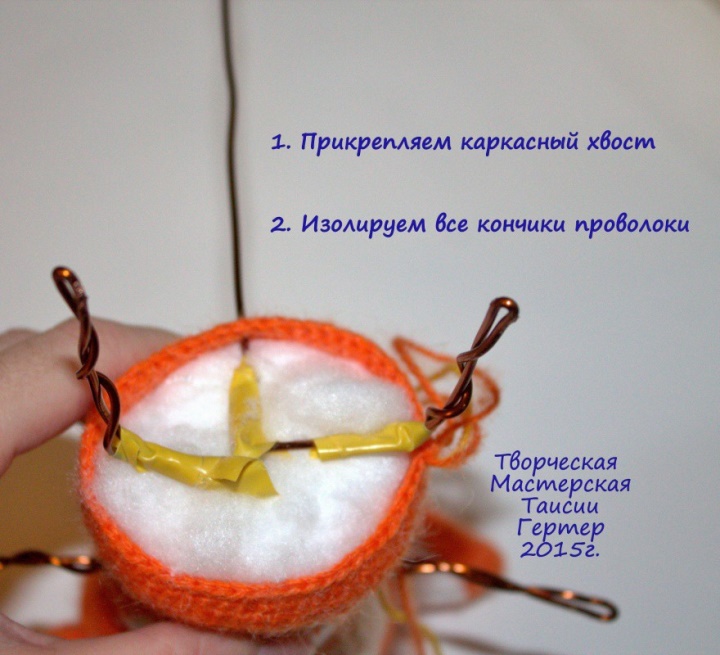
The tip of the tail is also isolated:
We plan our legs:
1 row: 10 sb, then
counted in
the opposite side 21
loop, note it somehow
marker (pin for example),
we type 6 c.p. and with the help of ss
fasten to the marked loop,
we bind 6 sebes on this
side, we again consider 21
loop, only now ahead
also note the 21st loop
marker, we type 6 bp. and ss
fasten to the marked loop,
we knit along this side of 7cb (25)
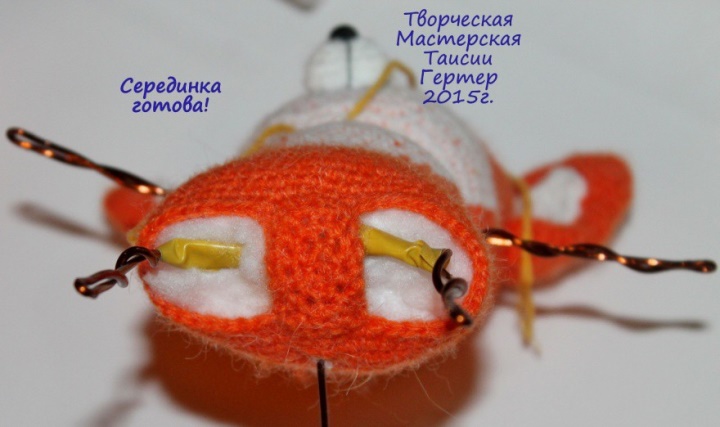
We knit the middle between the legs:
2 row: we knit 6 sb along the chain for
front half loop, 1 sb, 3
ub, 6 сбн for front
half loop around the second chain, 3
ub (19)
3 and the following series:
continuous decreases to the
end, fix the thread,
cut off.
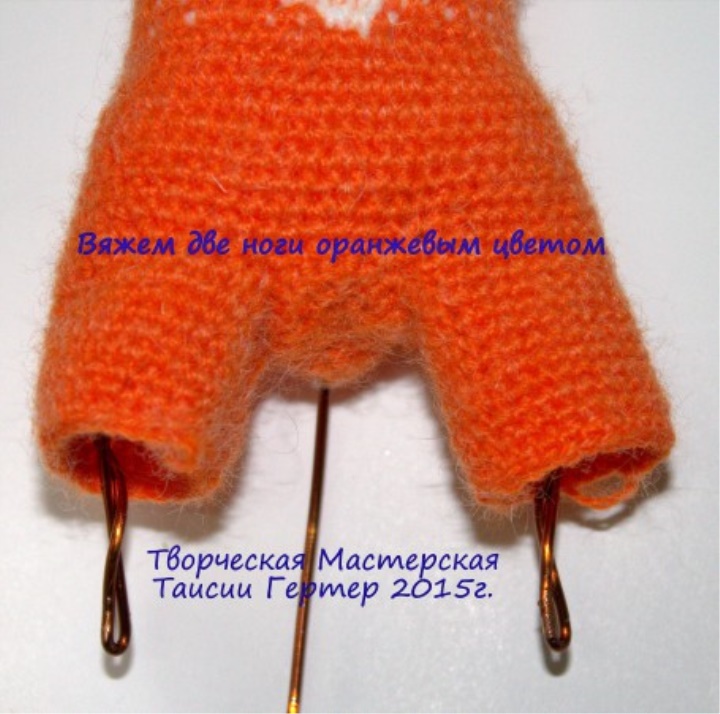
Legs (2 parts):
Orange yarn: 1 - 10 row: 27 sb (27), fix the thread,
cut
Black yarn: 11 - 21 row: 27 sb (27)
Fill with sintepuhom both legs
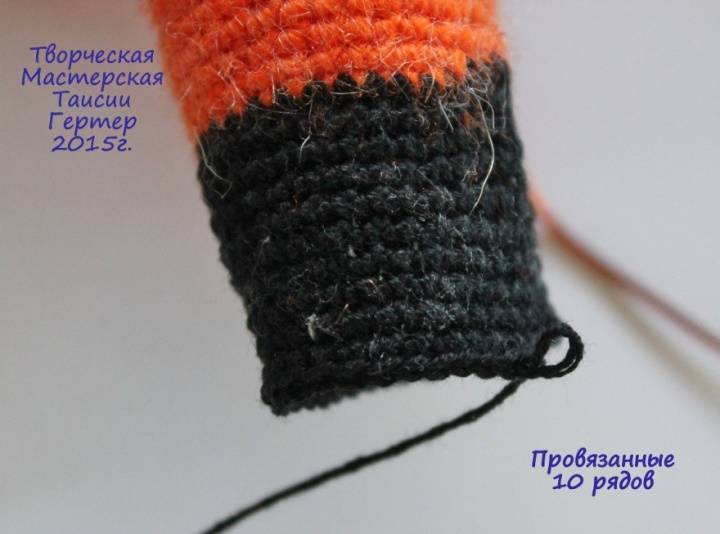
And now a small secret to the stability of the legs) I invented it myself,
never at anybody such did not see. We take two flat buttons
suitable diameter and sew one on each leg, and
namely to the wire frame. There's just a loop on the end and
very conveniently having hooked for it a thread, to sew to it a button:
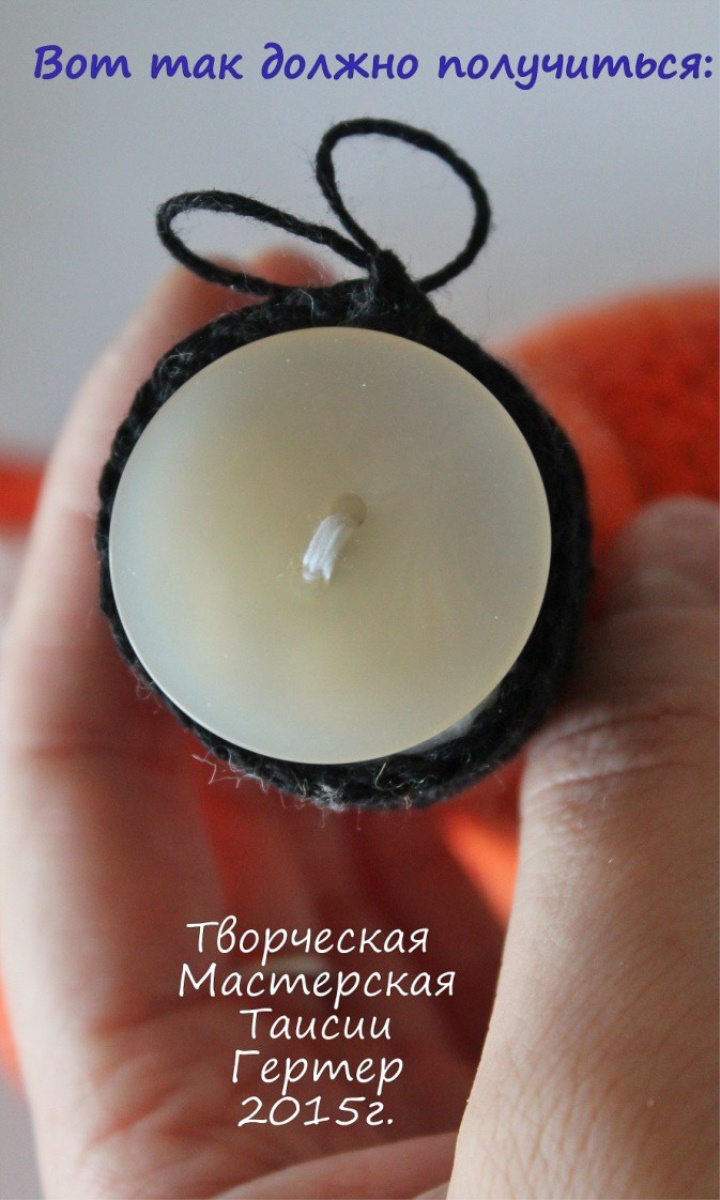
Now it only remains to bind our feet, and we do this as follows
way: alternating (1 sb, 1 yb) until there is no more
a small hole, and then it will be necessary to tighten it, complete
knitting, securing the thread. The number of lows for everyone will be
different depending on the diameter of the buttons, the thickness of the yarn, etc.
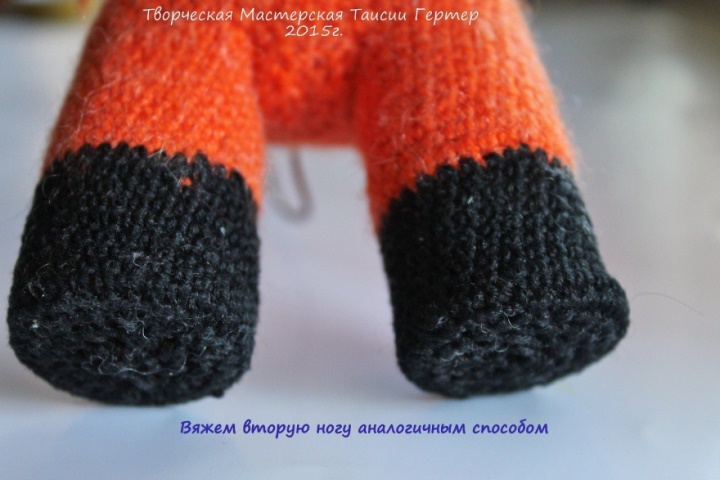
It turns out this kind of beauty:
Hands (2 parts):
Orange yarn:
1 row: 6 scales in the spacecraft
2 row: 6 pr (12)
3 row: (1 sb, 1 pr) * 6 (18)
4 - 11 series: 18 sbn
Black yarn:
12 - 20: 18 sb
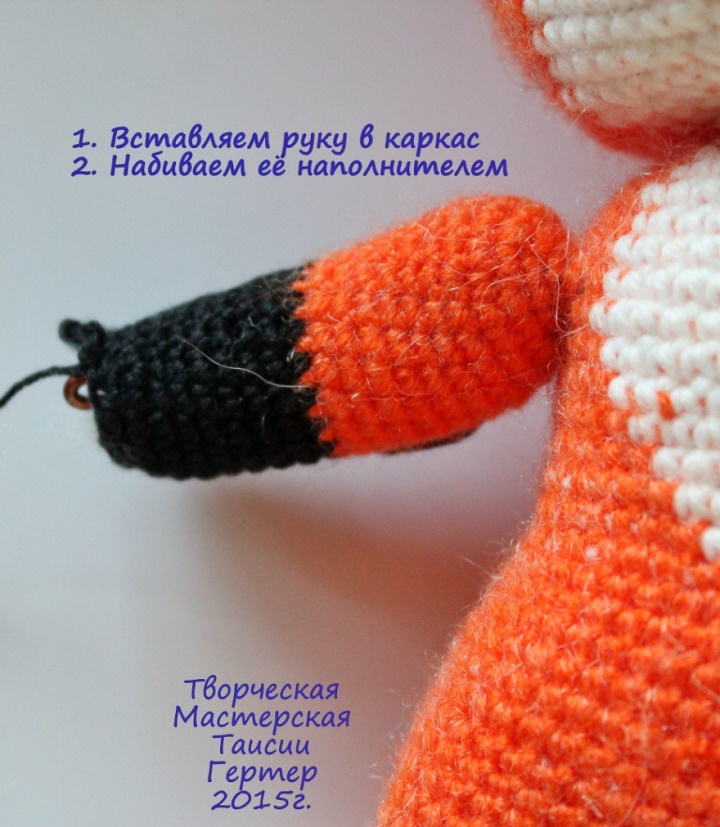
We insert into the wire
carcass
21: (1 сбн, 1 уб) * 6 (12)
22: 6 ub (6)
We finish knitting,
fix and cut the thread
Tail:
Orange thread:
1 row: 6 scales in the spacecraft
2 row: 6 pr (12)
3 - 5 series: 12 sbn
6: (3 sb, 1 pr) * 3 (15)
7 - 9 series: 15 sbn
10 series: (4 sb, 1 pr) * 3 (18)
11 - 13 series: 18 sbn
14th row: (5 sbn, 1 pr) * 3 (21)
15 - 17 series: 21 sbn
18 series: (6 sbn, 1 pr) * 3 (24)
19 - 21 series: 24 sbn
22 row: (3 sb, 1 pr) * 6 (30)
23 series: 30 sbn
24 row: (4 sb, 1 pr) * 6 (36)
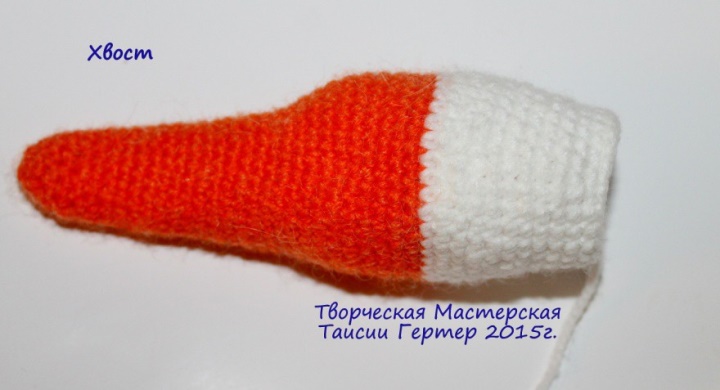
25 - 30 series: 36 sbn
White thread:
31 - 32 rows: 36 sb
33 series: (10 сбн, 1 уб) * 3 (33)
34 row: 33 sbn
35 series: (9 сбн, 1 уб) * 3 (30)
36th row: 30th c.
37 row: (8 sb, 1 ub) * 3 (27)
38 row: 27 sbn
39 series: (7 sb, 1 ub) * 3 (24)
40 row: 24 sbn
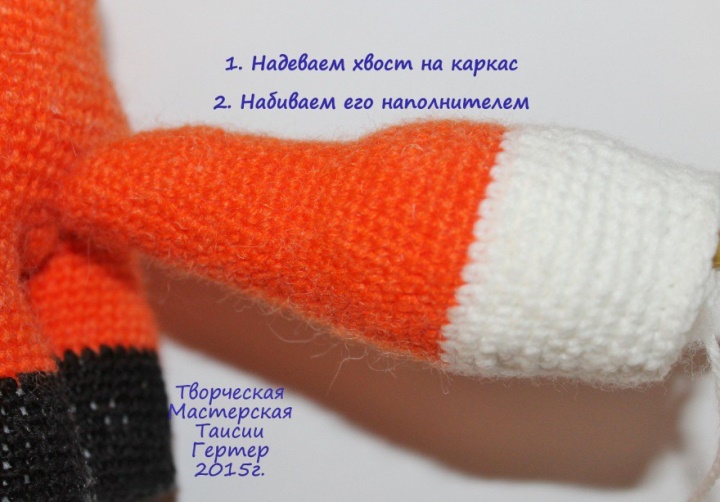
We put the tail on the frame, stuff it
filler
41 series: (2 sb, 1 ub) * 6 (18)
42 series: (1 сбн, 1 уб) * 6 (12)
43 row: 6 ub (6)
Decor:
For toning the muzzle we use eye shadow. I used
dark brown color for eye area and dark gray color
for the tips of the ears. Also a little tinted the middle of the ears
pale yellow color.
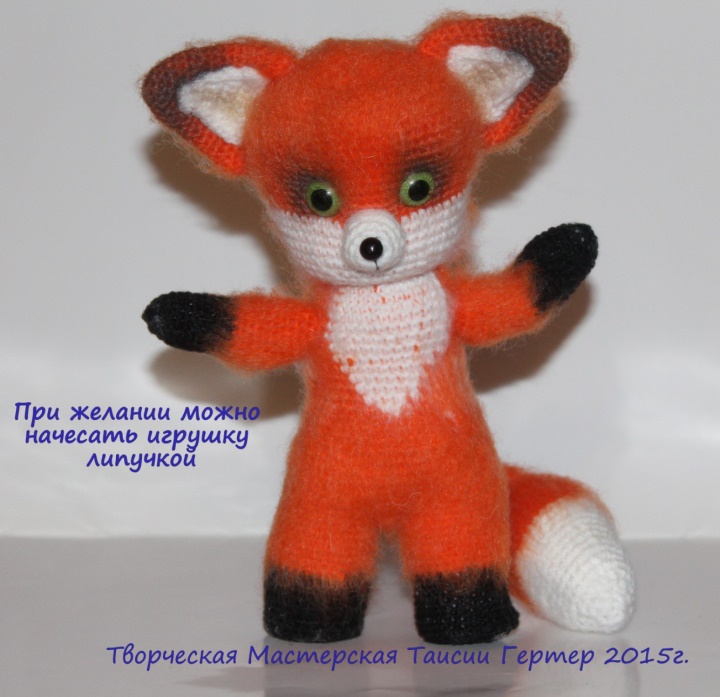
You can scratch the toy with Velcro:
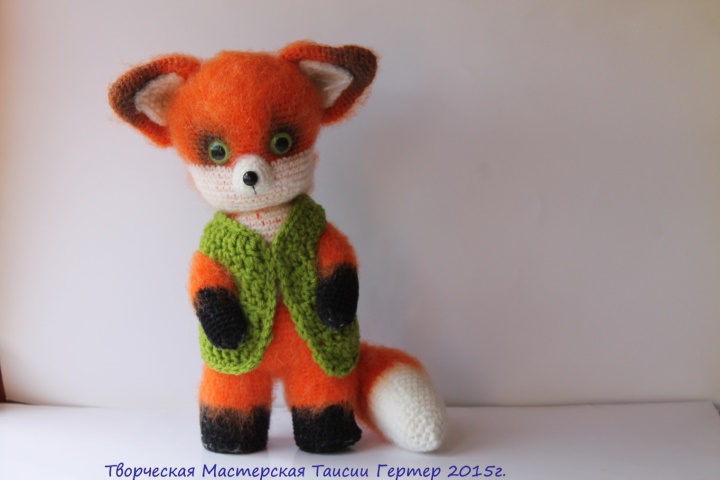
You can tie a scarf or waistcoat in any color (i
picked up the green under the eye color):
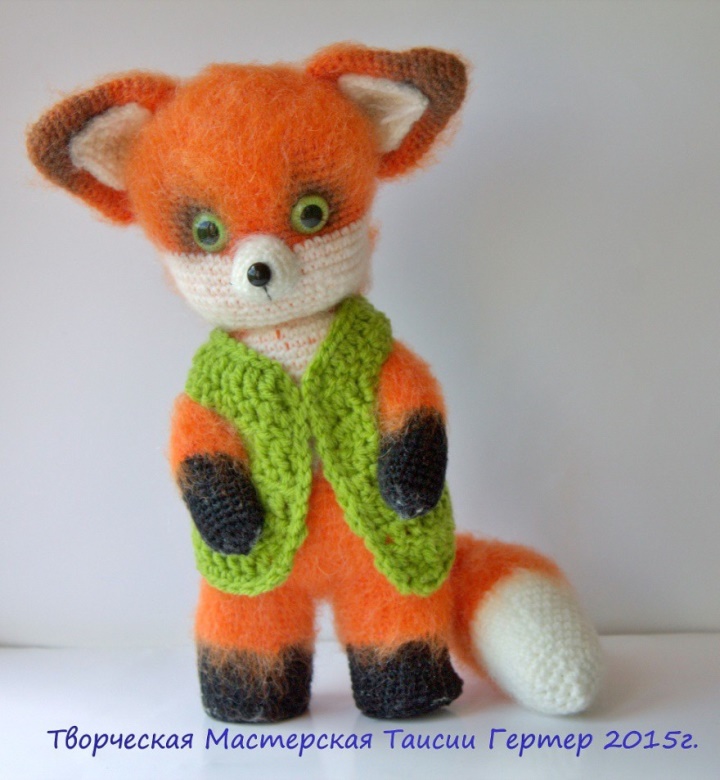
All work is over!
That's what the foxes are from this description
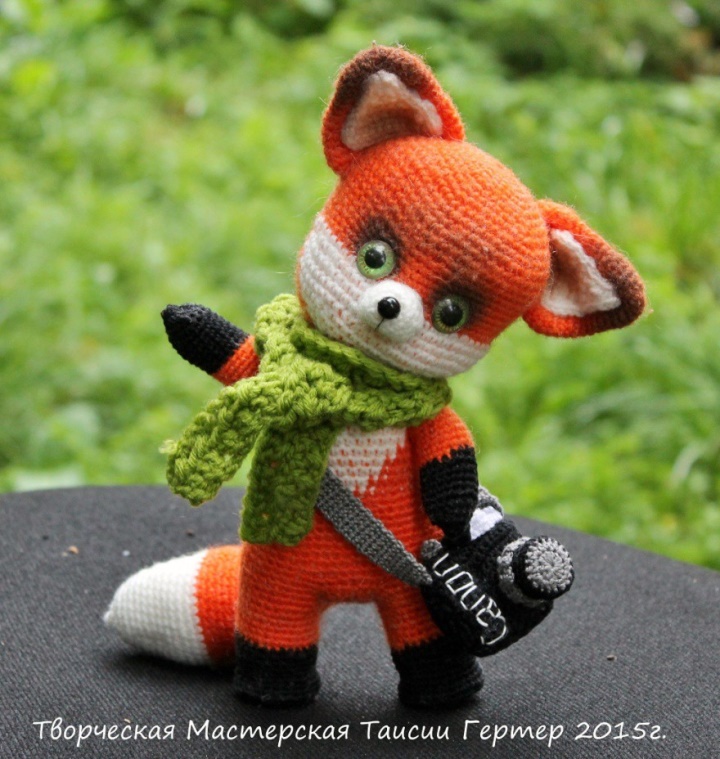
Source : ЛИСЕНОК ФИЛИПП