1. Bp. - air loop.
2. SS - connecting bar.
3. Sbn - a column without a crochet.
4. Ssn - a column with a crochet.
5. Pr.- increase - to tie 2sbn in one loop.
6. Уб.- Decrease - to tie 2сбн together.
tying the row.
1. Hook No. 1.5.
2. Scissors.
3. The needle is large (gypsy).
4. Needle for felting No. 38 stellate.
5. The yarn for hand knitting, I have: Angora Real 40 Uni. Manufacturer Alize, Turkey.
thread length 480 meters, weight 100 grams. № 0552. Can be any similar in quality.
6. Wool for felting natural light beige shade.
7. White yarn for a waistcoat - a little.
8. The yarn for the vest is green - quite a bit.
9. Black thick cotton threads.
10. Filler for toys - sintepon 0,5 m.
11. Eyes and spout. Eyes are glued, size 8 mm, but if there are none, you can replace
on other diameter 8-10 mm. Nose width of 1.5-2 mm - 1 pc.
12. A hat gum - 0,5 m.
13. Nine shirts buttons and 1 button 1 cm in diameter (buttons can be bu
better with two holes).
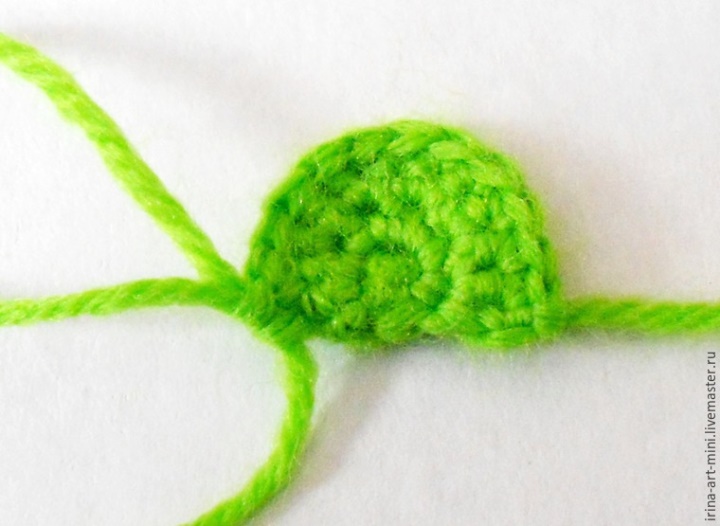
The head is a light green thread.
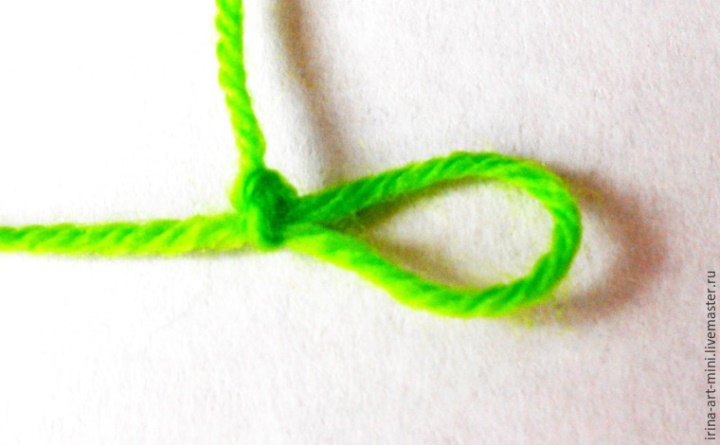
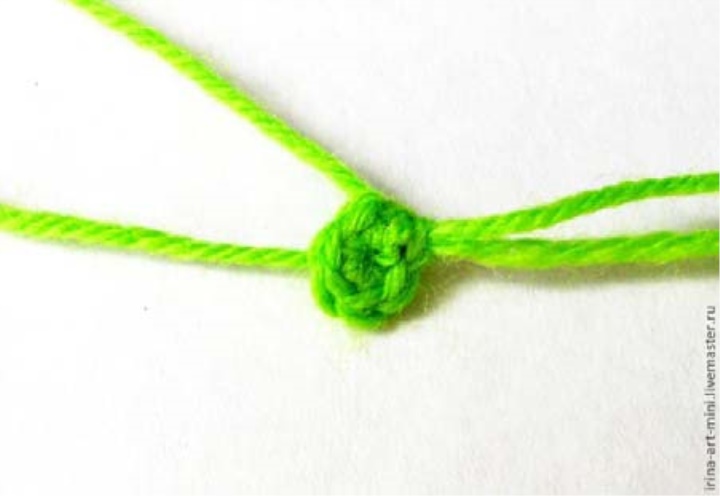
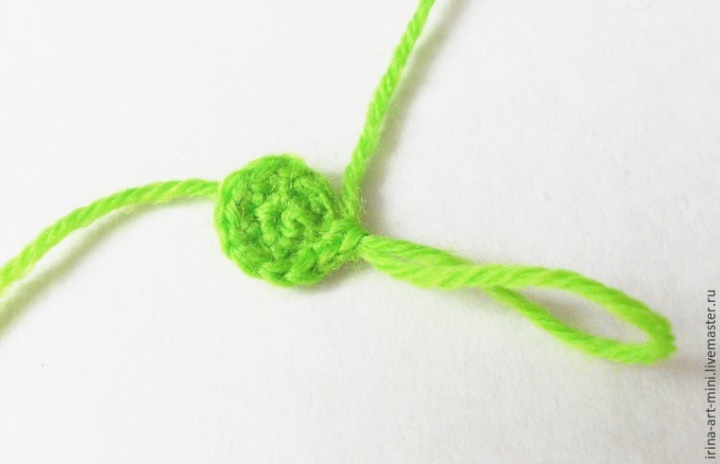
1 p. - 2 in, in the second from the hook 6 sbn, close in the ring with 1 cc (6) and
tighten the sliding unit.
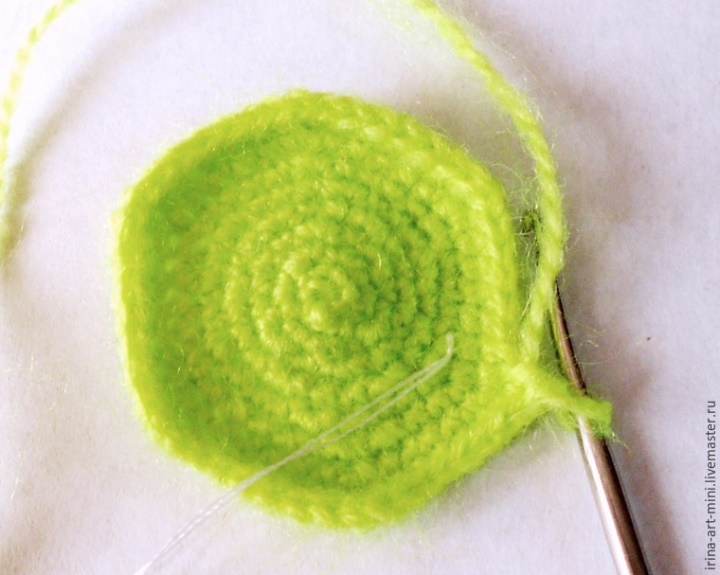
R. - an increase in each loop (12).
3 r. - (sb, increase) x 6 times (18).

For convenience, we mark the beginning of the series with a contrasting thread.
4 r. - (2cb, increase) x 6 times (24).
5 r. - (3сбн, привка) х 6 times (30).
6 r. - (4сбн, привка) х 6 times (36).
7 r. - (5cb, increase) x 6 times (42).
8 r. - (6ab, increase) x 6 times (48).
9-16 r. - Slip into each loop (48).

17 r. - (6 сбн, убавка) х 6 times (42).
In order that the allowances are not very prominent, we subtract this: we introduce a hook into
the front wall of the first loop, and then insert the hook into the rear wall of the second loop,
we hook a working thread and we sew 1 sc.
18 r. - (5 сбн, убавка) х 6 times (36)
19 r. - (4 sb, reduction) x 6 times (30)
20 r. - (3 scales, decrease) x 6 times (24)
21 r. - (2 sb, reduction) x 6 times (18)
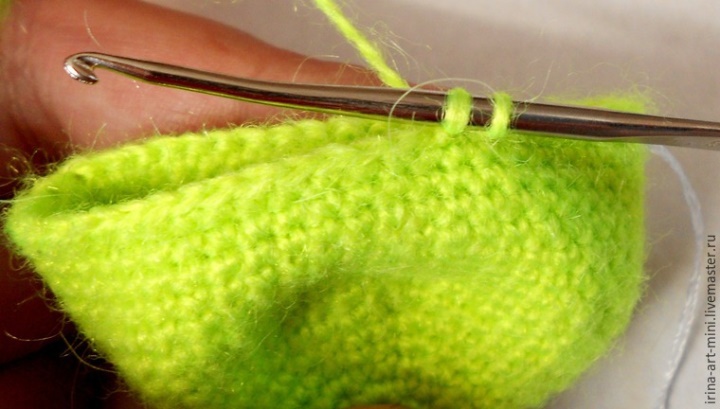
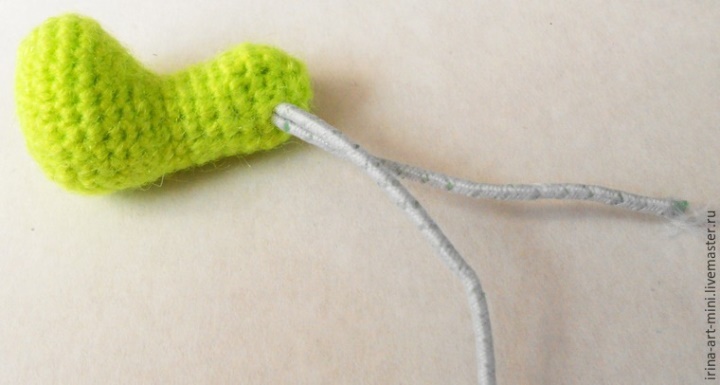
Here we will stop and start to fill the part with a sintepon, densely laying
filler.
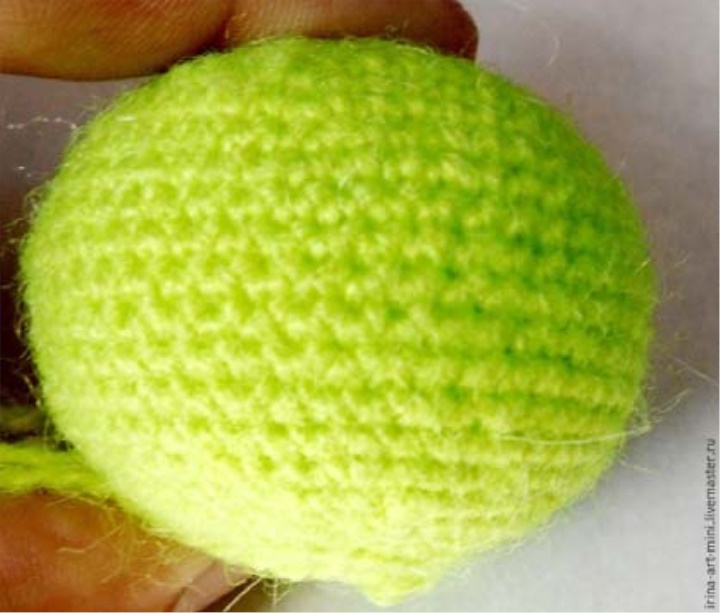
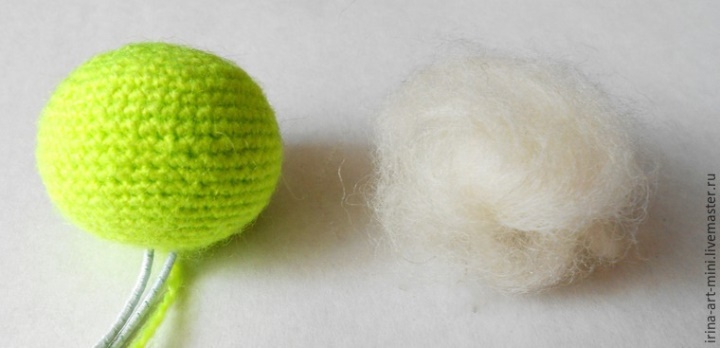
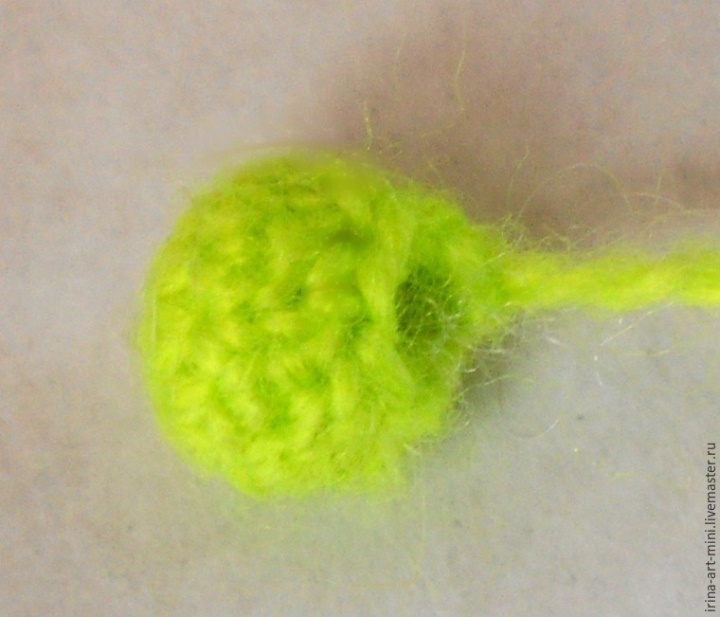
Here such head at us it has turned out.
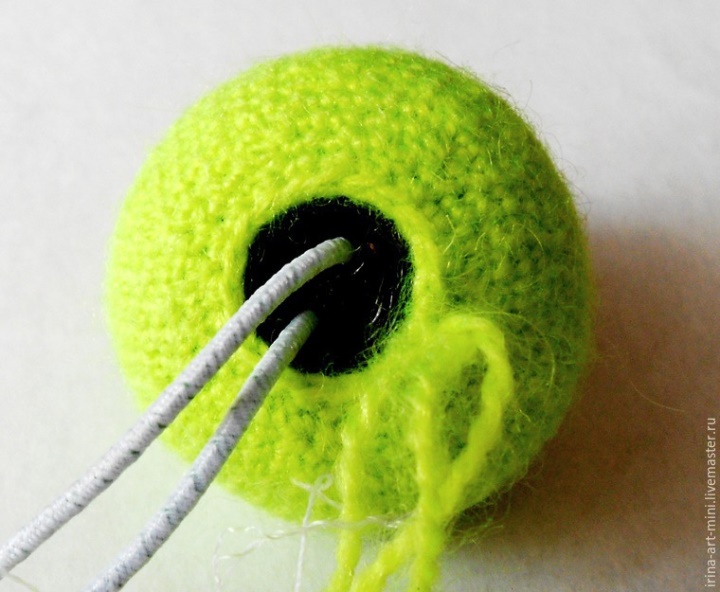
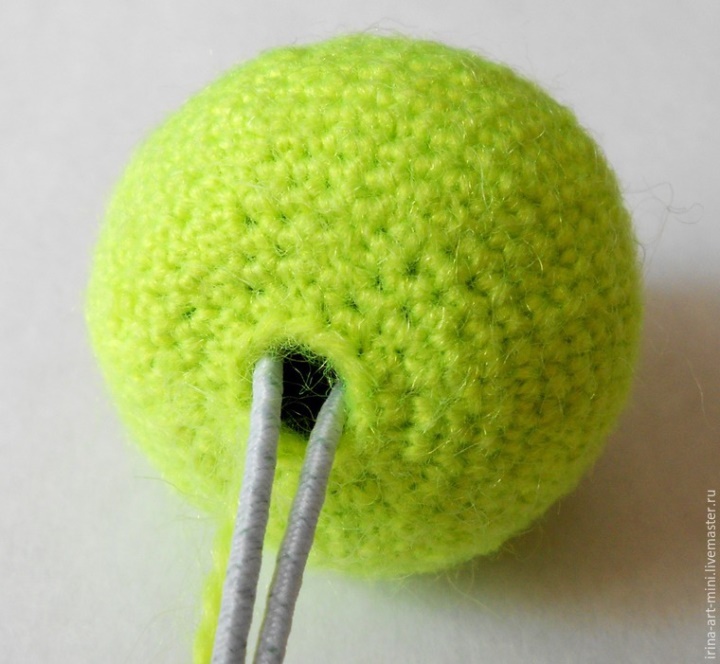
Now we take a hat and a big button.
We connect the button with an elastic band and insert it into the head.
The button in the head should hold tight, if not, then it is necessary
or donap a detail, or take a button with a larger diameter.
22 r. - (cb, decrease) x 6 times (12).
23 r. - Reduction x 6 times (6).
Ears - light green thread - 2 pcs.
We begin just as we started our head.
1 p. - 2 in, the second from the hook 6 sbn (6).
2 r. - in the opposite direction (not in a circle) - 1 in, increment x 6 times (12).
3 r. - turn, 1 in, 12 sb (12).
End the knitting, fix the thread and leave a long thread for sewing the eyelet.
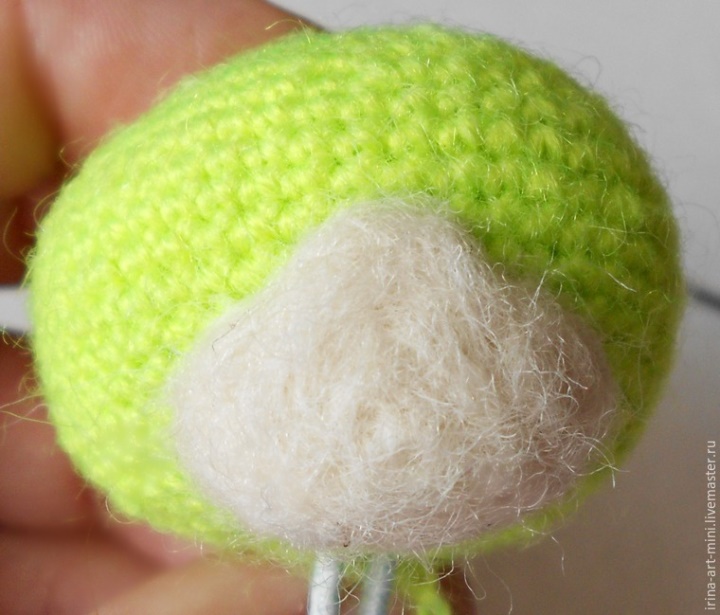
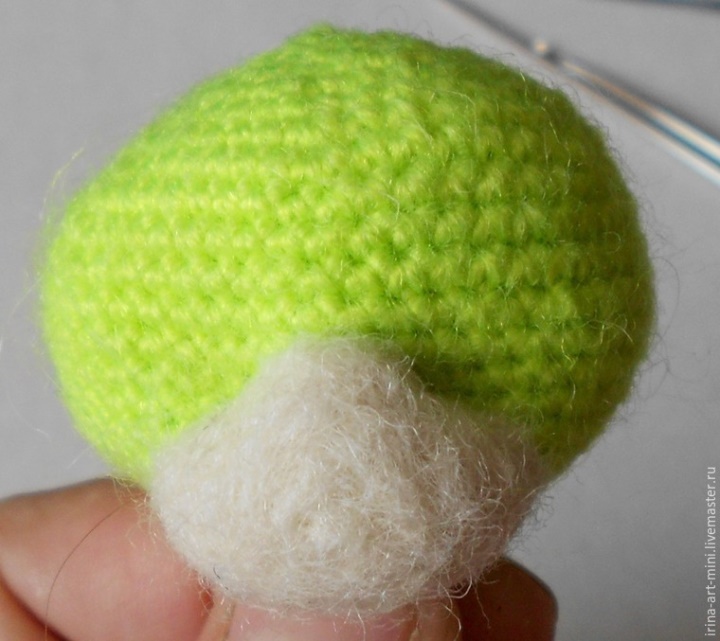
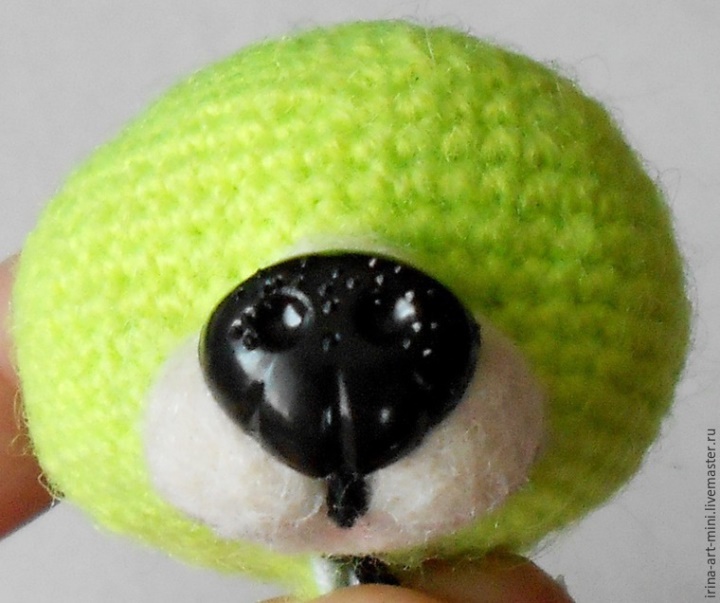
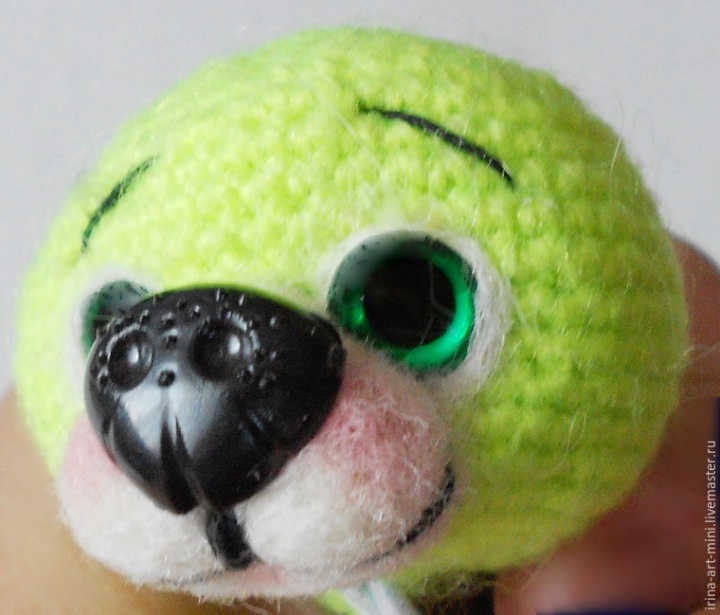
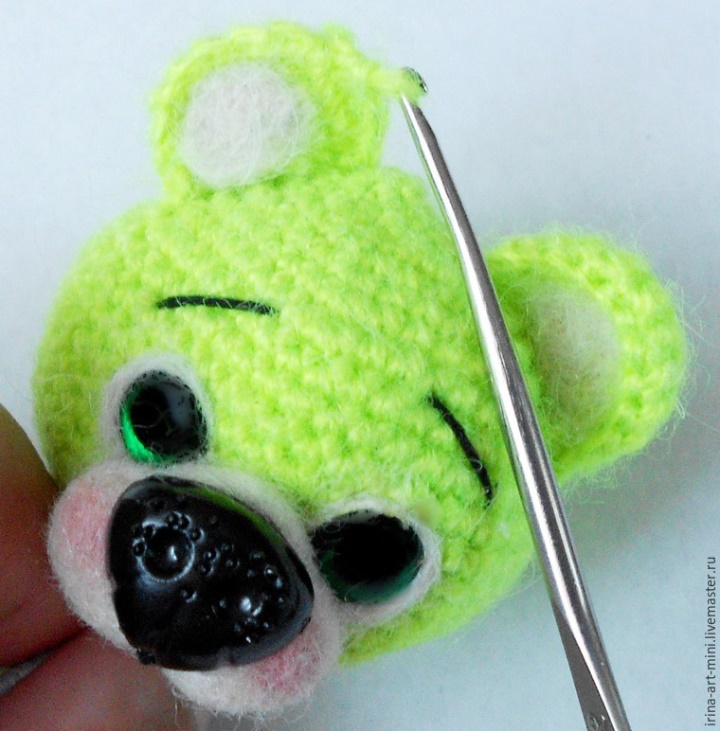
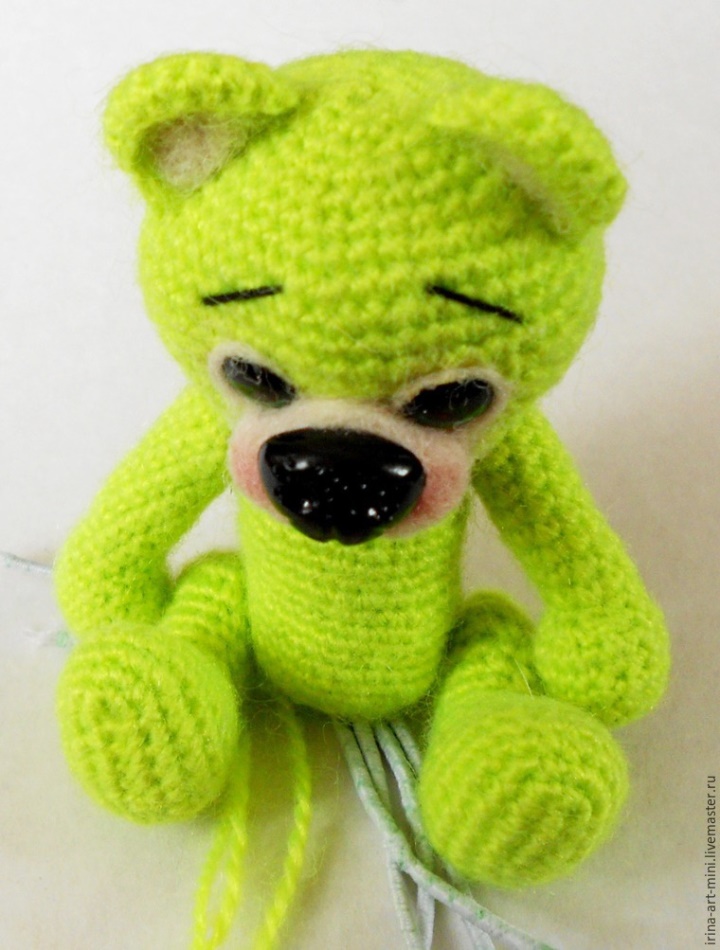
We proceed to felting - the formation of the muzzle.
Take this piece of wool.
And we will stick a needle for felting in a circle - a contour of a muzzle.

For clarity, I drew an approximate contour mordashki.
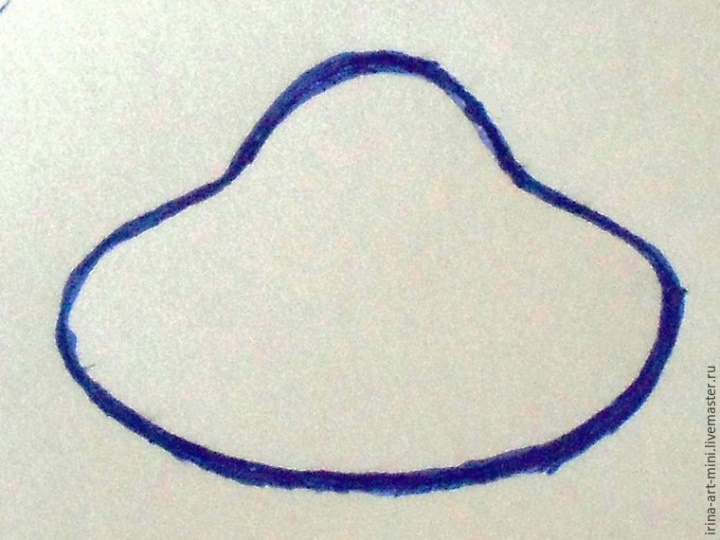
And the place for the muzzle is not accidental - the bottom edge of the muzzle is defined by
a button inside the head, that is, we stick it at the very button.
And the top is formed in the form of a triangle with rounded corners.
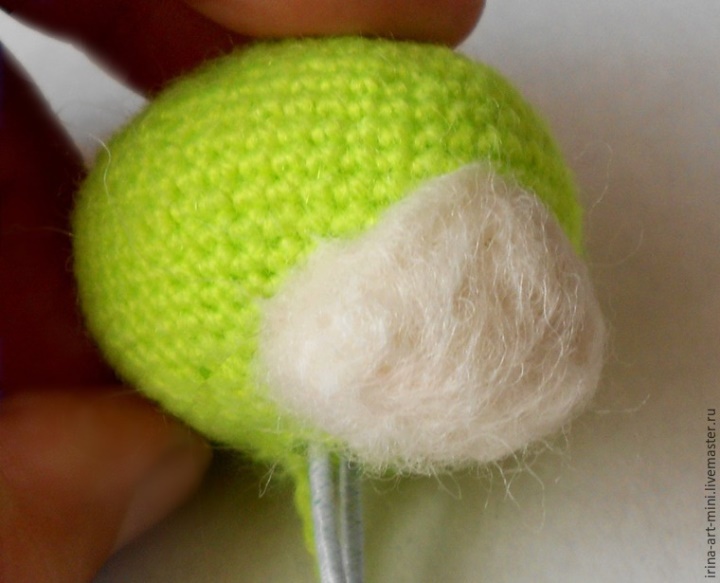
Do not forget that the needle is very sharp, you need to protect your fingers, as well as these needles
quickly break, therefore, gently piercing the entire face, we put it to
head bears.
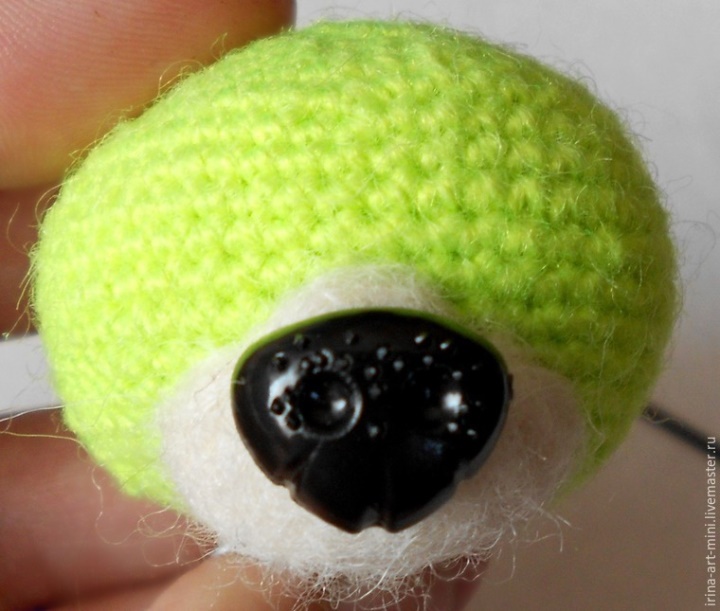
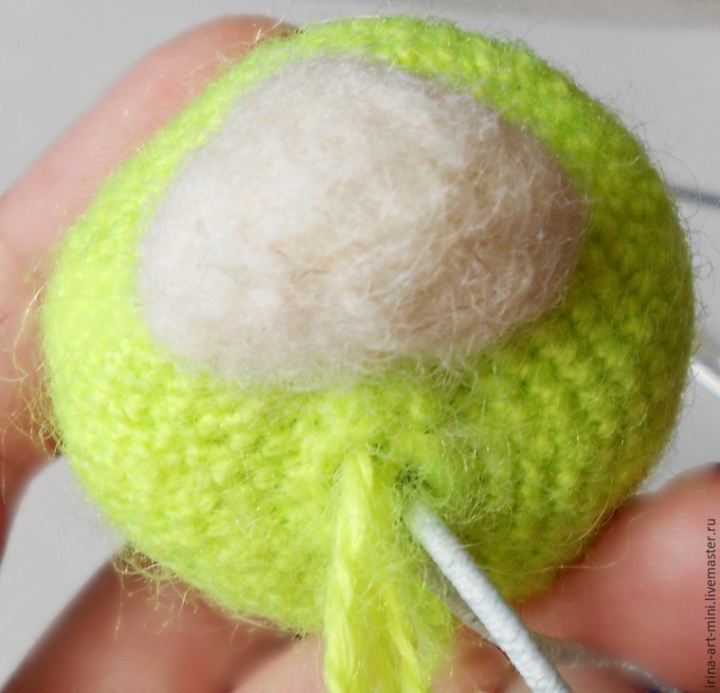
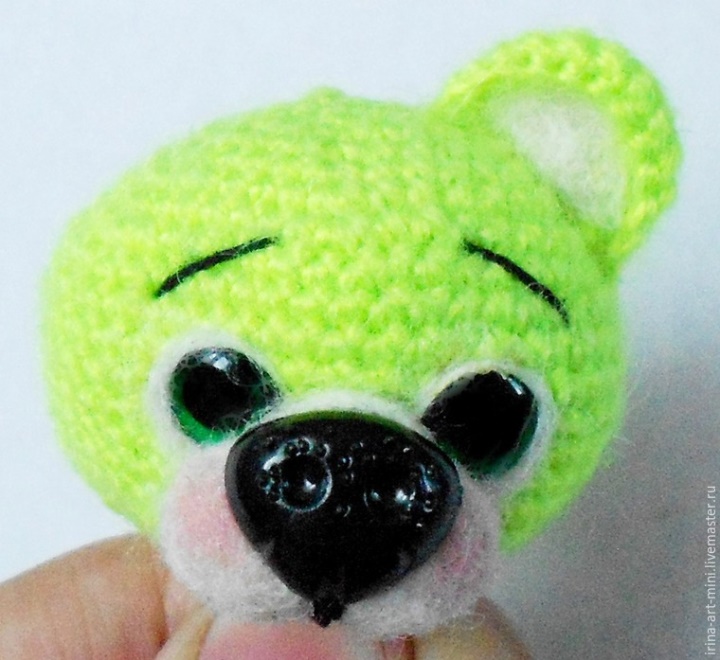
Checking with the photo, we roll the whole face, do not try to seal it tightly in
the moment, there will still be time, now the main thing is to weld exactly and mirror,
for this it is convenient to apply a spout, immediately you will see uneven places.
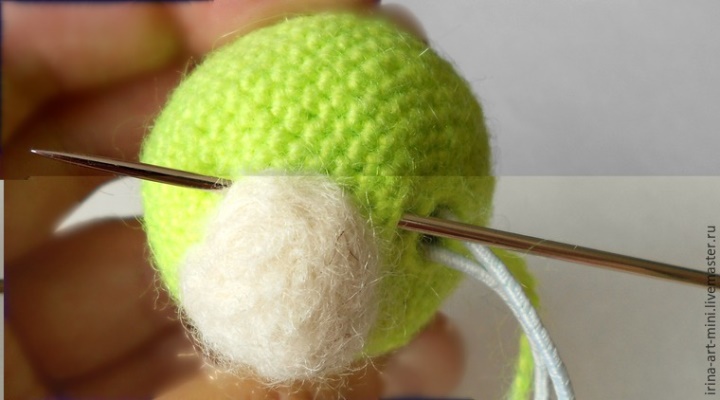
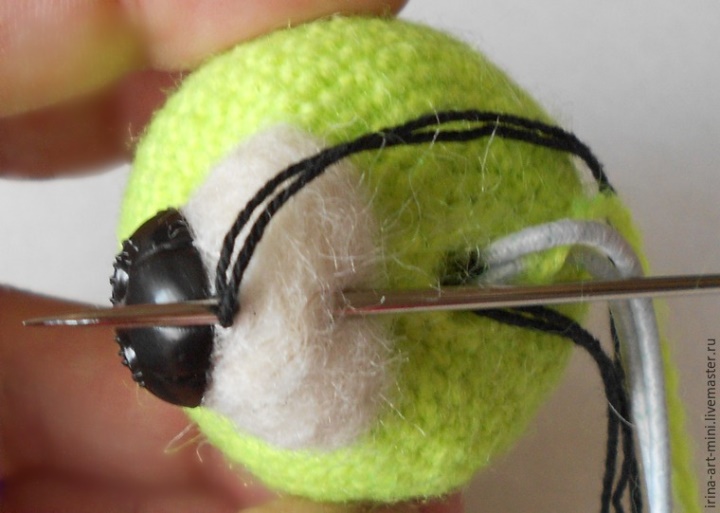
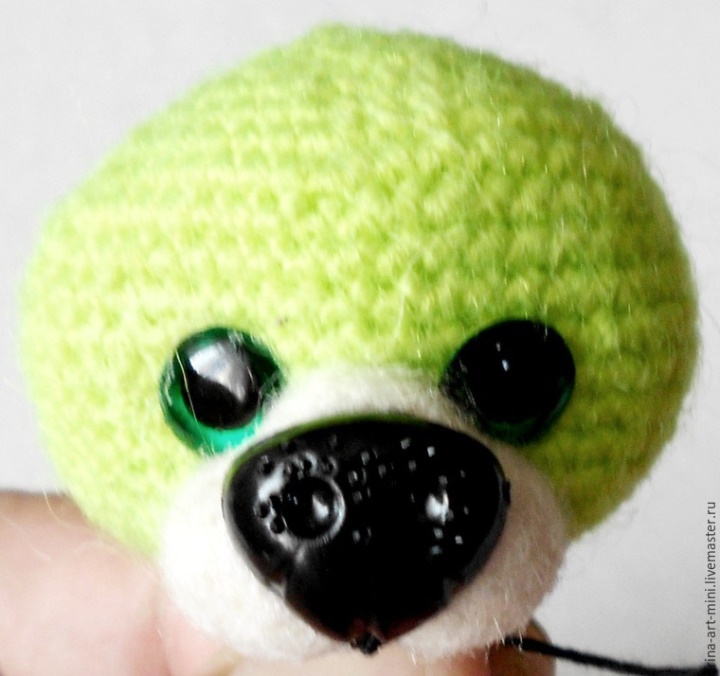
Mouth pulls.
We introduce a large needle with a green lace outside at the base (for such small
toys I use the same thread as for knitting doubly, but you can take a dental
thread, which masters often use), right next to the inner button and
we deduce in an external corner of the future eye.
Then we inject the needle into the inner corner of the eye and bring the muzzle down next to it
(not the same) with a tail, pulling both threads, forming on the muzzle a groove for
glazika and tie a knot.
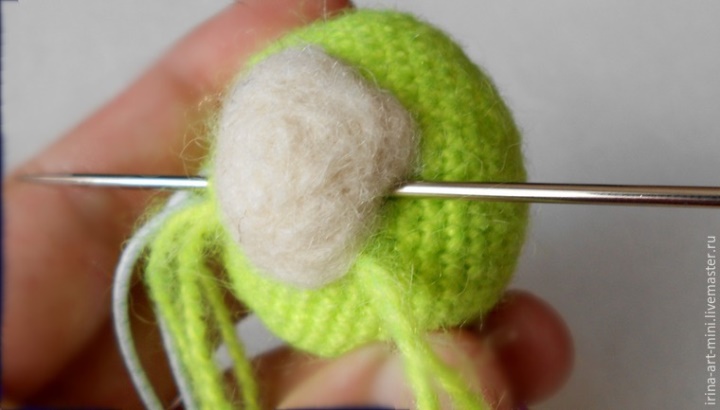
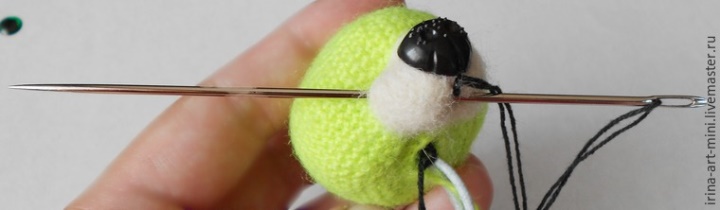
With the help of a hook or needle ponytails stretch, sticking next to the knot, and
We put a needle into the hole in the bottom of the head.
The second eye is pulled mirror, repeating the previous jaws.
Now we hide all the ponytails in our heads, leaving only to stick out the rubber bands,
these are dimples for the eyes.
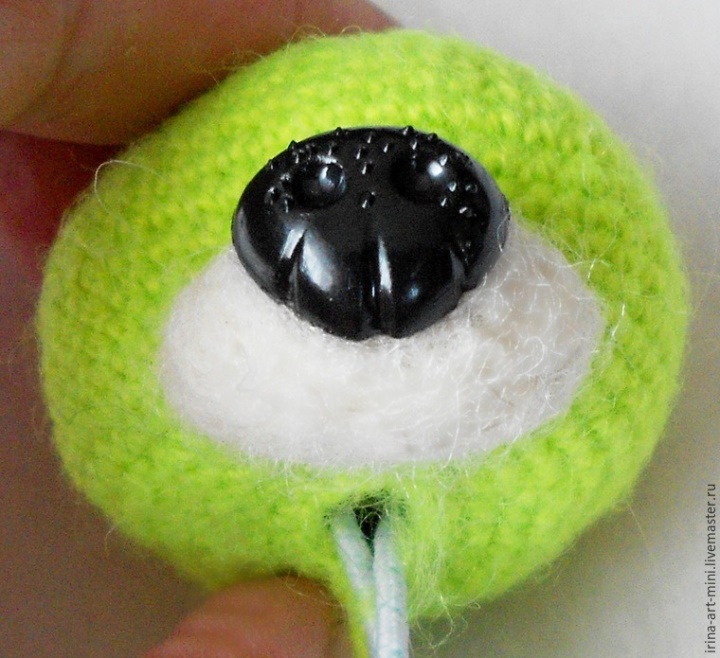
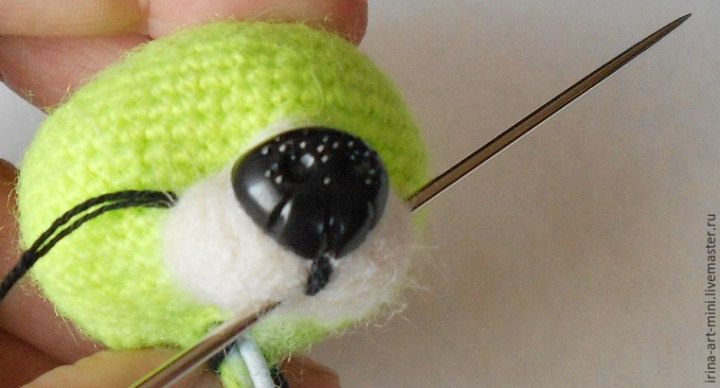
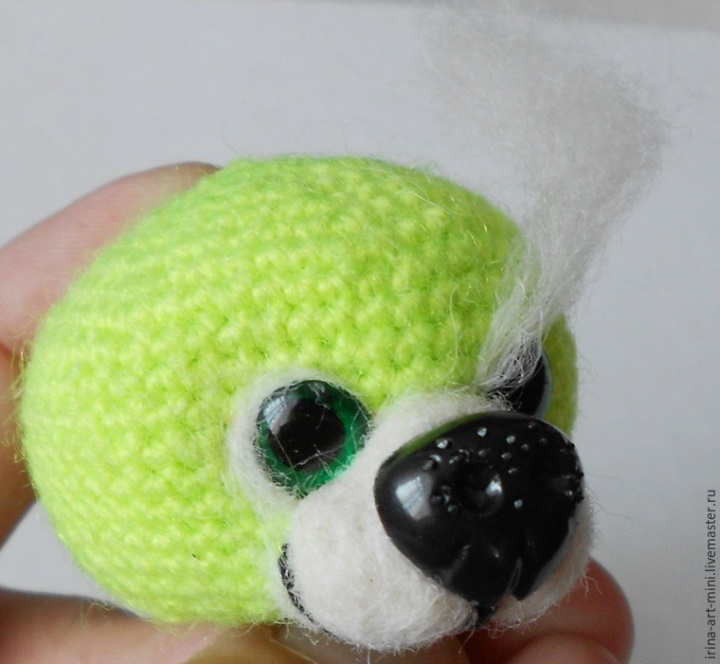
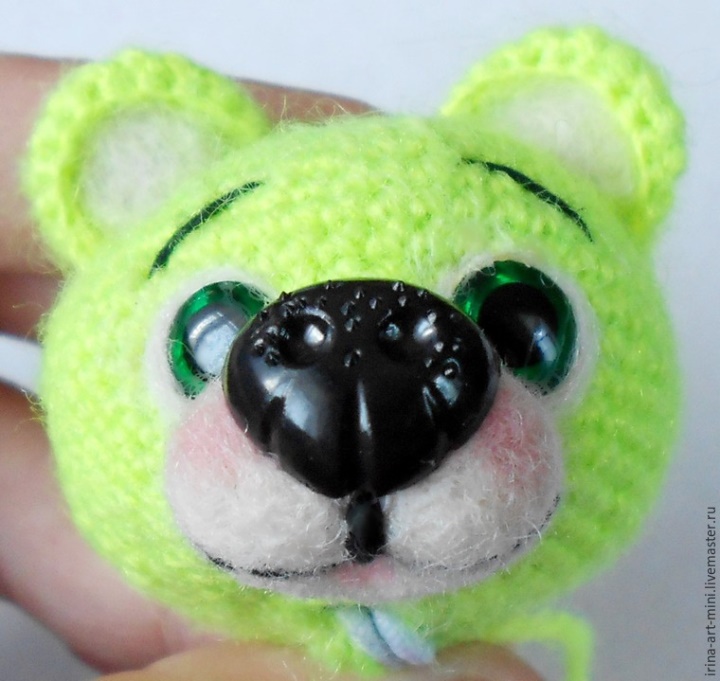
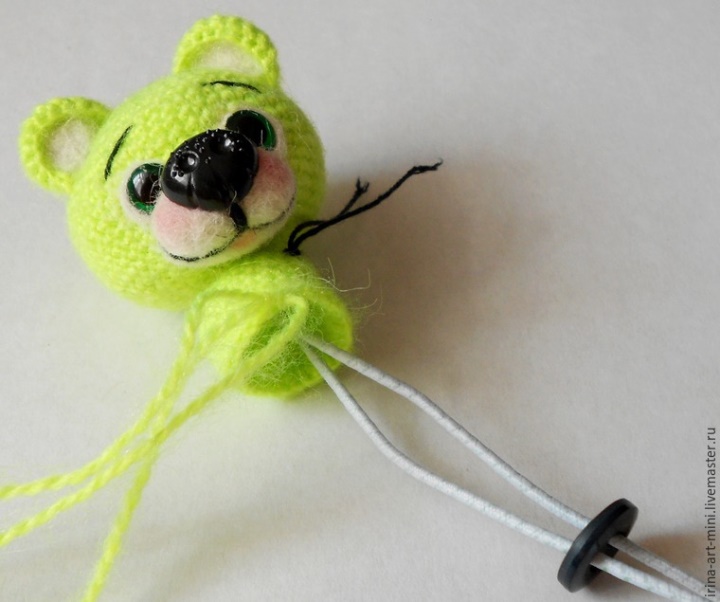
We glue the spout, tightly pressing all sides of the spout.
Now you can tighten the muzzle more tightly, forming a beautiful bridge of the nose,
Eyelashes and a snub nose.
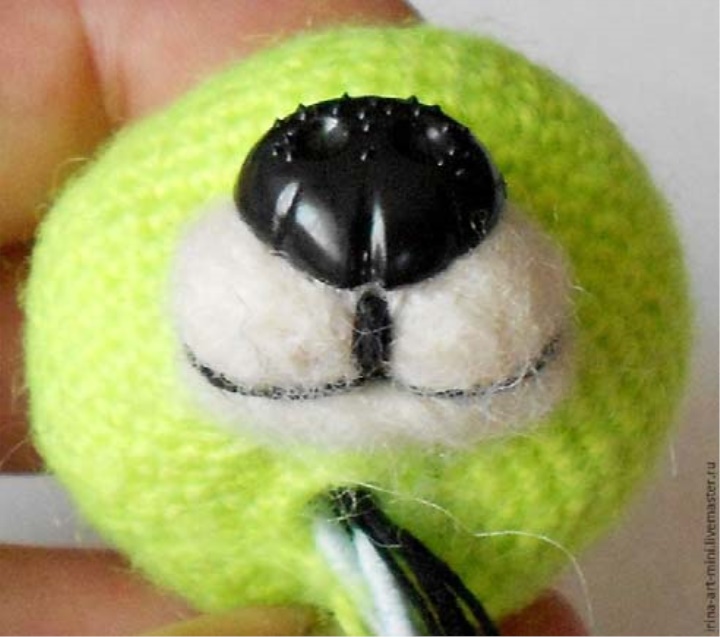
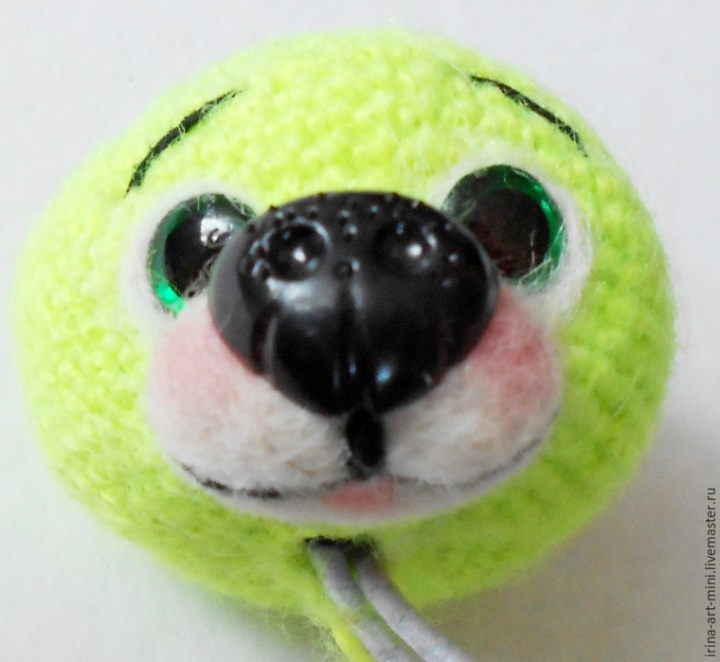
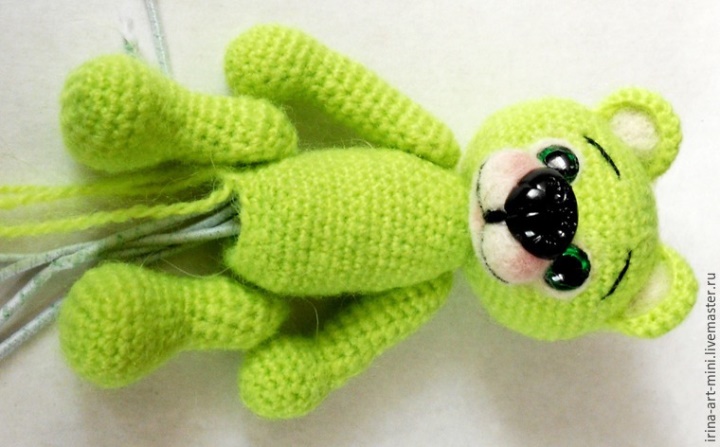
Stitching the mouth.
We introduce a needle with a black thread into the opening of the neck, and we bring it out in the muzzle under a spout
(the middle of the spout), stretch the thread, leaving a small tail.
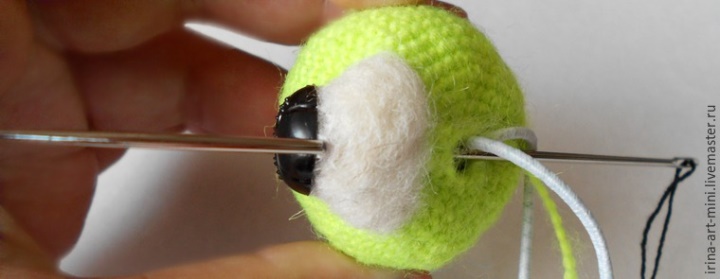
Now we introduce the needle in the lower part of the muzzle, at the point, not reaching the edge of the muzzle 0.5
cm, and output again under the spout, tighten a little, forming a depression in the bottom -
mouth.
Again, insert the needle into the point of the mouth, and output it at the top of the cheek.
We introduce the needle into the mouth, and draw a point (mirror) of the upper part of the other cheek.
Now we introduce the needle into the mouth, and put it into the hole of the neck, we have a smile :)
Correct the thread on the cheeks so that they are plump and the same, and in the neck
we tie a knot of black threads, hide the tails in the head.
In the deepening of the mouth we seal a small ball of pink color, it is possible from
loose knitting thread of the desired color, or use a blush.
Manicure scissors neatly trim the protruding hairs of wool,
comparing the surface of the muzzle.
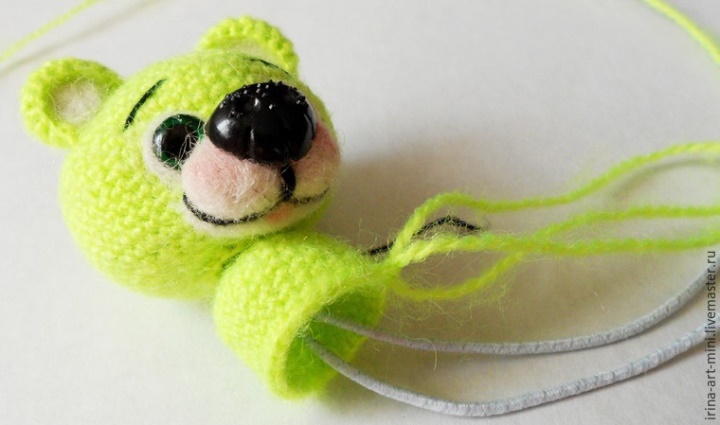
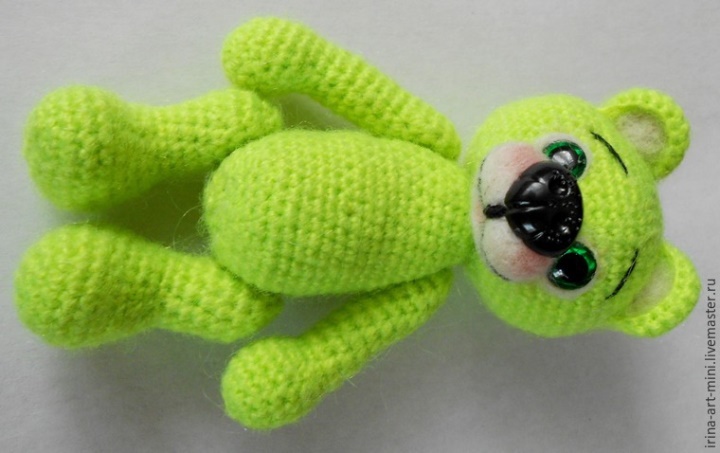
Eyes.
If you like everything, glue the eyes, and do it this way: glaze tightly plant
into the recess and squeeze the bottom edge of the eye into the embedded muzzle.
Take 2 small strips of hair and tie them around the eyes, in the inner
corner is thin strip, and the outer corner is thicker.
We bridle the cheeks, and do it in the upper (not in the middle) part of the cheeks.
We sew the edges by inserting a needle with a black thread into the hole in the neck, and,
(see photo), then insert the needle through the four loops and upwards into 2 rows, and
we deduce in a point of the second brow, we sew it and we deduce a needle in an aperture of a neck,
we tie a knot of black threads.
We hide all the threads and nodules in the head, leaving only the elastic band.
Align and fix the muzzle with water with the addition of several
drops of glue PVA (it is possible without glue), we wet a finger all face and we leave
dry. Note that a black thread can shed, it is better not to
to wet.
In the course of creation, it will be necessary to critically examine the face again and again
stronger to seal it and eyelids where necessary, and also to use scissors
for leveling the surface, making it perfectly flat and dense.
Well, for now, the face is ready
Part 2
Ears.
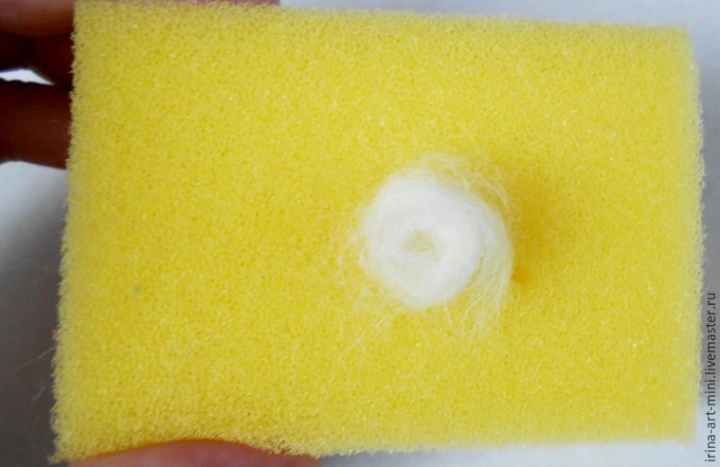
Take 2 small pieces of wool, on a sponge with a needle for felting
form the same circles.
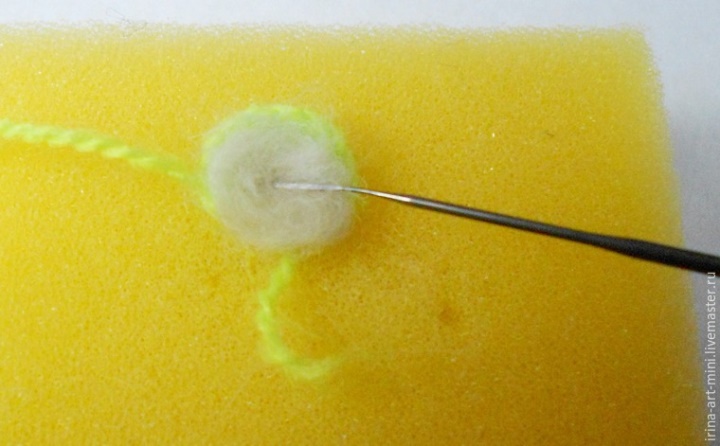
On the sponge we put these mugs on the ears and we put the wool in inside, leaving
only one row of eyelet loops.
Determine the place of sewing the ears, focusing on the eyebrows, sew long
end of the thread.
And then we tie the eye along the edge with the same thread: 1 sb in the angle of the lug's connection with
head, 12 sb on the edge of the ear, 1 sb in the other corner between the ear and the head.
Sew the second eye.
The remainder of the thread is hidden by pulling the needle through the head into the hole in the neck.
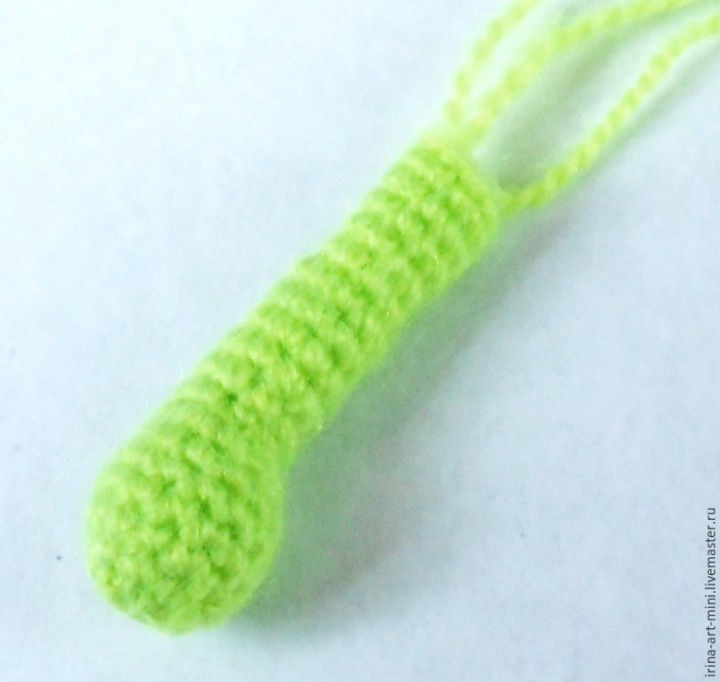
Handles - 2 pcs.
We begin with a sliding node.
1 p. - 2 in, in the second from the hook 6 sbn, close in the ring with 1 cc (6).
2 r. - an increase of x 6 times (12).
3 r. - (3 sb, increase) x 3 times (15).
4-6 r. - slip into each loop (15).
7 r. - Reduction x 3 times, 9 sbn (12).
8 r. - (cb, decrease) x 2 times, 7 sb (10).
9-18 r. - slip into each loop (10).
We insert the button fastening.
We fill the handle with the synthepone almost to the top, leaving 1 cm.
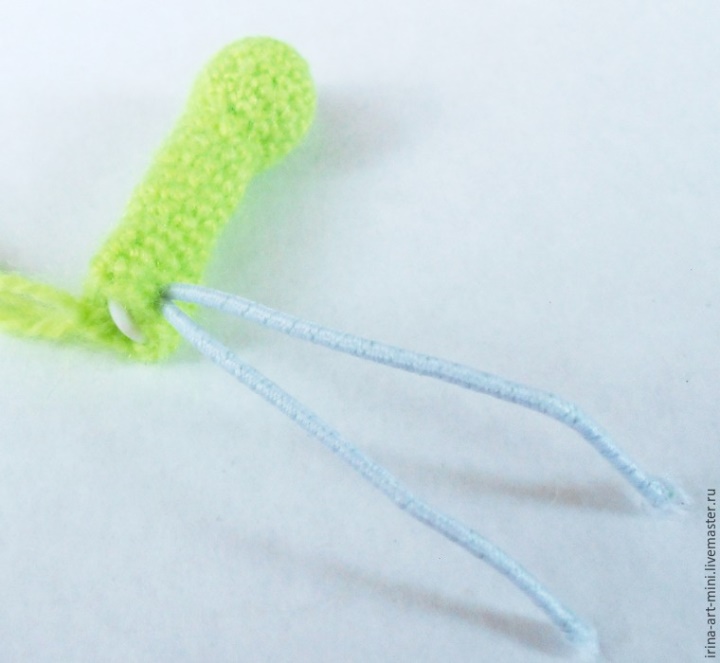
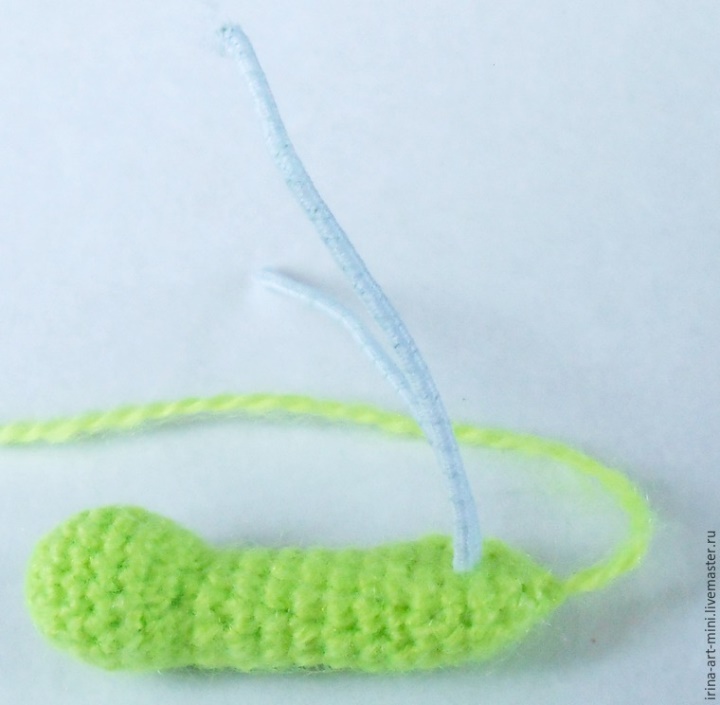
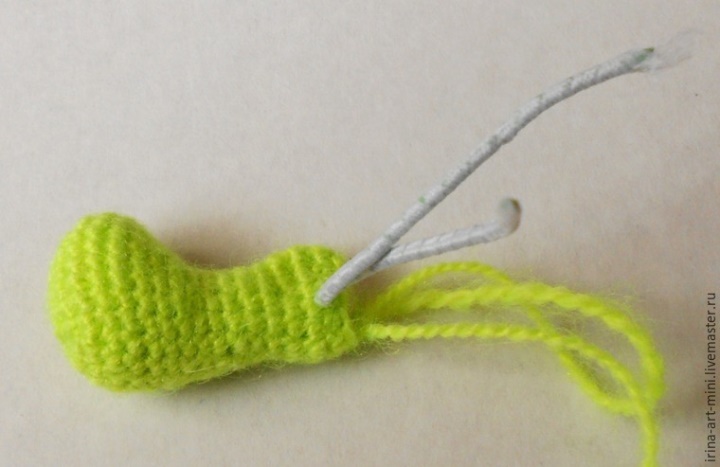
Cut off the gum tips - the tips of the head - 2 pcs. at 10 cm,
we put this rubber band in the button.
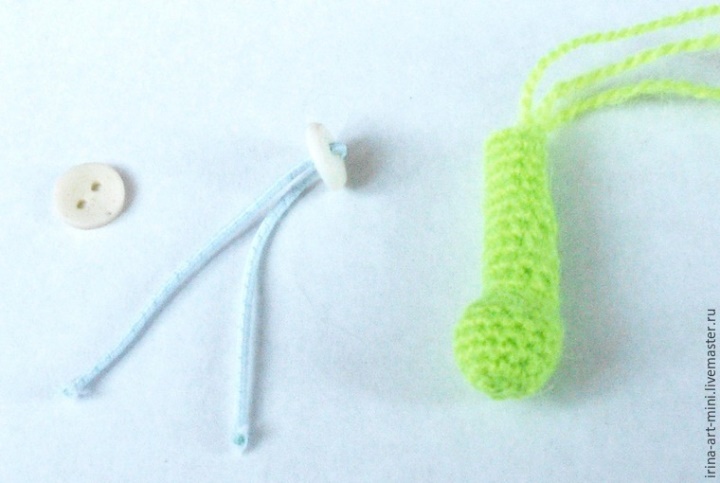
Then insert the tips of this design into the eye of the big needle and, inserting the needle into the
inside the handle, stretch the elastic band outwards, and do not confuse - the tips of the eraser
should stick out in the middle of the handle from the side of the cam (check with the photo), and the button
tightly pressed inside the handle.
We fill and tie the 19th row - 6 x decrease, knit finish, fix the thread
and put the tip in the handle.
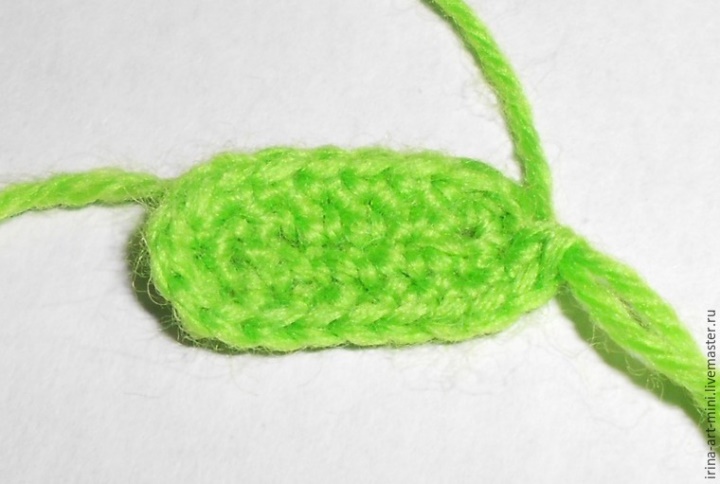
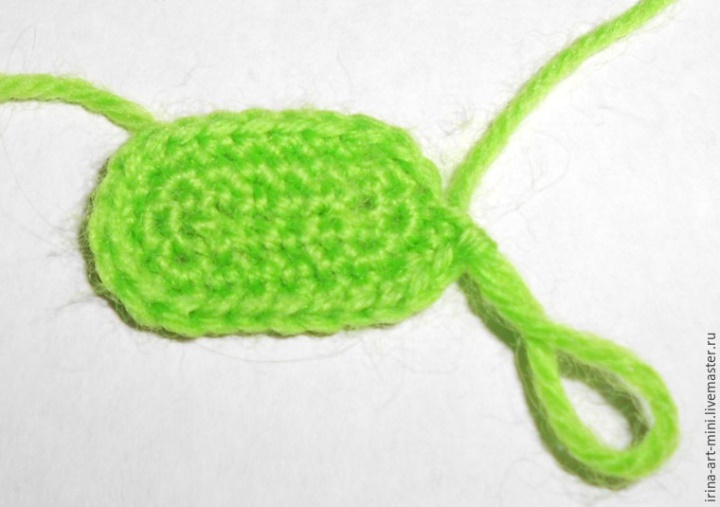
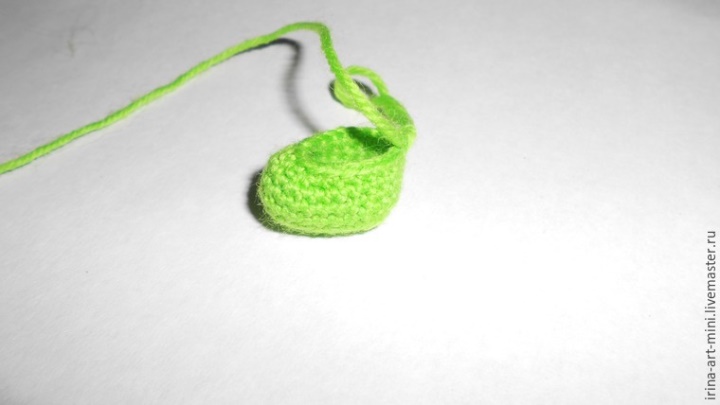
Legs - 2 pcs.
1 p. - 7 in.
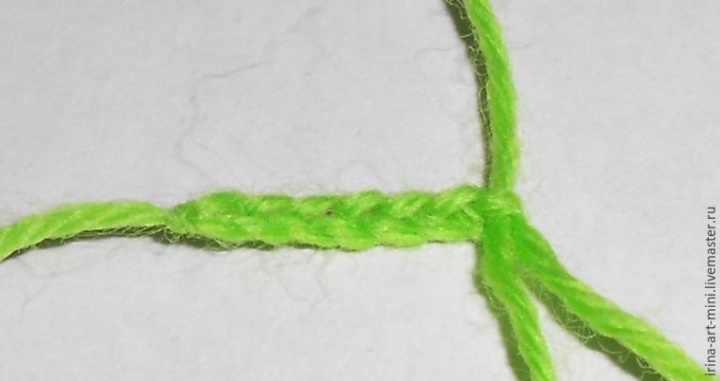
5 sb, beginning with the second loop from the hook, 3 sb in the sixth loop.
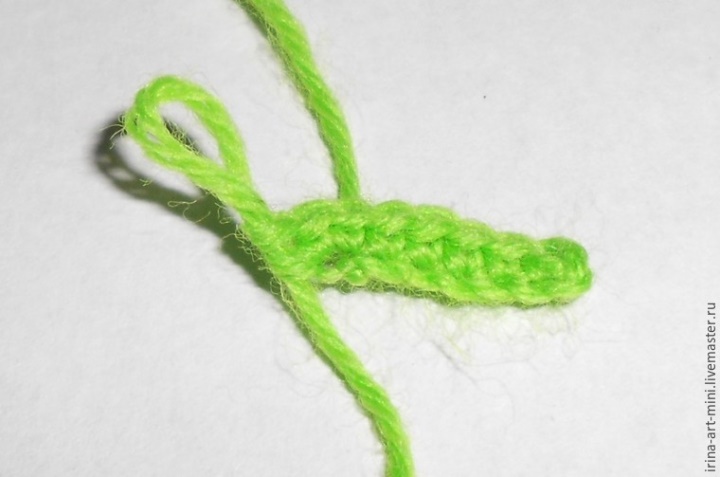
Next, we knit on the other side of the chain 5 sb and one sbn in the loop, from where we
began to knit (14), turned out to be an oval.
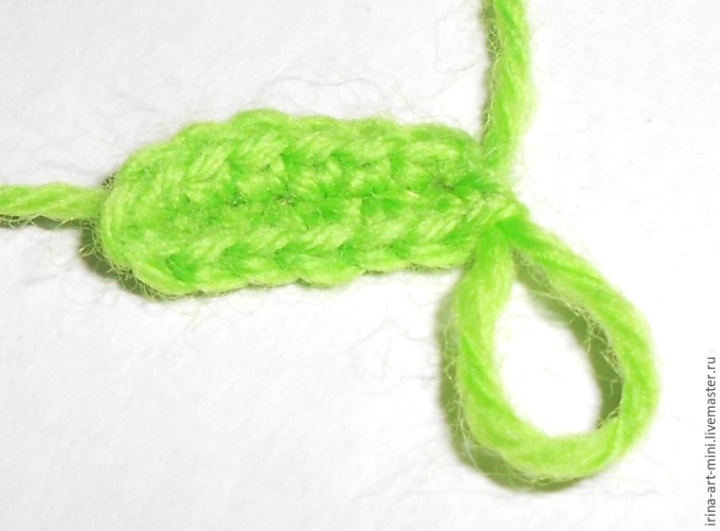
Then we knit in a circle.
2 r. - an increase, 4 sb, (increase) x 3 times, 4 sb, (increase) x 2 times (20).
3 r. - 1 sb, an increase, 5 sb, an increase, 3 sb, an increase, 5 sb, an increase, 2 sbn (24).
4-6 r. - slip into each loop (24).
7 r. - 8 сбн, (reduction) х 4 times, 8 сбн (20).
8 r. - 7 сбн, reduction, 2 сбн, убавка, 7 сбн (18).
9 r. - 7 сбн, (reduction) х 2 times, 7 сбн (16).
10 r.- 3 sb, decrease, 1 sb, (decrease) x 2 times, 1 sb, decrease, 3 sbn (12).
11-14 r. - Sneak into each loop.
15 r. - (3 sb, increase) x 3 times (15)
16 r. - in each loop (15)
17 r. - (cb, decrease) x 5 times (10)
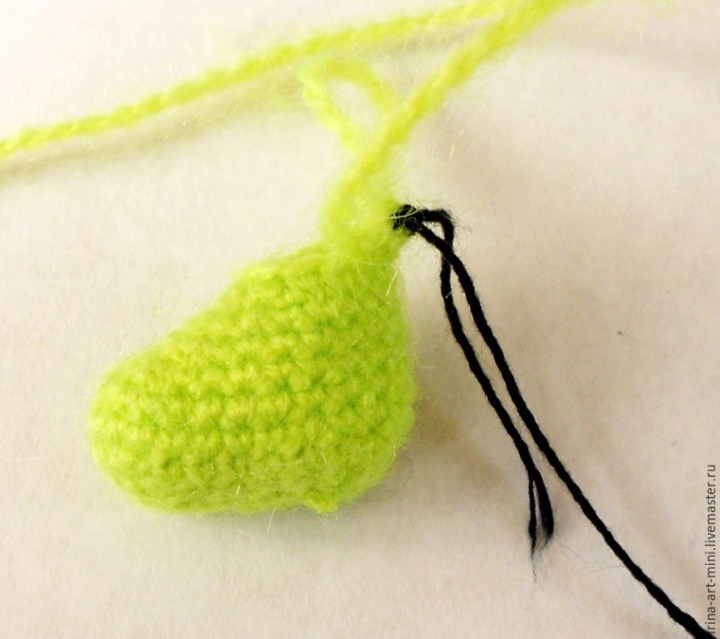
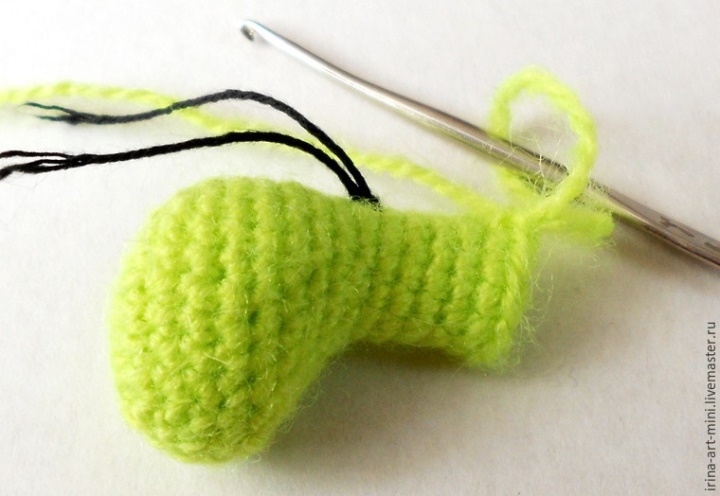
We tightly stuff the leg to the top, leaving 1 cm for the button, insert
button fastening on two legs, but on opposite sides, we finish.
18 r. - (reduction) x 5 times.
Strip the thread and hide it in the foot.
Tail.
1 p. - 2 in, second from the hook 6 sbn, close in the ring with 1 cc (6)
2 r. - an increase of x 6 times (12)
3 r. - Sb into each loop (12)
Thread the thread and leave the end for sewing.
Torso.
We begin with a sliding node.
1 p. - 2 in, second from the hook 6sbn, close in the ring with the help of Icc (6)
2 r. - an increase of x 6 times (12)
3 r.- (1-fold increase) x 6 times (18)
4- 7 p. - in each loop (18)
8 r. - 1сбн, (increase, 1 сбн) х 7 times, increase, 2 сбн (26) mark the last loop
contrasting thread - this is the middle of the back.
9 r. - slip into each loop (26).
We fix the head.
We pass the ends of the rubber bands into the hole on top of the trunk.
We put on a small button, tighten and tighten a tight knot.
Then attach the handles to avoid making mistakes with the fixing point, mark
and check the mirroriness of both handles, insert the tips of the rubber band in the eyelet
Needles and stretch into the trunk.
We put on the tips of the rubber bands from the handles of the button, tightly pressed inside the trunk and
tying the knot.

We continue to knit the torso.
10 r. - 6 сбн, (an increase, 3 сбн) х 3 times, an increase, 7 сбн (30)
11-16 r. - Slip into each loop
17 r. - (4 sb, increase) x 6 times (36)
18 r. - sbn into each loop (36)
19 r. - (4 sb, reduction) x 6 times (30)
20 r. - (3 scales, decrease) x 6 times (24)
21 r. - (2 сбн, убавка) х 6раз (18)
We attach the legs similarly, like handles, to better understand where to
attach the legs, do the following: stretch the rubber bands from the legs, but not
tie knots. and plant a bear, if he sits exactly, you can put on buttons
and tie knots, if not, remake.
All the tips from the head, from the handles and from the legs we tie together, cut, leaving
small ends, so that the nodes are not untied, and hide in the trunk, we fill tightly,
straightening all the increments on the tummy.
We continue to knit the torso.
22 r. - (sb, decrease) x 6 times (12)
23 r. - Reduction x 6 times (6)
During these last adjustments we beat the bear, then sew the hole down
torso.
Sew a tail.
Since our teddy bear must sit steadily, the tail adds stability,
means to find the right place for sewing a tail, we plant our teddy bear
and pin the tail with a needle. We check if the bear sits steadily, then
the tail can be sewn.
Sew it round the long end of the thread, then the tip is hidden in the body
bear cub.
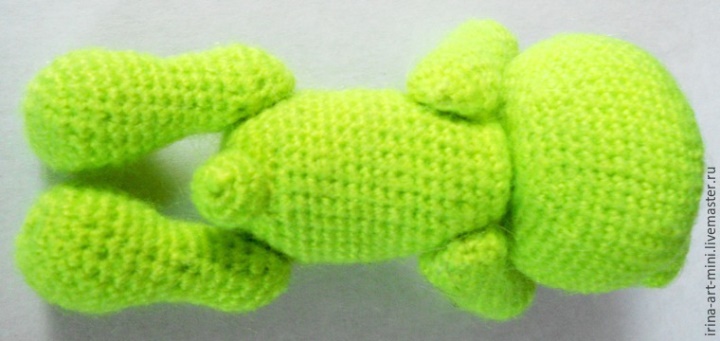
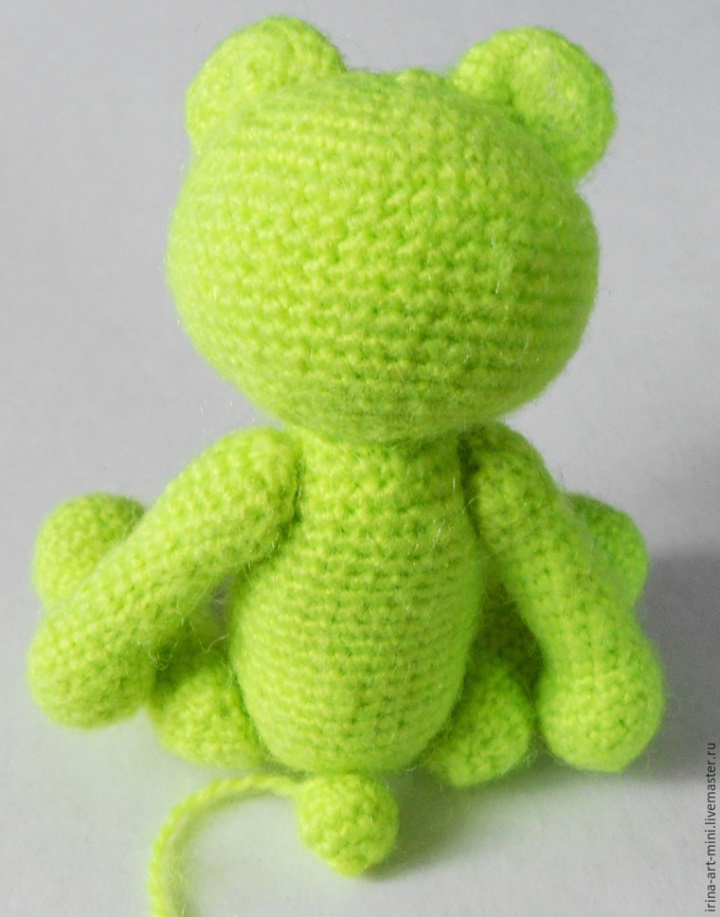
Look at the correctness of the figure: a round tummy in front, slightly arched
back and convex ass :), it means that it is connected, all
correctly. We are good fellows!

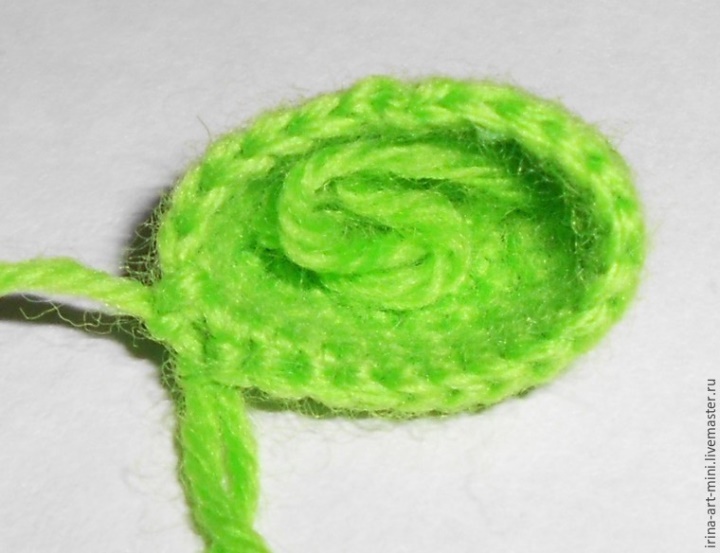
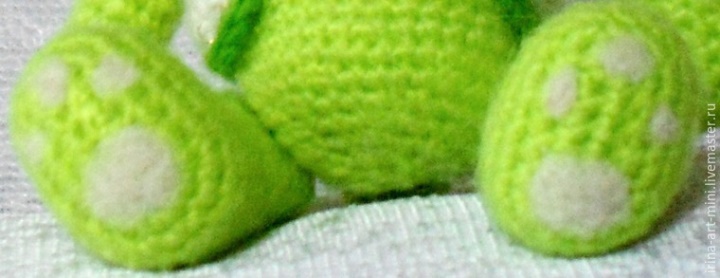
We decorate the legs.
We put circles on the feet (see photo).
Now you can dress our teddy bear.
You can dress him up in any clothes, and I'll tell you how to tie a vest.

Vest.
We knit on thin knitting needles, without edge knitting, all eye loops, knitting by raglan.
Dial 21 loops - a white thread
1 p. - 21 persons.
2 r. - 2 persons, 2 persons, 3 persons, 2 persons, 3 persons, 2 persons, 3 persons, 2 persons, 2 persons.
3 r. - all facial.
4 r. - 3 persons, 2 persons, 5 persons, 2 persons, 5 persons, 2 persons, 5 persons, 2 persons, 3 persons.
5 r. - all facial.
6 r. - 4 persons, 2 persons, 7 persons, 2 persons, 7 persons, 2 persons, 7 persons, 2 persons, 4 persons.
7 r. - all facial.
8 r. - 6 persons, 10 loops to close, 12 persons, 10 loops to close, 5 persons.
9 r. - all facial (on the knitting needles there are 25 faces of loops).
10-16 r. - all facial.
Close all the loops, cut off the thread and tie it with a green thread.
Now my favorite process begins - we put on a bear
Mishutka Laimik
Source : https://vk.com/lyubov_komkova_knitting