Fig.2 You can knit in the same direction as the previous row, you can reverse. The lobules in the ribbon will be both facial and purl, so choose yourself. At the end fix the connection with the first column of the row.
Figure 3. Knit 6VP, CH, 3VP, CH, 6VP, RLS
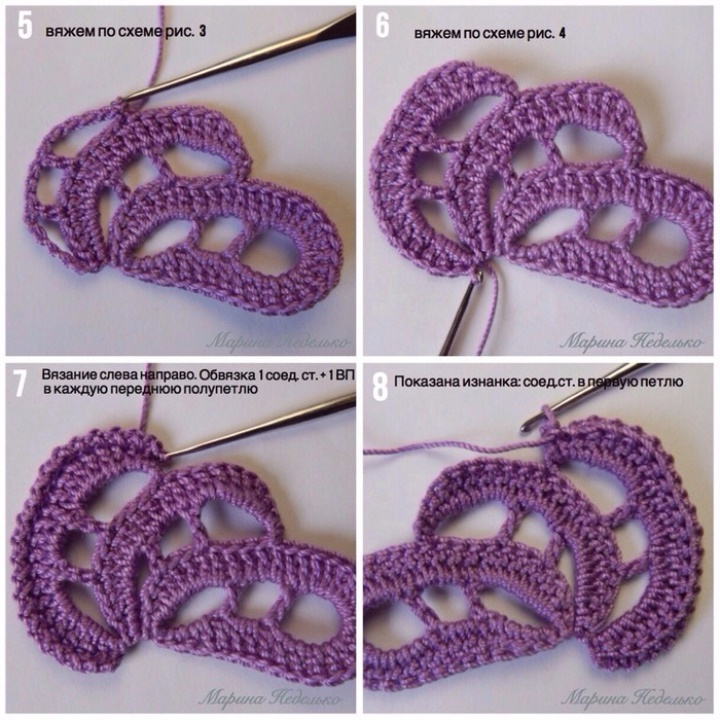
Figure 5 Knit number scheme Figure 3.
Figure 6 Knit number scheme Figure 4.
Figure 7 Knit left piping: in each of the front half loop bars 1 joint ed. + 1VP.
Fig.8 shows the wrong side. In the back half of the first column knit Comm. Art.
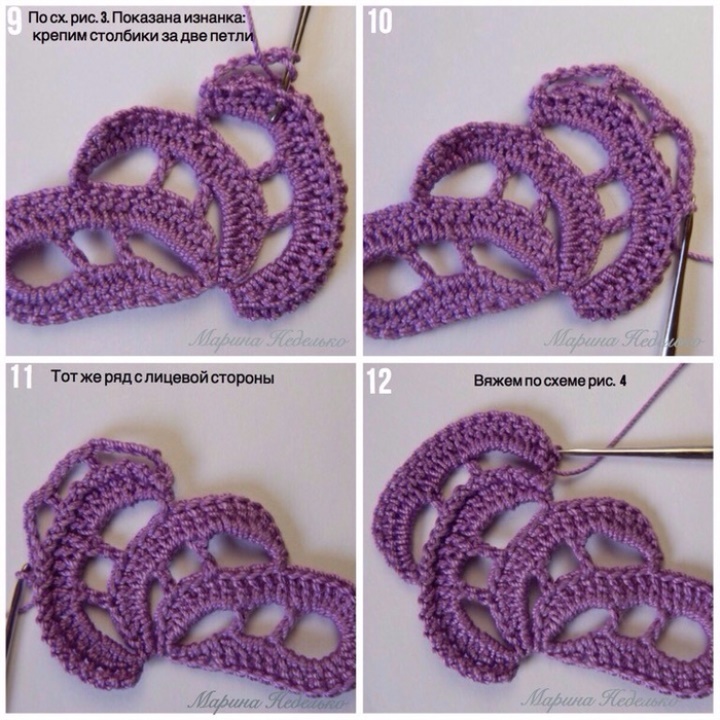
Fig.9 shows the wrong side. We knit according to the scheme of Fig.3. We fix the posts in two loops so that the loop does not stretch out.
Fig.10 Shows the wrong side. The same row, linked according to the scheme of Fig.3.
fig.11 The same row from the front.
fig.12 We knit according to the scheme fig.4.5
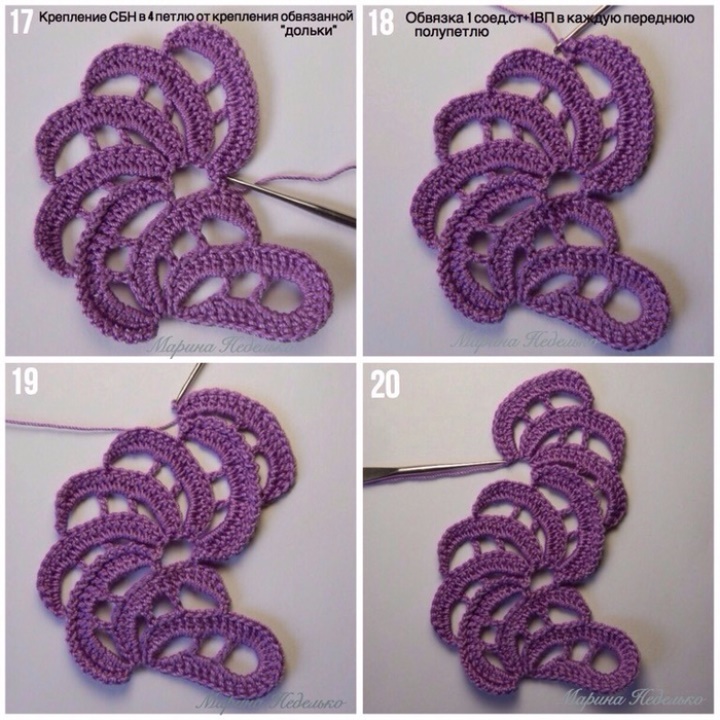
fig.17 Fastening in the lower row of the sc in the fourth loop from fastening the "wedge" with strapping.
Fig.18 Strapping in each front half-loop of columns 1 connected st. + 1VP. In the end we attach the connection. for the back half of the last column.
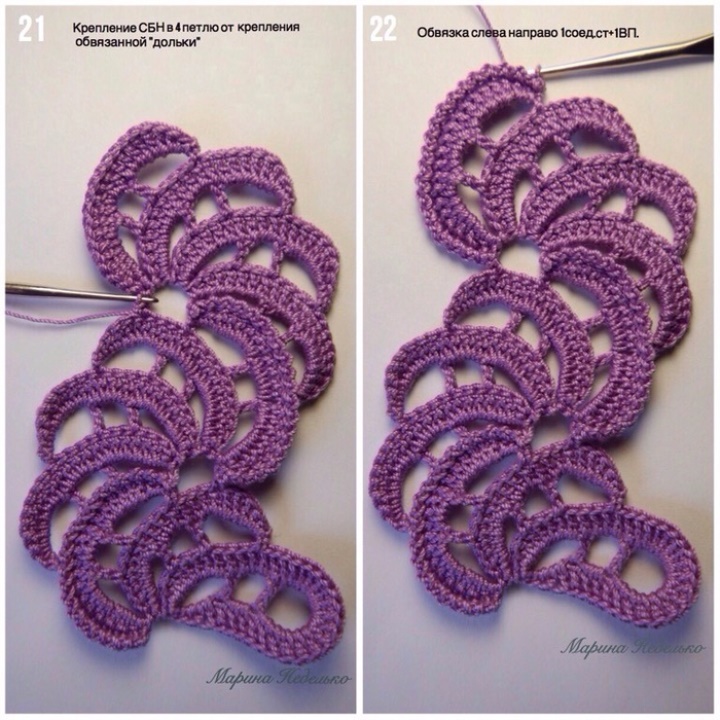
Fig . 21 Fastening to the bottom row of the RLS in the fourth column from the fastening of the “lobule” with strapping.
Fig.22 Binding from left to right. At the end of the mount connection for the back half of the last column.
Next we knit, alternating one tied "slice" with three untied.
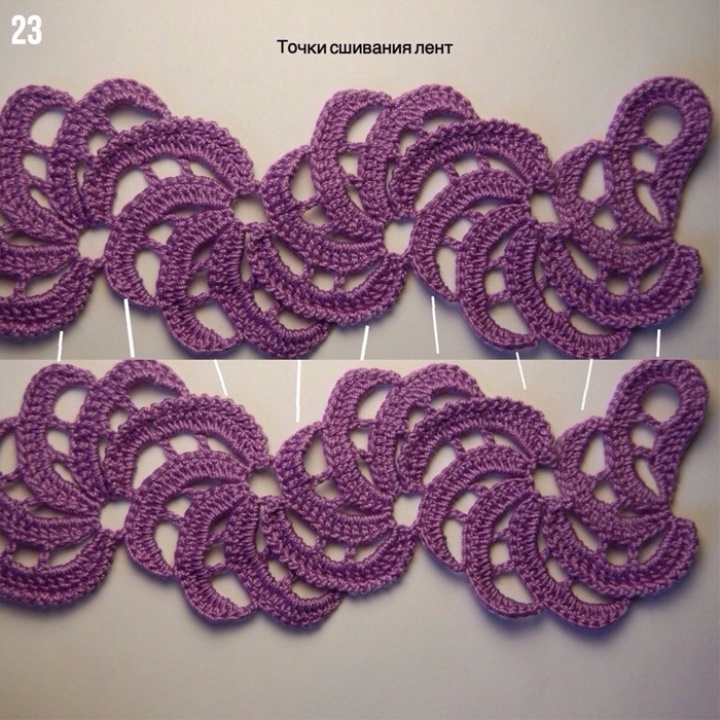
I knitted each ribbon separately, and then stitched them with a needle. Junctions about trying to show in Figure 23
Next photo - greenbacks use of "mandarin".
All good))) Live with love to all and to all)))