You will need...
5 stitches = 1 inch in stitch garters, using Color a.
4 stitches = 1 inch in any of the three stitches.
NOTE: To change the width of the finished hood, add or subtract any odd number and follow the instructions as written.
All these three stitches of the structure use the technique of "knitting in the line below." Here's how to do it ...
Insert the needle in the right center of the stitch below the first stitch on the left knitting needle. Place for insertion of the right needle, indicated below as an arrow.
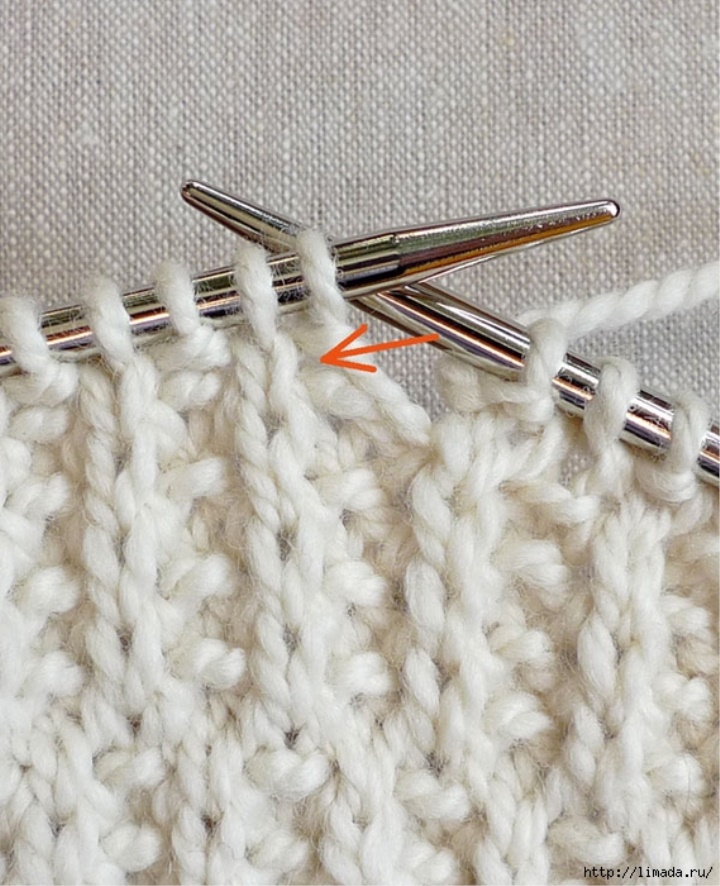
And the needle should go to this place ...
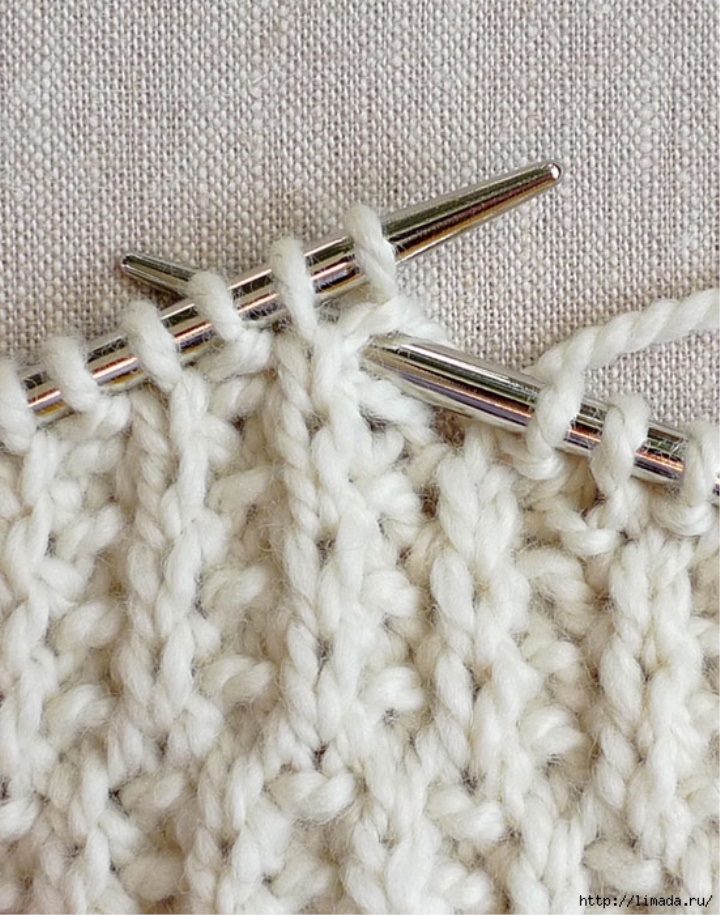
Now knit, normally, attracting working yarn around the right needle in a counterclockwise direction and dragging a stitch. When you allow a stitch to fall on the left knitting needle, it will actually be two stitches: one from the previous line and the line before. It may feel like you are doing something terribly wrong, but if you have the right needle inserted correctly, then everything will be fine!
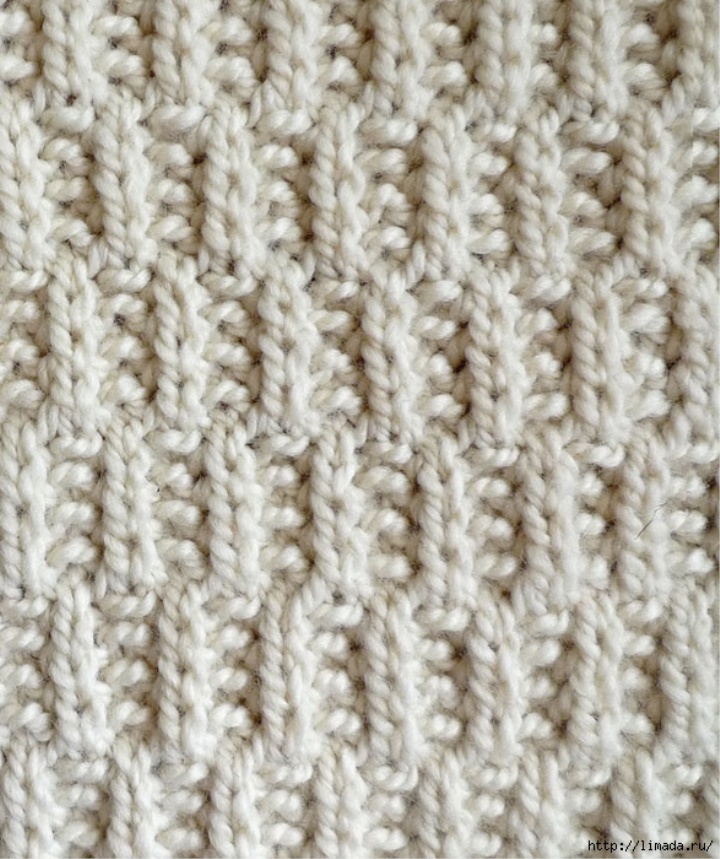
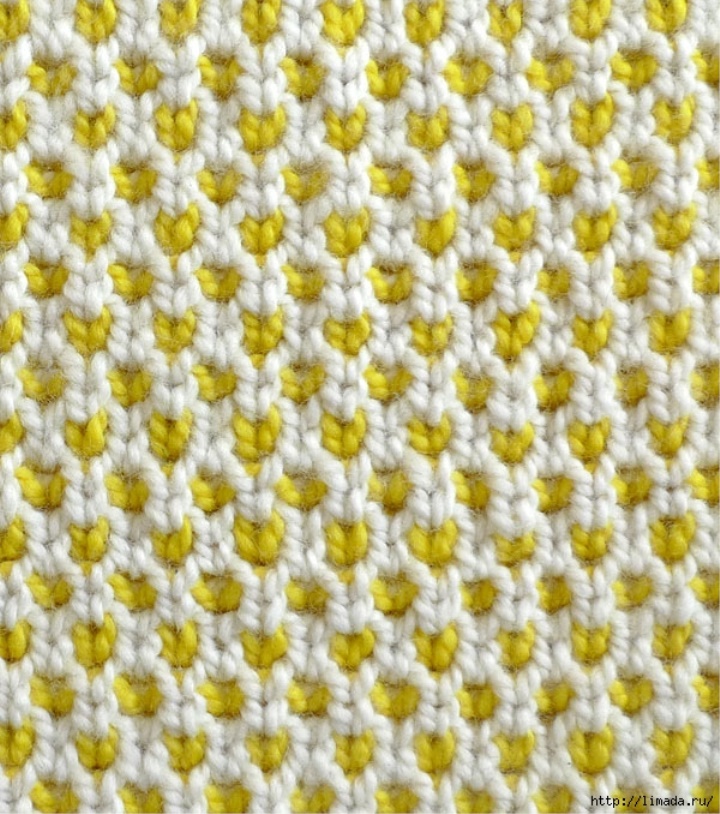
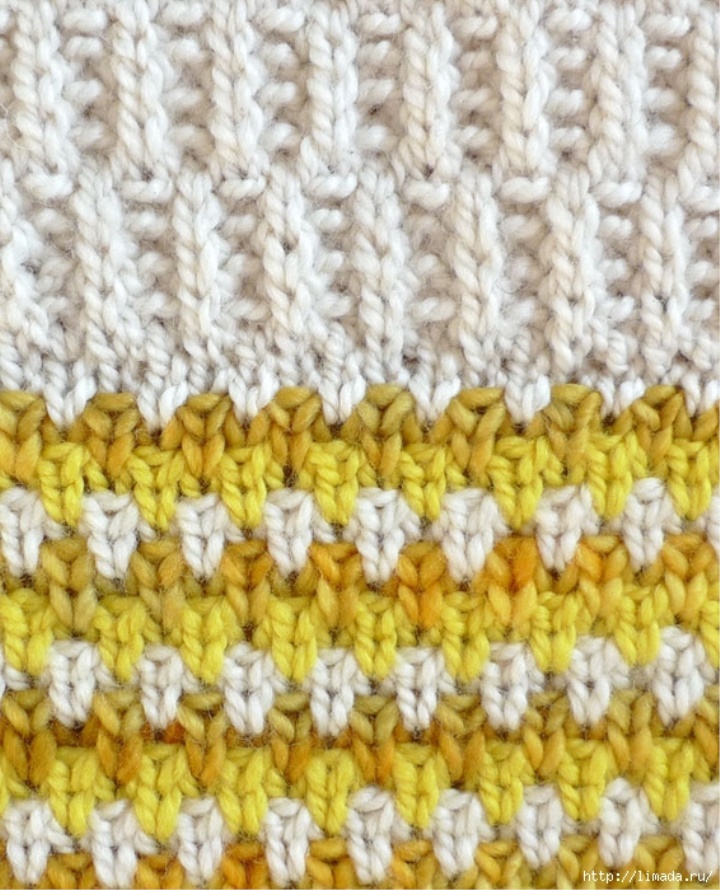
START: UNIT # 1, RAMBLER PATTERN
Here is the right finished Rambler Template:
And that way:
With Color, use a Pre-cast (dial chain) cast on 51 stitches. (Why pre-chain? Since at the end of the project you can graft two ends together, avoiding a seam. However, if you find the Pre-thrown At a little overwhelming, then just use the usual long tail of the chain, and when you're done, you can sew the two ends together. Your hood will be beautiful!)
K-FACE LOOP P-PANEL LOOP
Line 1 (seamy side [ex]): persons2, * ip1, "persons1", "Repeat from * to the last line, persons1.
2 row (right [rs]): persons1 * id1 in the line below, id1, repeat the procedure starting from * last 2 lines, persons1 in the line below persons1. (See Sample Note, above, for "persons1 in the line below" for instructions.)
Lines 3-8: Repeat Lines 1 and 2 are three times as large.
Line 9 (ws): persons1 * int1, "persons1", "Repeat from * to the end of the line.
Line 10 (rs): persons1 * out1, "persons1" in the line below, repeat the procedure, starting with * last 2 lines, out1, ", persons1".
Lines 11-16: Repeat Lines 9 and 10, three times.
Repeat 1-16 Rows until a piece of measure, 20 inches from the cast on the edge, ending at Line 14.
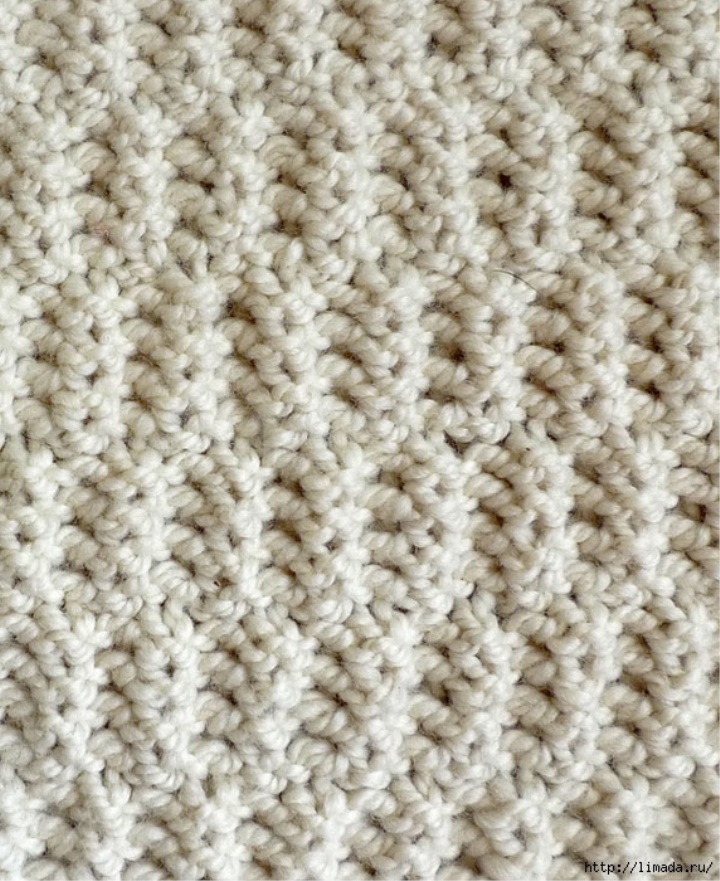
BLOCK NO. 2, ROSE TISSUE CHECKED
Here is the finished fabric on the right is checked:
FACIAL
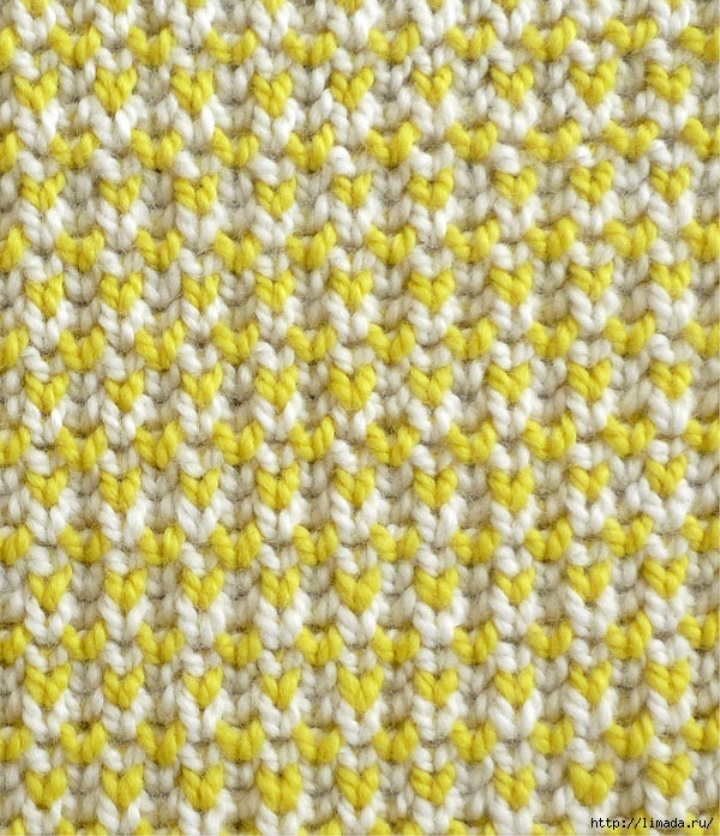
Line 1 (ws): With Color "," persons1 ", * persons1 in the line below persons1", "Repeat from * to the end of the line.
Line 2 (rs): With Color, faces2, * faces1 in the line below faces1, Repeat from * to the last line, faces1.
Line 3 (ws): With Color B, repeat Line 1. Do not include work at the end of the line.
Line 4 (ws): Keeping that side of the work up, slide the stitches to the right end of the needle and with Color, repeat Row 2. Turn the work.
Line 5 (rs): With Color, repeat Line 1. Do not include in work.
Line 6 (rs): Holding the right side of the worker up, slide the stitches to the right end of the needle and with Color B, repeat Row 2. Turn the job.
Repeating Lines 1-6 until a piece of 40 inches from the throw is on the edge, ending with 5 Rows.
BLOCK № 3, ENGLISH ROSE TVID
Here is the finished English Rose Tweed on the right:
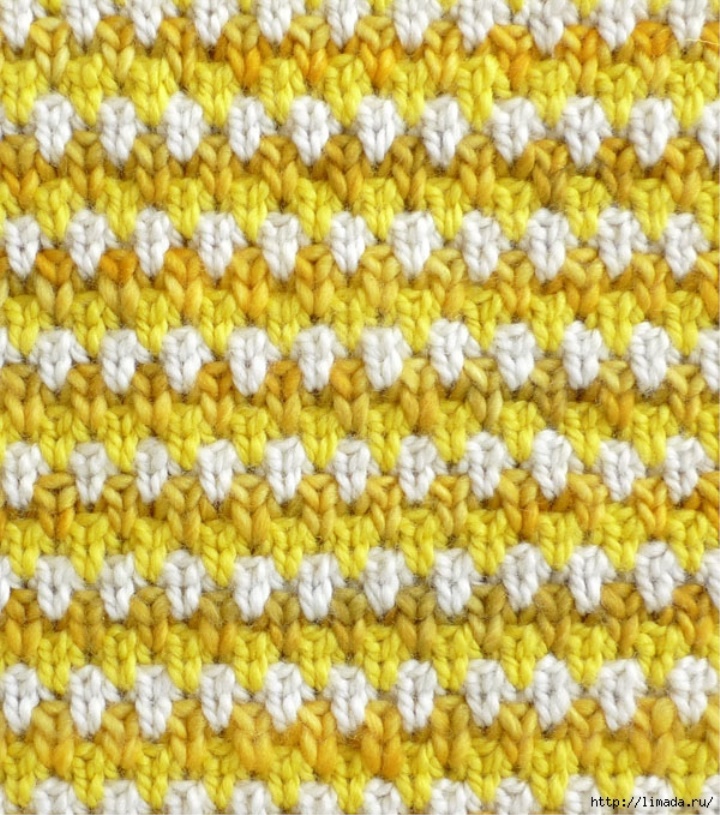
Adjusting the Strings (ws): With Color, "faces1", knit from the front and from the inside , knit to the end of the row. (52 stitches)
Line 1 (rs): From Color B, "faces1", * out1, "persons1" in the line below, repeat the procedure starting from the last stitch, "persons1".
Line 2 (ws): With Color B, knit.
Line 3: With Color C "," persons1 ", * persons1 in the line below, out1, repeat the procedure starting from * the last stitch", "persons1".
Line 4: With color C, knit.
Lines 5 and 6: With Color, repeating Lines 1 and 2.
Lines 7 and 8: Color B, repeat lines 3 and 4.
Lines 9 and 10: With Color C, repeating Lines 1 and 2.
Lines 11 and 12: Color, repeating Lines 3 and 4.
Repeat 1-12 Rows, until a piece measures 60 inches from being thrown on the edge, ...
IF YOU USED THE TEMPORARY CAST
... ending at line 4.
Next Line (rs): With Color, "faces1", * out1, "faces1" in the row below, repeat the procedure starting with the last 3 stitches, faces2tog, "faces1". (51 stitches)
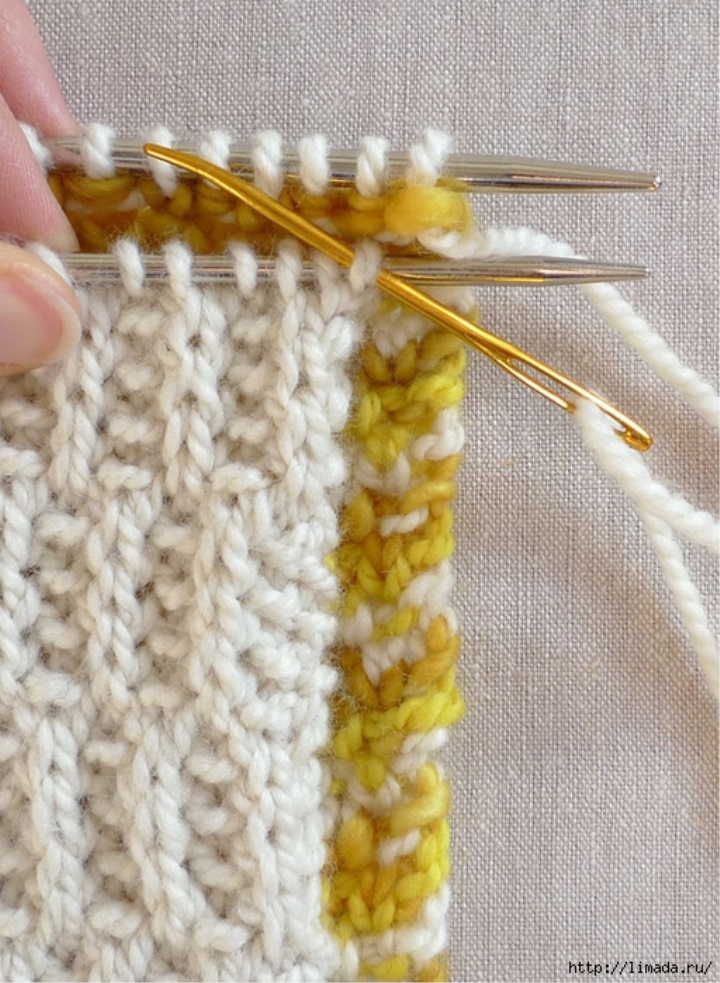
Rip off all the threads, leaving behind a 32-inch colored tail.
Put the Porvisional thrown On the seams on the second (preferably smaller) needle.
Thread, tail color on tapestry needles. From the wrong side together "(be careful not to twist the hood), hold two round needles parallel to each other and use the Kitchener Stitch to plant the hood of the two ends together.
IF YOU USED A LONG TAIL THROUGHED ON
... ending in 5 Lines.
Next Line (ws): With Color, snapped in purl.
Rip off all the threads, leaving behind a 32-inch colored tail.
Thread the tail on the tapestry needles and on the wrong side together and, making sure that the hood is not interlaced, sew the two ends. Sew under one stitch on the seam, and then across under the binding stitch, continuing back and forth until you finish!
ANYWAY...
Weave in the remaining ends and gently block your hood, if desired. Then wrap yourself!
a source