Any schematic description of the toy is universal. The language on which explanations are made to the pattern of knitting does not matter much.
But sometimes it's difficult to understand from which side to start knitting and assembling the parts. At me so sometimes it is simple
sports interest wakes up, as when solving a rebus.
I want to offer one such decision to your attention.
The knitting pattern of this doll was met in the scanner of a Thai magazine.
Let's try to tie it together, using a verbal description and a step-by-step photo.
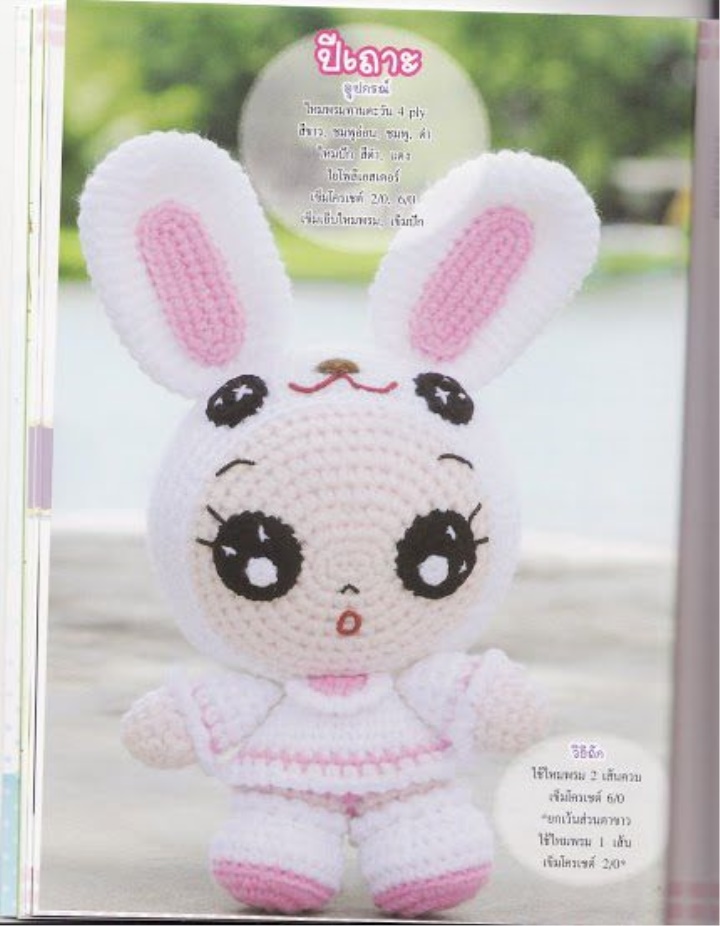
To knit bunny will need
yarn
100% acrylic or cotton, or n / w 100 g 438
m.
hook
1.75
filler
needles
and thin, sturdy sewing thread for sewing parts
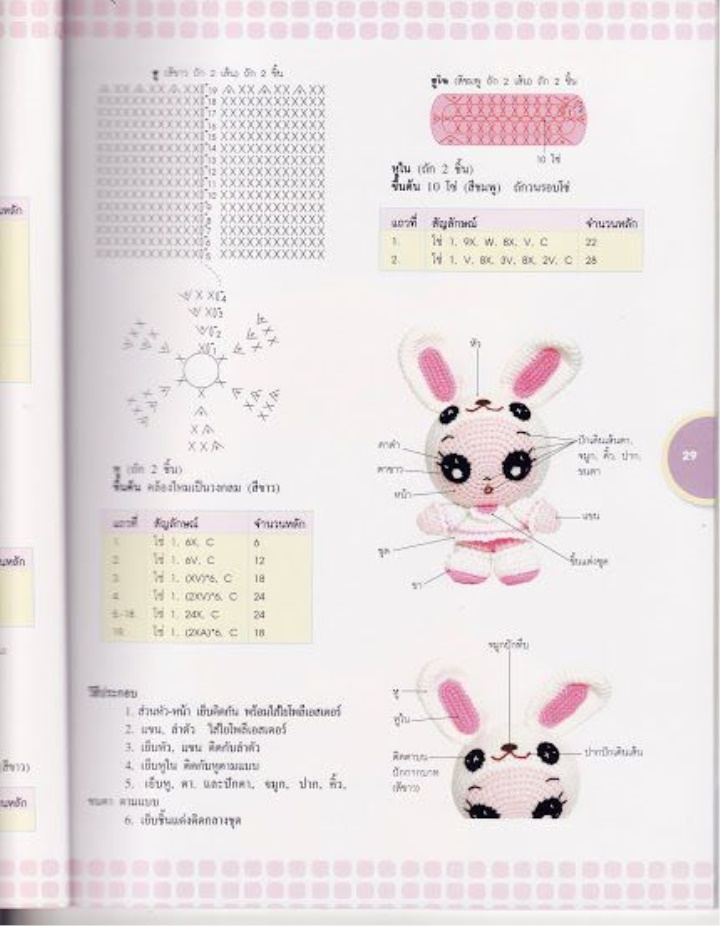
Conventions
Bn - air loop
x - column without crochet (Sb)
V - in one loop to tie 2Sbn
A-reduction (2 Sb tie together)
How to read the description.
For example, "1p.6x = 6Sbn" in
the first row of tying 6 posts without a crochet.
As a result, in the bundled row there should be 6 posts without a crochet (or six loops on top of the pigtail).
Or "2x, v ..." knitting
in this order: 2 Sb, addition (2Sbn in the next loop), addition, etc.
All parts are knitted in a spiral without joining the rows.
The first row is knitted in an amigurumi ring.
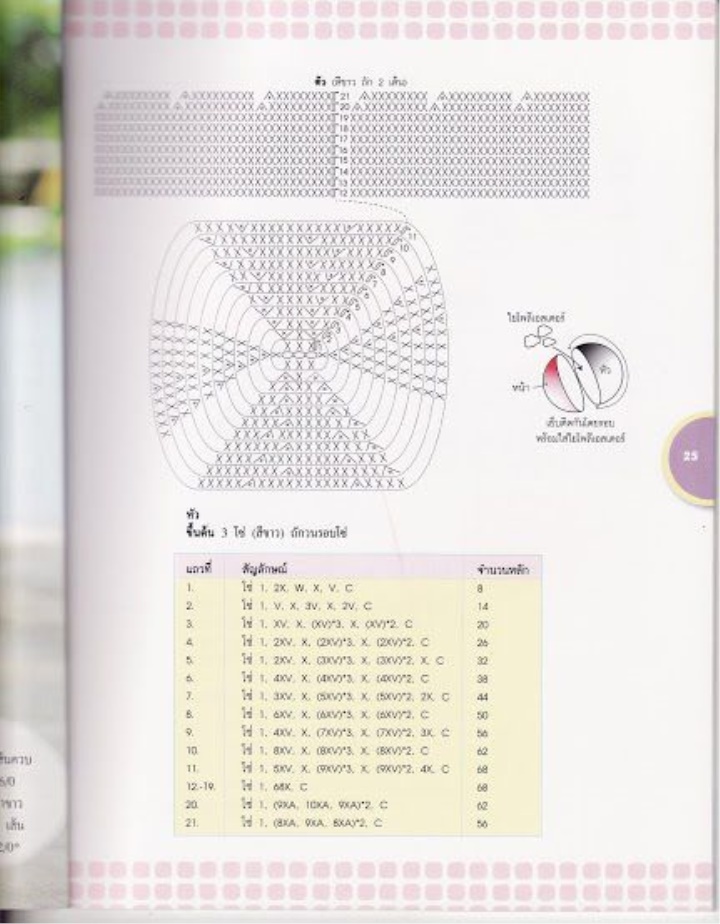
Neck
White thread
The chain of five air loops, starting with the third loop from the hook, 2x, 3x in one loop, turn the work, continue
from the opposite side of the chain x,
2x in the last loop of the chain = 8
2p.V, x, 3V, x, 2V = 14
3 times x, v, x, (x, v) 3 times, x,, (x, v) 2 times = 20
4p.2x, V, x, (2x, V) 3 times, x, (2x, V) 2 times = 26
5p.2x, V, x, (3x, V) 3 times, x, (3x, V) 2 times, x = 32
6p.4x, V, x, (4x, V) 3 times, x, (4x, V) 2 times = 38
7p.3x, V, x, (Sx, V) 3 times, x, (Sx, V) 2 times, 2x = 44
8p.6x, V, x, (6x, V) 3 times, x, (6x, V) 2 times = 50
9p.4x, V, x, (7x, V) 3 times, x, (7x, V) 2 times, 3x = 56
10p.8x, V, x, (8x, V) 3 times, x, (8x, V) 2 times = 62
11p. 5x, V, x, (9x, V) 3 times, x, (9x, V) 2 times, 4x = 68
1219r.
68x
20p (9x, A, 10x, A, 9x, A) 2 times = 62
21r. (8x, A, 9x, A, 8x, A) 2 times = 56
Secure the thread and cut it off.
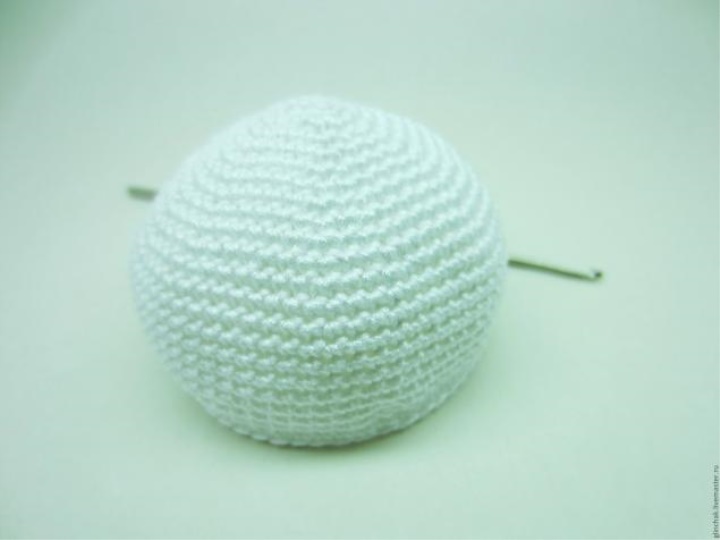
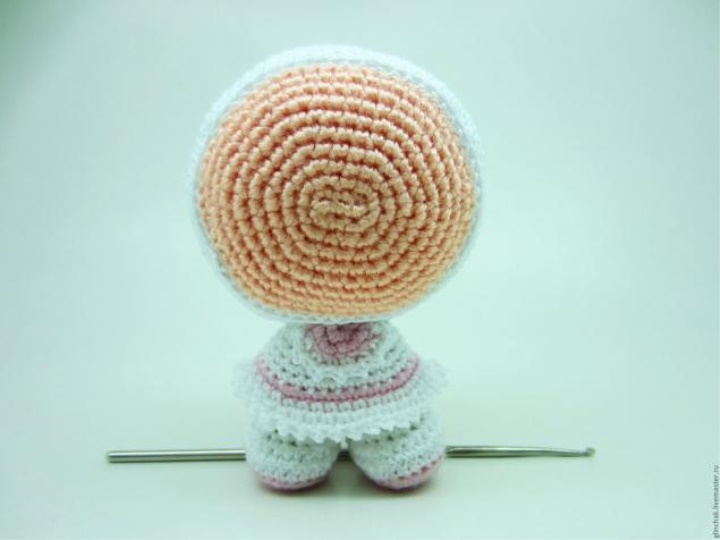
Here such detail should turn out.
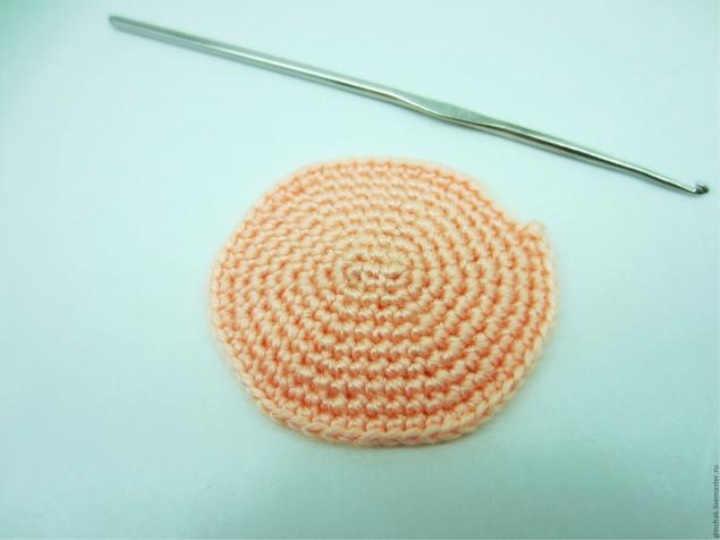
Face
Flesh-colored thread
The chain of five air loops, starting with the third loop from the hook, 2x, 3x in one loop, turn the work, continue
from the opposite side of the chain x,
2x in the last loop of the chain = 8
2p.V, x, 3V, x, 2V = 14
3 times x, v, x, (x, v) 3 times, x, (x, v) 2 times = 20
4p.2x, V, x, (2x, V) 3 times, x, (2x, V) 2 times = 26
5p.2x, V, x, (3x, V) 3 times, x, (3x, V) 2 times, x = 32
6p.4x, V, x, (4x, V) 3 times, x, (4x, V) 2 times = 38
7p.3x, V, x, (Sx, V) 3 times, x, (Sx, V) 2 times, 2x = 44
8p.6x, V, x, (6x, V) 3 times, x, (6x, V) 2 times = 50
9p.4x, V, x, (7x, V) 3 times, x, (7x, V) 2 times, 3x = 56
Secure the thread and cut it off.
Sew both parts together using thin sewing threads of white or flesh color.
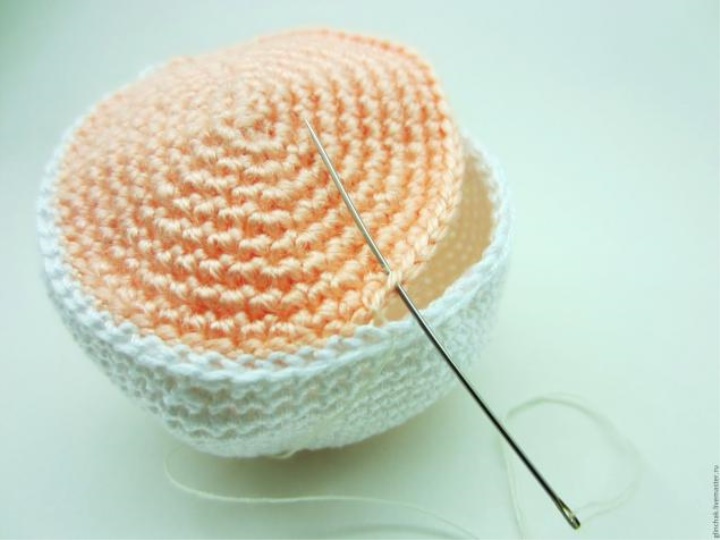
The final number of loops in both details: both the face and the occiput are the same.
In order for one part to be clearly aligned with the other, it is necessary to connect the stitches of all the eyelets of both parts, one to
one.
In this case, the needle is stuck into the center of the face from the top behind the front wall of the hinge, and in the nape of the head - from the bottom
bottom for
The front wall is in the center of the loop.
When the hole becomes very small, the detail of the head must be filled.
It is desirable to fill up to a beautiful rounded shape, strongly, until the stone state is not worth typing.
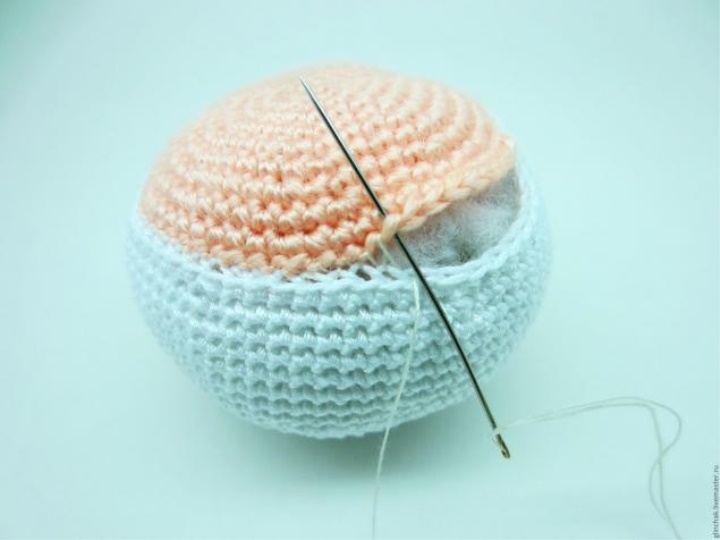
After the head is completely filled, the hole is sewn.
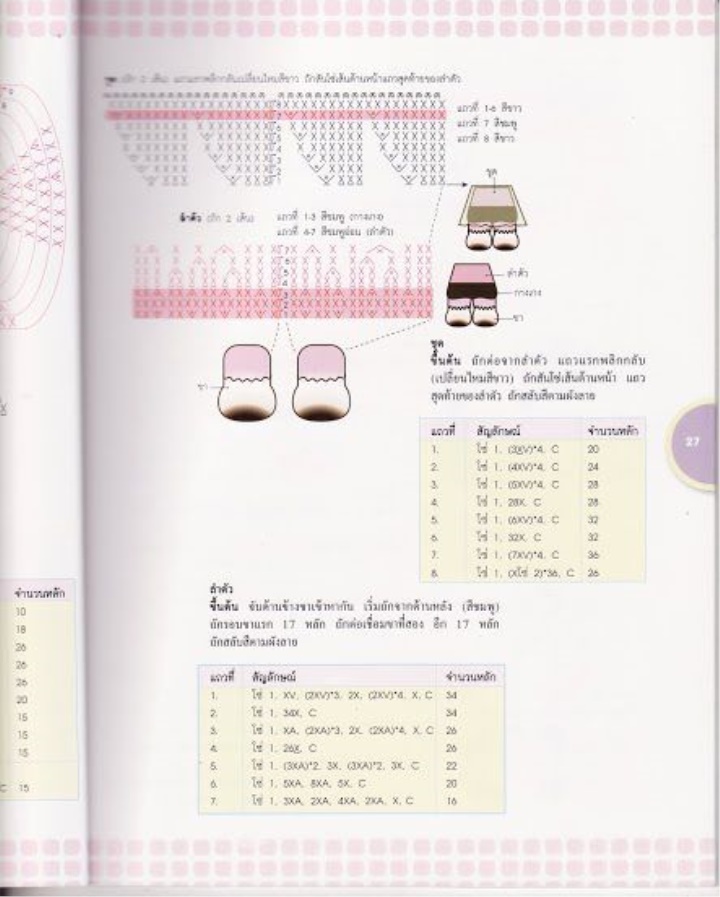
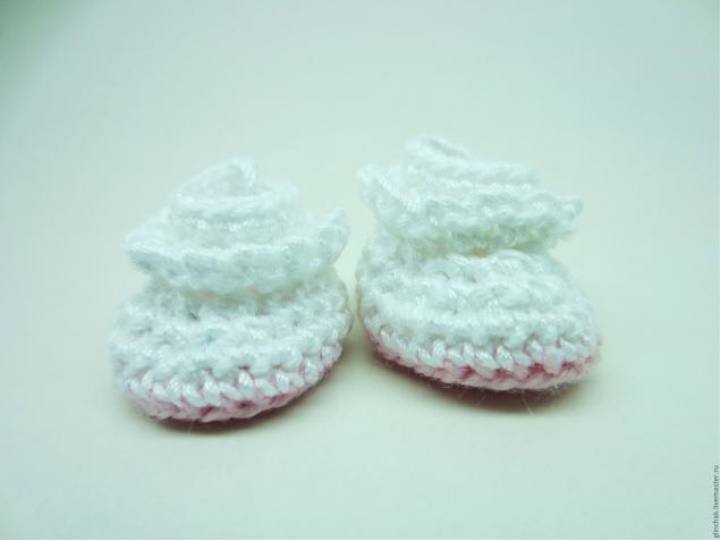
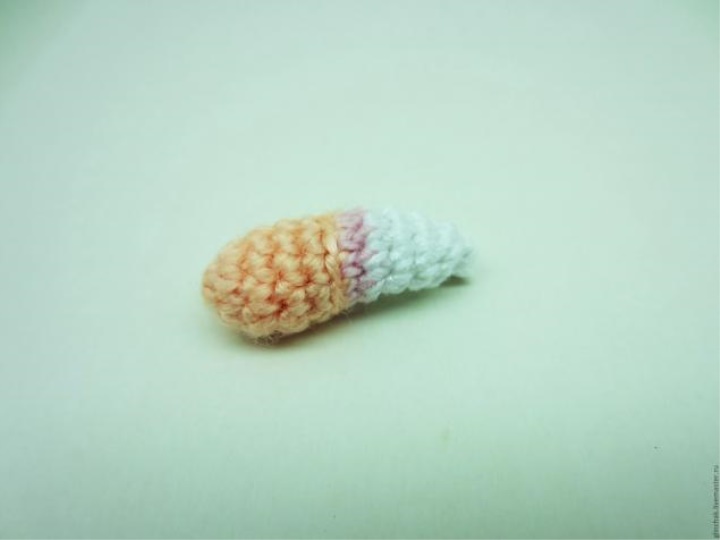
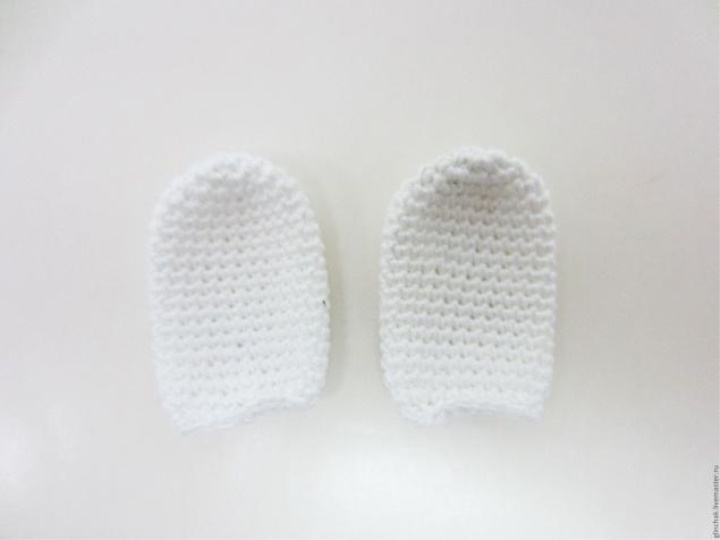
Leg.
A thread of pink color.
The chain of five air loops, starting with the third loop from the hook, 2x, 4x in one loop, turn the work, continue
from the opposite side of the chain x,
3x in the last loop of the chain = 10
2p.V, x, 4V, x, 3V = 18
(X, v) 4pasa, x, (x, v) 3 times = 26
Change the thread color to white
4p.26x behind the back of the hinge
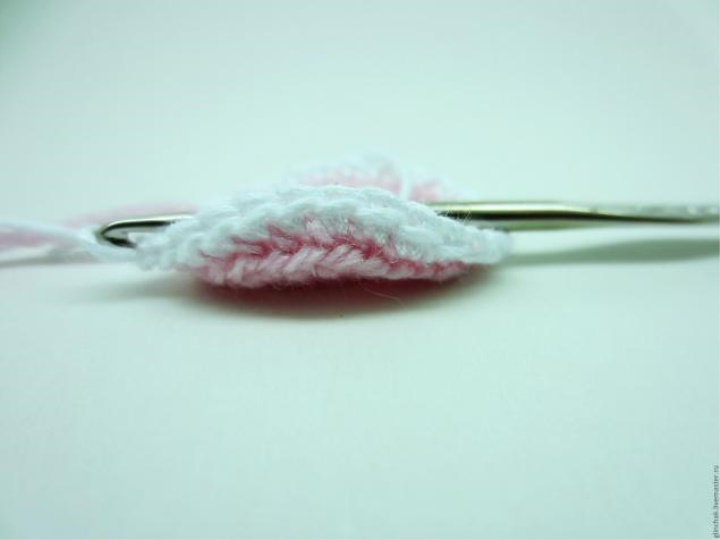
When the first row is flossed with a new color, the ends of the threads at the joint of the flowers must be tied to a strong double knot, this
It will not allow the parts to creep away when filling and smooth out the color transition.
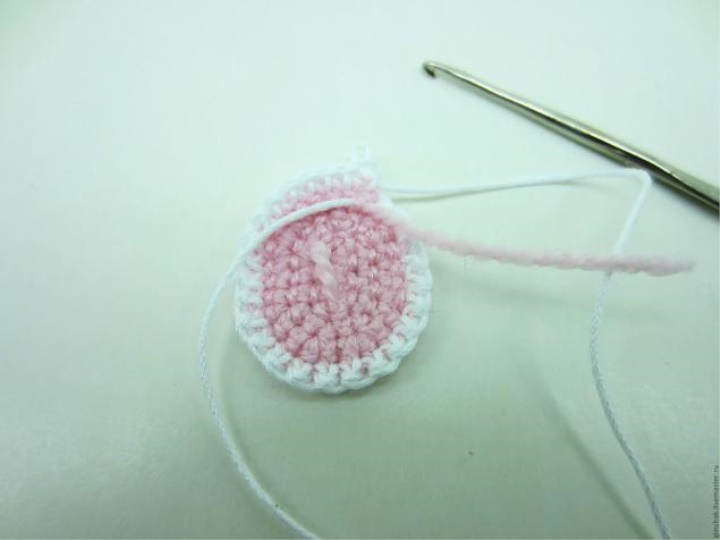
5p.26x
6 times (3x, A) 2 times, (x, A) 3 times, 3x, A, 2x = 20
7p.A, 5x, 4A, 5x = 15
8p.15x behind the back of the hinge
910r.
15x
Cut off the thread.
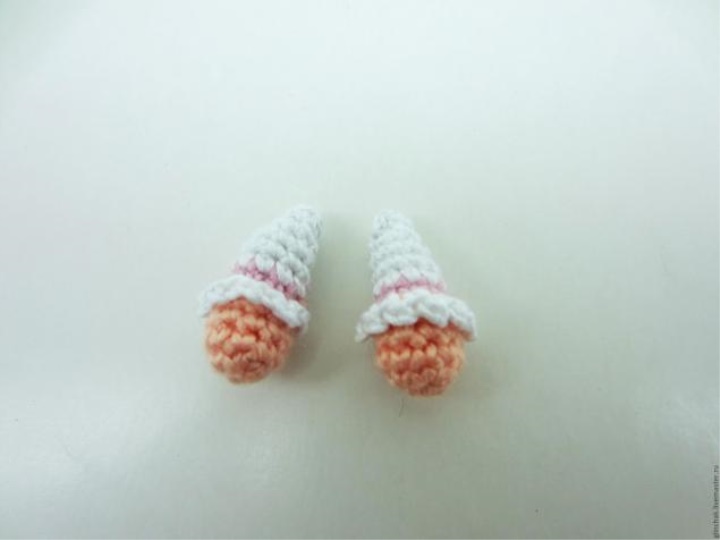
To the 8th
row behind the front wall of the loop to tie the rim - x, 2Bp into
each loop in a circle.
The second leg is tied in the same way.
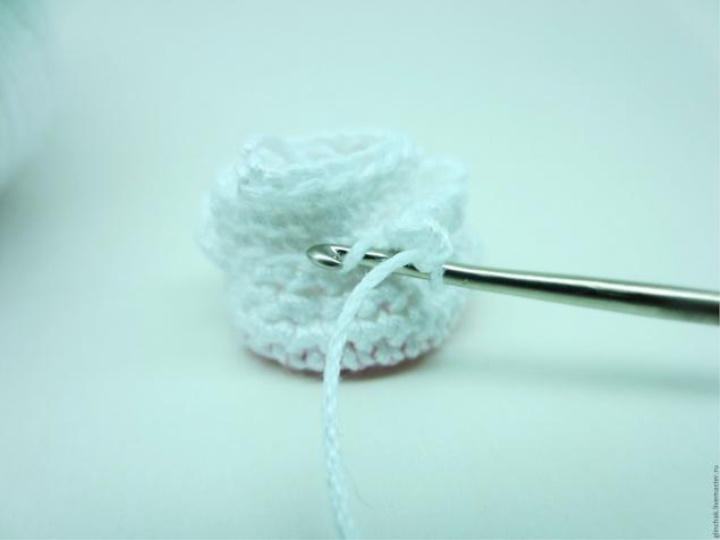
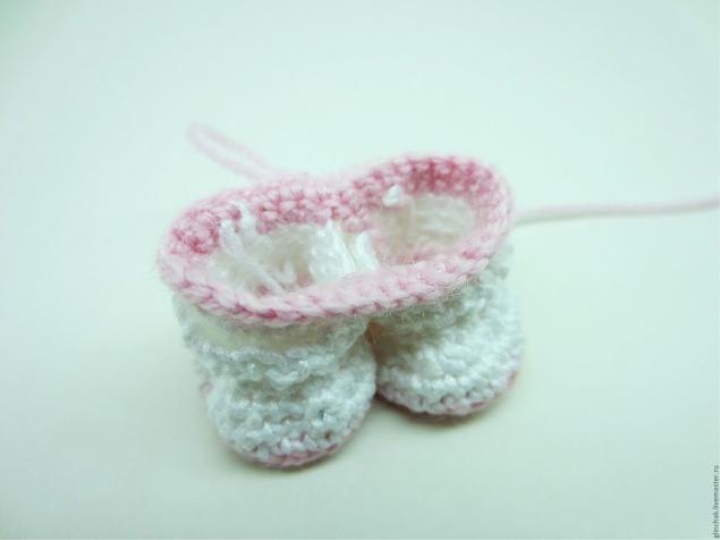
Torso.
We begin knitting with a thread of pink color.
We combine the two legs with the first row, connected in a circle.
Here the important point is that the finite number of loops of each leg is equal to 15.
The first row of the trunk we knit on 13 loops of each leg, i.e. Two loops on each leg are dropped out of knitting.
These two loops on each side should appear at the center of the joint of the legs.
They can be sewn immediately and knit from the first loop from these sewn loops.
1p. x, V, (2x, V) 3 times, 2 x - one leg (2x, V) 4 times, x by
other leg = 34
2p.34x
3p. x, A, (2x, A) 3 times, 2x, (2x, A) 4 times, x = 26
Change the thread color to white
4p.26x behind the back of the hinge
5p. (3x, A) 2 times, 3x, (3x, A) 2 times, 3x = 22
6p.5x, A, 8x, A, 5x = 20
7p. 3x, A, 2x, A, 4x, A, 2x, A, x = 16
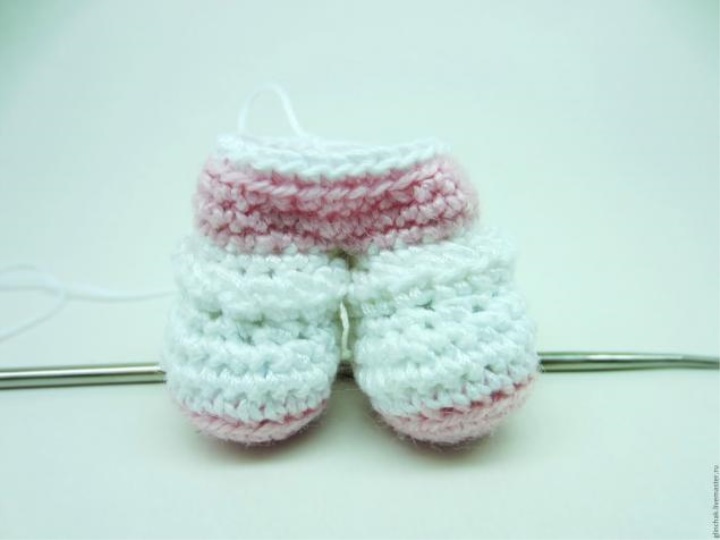
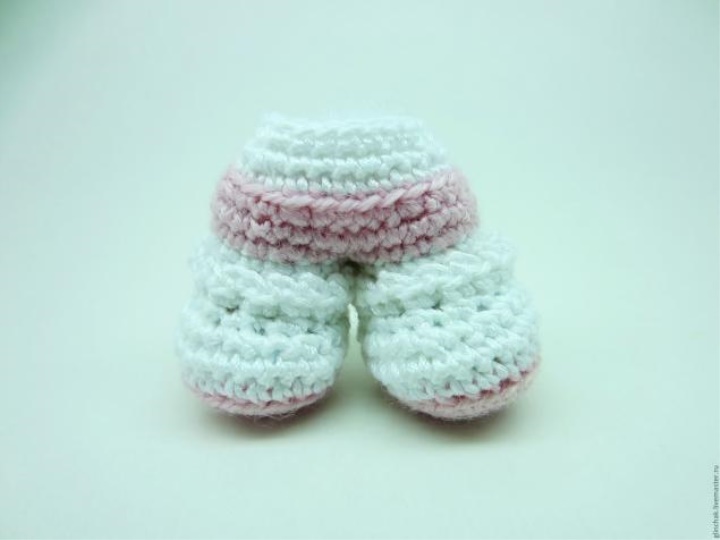
Finished detail of the trunk.
Dress.
We begin knitting from the neck of the trunk, towards the legs. The first row we knit by the front wall of the loop
1p. (3x, V) 4 times = 20
2p. (4x, V) 4 times = 24
3p (5x, V) 4 times = 28
4р.28х
5p (6x, V) 4 times = 32
6p.32x
Change the color of the thread to pink
7p (7x, V) 4 times = 36
Change the thread color to white
8р.х, 2Вп - in each loop in a circle (a border)
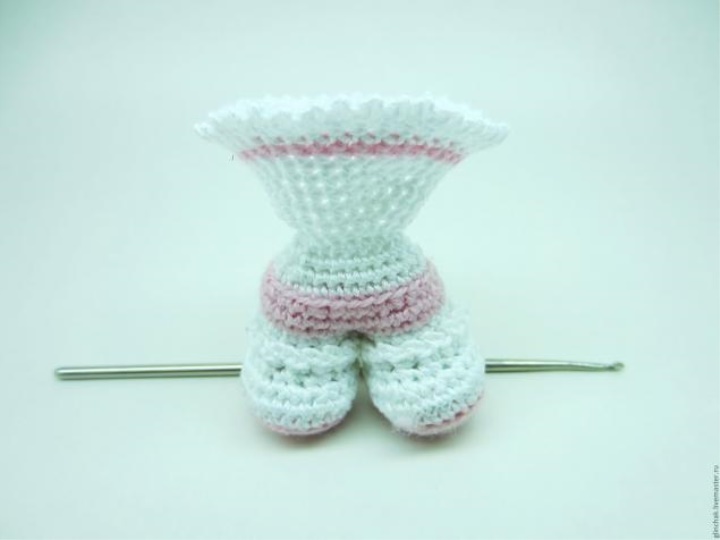
We turn the dress to the right place.
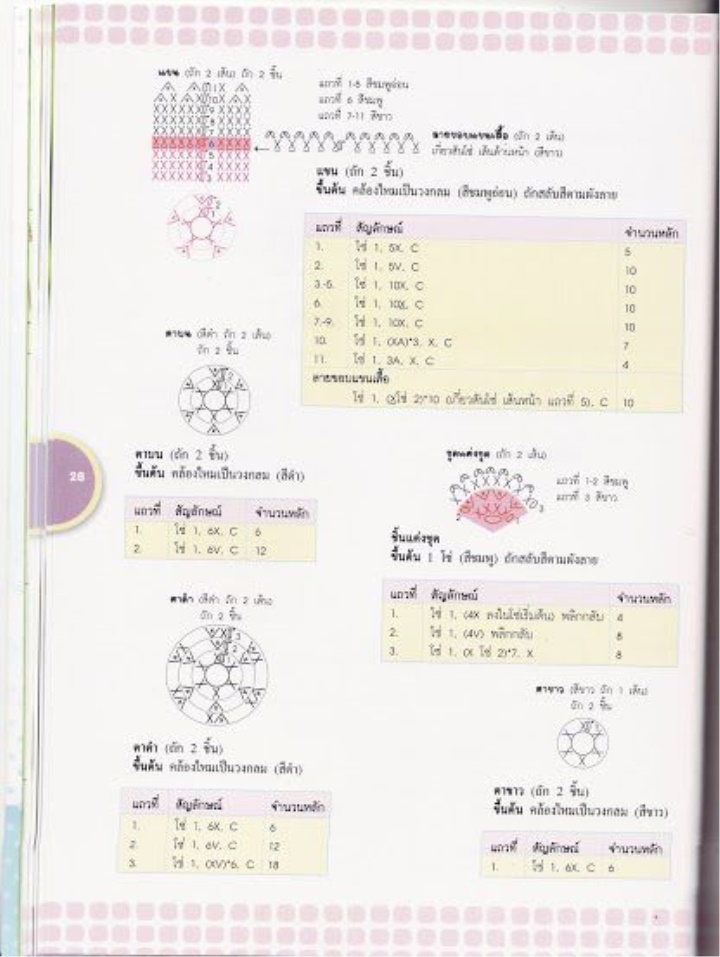
A pen
1p. 5x in the ring amigurumi
2p. 5V = 10
35r.
10x
Change the color of the thread to pink
6p. 10x behind the back of the hinge
Change the thread color to white
79r.
10x
10p (x, A) 3 times, x = 7
11p.3A, x = 4
To the sixth row we bind the rim - x, 2Bn in
each loop in a circle.
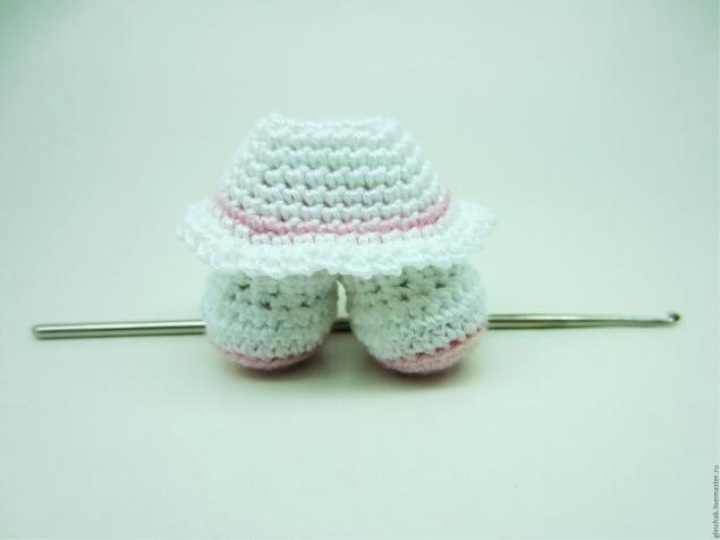
Manishka
The part is joined by turning rows.
A thread of pink color
1p. 3Bp, in the 3rd loop from the hook - 4x, turn.
2p.1Vp lifting, 4V = 8, turn.
Change the thread color to white.
3p.1Bp lifting, x, 2Bp - in each loop to the end of the row.
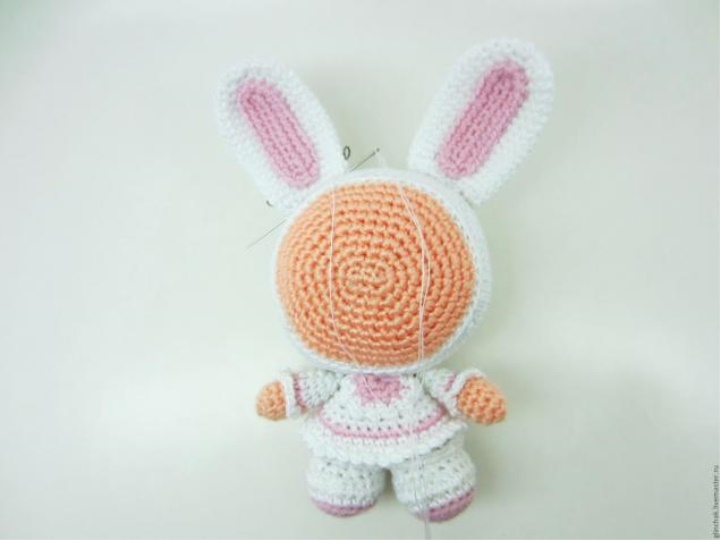
We sew the shirt-front to the trunk. My head is already sewn on this photo.
Eye of a bunny.
A thread of white color.
1p.6x - into the ring amigurumi.
2p.6V = 12
3p. (X, v) 6 times = 18
4p. (2x, V) 6 times = 24
518p.
24x
19r. (2x, A) 6 times = 18
The inner part of the eyelet.
A thread of pink color
1p. A chain of 12in, beginning with the 3rd loop from the hook - 9x, 3x in the last loop of the chain, the work is rotated, continue on
to the opposite side - 8x, V = 22
2p.V, 8x, 3V, 8x, 2V = 28
Cut off the thread. Carefully sew the middle to the inside of the eyelet.

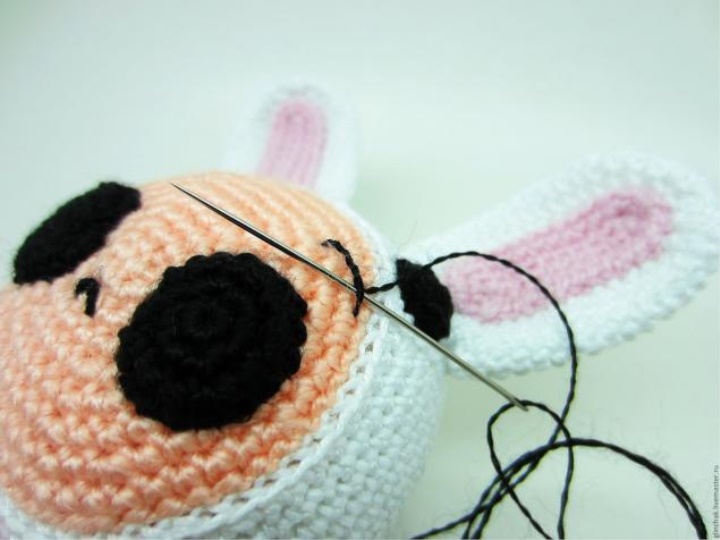
Sew ears to the head, handles to the trunk, pre-chipped parts with pins.
The girl's eye (2 details).
A thread of black color.
1p.6x - into the ring amigurumi.
2p.6V = 12
3p. (X, v) 6 times = 18
Eye of the bunny (2 details).
A thread of black color.
1p.5x - into the ring amigurumi.
2p.5V = 10
Eyes of a doll and a bunny are sewn with thin sewing threads of black color.
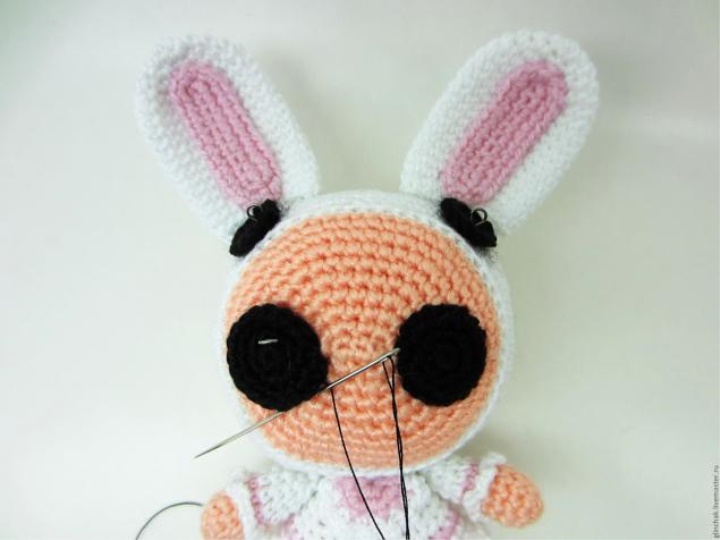
Embroider a nose and eyebrows of a doll with thin woolen threads for embroidery or a floss.
Both the nose and eyebrows are performed according to the same principle. First, the main stitch is executed.
Hold your finger, give it the desired snub nose shape and a more smooth bend of the eyebrows.
Then this stitch is wrapped around the needle with a thread. When winding a stitch, you need to lightly grasp the canvas.
The nose is wrapped more tightly, the eyebrows are smaller.
Rotik embroider similarly, just the main stitch immediately form a circle. To make the mouth look plump,
we pass through small stitches in a circle several times, slightly grasping the main canvas.
Embroider a bunny's nose with beige threads.
Rotik seam the "back needle" and in the opposite direction, wrap the thread of these stitches to make the lines smooth.
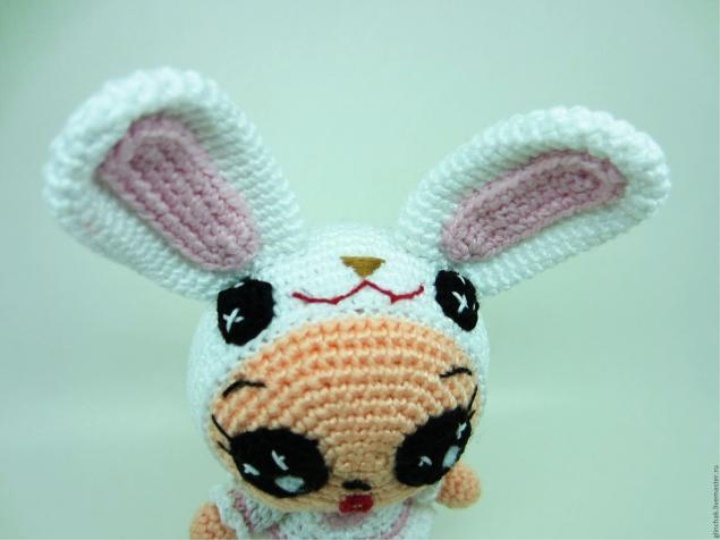
We embroider small glare on the eyes of the doll and bunny.
Blink can be connected with a white thread 6x
in the ring amigurumi.
Pull off, thread secure and cut and sew.
Alternatively, it can be cut out of felt or piled out of white wool, if you are friends with dry felting.
In my case it is cut out of felt and a loose circle.
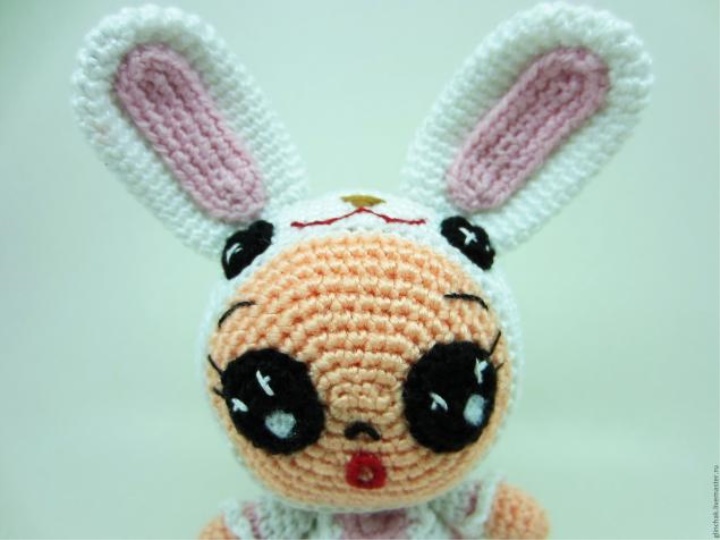
in a bunny suit is ready.