1. Threads:
Color of skin - color No. 2103 "IRIS" Vita Cotton (20 grams -
Black color - color No. 2102 "IRIS" Vita Cotton (20 grams
2. Threads for hair - string floss № 865 (Chocolate)
3. Threads for eyes - sewing thread: black,
brown and white colors.
4. Hook: 1.5 mm (or one that fits the yarn that you use)
5. Hook: 1.05 mm
5. Filler
6. Tapeworm needle
7. Copper wire thickness - 1.0 mm - 1.2 meters
Hands (make 2 pieces)
Starting with a black thread (2 strands together)
3 in
Rnd 1: 2 sb in 2 loop from the hook, 3 sb in the next loop, turn the work to continue knitting
on the opposite side of Bn (1 sb in 1 bp) - 1 time [6]
Rnd 2: (increase, 2 sc) repeat 2 times [8]
Rnd 3: increase, 7 sbn [9]
Rnd 4: Slept by the Circle [9]
Rnd 5: 6 sb, decrease, sbn [8]
Rnd 6: sbn, decrease, 5 sbn [7]
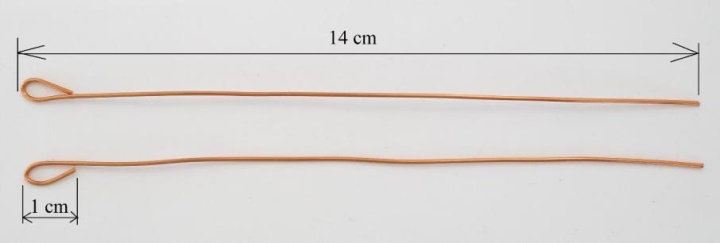
Cut 2 pieces of wire 15 cm long. Fold the end of the wire (1 cm) as shown.
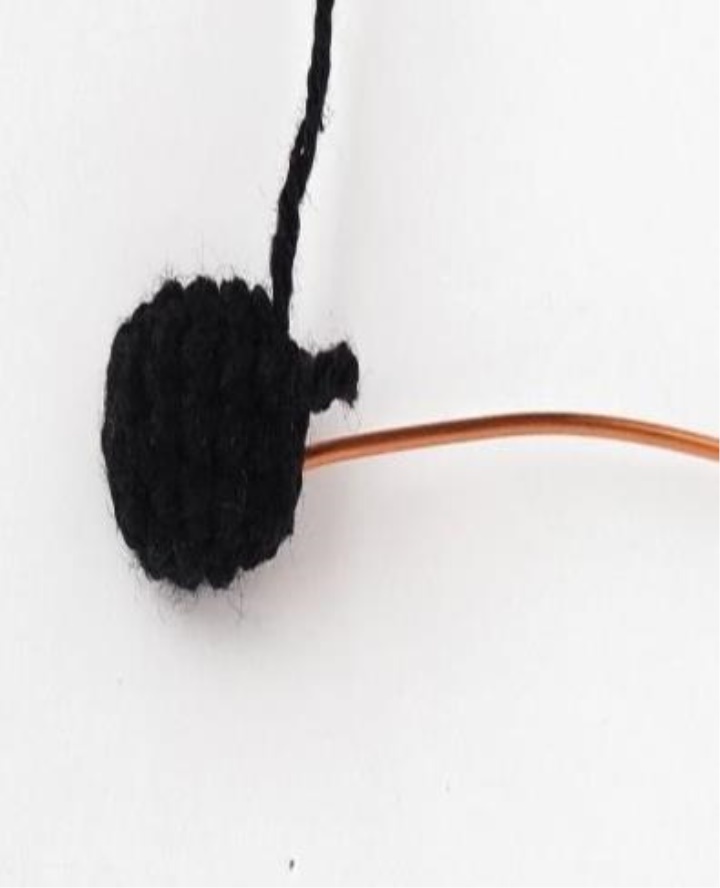
Insert the wire into your hand.
Rnd 7: decrease, 5 sbn [6]
Rnds 8-18: Sable in a circle [6]
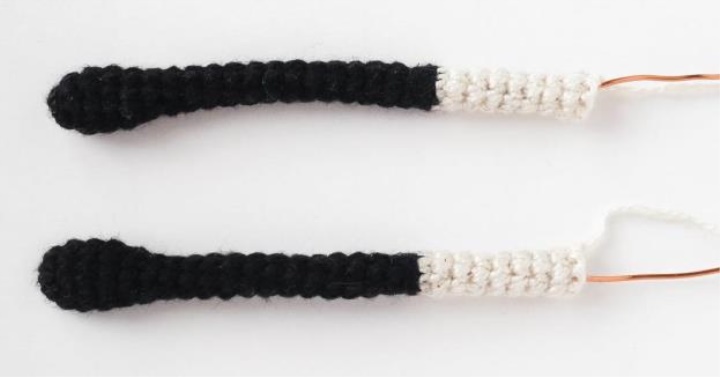
Rnd 19: 3 sb, change the thread to the color of the skin and continue to knit this thread (two strands together), 3 sbn
[3 black + 3 beige]
Rnds 20 -27: in a circle in a circle (6)
Rnd 28: 2 sb, increase, 2 sb, 2 sbn [8]
Close knitting.
Legs
Left leg:
Starting with a black thread (2 strands together)
3 in
Rnd 1: 2 sb in 2 loop from the hook, 3 sb in the next loop, turn the work to continue knitting
on the opposite side of Bn (1 sb in 1 bp) - 1 time [6]
Rnd 2: (increase, 2 sc) repeat 2 times [8]
Rnd 3: (increase, 3 scales) repeat 2 times [10]
Rnd 4: Sable in a circle [10]
Rnd 5: decrease, 8 sbn [9]
Rnd 6: 6 sbn [6]
Rnd 7: 1 turn, turn, 4 roll [4]
Rnd 8: 1 in, turn, 4 sb, make sb in the 7th row and go to the 5th row-3 sbn [8]
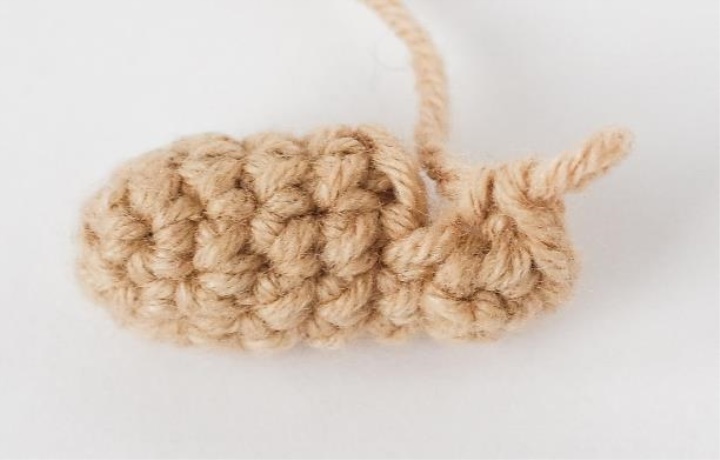
Rnd 9: 2 sb, we make sbn in vp 8 rows, (decrease) repeat 2 times, 4 sbn [9]
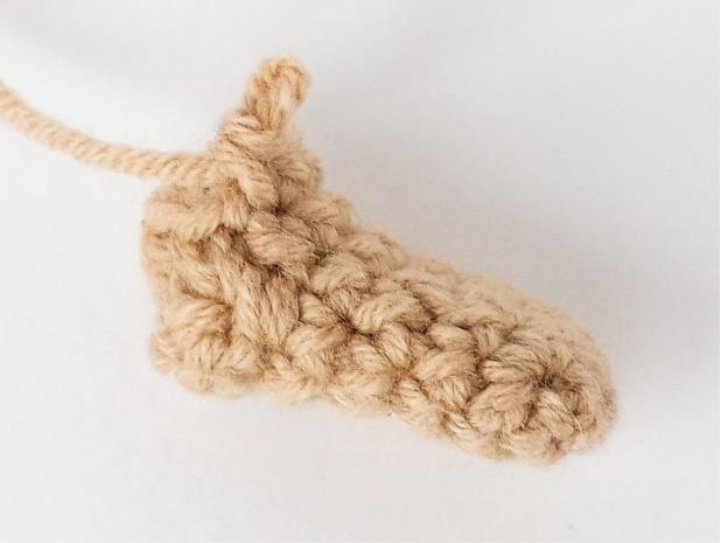
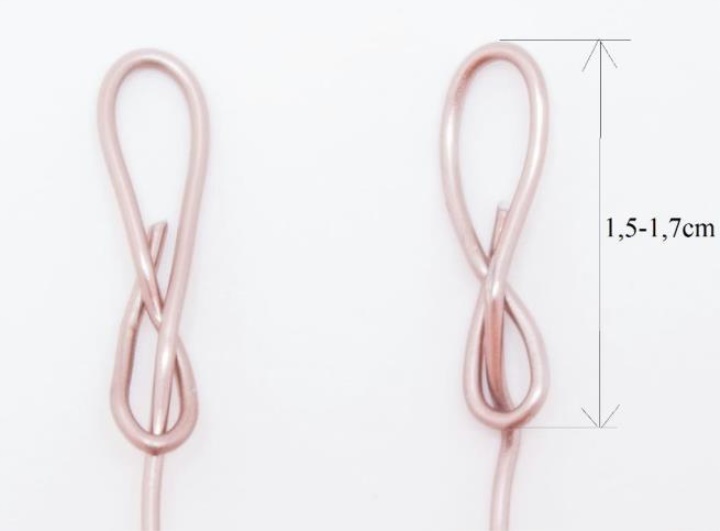
Take 2 wires 25 cm long. Fold the end 3.5 cm. Then bend as shown in pictures below.
Use the patch, also as shown in the picture below.
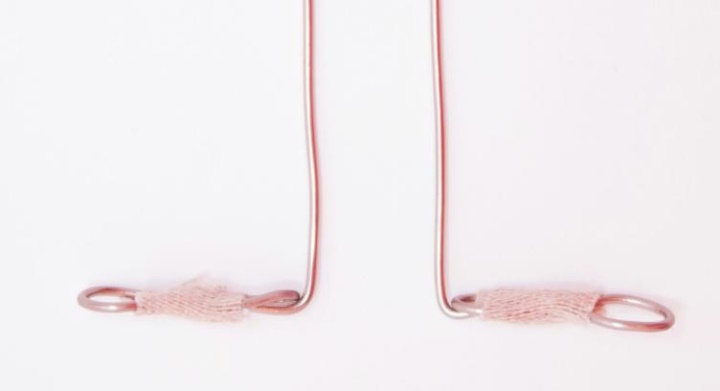
Insert the wire in the leg.
Rnd 10: 2 sb, (reduction) 2 times, 3 sbn [7]
Rnds 11-15: Sable in a circle [7]
Rnd 16: 4 sb, increase, 2 sbn [8]
Rnd 17: 4 sb, increase, 3 sbn [9]
Rnd 18: 4 sb, increase, 4 sbn [10]
Rnd 19: 4 sb, increase, sb, increase, 3 sbn [12]
Rnds 20-21: Sable in a circle [12]
Rnd 22: 6 sbn, decrease, 4 sbn [11]
Rnd 23: 4 sb, decrease, decrease, decrease, 2 sbn [9]
We begin to fill the part.
Rnd 24: 3 sb, (decrease, sb) repeat 2 times [7]
Rnd 25: Sable in a circle [7]
Rnd 26: 5 sb, increase, sbn [8]
Rnd 27: 5 sb, increase, 2 sbn [9]
Rnd 28: 6 sb, increase, 2 sbn [10]
Rnd 29: 6 sb, increase, 3 sbn [11]
Rnd 30: 7 sb, increase, 3 sbn [12]
Rnd 31: 7 sb, increase, 4 sbn [13]
Rnd 32: Sable in a circle [13]
Rnd 33: 8 sb, increase, 4 sbn [14]
Rnds 34-36: Around the Circle [14]
Rnd 37: 5 sb, ss, close the knitting [5]
Fill the leg with filler.
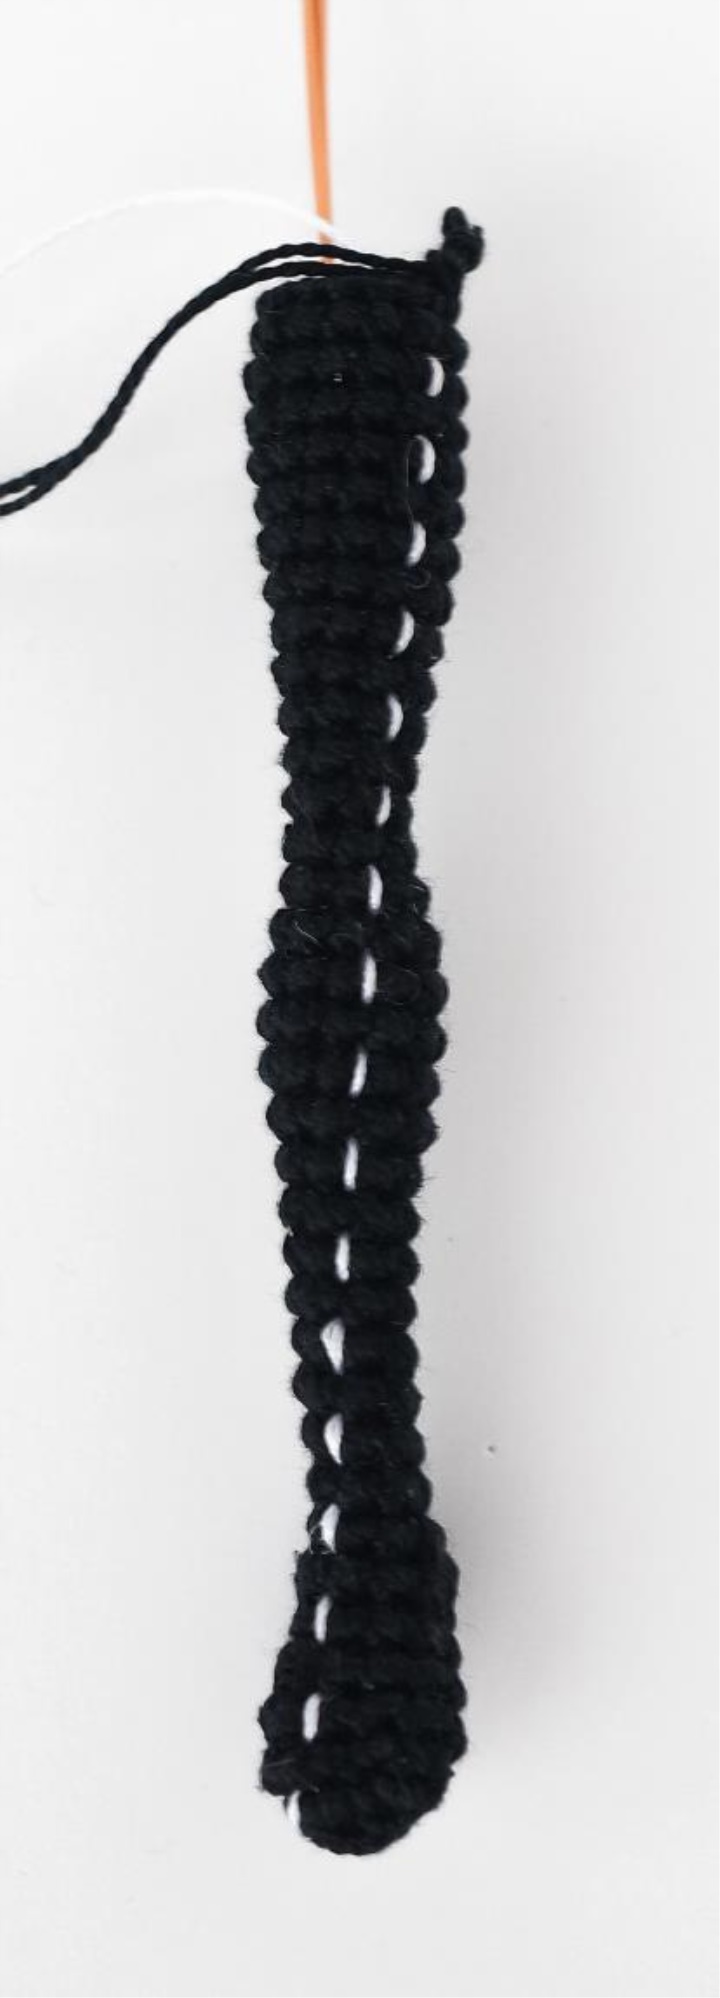

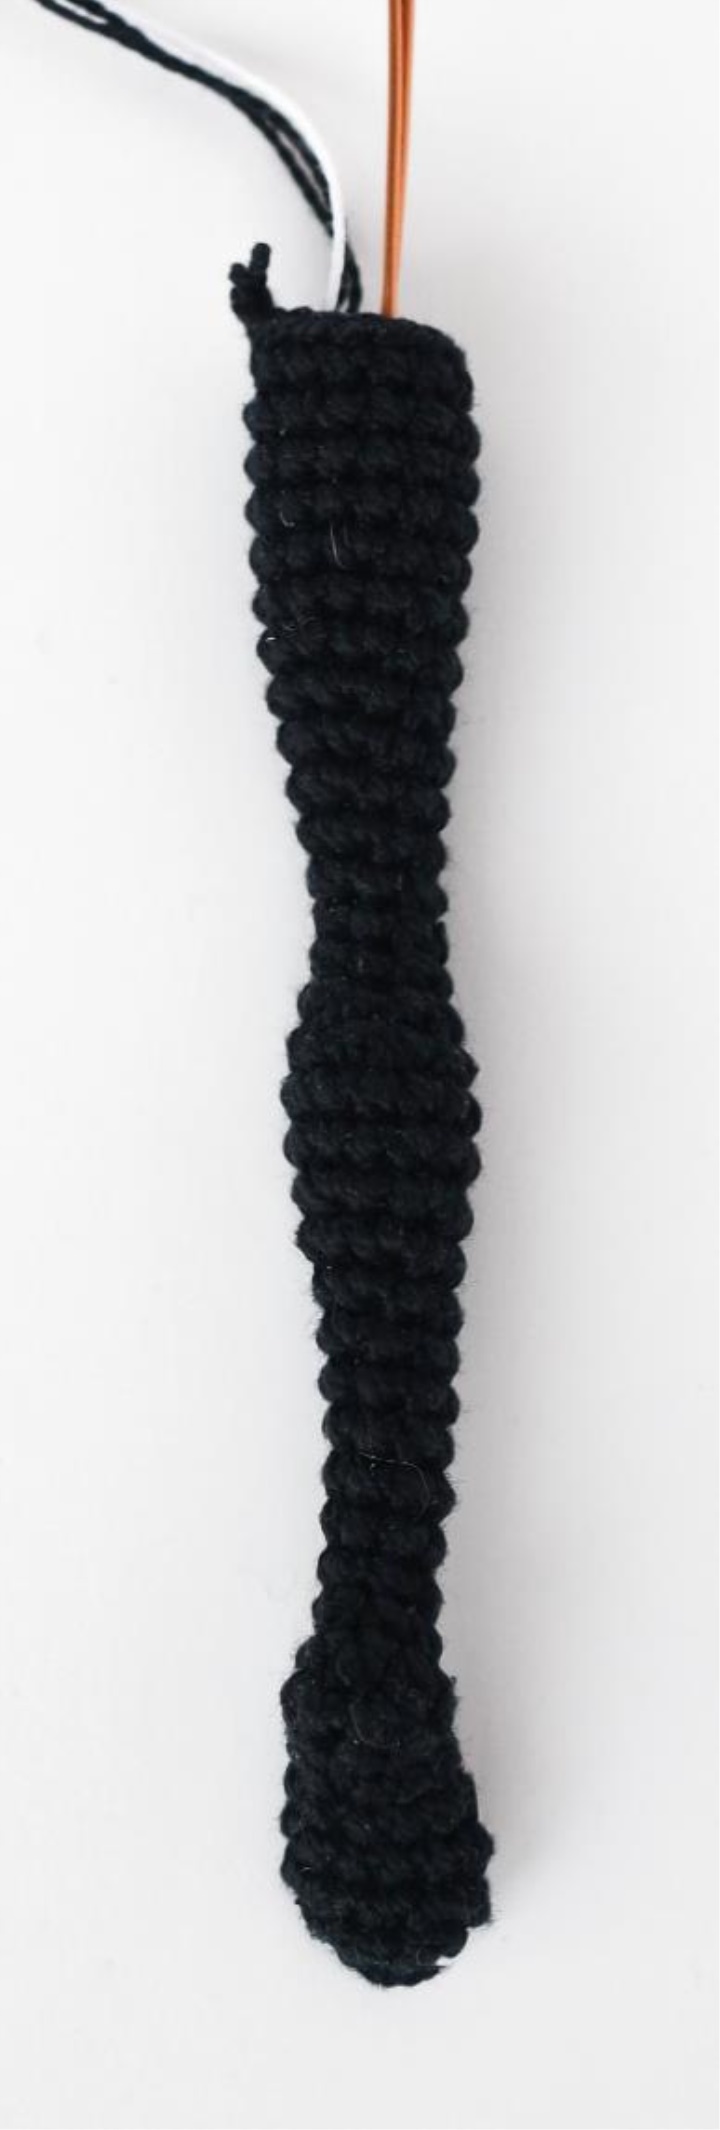
Right leg:
Starting with a black thread (2 strands together)
3 in
Rnd 1: 2 sb in 2 loop from the hook, 3 sb in the next loop, turn the work to continue knitting
on the opposite side of Bn (1 sb in 1 bp) - 1 time [6]
Rnd 2: (increase, 2 sc) repeat 2 times [8]
Rnd 3: (increase, 3 scales) repeat 2 times [10]
Rnd 4: Sable in a circle [10]
Rnd 5: decrease, 8 sbn [9]
Rnd 6: 6 sbn [6]
Rnd 7: 1 turn, turn, 4 roll [4]
Rnd 8: 1 in, turn, 4 sb, make sb in the 7th row and go to the 5th row-3 sbn [8]
Rnd 9: 2 sb, we make sbn in vp 8 rows, (decrease) repeat 2 times, 4 sbn [9]
Put the wire in the leg.
Rnd 10: 2 sb, (reduction) 2 times, 3 sbn [7]
Rnds 11-15: Sable in a circle [7]
Rnd 16: 4 sb, increase, 2 sbn [8]
Rnd 17: 4 sb, increase, 3 sbn [9]
Rnd 18: 4 sb, increase, 4 sbn [10]
Rnd 19: 4 sb, increase, sb, increase, 3 sbn [12]
Rnds 20-21: Sable in a circle [12]
Rnd 22: 6 sbn, decrease, 4 sbn [11]
Rnd 23: 4 sb, decrease, decrease, decrease, 2 sbn [9]
We begin to fill the part.
Rnd 24: 3 sb, (decrease, sb) repeat 2 times [7]
Rnd 25: Sable in a circle [7]
Rnd 26: 5 sb, increase, sbn [8]
Rnd 27: 5 sb, increase, 2 sbn [9]
Rnd 28: 6 sb, increase, 2 sbn [10]
Rnd 29: 6 sb, increase, 3 sbn [11]
Rnd 30: 7 sb, increase, 3 sbn [12]
Rnd 31: 7 sb, increase, 4 sbn [13]
Rnd 32: Sable in a circle [13]
Rnd 33: 8 sb, increase, 4 sbn [14]
Rnds 34-36: Around the Circle [14]
Body:
Rnd 37: the right foot - 13 sb, 3 cd, the left leg - we make a sb in the last loop (where you did the ss) of the left foot, 2 sb, increase, sb, increase, 8 sb, (1 sb in 1 cd) repeat 3 times, sbn [36]
Rnd 38: 8 sb, increase, sb, increase, 2 sb, (1 sb in 1 cd) repeat 3 times, 20 sb [38]
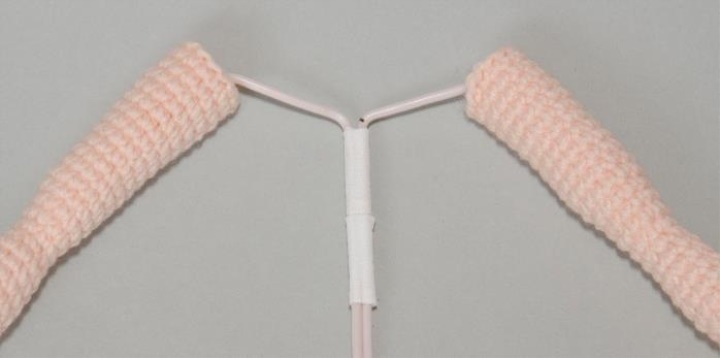
Rnds 39-40: Circle in Circle [38] Connect the 2 wires as shown in the figure below.
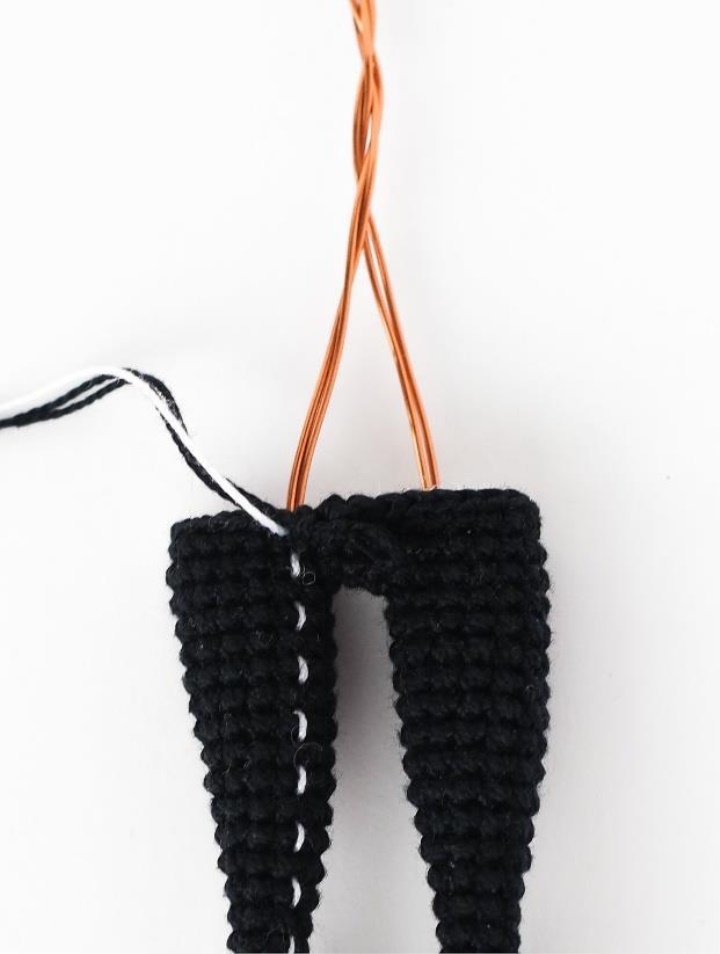
Rnd 41: 7 сбн, decrease, 17 сбн, decrease, 10 сбн [36]
Rnd 42: 7 sb, decrease, 15 sb, decrease, 10 sbn [34]
Rnd 43: 7 sb, reduction, 13 sb, decrease, 10 sbn [32]
Rnd 44: 7 sb, reduction, 11 sb, decrease, 10 sbn [30]
Rnd 45: 7 sb, reduction, 9 sb, decrease, 10 sbn [28]
Rnd 46: 7 сбн, убавка, 7 сбн, убавка, 10 сбн [26]
Rnd 47: 7 sb, decrease, 5 sb, decrease, 10 sb [24]
Rnd 48: 7 sb, reduction, 3 scales, decrease, 10 sbn [22]
Rnd 49: (5 sb, reduction) x 2, 8 sbn [20]
Rnd 50: 4 sb, reduction, 5 sbn, decrease, 7 sbn [18]
Rnd 51: 4 sb, reduction, 3 scales, decrease, 7 sbn [16]
Rnd 52: Rise in a circle [16]
Rnd 53: 3 sb, increase, 5 sb, increase, 6 sbn [18]
Rnd 54: 4 sb, increase, 5 sb, increase, 7 sbn [20]
Rnd 55: Rise in a circle [20]
Rnd 56: (5 sb, increase) x 2, 8 sbn [22]
Rnd 57: Rise in a circle [22]
Rnd 58: 5 sb, increase, 7 sbn, increase, 8 sbn [24]
Rnd 59: Sable in a circle [24]
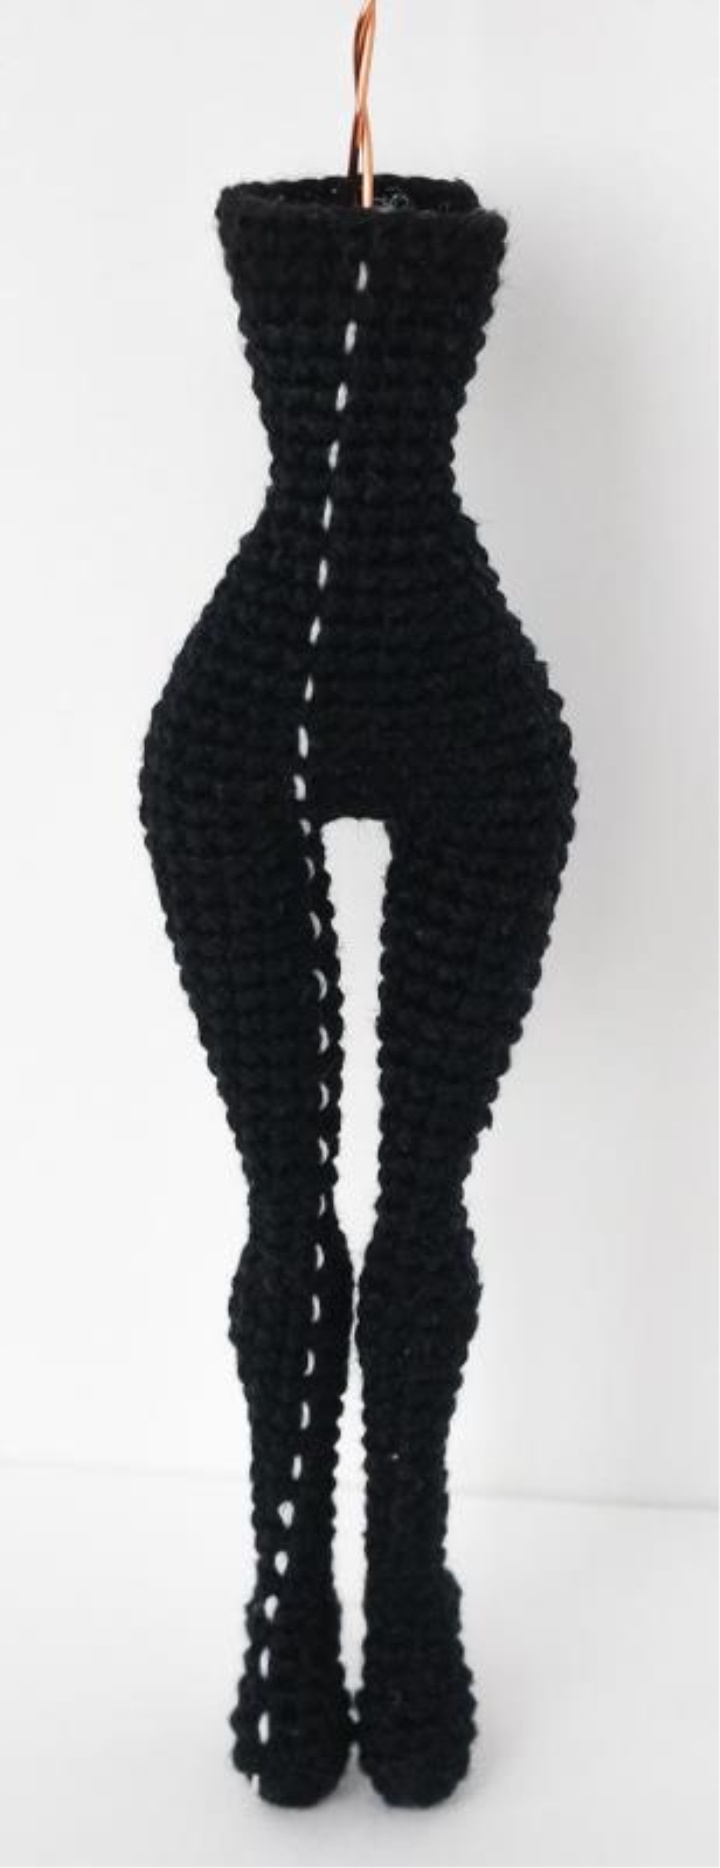
Attach one arm to the body from the side, in order to measure distances to the wire.
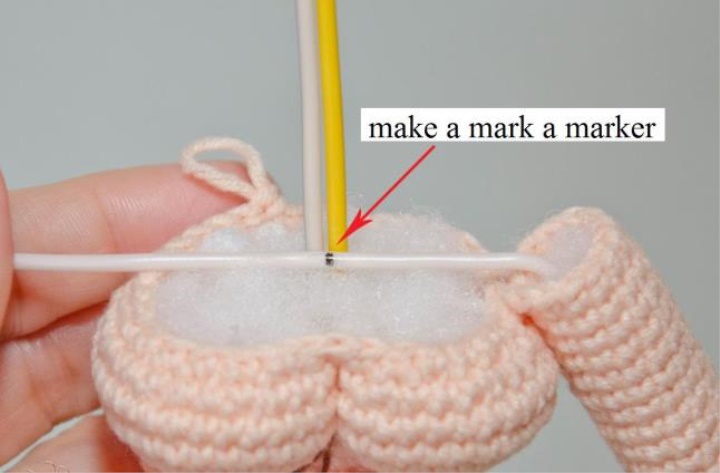
Bend the wire at the mark.
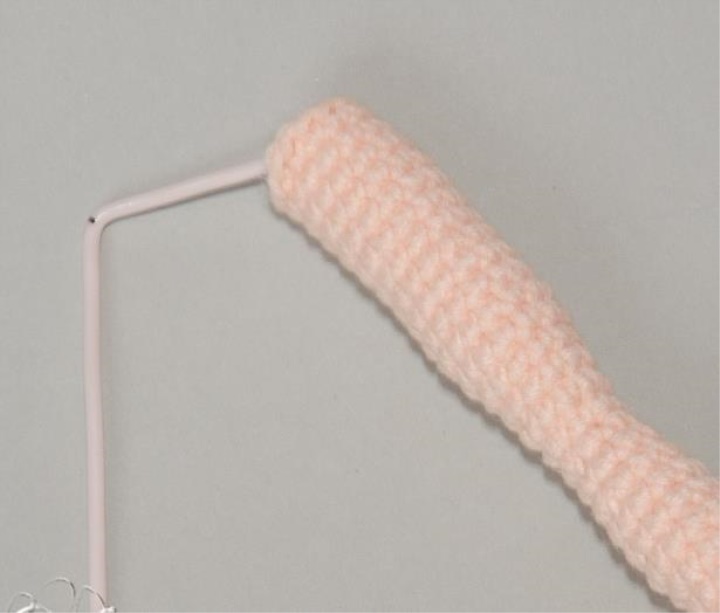
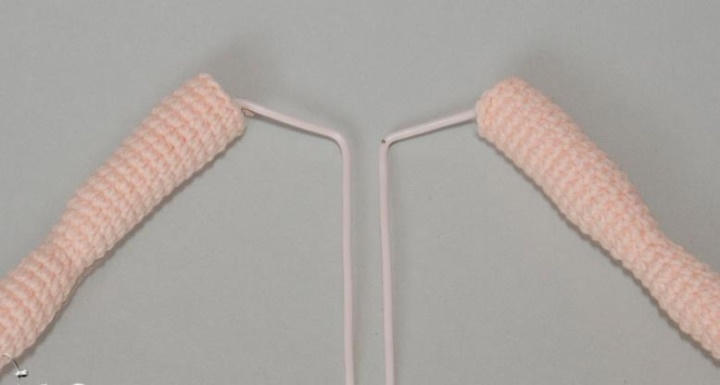
Make the same bend on the second hand, as on the first.
Secure both wires with adhesive tape.
Mark the marker on the wire in the body.
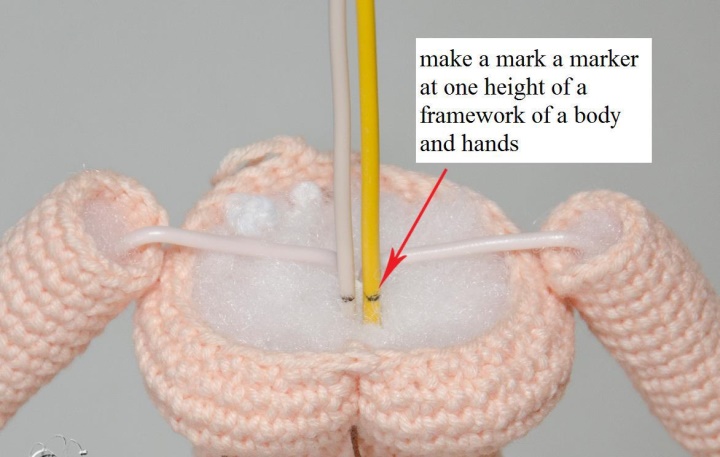
Bend your knitting.
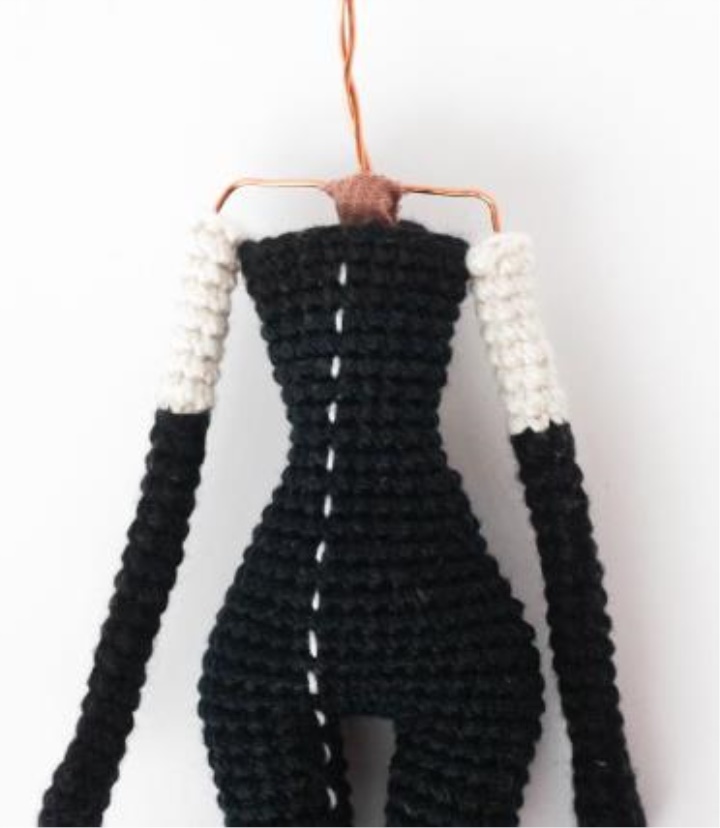
We continue to knit the body:
Rnd 60: 16 sb, change the thread to the color of the skin and continue to knit it (two strands together), connect the left
hand and body - (1 sb in the loop of the hand and in the loop of the body) repeat 2 times (as shown in the figure below), the body-6 sbn [24]
Rnd 61: 6 sb, connect the right hand and body - (1 sb in the loop of the hand and in the loop of the body) repeat 2 times (as shown in the figure below), the body - 8 sbn, the left hand - 6 sbn, the body - 6 sbn [28]
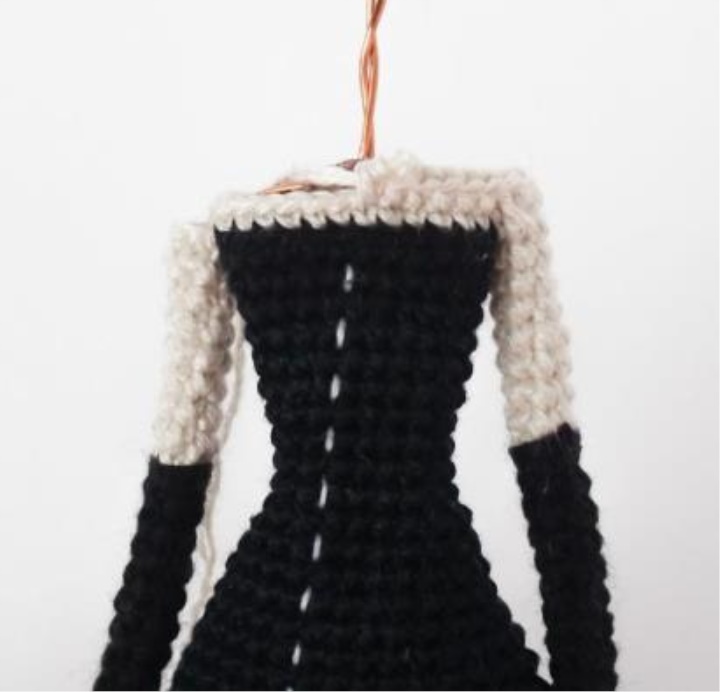
Rnd 62: 6 sbn, right hand - 6 cms, body - 15 cms, decrease, decrease, decrease [30]
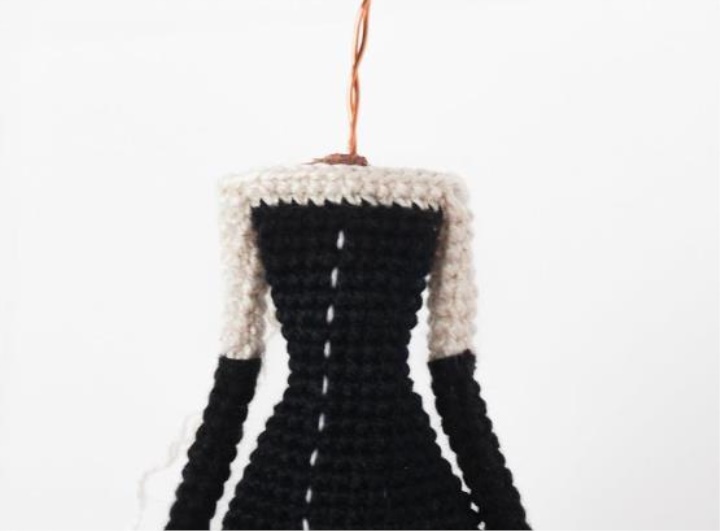
Rnd 63: decrease, decrease, decrease, 22 sb, decrease, sbn [27]
Rnd 64: sbn, decrease, 2 sb, (decrease) x 2, 10 sb, (decrease) x 2, 4 sbn [22]
Rnd 65: 2 sb, (reduction) х 3, 6 сбн, (reduction) х 3, 2 сбн [16]
Rnd 66: sb, (reduction) х 3, 2 сбн, (reduction) х 3, сбн [10]
Rnd 67: sb, (reduction) x 4, sbn [6]
Rnd 68: Rise in a circle [6]
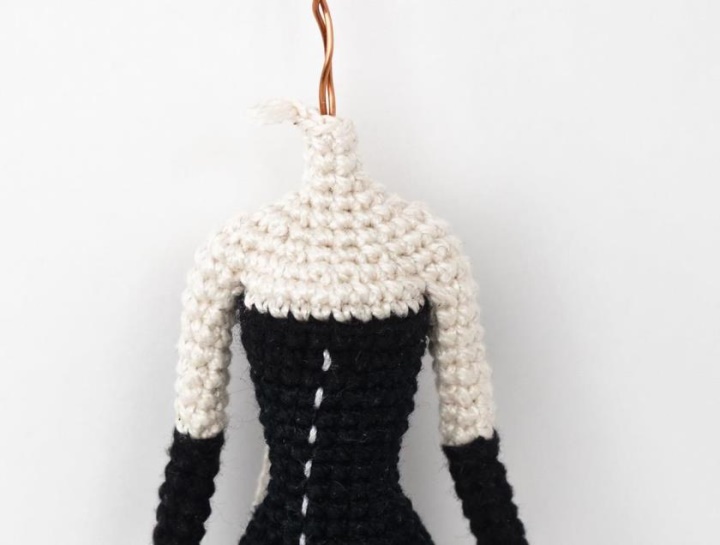
Tail:
Starting with a black thread (2 strands together)
Rnd 1: 6 in the ring amigurumi [6]
Rnds 2-30: Sable in a circle [6]
Cut off the long thread for sewing.

Take the wire 13 cm, fold the end of the wire - 0.5 cm.

Place the wire in the tail

Sew a tail to the body
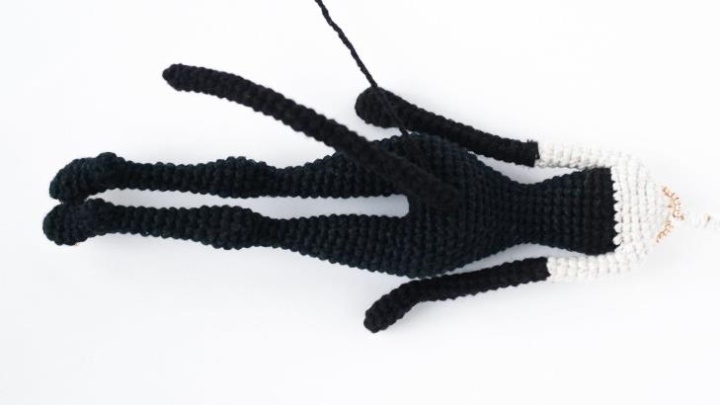
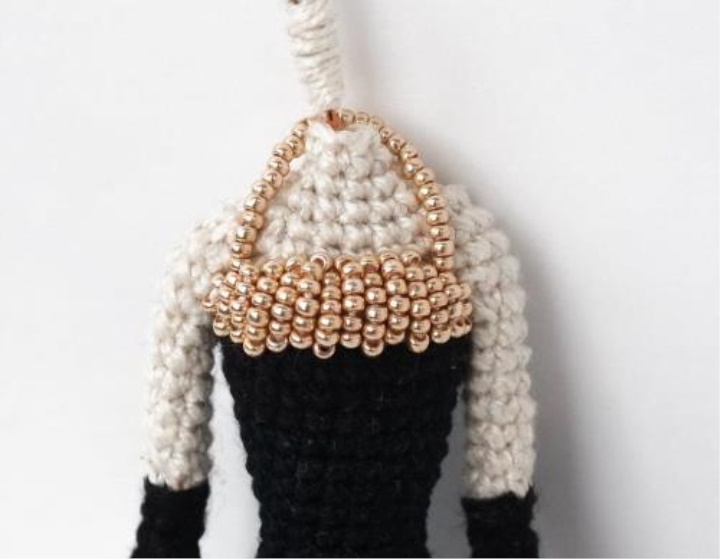
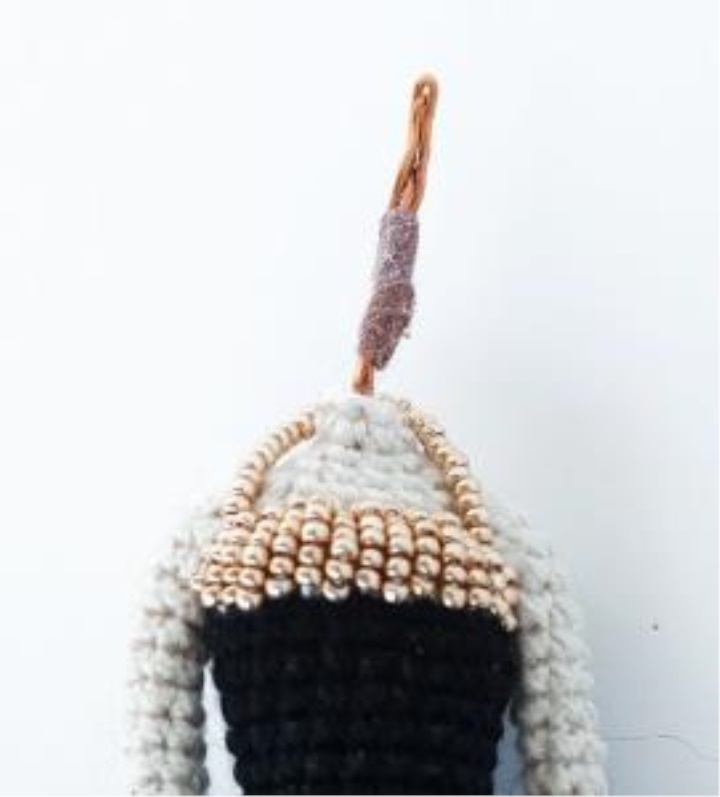
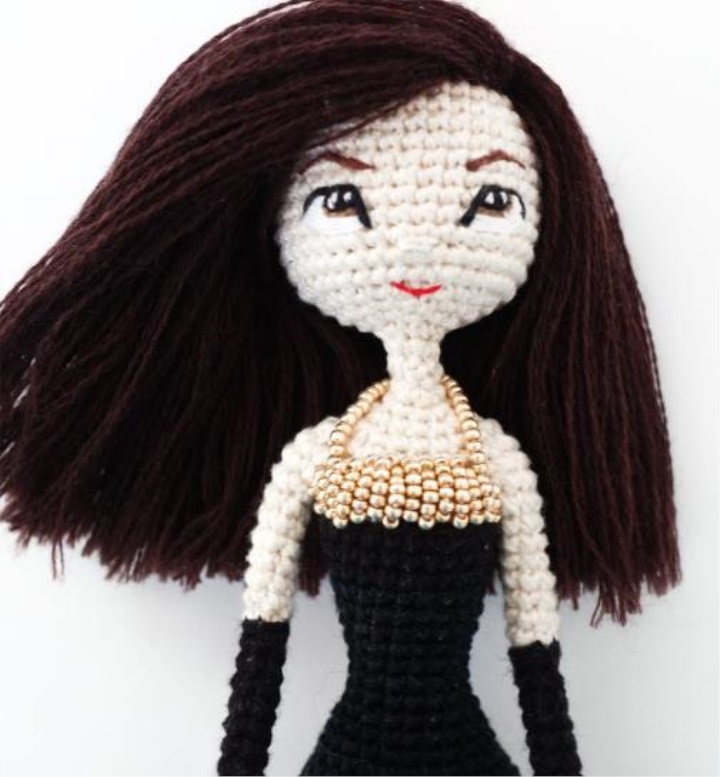
Sew the beads on the chest, as shown in the picture below. The figure below shows the number of beads in
of each line. On the thread (which will be around the neck) is used about 26 pieces of beads.
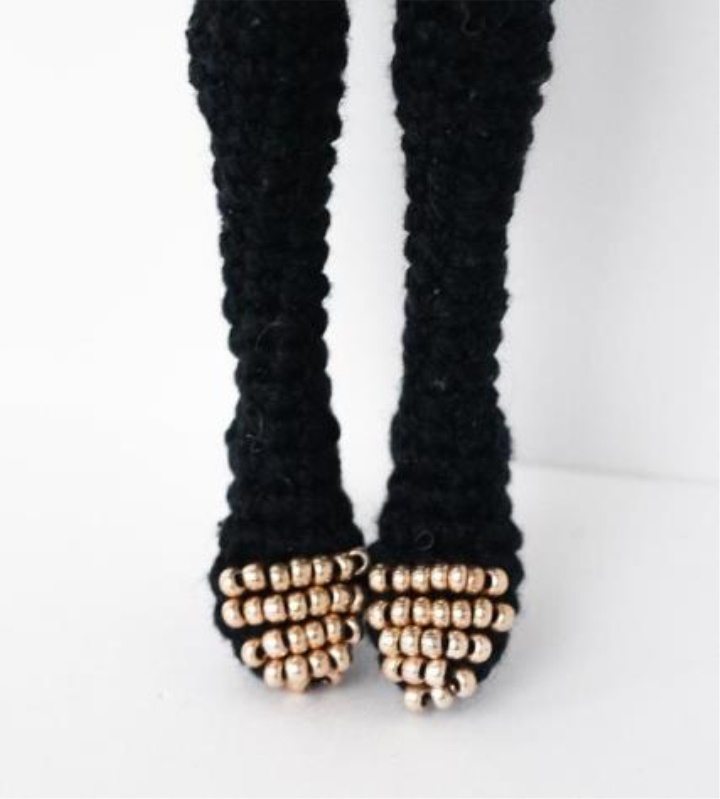
Sew beads on the legs, as shown in the picture below.
Bend the wire, use a patch.
Head:
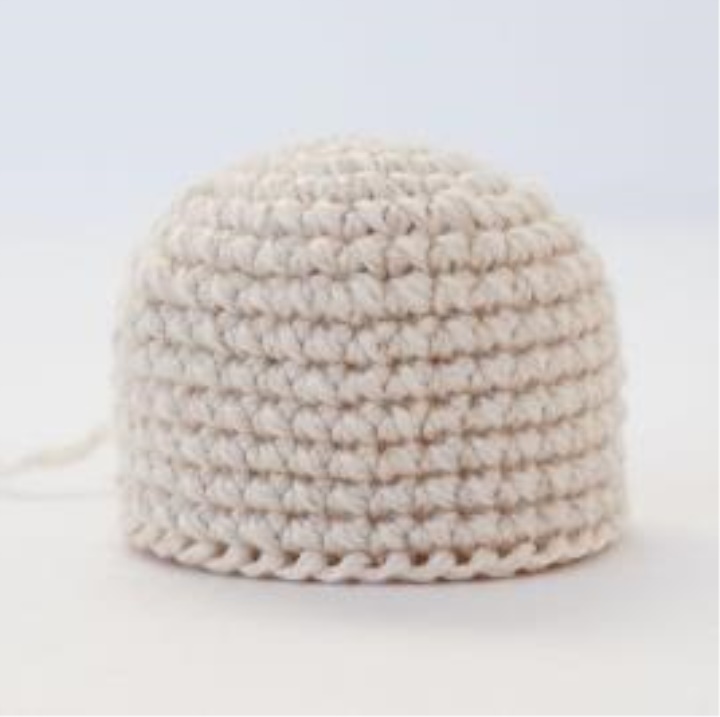
Beige thread (2 strands together)
Rnd 1: 6 in the ring amigurumi [6]
Rnd 2: an increment of x 6 [12]
Rnd 3: (cb, increase) x 6 [18]
Rnd 4: (2 sb, increase) x 6 [24]
Rnd 5: (3 sb, increase) x 6 [30]
Rnd 6: Rise in a circle [30]
Rnd 7: (4 sb, increase) x 6 [36]
Rnds 8-15: Sable in a circle [30]
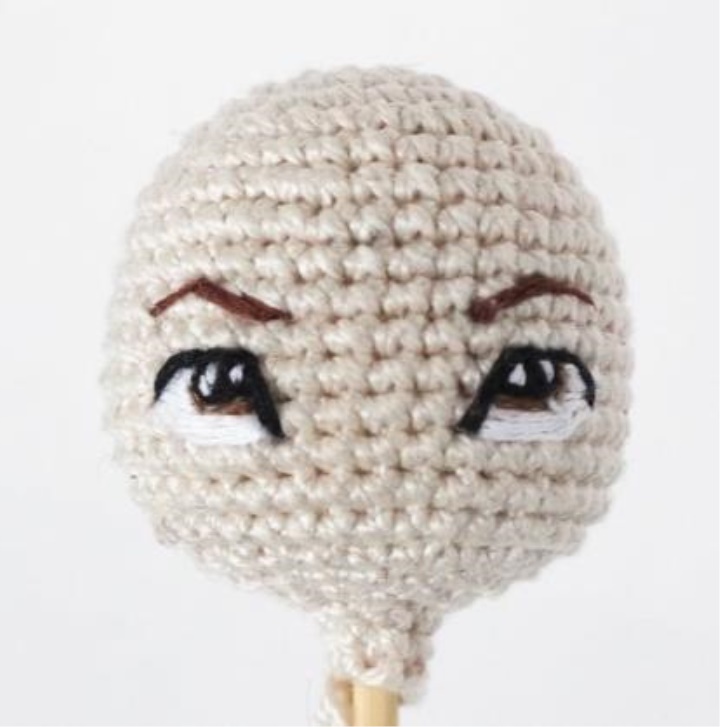
Eyes:
Materials:
1. Sewing threads - black, brown and white.
2. Thin Needle
Tip: Embroider each eye separately.
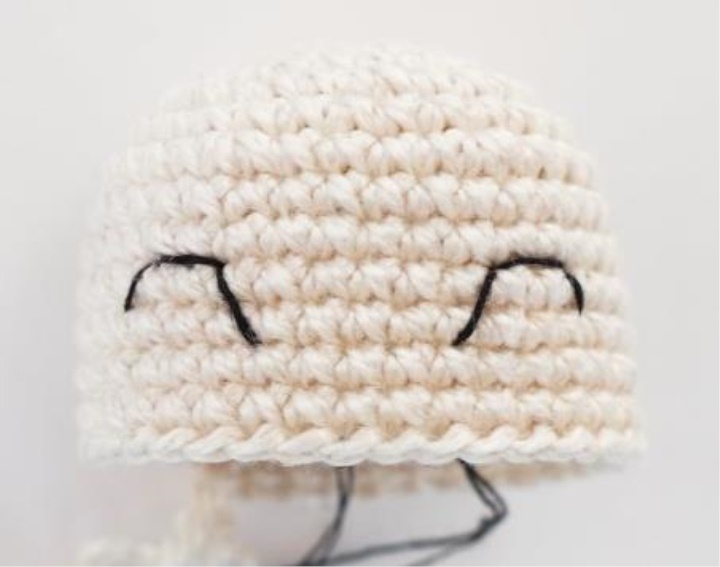
Contour of eyes:
Black thread
Eye pupil:
Black thread
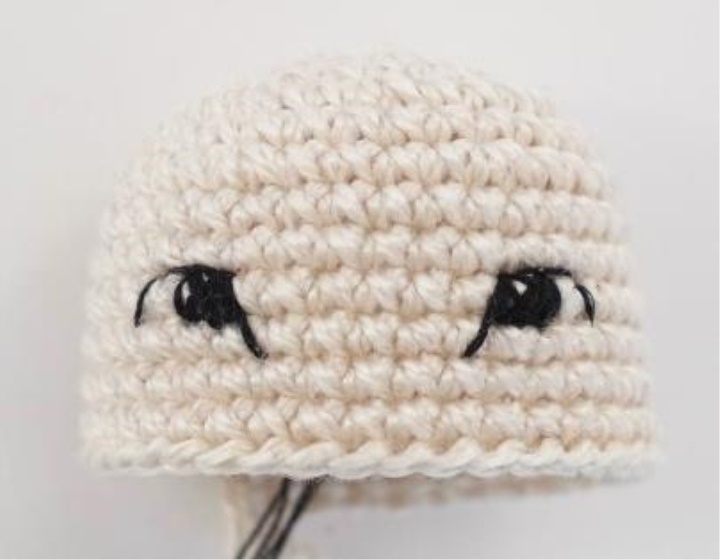
Do not cut the black thread
Iris of the eye:
To embroider brown eyes irises, as shown in the picture below
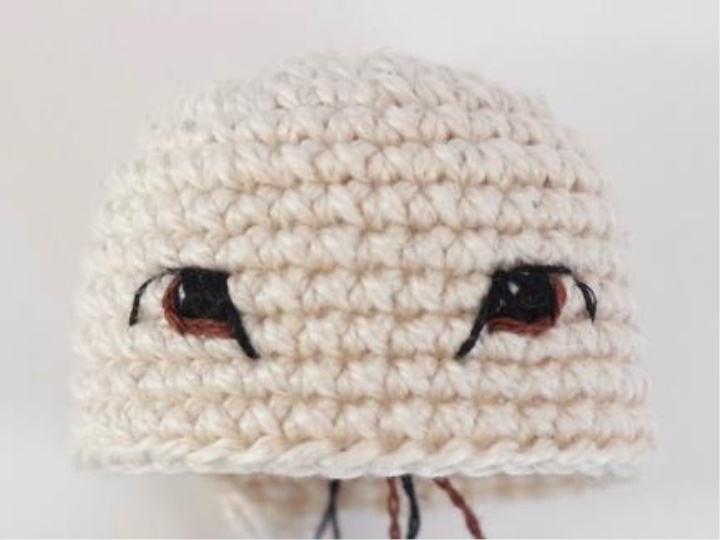
White thread:
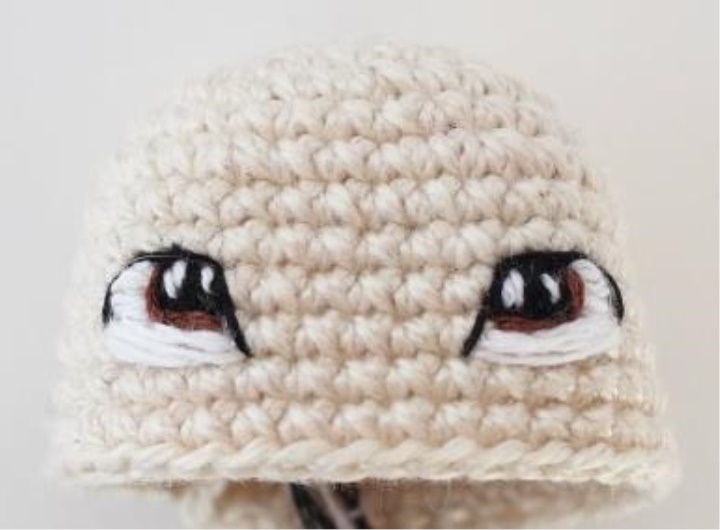
Use a white thread to embroider a white glare:

Embroider black borders as shown in the picture below.
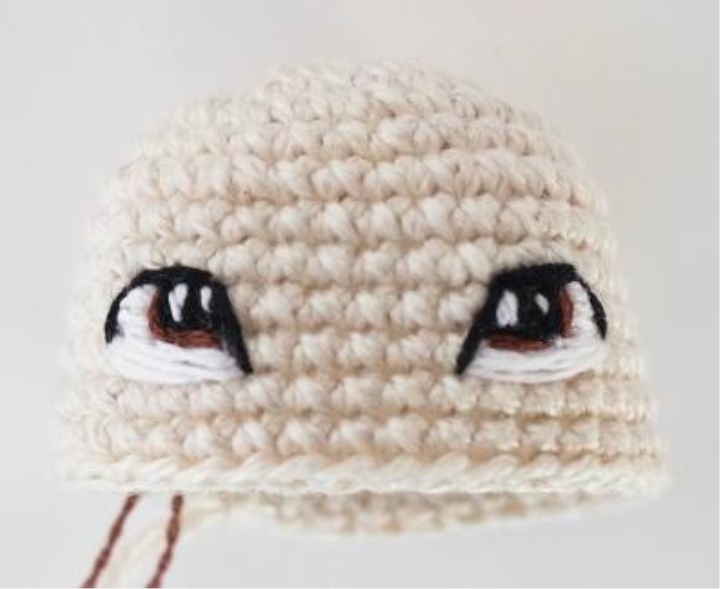
Eyebrows
Embroider brown eyebrows, as shown in the picture below.
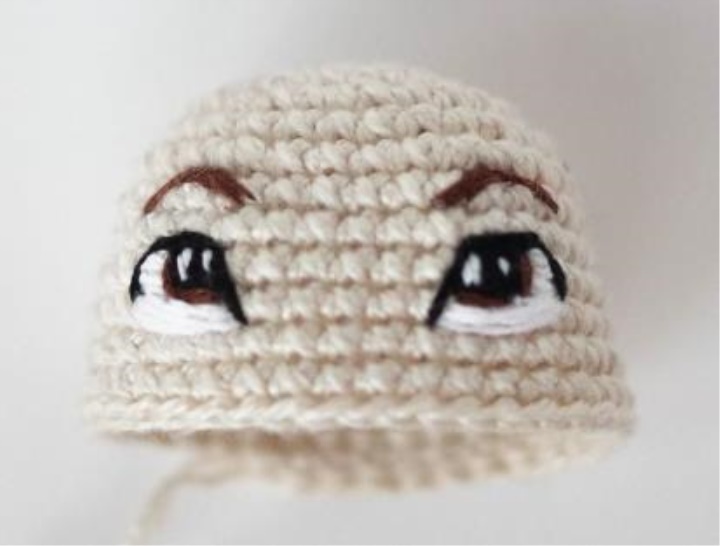
We continue to knit a head
Rnd 16: (reduction, sbn) x 12 [24]
Rnd 17: (2 sb, decrease) x 6 [18]
Rnd 18: (decrease, sbn) x 6 [12]
Rnd 19: (reduction) x 6 [6]
Rnd 20: Sable in a circle [6]
Leave a long string for sewing.
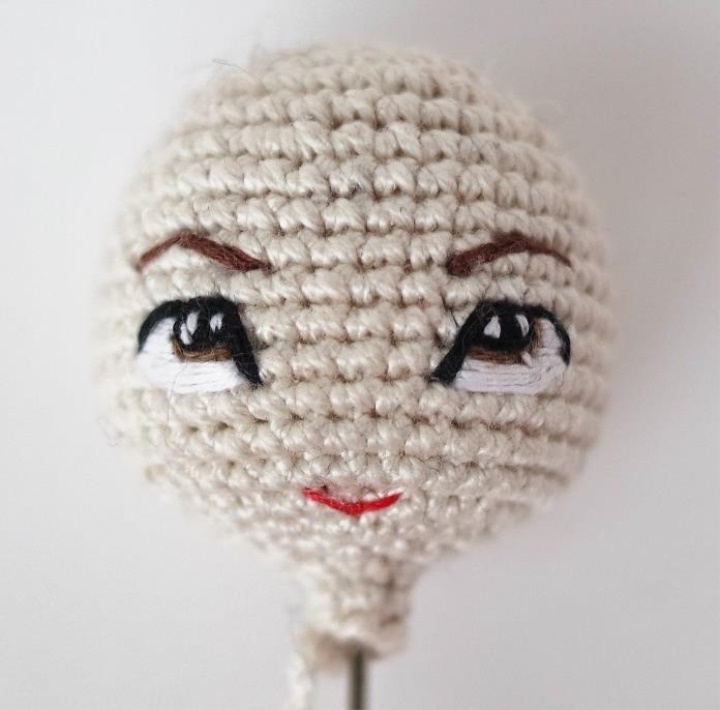
Lips
Embroider red lips as shown in the picture below.
Hair:
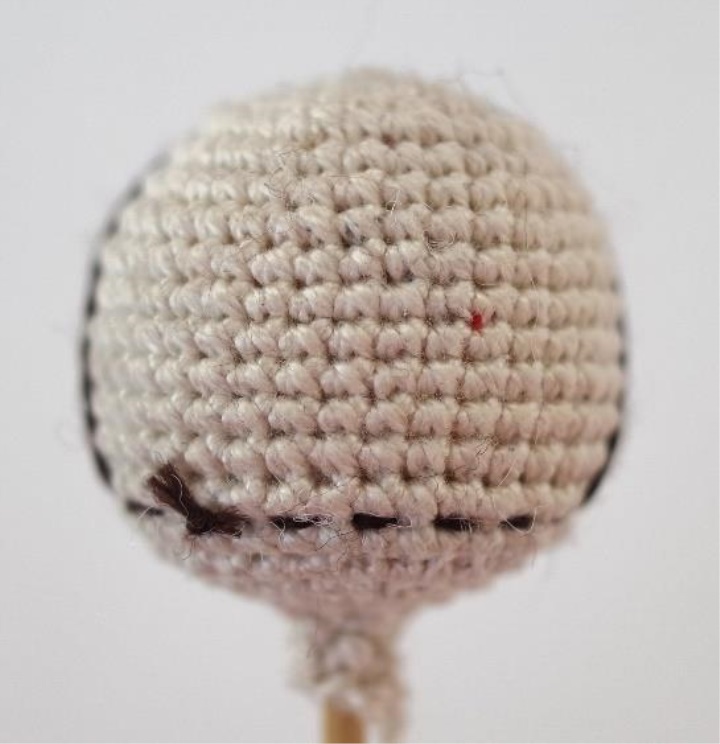
Use a brown thread to mark the hairline.
The line of hair growth on the forehead is between the 5th and 6th rows of the head. The length is 12 loops.
The hair growth line on the back of the head is between the 14th and 15th rows of the head. The length is 14 loops.
Make on both sides of the head a smooth transition of hair from the forehead to the back of the head.
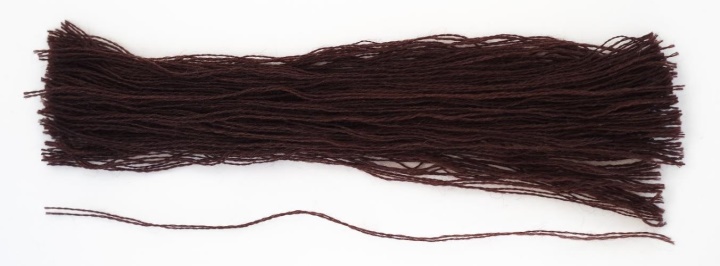
The length of the strand is 12 cm.
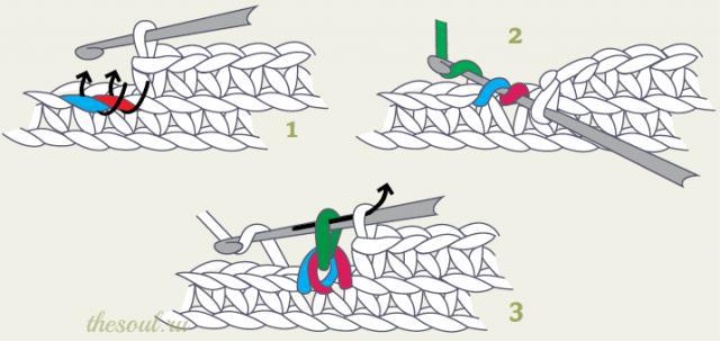
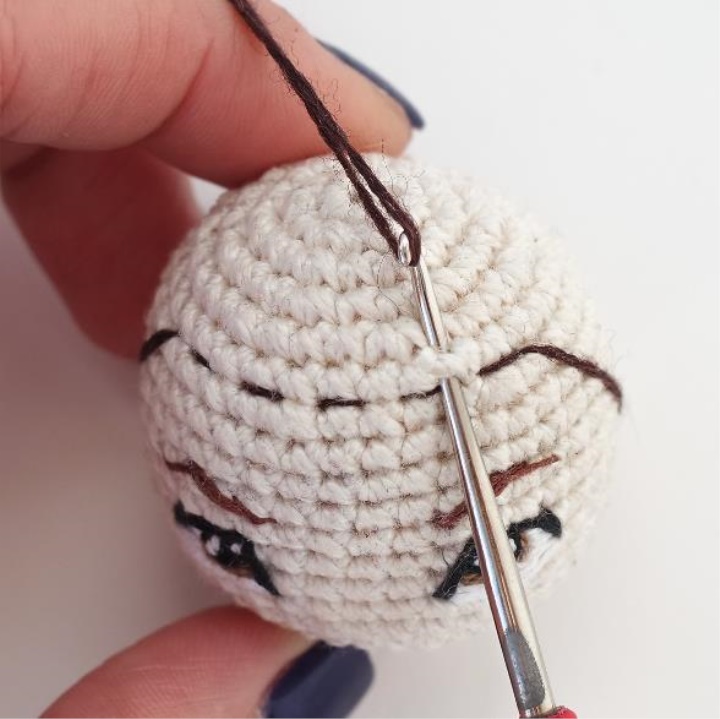
1. Insert the hook into one of the "holes" in the head of the doll, and pull it out of the other directly above it
2. Fold a piece of yarn in half and hook it by the hook.
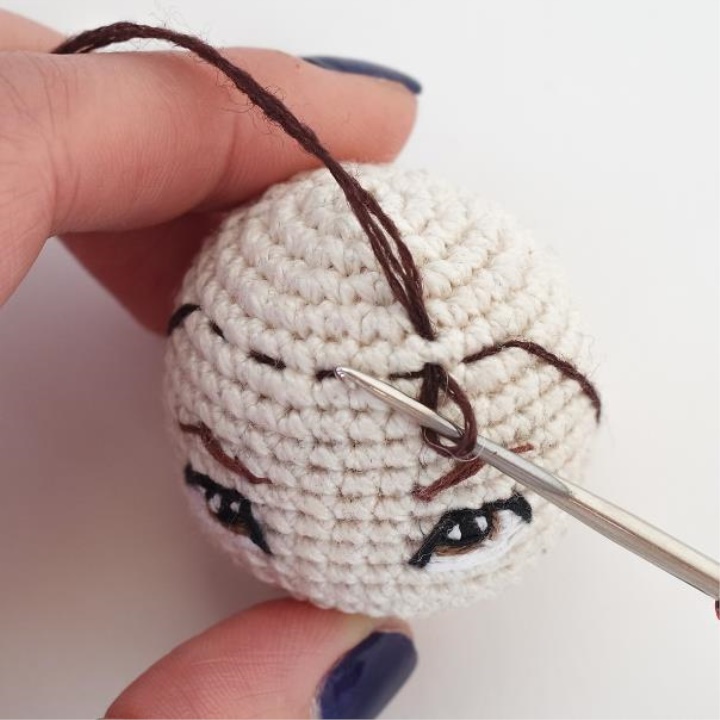
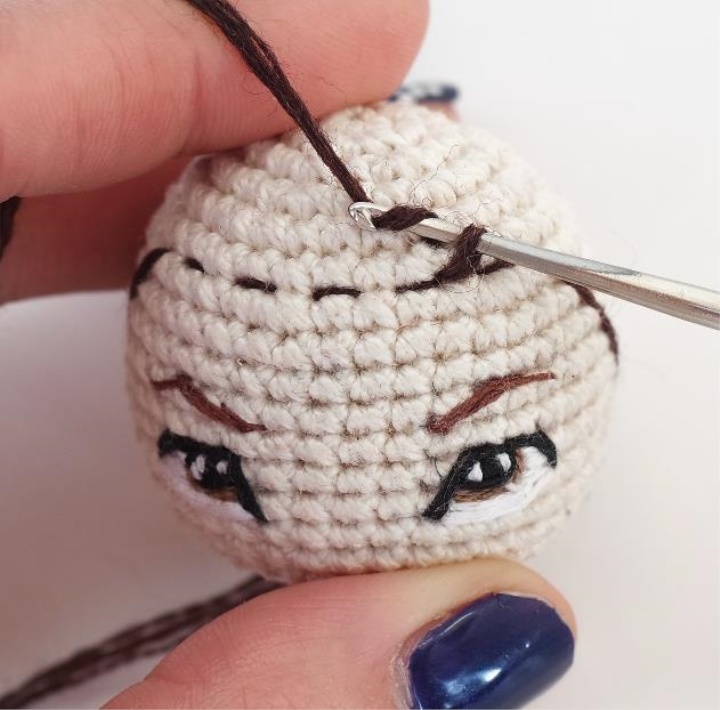
3. Pull the yarn through the hole, but not completely
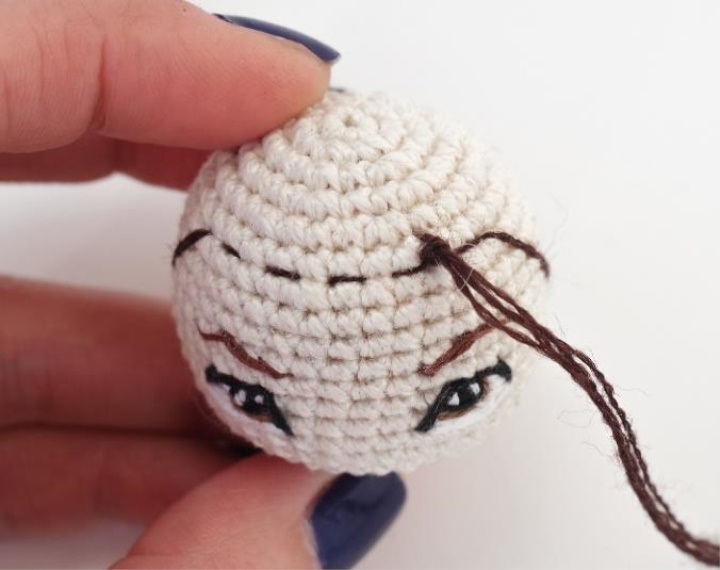
4. Secure the yarn by passing its end through the loop.
First, fix the hair on the marked line.
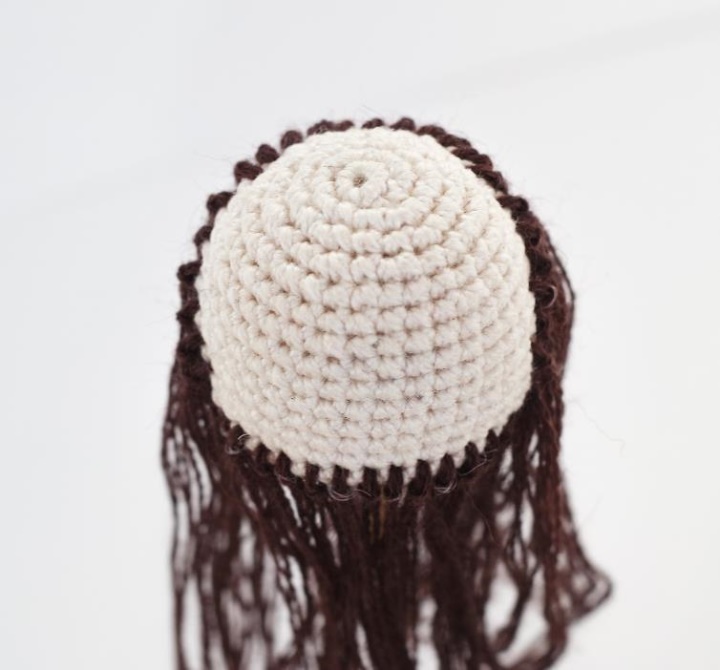
Start with the bottom line of the hair. In the first few rows I usually just put strands of hair not in each hole, and through one and through a series
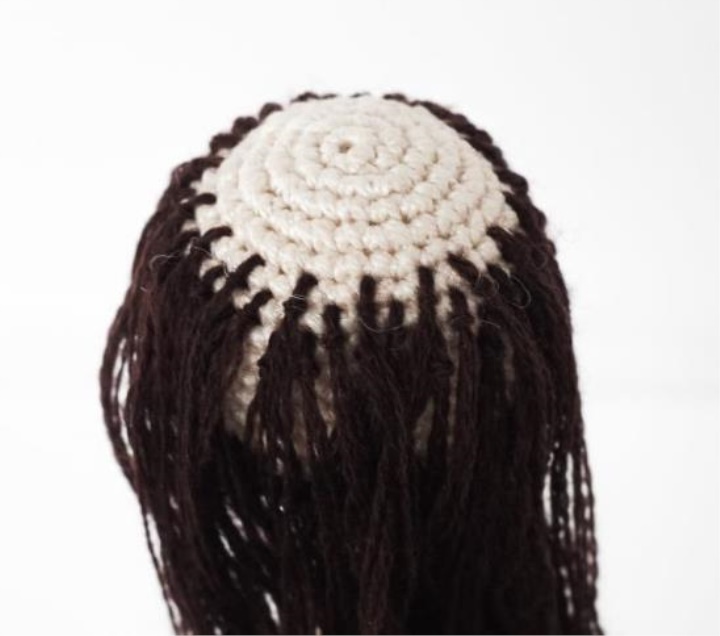
When you get to the top of your head, you will need to start attaching strands of hair to each stitch in each row. Thus, the hair will be good and thick from above and cover the skin head.
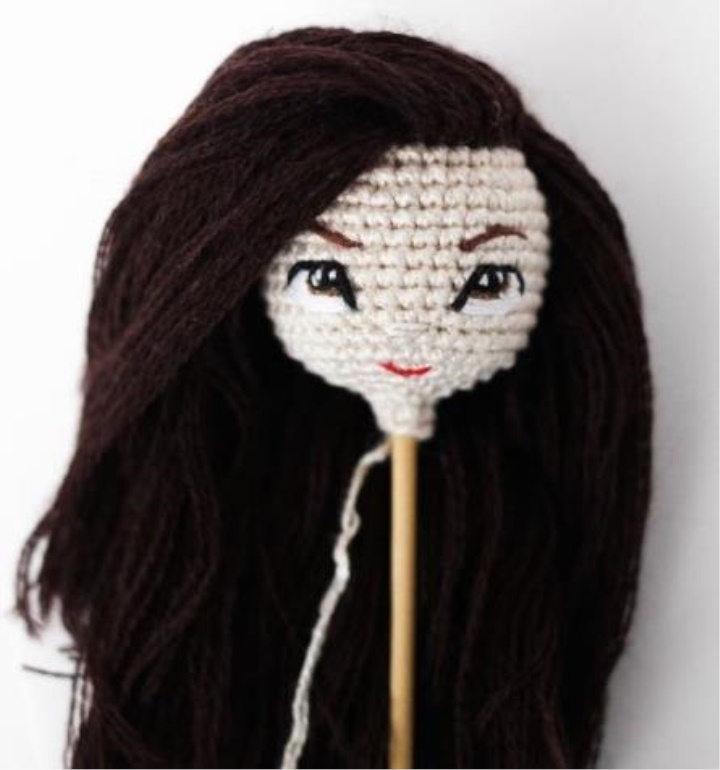
Insert the end of the wire into the head.
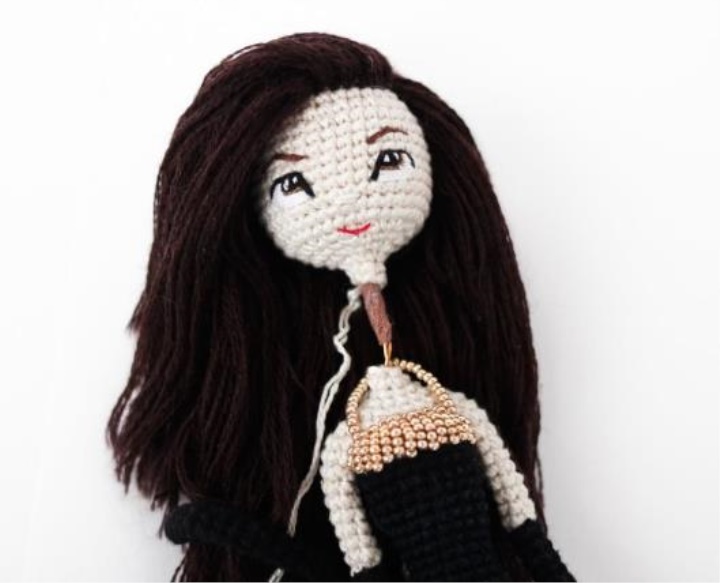
Sew your head to the body.
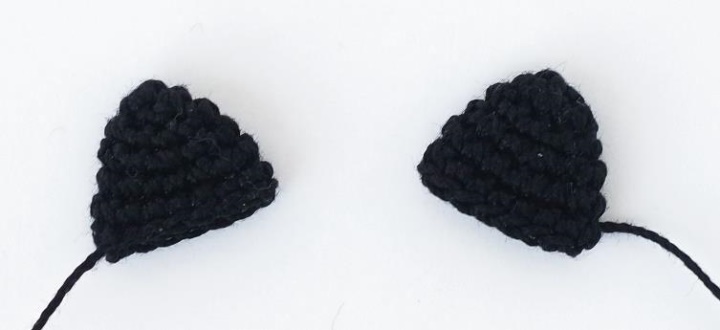
Bezel with cat ears:
Ears:
We use a black thread
Rnd 1: 5 in the ring amigurumi [5]
Rnd 2: an increment of x 2 [10]
Rnd 3: Sable in a circle [10]
Rnd 4: (sb, increase) x 5 [15]
Rnds 5-6: Rise in a circle [15]
Leave a long thread to sew
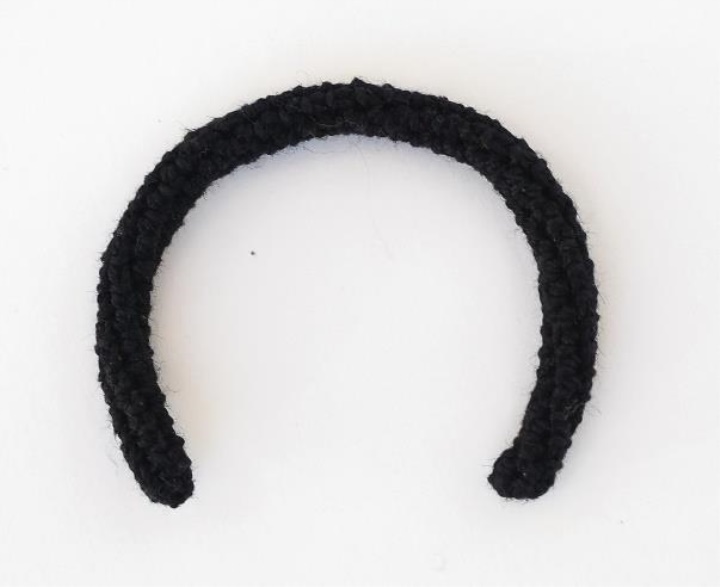
Bezel:
We use a black thread
Rnd 1: 5 in the ring amigurumi [5]
Rnds 2-43: Sable in a circle [5]
We sew our ears:
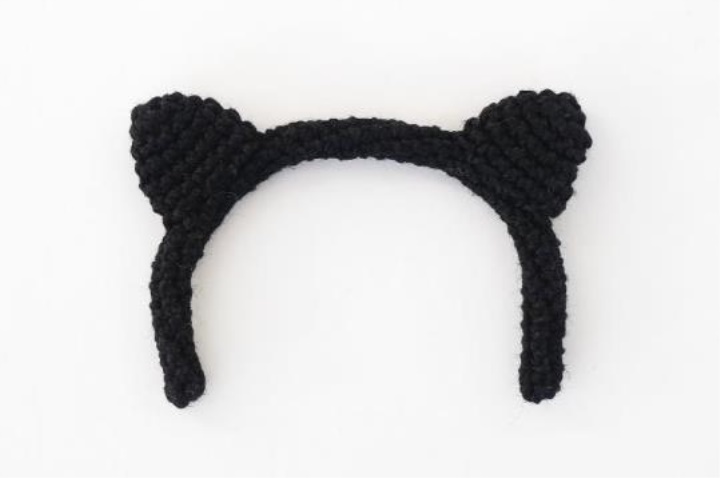
You're done !!! Congratulations!!!