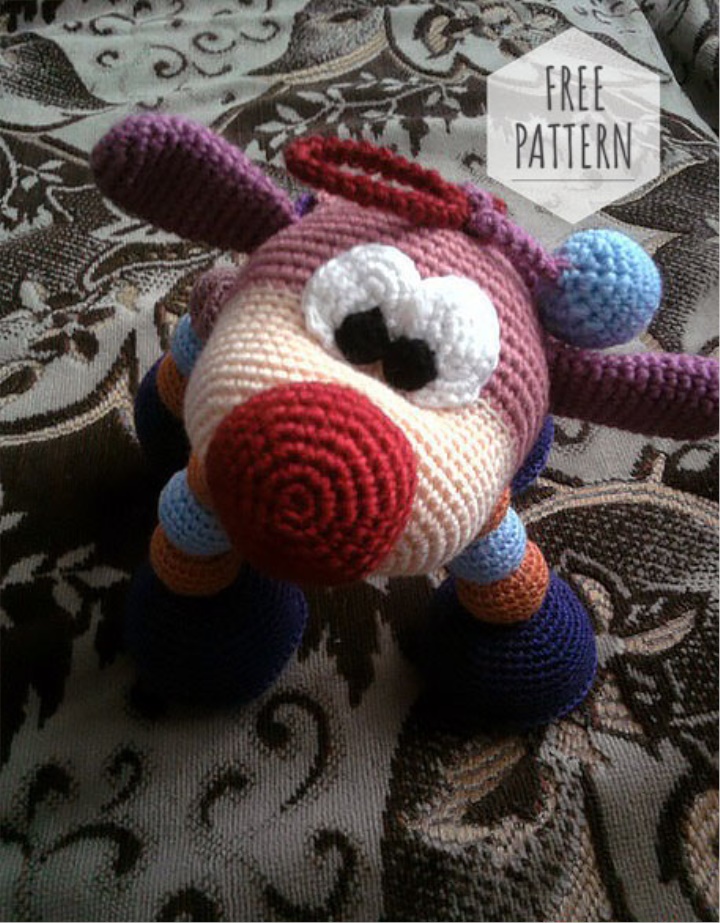
So let's start.
To start, let's talk all the points of the org-so that we do not have any of the rumors and bickering.
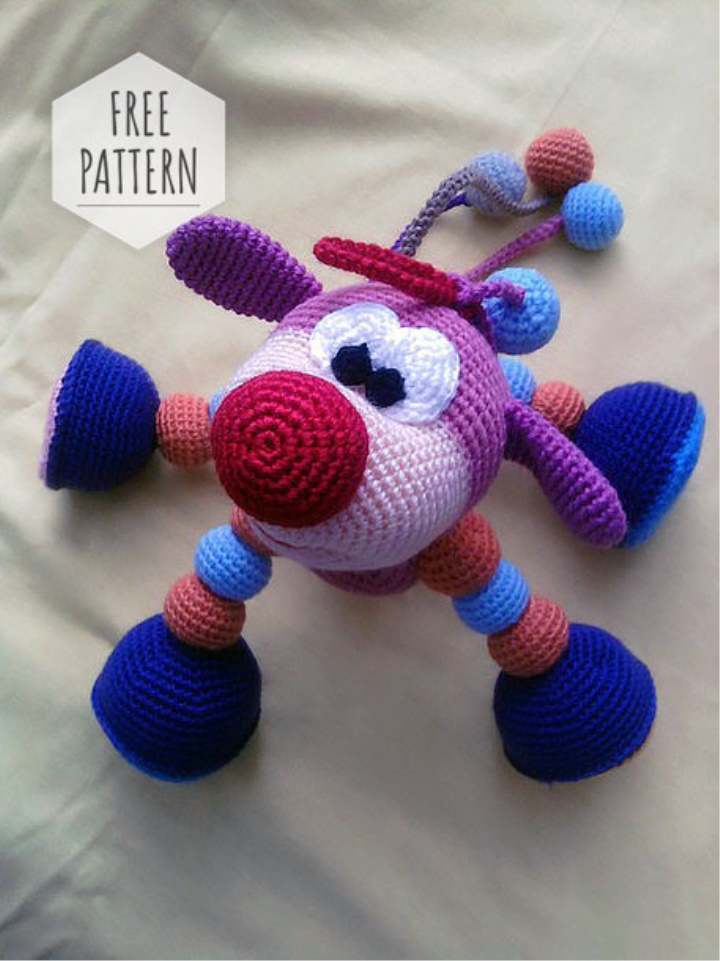
1. Author's toy, so please do not take pictures on the background of the description.
2. Selling, giving is your right. There is no prohibition.
3. All requests for posting descriptions and uploading on other resources-I am against. Send it here, and then we'll deal with the petitioners.
4. Each next stage-1 every 4 days. I will not demand to upload a photo and a strict report. Everyone knits at his own pace as he manages and can.
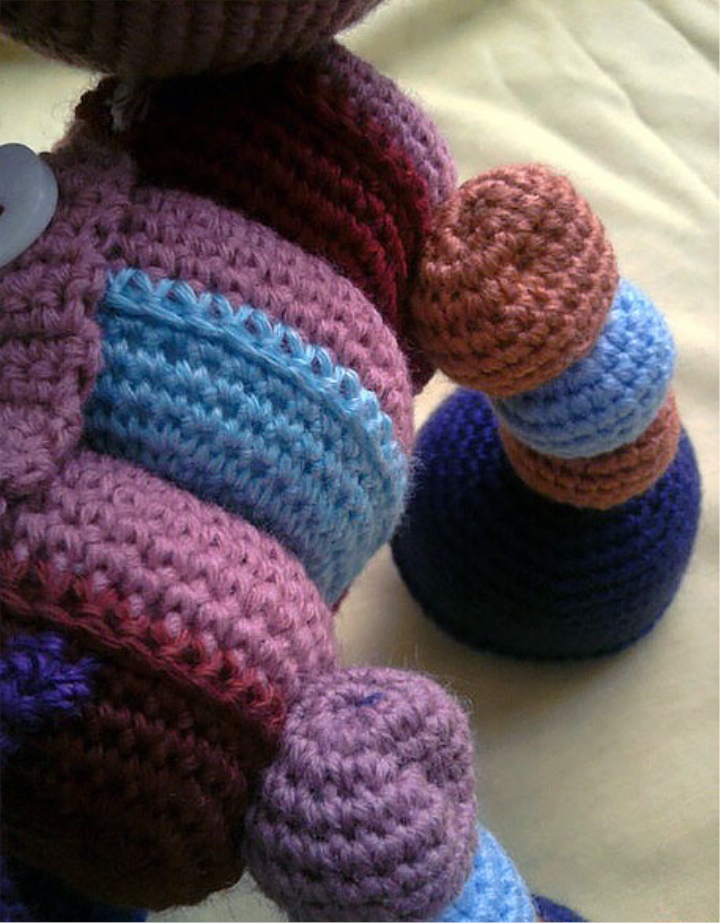
Threads – it is good to use leftovers, you need a little – grams of a total of 50. Well, if you manage to pick up the threads of the rainbow spectrum-your kids will learn to distinguish colors. I use the most different-usually look length in 100 grams, it approximately 350-390 meters.
Hook under your thread. I knit the toys tightly-and my hook for this 1.25 (for thread 350-390), otherwise will be loose and ugly. If the thread is thicker-from 280 to 350 in 100 gr, I take the hook 1.3 or 1.5.
The eyes are bought-only if the child is not pulling in the mouth all in a row! Better tie it.
Synthesizer (for stuffing).
A column without a scum is understandable.
Ubava-2 bars to get together.
Raise-from 1 column to link 2.
The cord of a caterpillar-to look it is possible MK on the Internet.
You know, that's good. No-well, not much experience, I mastered this step only in the summer.
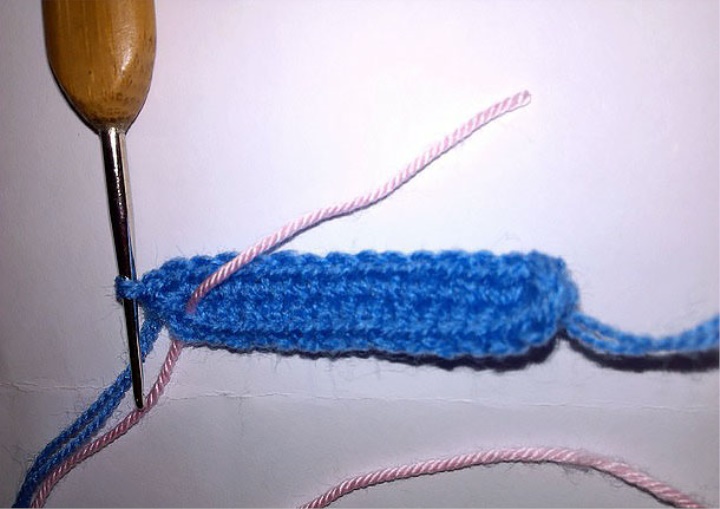
Stage 1. Everything is knitting in a spiral.
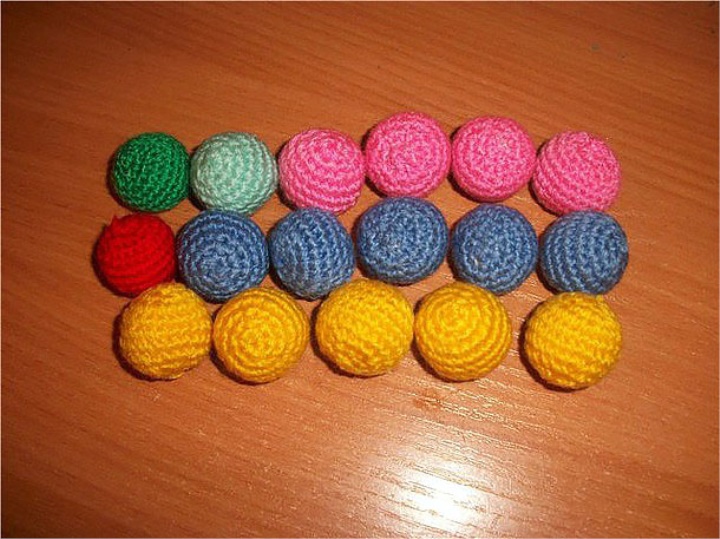
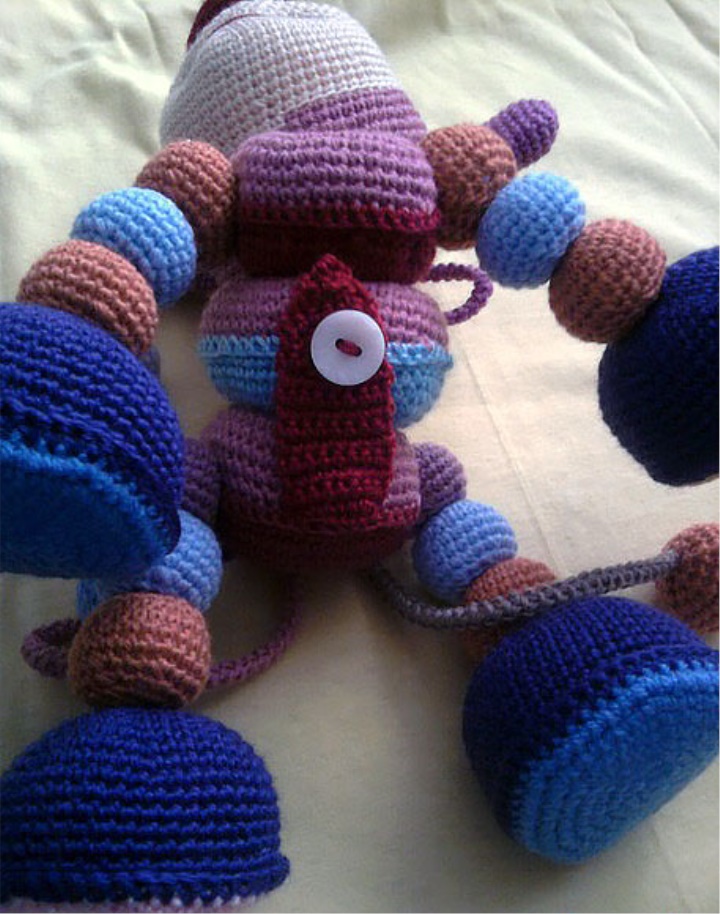
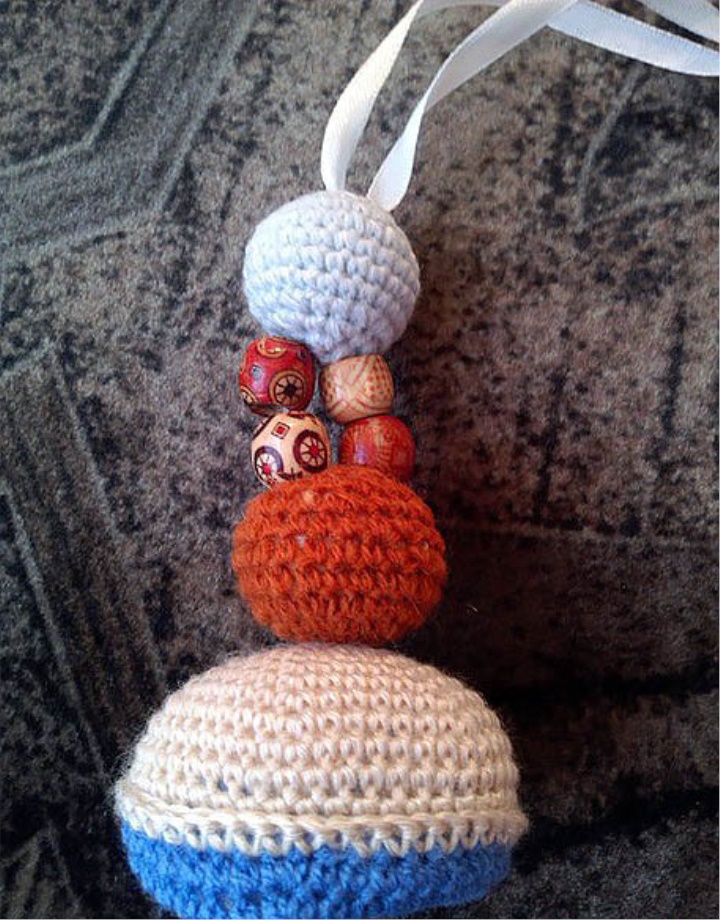
Beads-They need a lot-3 on the leg, on the tail 3, on the Bangs 2-only 17 pieces. I knitted all different colors-but you can pick up.
1.2 of the loop, 6 to the second from the hook
2. Add to Each loop (12)
3 increase, 1 in a circle (18)
4. Increase, 2 in a circle (24)
5-7. 3 Rows in a circle
8. Ubava, 2 SBN-In a circle (18)
9. Ubava, 1 SBN-In a circle (12)
10.6 decreases. Thread to fasten the fill in the process of knitting.
The ice stage-April 5.
If anyone will knit then horse-to tie an additional 4 or 8 beads for a horse more tender color-she's a girl...
Stage 2.
Today we finish the legs.
Sole-4 pieces. You can all multicolored.
1.2 of the loop, 6 to the second from the hook
2. Add to Each loop (12)
3 increase, 1 in a circle (18)
4. Increase, 2 in a circle (24)
5. Increase, 3 in a circle (30)
6. Raise, 4 in a circle (36)
7. Increase, 5 SBN-In a circle (42)
8. Increase, 6 SBN-In a circle (48)
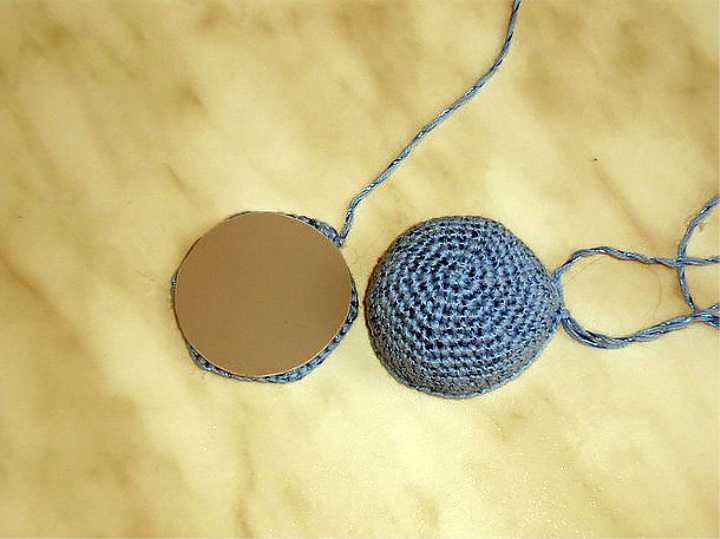
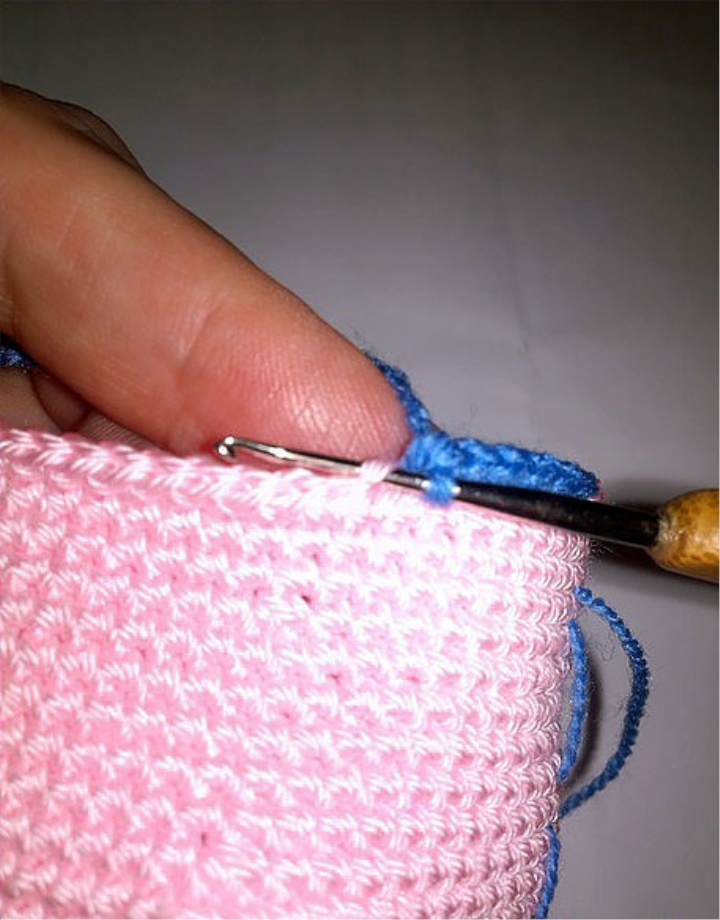
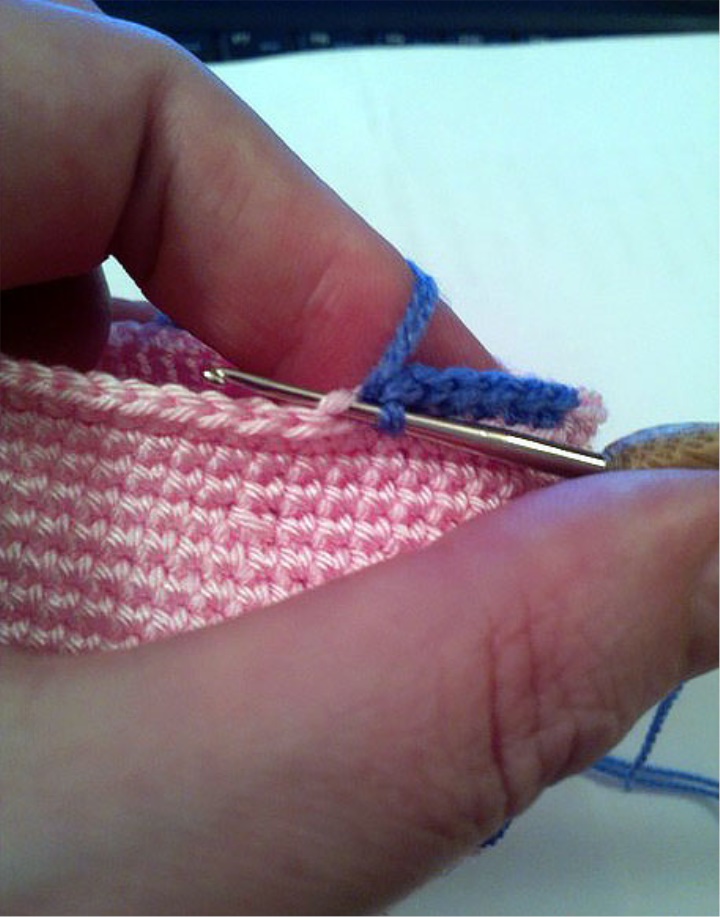
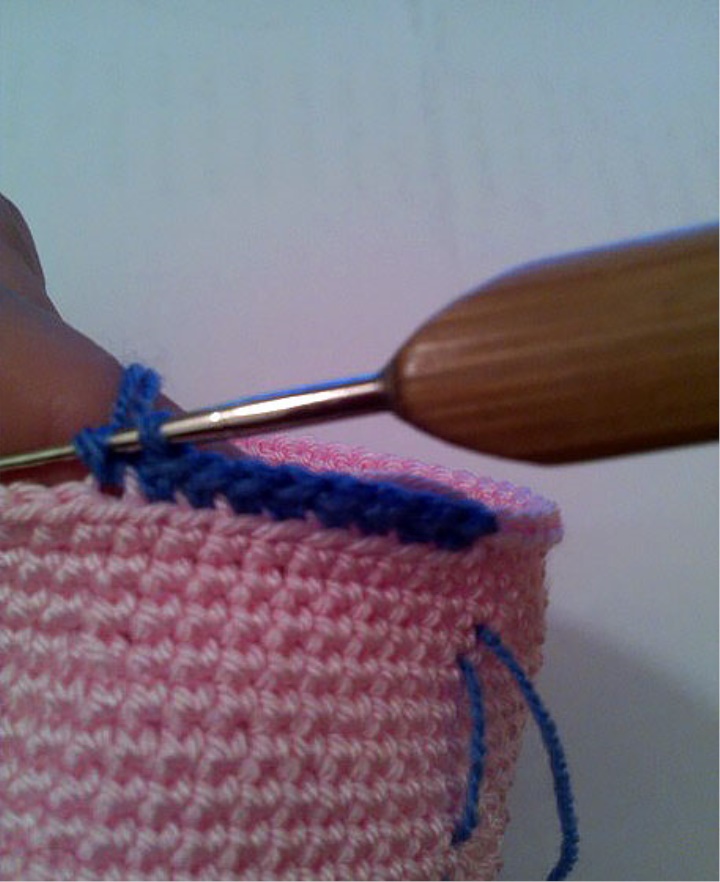
Cut the thread. For greater stability it is possible to cut out a plastic circle and to glue to a sole. But it is possible and in other way-will knit when the top, at packing insert a cardboard (plastic)-glue has a property to turn yellow.
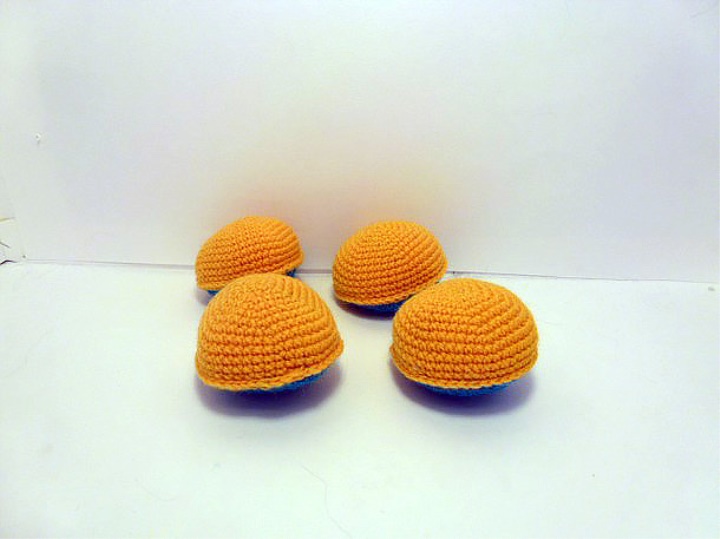
The foot itself-more precisely its top-4 pieces
1.2 loops, 6 on the second of the hook
2. Add to Each loop (12)
3. Increase, 1 in a circle (18)
4. Increase, 2 in a circle (24)
5. Increase, 3 in a circle (30)
6. Raise, 4 in a circle (36)
7. Increase, 5 SBN-In a circle (42)
8. Increase, 6 SBN-In a circle (48)
4 -5 rows Evenly, then tie together with the sole.
I recommend to immediately tie the sole-and then the top. More beautiful. And to tie a Rahim step-if anyone can...
Another point-if we knit a fork-in one sole hiding bag terribly rustling, in the other-the bell, in the third-pour phalolku instead of stuffing, in the fourth (here the fantasy is over)-I put a pebble-as a result of this leg was the most usual, a little Heavier than the rest--a cobble-stone did not cram!
For the loball legs sew like this: I tightly sewed beads through each other and to the top of the soles. No wire required-the loball will be steady, checked!
For the horse legs will collect and immediately fasten to the body-but can be assembled and put aside, because the legs are fastened front and the tape is held in the neck, and the hind legs will be left to the tail and tie on the bow. The principle of my horse was:
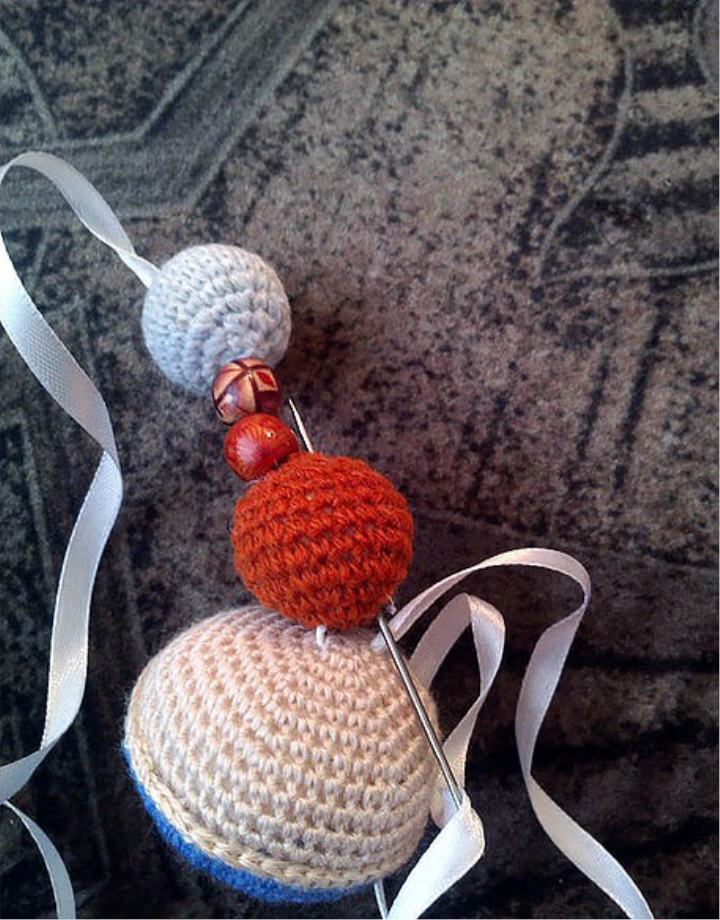
Sew the legs. Here we will be cunning: take a ribbon satin thin, cut into 4 parts-for four feet. About 50 cm we go into a needle with a wide ear and start to be strung in the following order:
-Big Bead 1
-Bead Small 1
-Big Bead 2
-Knitted Bead
-Upper Leg
Now in the opposite direction:
-Output through the top of the foot
-Knitted Bead
-Big Bead 2
-Bead Small 2
-Big Bead 1
Put your feet aside.
You can see in this photo how I collected the legs of Horka.
The girls planned the 3rd stage on Thursday, but I'm going to have a business trip--maybe I'll leave the day at 3. So I will give you the 3rd stage, and you already knit at your pace-who as it turns out.
Stage 3.
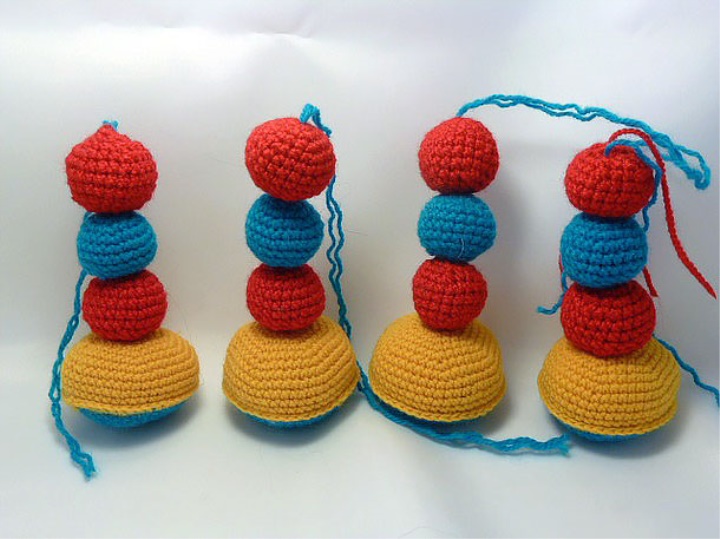
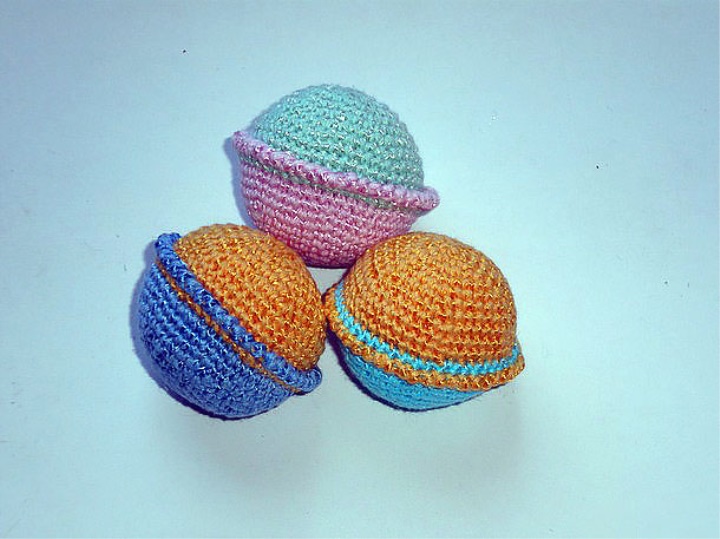
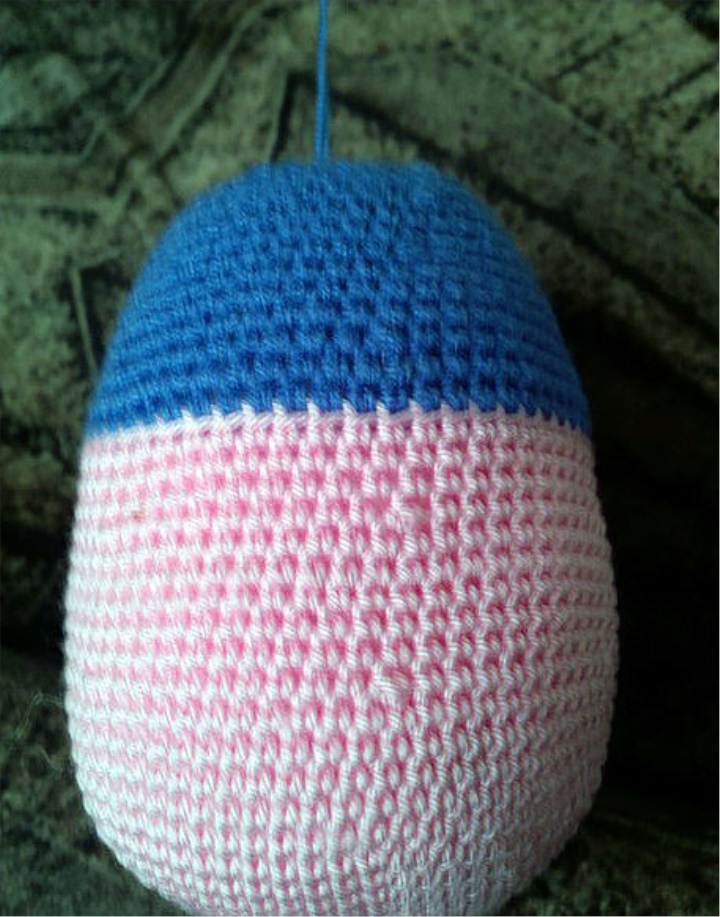
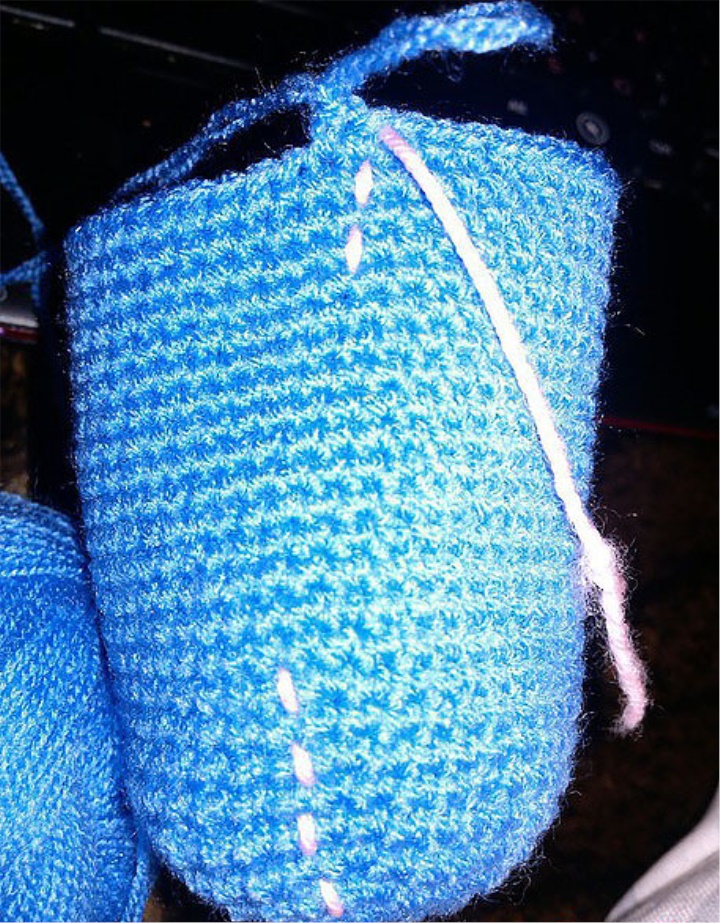
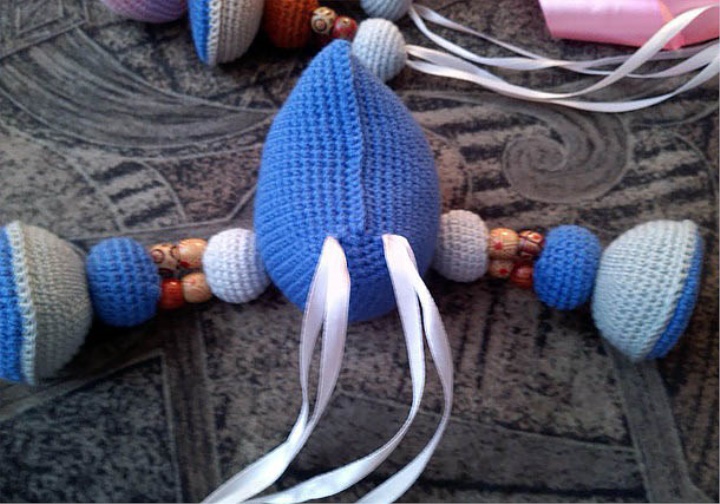
The body of the lomballoon. Six children
1.2 loops, 6 on the second of the hook
2. Add to Each loop (12)
3 increase, 1 in a circle (18)
4. Increase, 2 in a circle (24)
5. Increase, 3 in a circle (30)
6. Raise, 4 in a circle (36)
7. Increase, 5 SBN-In a circle (42)
8. Increase, 6 SBN-In a circle (48)
3 rows evenly, then tie together two pieces, fill.
To stitch the body will be as follows:
You see--these balls are like pancakes--tightly together.
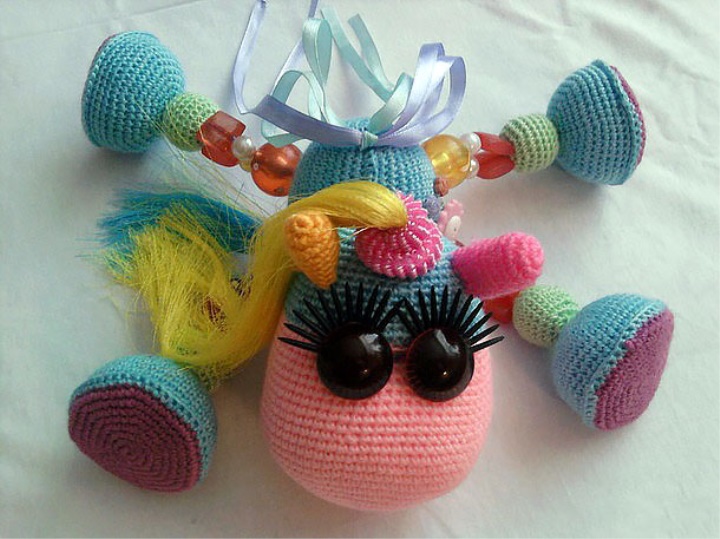
Horse's head is for those who knit a girl.
Head – Start with a light color.
1.2 of the loop, 6 to the second from the hook
2. Add to Each loop (12)
3. Increase, 1 in a circle (18)
4. Increase, 2 in a circle (24)
5. Increase, 3 in a circle (30)
6. Raise, 4 in a circle (36)
7. Increase, 5 SBN-In a circle (42)
8. Increase, 6 SBN-In a circle (48)
9. Increase, 7 SBN-In a circle (54)
10. Increase, 8 in a circle (60)
11. Increase, 9 SBN-In a circle (66)
12. Increase, 10 sbn-In a circle (72)
13-17 Evenly
18. Ubava, 10 SBN-In a circle (66)
19-23
24. Ubava, 9 SBN-In a circle (60)
25-27
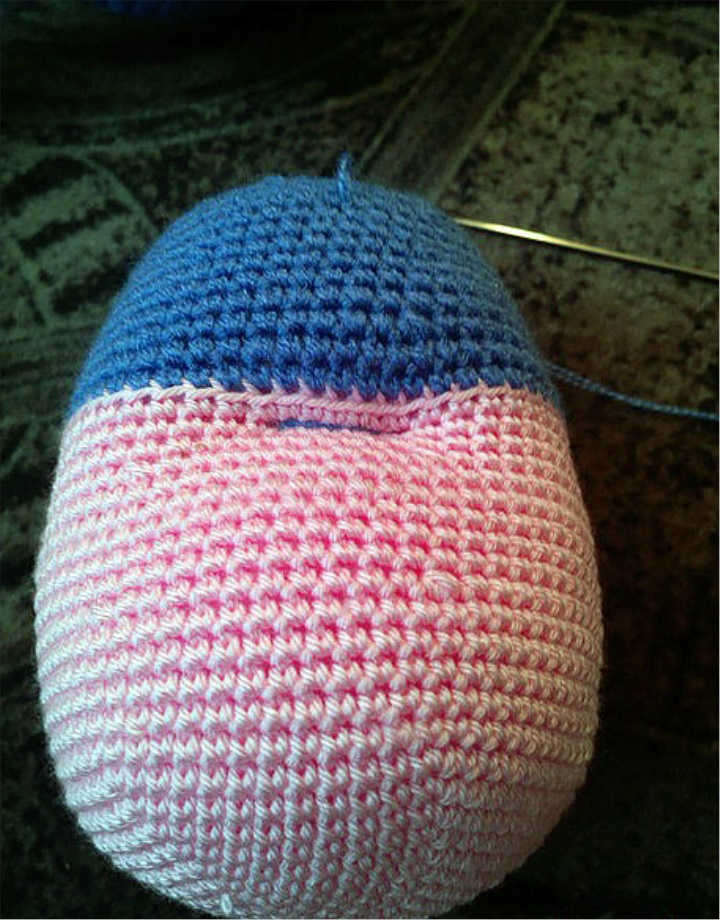
28. Change color-behind the back wall smoothly.
29. Exactly
30. Ubavka, 8 SBN-In a circle (54)
31-33
34. Ubava, 7 SBN-In a circle (48)
35-36.
37. Ubava, 6 SBN-In a circle (42)
38
39. Ubava, 5 SBN-In a circle (36)
40. Ubava, 4 SBN-In a circle (30)
41. Ubava, 3 SBN-In a circle (24)
42. Ubava, 2 SBN-In a circle (18)
43. Ubava, 1 SBN-In a circle (12)
44. To the end, the thread to fasten (although I usually leave-it is very convenient to duck eyes and mouth. Stuffed in the process of knitting.
We create, advise and wait for the next stage.
Stage 4.
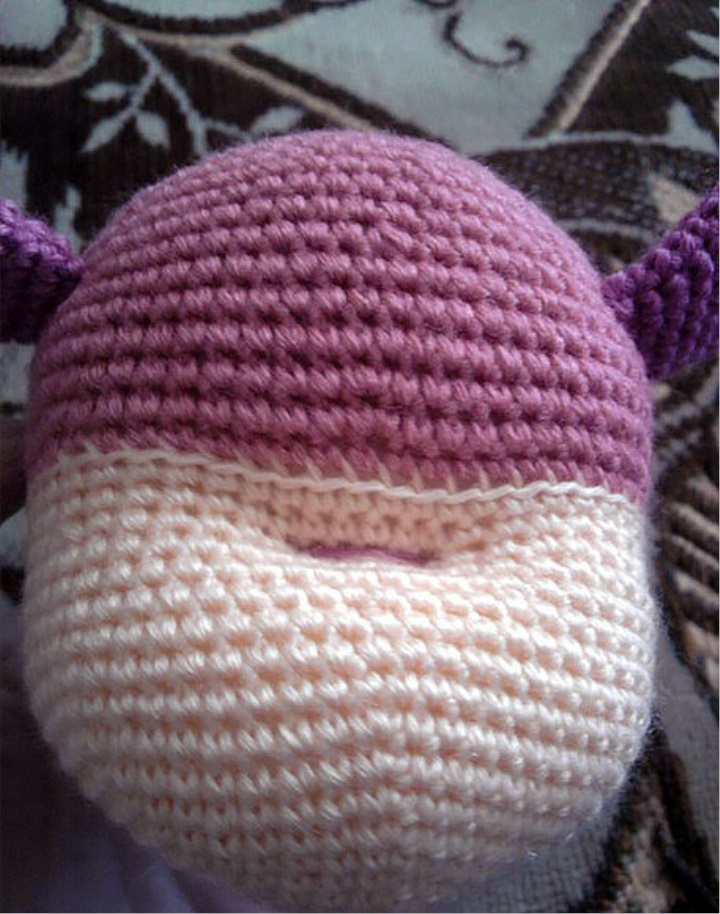
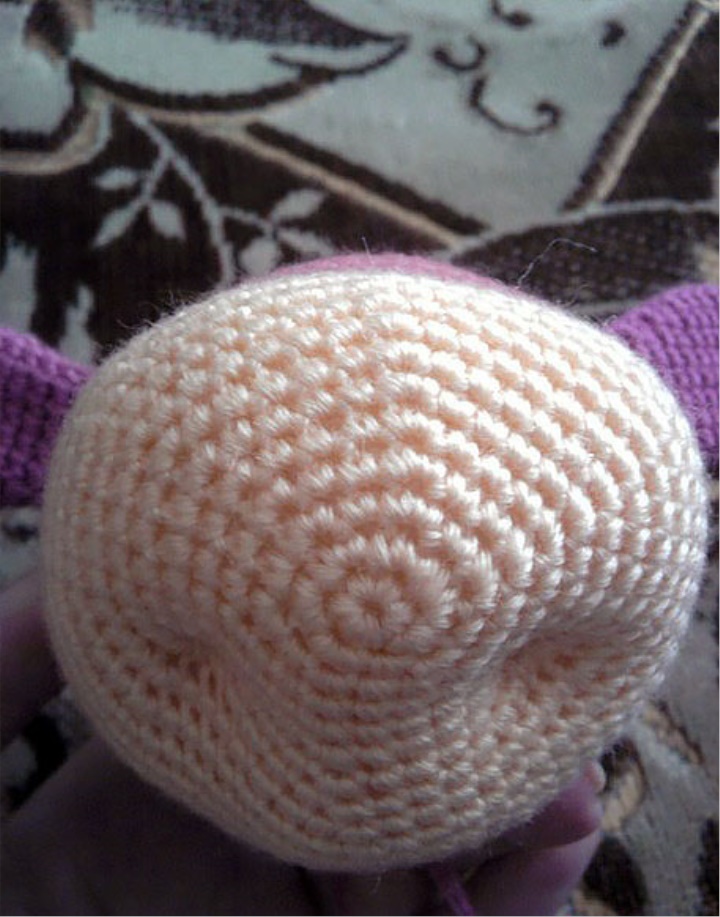
The head of the Lomballoon – we start with a light color.
1.2 of the loop, 6 to the second from the hook
2. Add to Each loop (12)
3. Increase, 1 in a circle (18)
4. Increase, 2 in a circle (24)
5. Increase, 3 in a circle (30)
6. Raise, 4 in a circle (36)
7. Increase, 5 SBN-In a circle (42)
8. Increase, 6 SBN-In a circle (48)
9. Increase, 7 SBN-In a circle (54)
10. Increase, 8 in a circle (60)
11-16 Evenly
17. Ubavka, 8 SBN-In a circle (54)
18-19
20. Change color-behind the back wall smoothly.
21. Increase, 8 in a circle (60)
22. Increase, 9 SBN-In a circle (66)
23-25. Exactly
26.9 SBN, Ubroka-In a circle (60)
27-28. Exactly
29.8 SBN, Ubroka-In a circle (54)
30. Exactly
31. Ubava, 7 SBN – In a circle (48)
32. Ubava, 6 SBN-In a circle (42)
33. Ubava, 5 SBN-In a circle (36)
34 in a circle (30)
35 in a circle (24)
36 in a circle (18)
37. Ubava, 1 SBN-In a circle (12)
38-Ubava, a thread to fasten (although I usually leave-it is very convenient to duck eyes and mouth. Stuffed in the process of knitting.
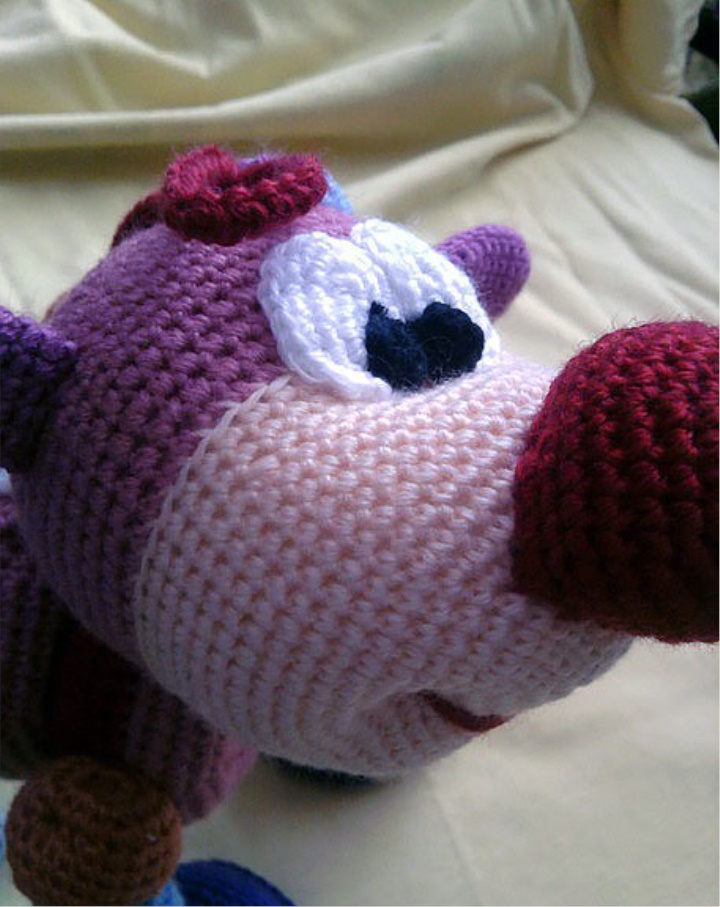
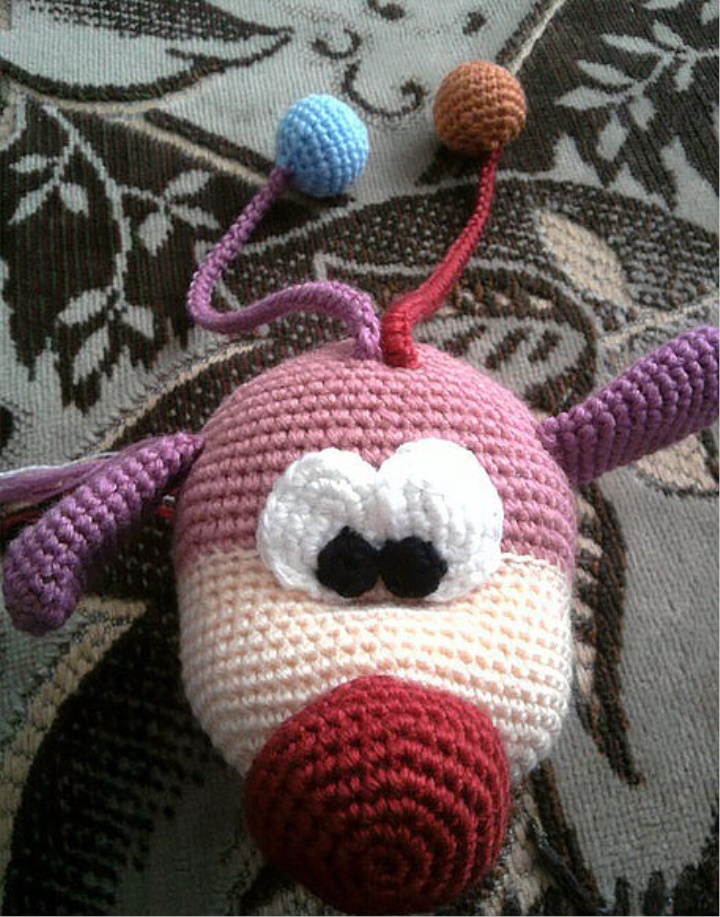
Make the Ducks on the picture. Insert the needle at the beginning of knitting, leave the tail of the thread. Bring out the needle in the place where there will be eyes (about three rows before the change of color)
Skip a few bars and enter the needle in place. Where the second Glick will be located. To bring a needle at the beginning of knitting. Pull the tails of the thread and make a duckling for the eyes. Ponytails tie a knot, loose ends of a thread to hide inside.
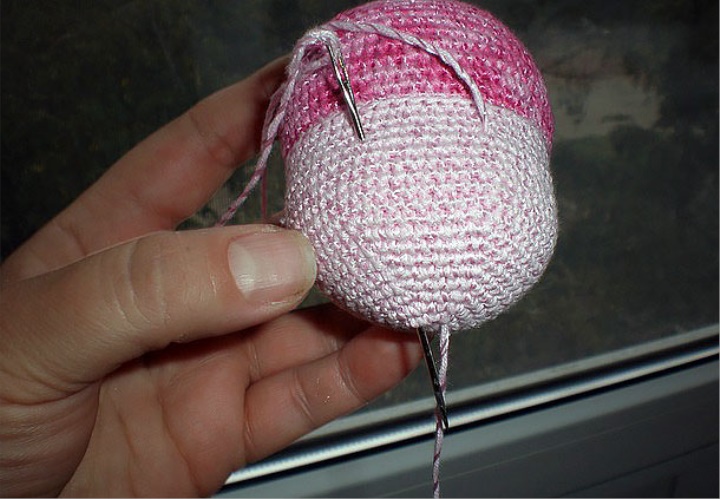
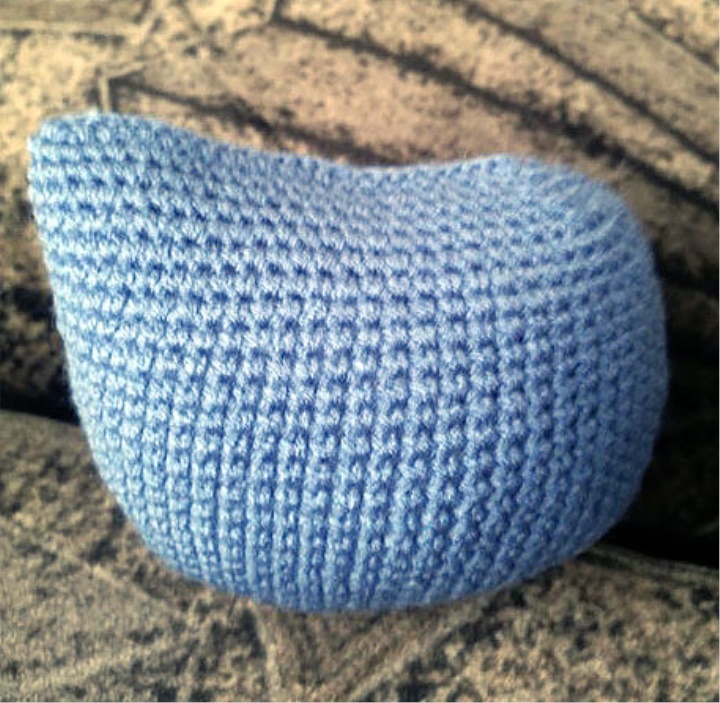
You see in the photo-that's how it will end up.
Eye-2 pieces
5 Loops
1.3 on the 2nd from the hook, 3 in 1, 2 off, plus
2. A raise, 2 SBN, 3 increments, 3 SBN, 1 increment.
3.1 SBN, increment, 2 SBN, (increment, 1 sbn) * 3, 3 SBN, (increment, 1 sbn) * 2
Leave a thread-it is more convenient to sewing.
Pupil-2 pieces
2 of the loops, 6 on the second of the hook
Cut the thread.
The ear is not stuffed.
1.2 of the loop, 6 to the second from the hook
2. Add to Each loop (12)
3. Increase, 1 in a circle (18)
4. Increase, 2 in a circle (24)
5-10. Exactly
11. Ubavka, 2 in a circle (18)
12. Exactly
13.7 SBN, Ubroka-2 times (16)
14. Exactly
15.6 SBN, Ubroka-2 times (14)
16. Exactly
17.5. Ubava-2 times (12)
Two rows Evenly
Nose
1.2 loops, 6 on the second of the hook
2. Add to Each loop (12)
3. Increase, 1 in a circle (18)
4. Increase, 2 in a circle (24)
5. Increase, 3 in a circle (30)
6. Raise, 4 in a circle (36)
7-8
9. Ubava, 4 SBN-In a circle (30)
10. Exactly
Leave the thread for sewing.
If you want a smaller nose-skip 6 row and respectively in the 9th then Ubavki after 3 svn.
Now it is possible to collect a head and in principle of a loball everything.
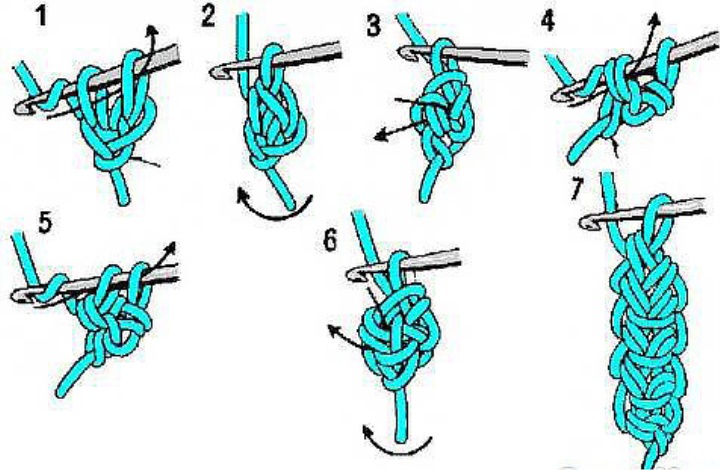
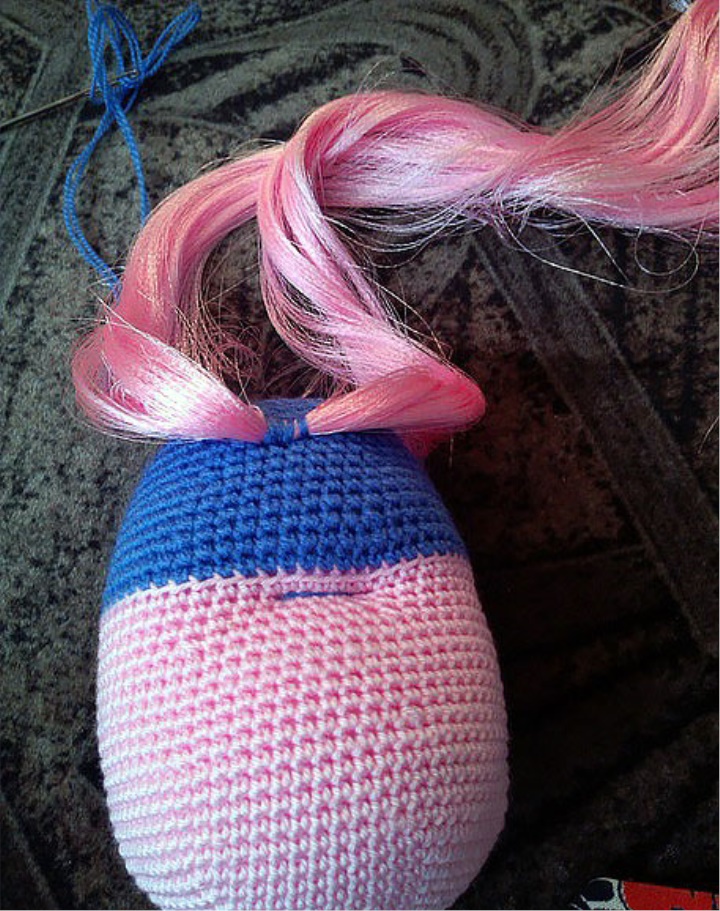
Knit cord-caterpillar for tail and bangs. For the convenience of sewing beads leave a long thread tip at the beginning and at the end of the lace.:
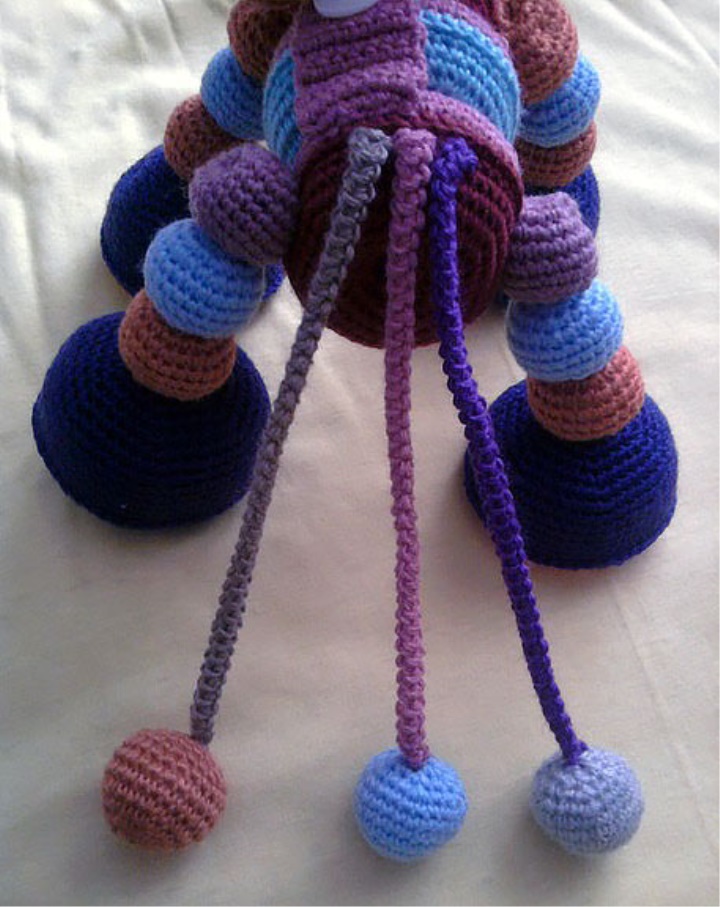
I've nailed three cords, I've seen girls nailed and 4 and 5-as you want. They are well plaited in a braid then.
Like a bangs
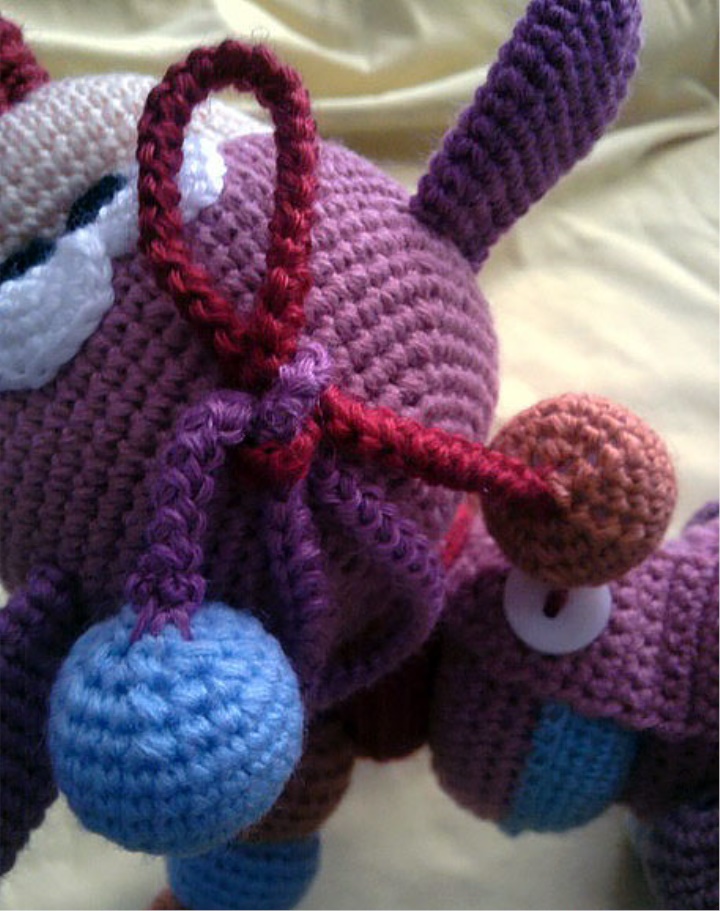
The length of cords-from 20 to 25 cm-as it turns out. The drawstring is more convenient to use than a simple chain of loops.
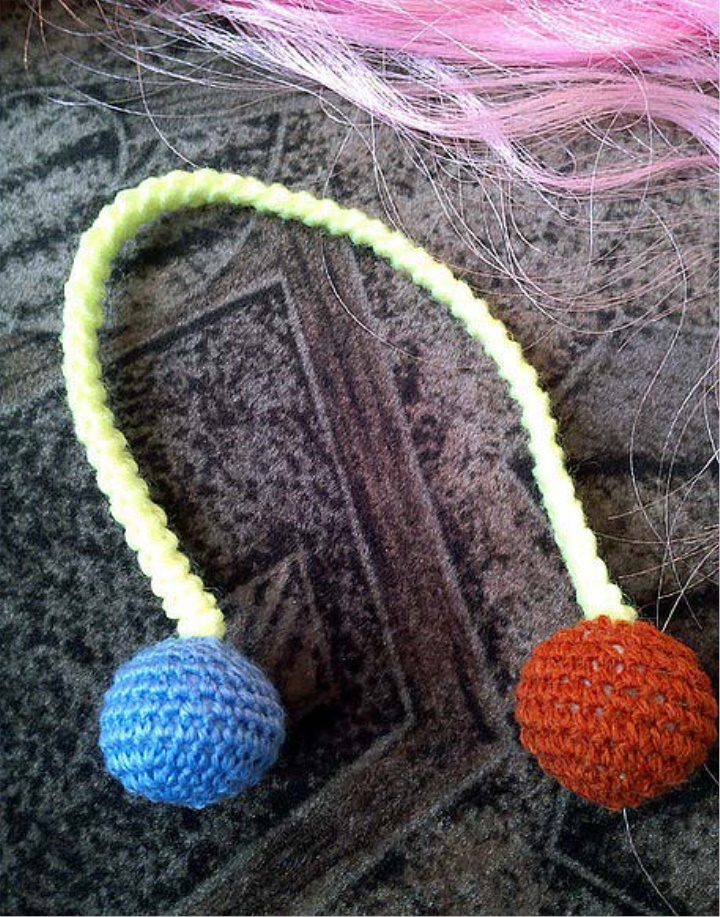
The fasteners are knit on request.
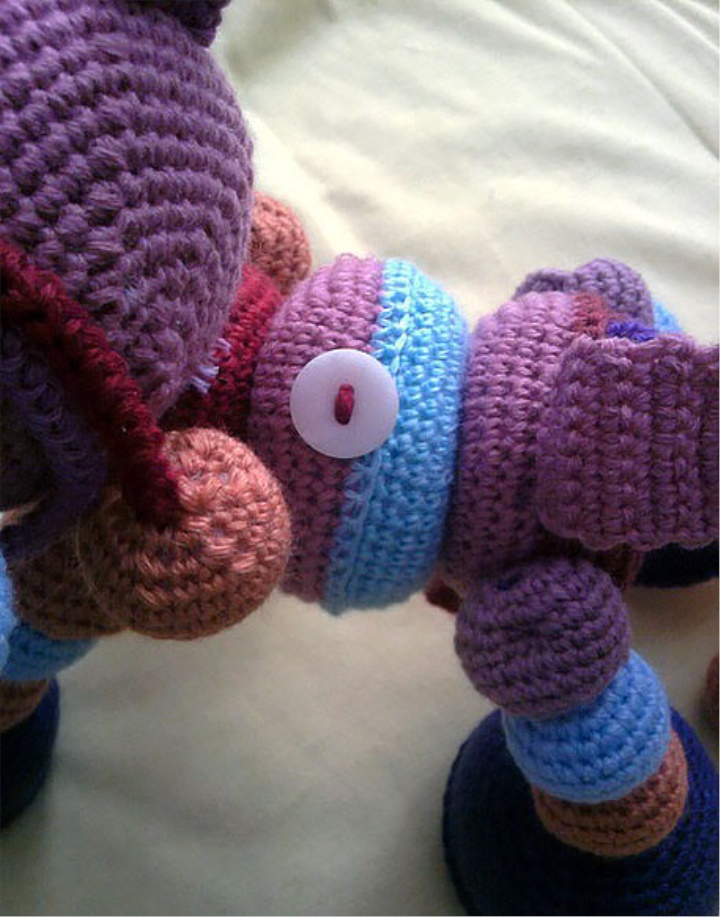
10 of the loops, 9 from the 2nd loop. It is not a spiral to pass 8 rows. Then tie the hole to the button:
3 Sat, 3 loops, 3 sat
Then there are two rows of straight, and knit of the corners – we make Ubavochek from two sides at the beginning of each row.
You can tie around the perimeter.
I have 2 clasps on my back and tummy
For those who knit Horka:
Body-1 piece. Knit in one color.
1.15 of the loops, with the second from the hook knitting: 13 SBN, 3 svn in 1-the-loop, 12-Rnd, raise
2. Raise, 12, 3 increments, 12 rnd, 2 increments
3.1 SBN, raise, 12 svn, (1 SBN, raise) 3 times, 12 SBN, (1 SBN, increment) 2 times
4.2 SBN, raise, 12 SBN, (2 SBN, increment) 3 times, 12 svn, (2 SBN, raise) 2 times
5.3 SBN, a raise, 12 SBN, (3 SBN, raise) 3 times, 12 svn, (3 SBN, increment) 2 times
6.4 SBN, raise, 17 SBN, raise, 9 SBN, raise, 16 SBN, raise, 5 SBN
7. Exactly
8.26 SBN, Add, 26, 1
9. Exactly
10.27 SBN, add, 27, 1
11-22. Exactly
23.23 SBN, Ubavka, 3 SBN, Ubavka, 3 SBN, Ubavka, 26 SBN.
24.23 SBN, Ubavka, 2 SBN, Ubavka, 2 SBN, Ubavka, 25 sbn.
25.23 SBN, Ubavka, 1 SBN, Ubavka, 1 SBN, Ubava, 24 SBN.
26.23 SBN, 3 Uavki, 23
Lay down the in half and sew along.
That's how I have a thread-marker is in the process of knitting.
And here is a drop:
Where it sticks out, it's going to be a ponytail.
The horns are not stuffed.
1.2 of the loop, 6 to the second from the hook
2. Add to Each loop (12)
3-10
I used to attach the bought eyes to the horse, you can link to the description of the eye of the Lomballoon, only with a blue pupil.
How to make a chelochka horse-I will show already in the next stage.
Knit, we collect the Lomballoon and brag.
Final build of the horse.
That's how I collect the legs of Horka. I take satin tape-cut about 50 cm, I put in the game and strung-knitted bead, two small, again knitted, I punch the needle in the sole:
And in the opposite direction-knitted, two small, knitted-and put aside so far.
I wear the front legs like this: I put 2 tapes from my legs into the needle and I put them in the place where the head would be:
And I tie tightly knot, fix with glue.
I wear my hind legs a little on the cross:

Withdrew tape and tightly tied in the knot and in the bow-this is our tail.
The Chelochka.
I take 2 sections of a wide satin ribbon-5 cm width-length of about 40 cm each. Color absolutely does not matter!
And I start to dissolve-pulled a thread and stretched out to get the type of "hair":
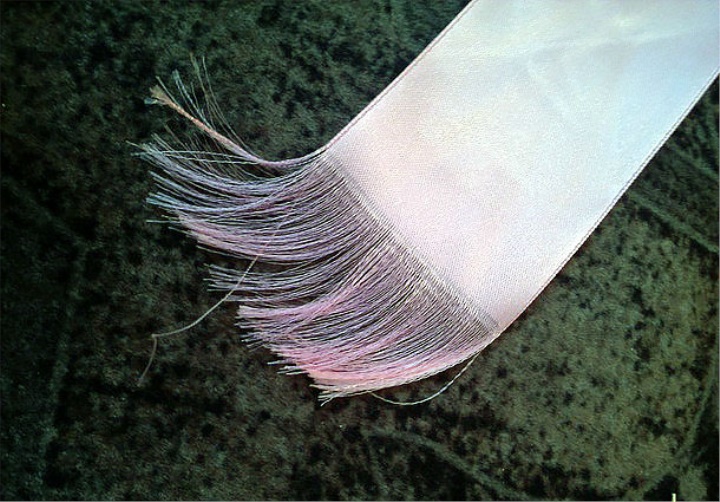
This "hair" is folded in half and is tightly attached to the head of the horse:
If the eyes are knit, you can duck a little bit like this:
Then I made a type of bow on the neck:
And I came to my head, fastened my eyes. In this version of the horn is not nailed-it was lazy.

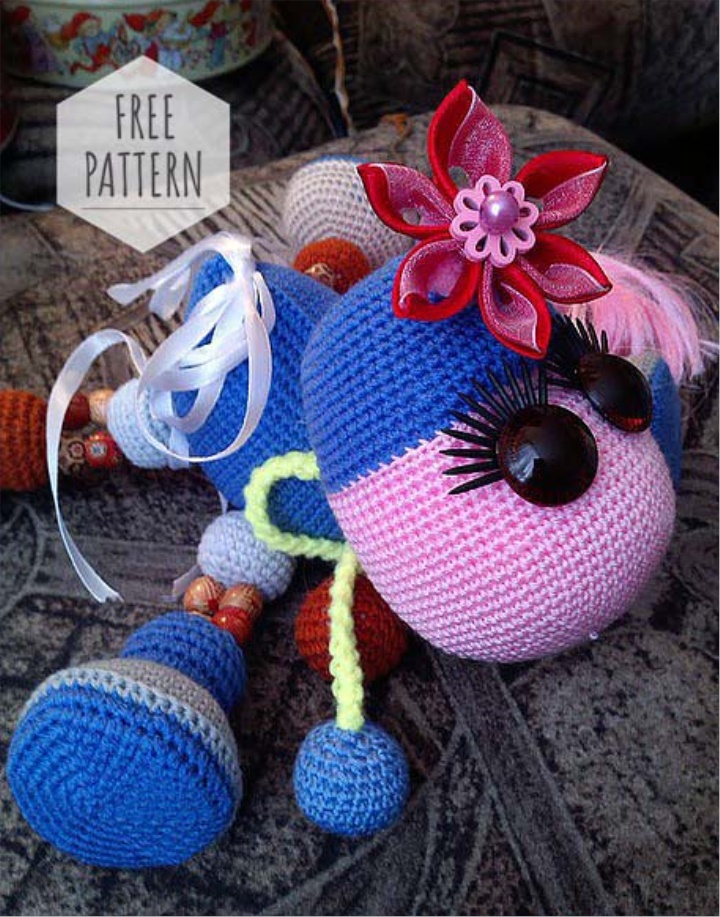
In this version of the horse only lies and sits slightly-it was conceived as such. On my head I attached a flower on an elastic band-still it is a toy for girls...
That's the whole process. Join-it's very exciting!
Source : https://www.stranamam.ru/post/9491127/