Click For Crochet Abbreviations List
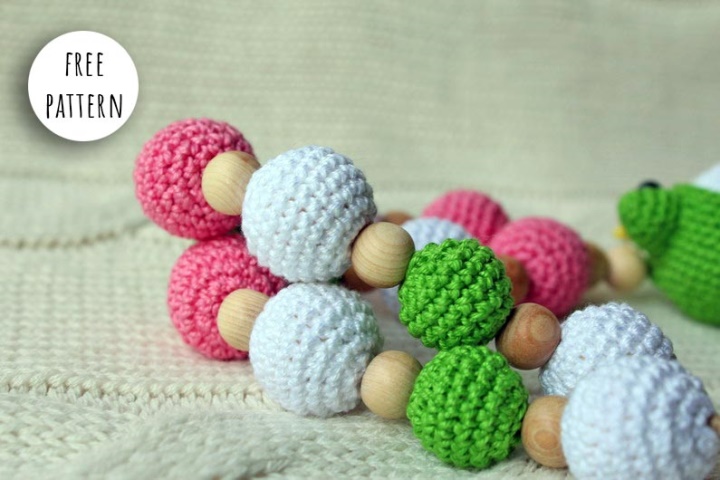
I want to suggest you to tie a small toy amigurumi, which can be used as a keychain, or hang on Slingo.
On occasion I bought a lot of colors of cotton yarn Vita Coco, and more than half knitted green tangle, because the shade fell well very bright and cheerful.
In general, recently imposed a lot of slingo, tying beads is a meditative activity that is difficult to stop at least once starting)))
For knitting I used such materials:
Vita Coco yarn Green, white and yellow (thickness 200km/50gr)
Hook № 1.5
Filler
Black eyes with secure fastening d = 6mm (2 pairs)
Bright pink iris threads for mouth embroidery
Legend:
-VP-Air Loop
— PRS — A column without a throw
— PRSs – A column with Crochets
-P-Raise
-U-Decrease
— (...) — The number of loops in a row after it is completely tied
-(Sequence) * times-parentheses indicate the sequence of actions to repeat the number of times specified in parentheses.
Head (1 piece):
Knitting with white yarn.
1st row: Ring Amigurumi of 6 loops (6)
2nd row: Raise in Each loop (12)
3rd row: (1 PRS, 1p) * 6 times (18)
4th row: (2 PRS, 1p) * 6 times (24)
5th row: (3 PRS, 1p) * 6 times (30)
6th row: (4 PRS, 1p) * 6 times (36)
7-th row: (5 prs, 1p) * 6 times (42)
8th – 12th series: (42 PRS) (42)
13th row: (5 prs, 1u) * 6 times (36)
14th row: (4 PRS, 1u) * 6 times (30)
15-th row: (3 PRS, 1u) * 6 times (24)
16-th row: (2 prs, 1u) * 6 times (18)
17th row: (1 prs, 1u) * 6 times (12)
Leave the thread to retraction the hole after packing.

Hood (1 piece):
Knit Green yarn.
1st row: Ring Amigurumi of 6 loops (6)
2nd row: Raise in Each loop (12)
3rd row: (1 PRS, 1p) * 6 times (18)
4th row: (2 PRS, 1p) * 6 times (24)
5th row: (3 PRS, 1p) * 6 times (30)
6th row: (4 PRS, 1p) * 6 times (36)
7-th row: (5 prs, 1p) * 6 times (42)
8th – 13th Series: (42 PRS) (42)
14th row: (19SBN, 1u) * 2 times (40)
15-th row: (18SBN, 1u) * 2 times (38)
Leave a long thread for sewing. Decreases in the last two rows of details are necessary for the hood to charge the head Amigurumi.
Hands (2 details):
Knit Green Yarn
1st row: Ring Amigurumi of 5 loops (5)
2nd row: Raise in Each loop (10)
3rd-5th Series: (10 prs) (10)
Leave the sewing thread to the torso.
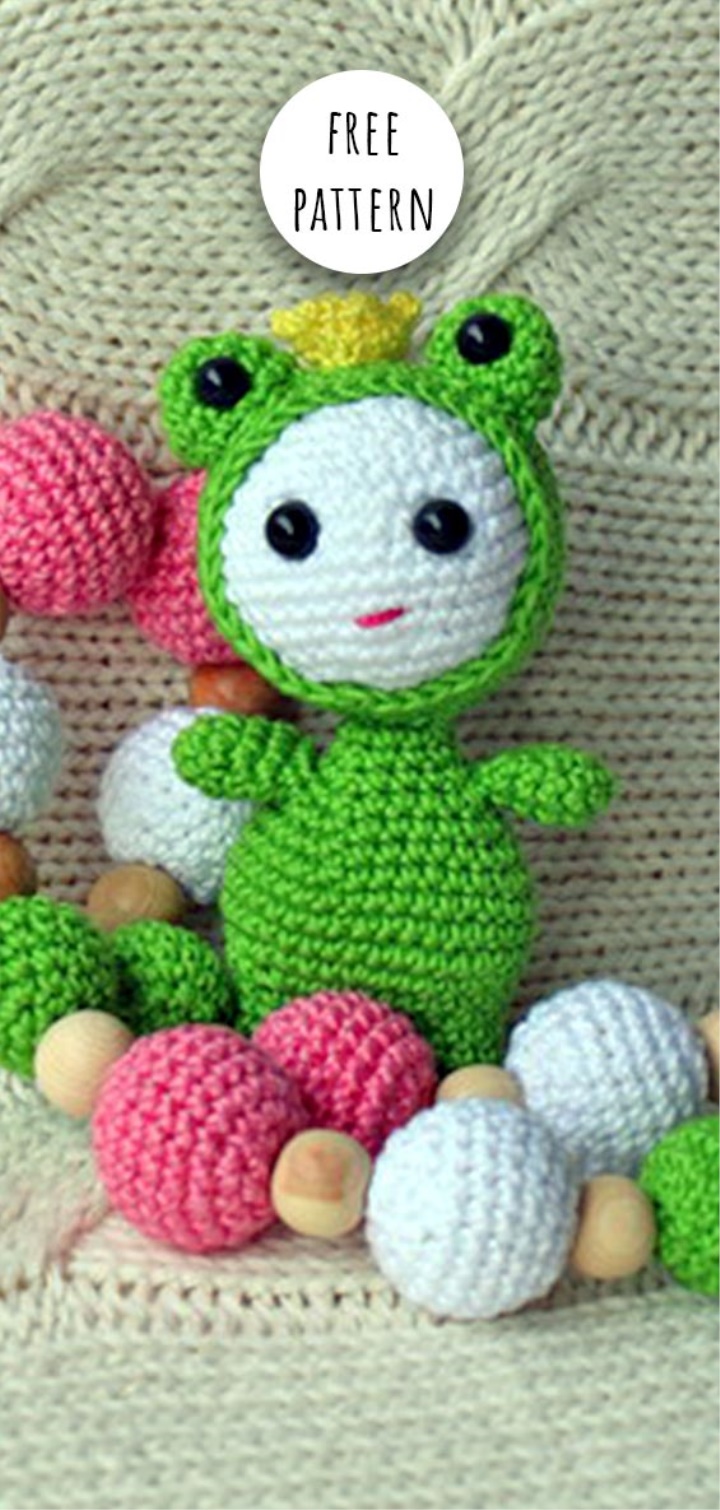
Eyes (2 details):
Knit Green Yarn
1st row: Ring Amigurumi of 5 loops (5)
2nd row: Raise in Each loop (10)
3rd row: (1 PRS, 1p) * 5 times (15)
4th-5th Series: (15 PRS) (15)
Leave a long thread for sewing
Legs tally one part with the torso, without stitching. First knit one leg with green yarn, tear thread. Knit the second leg, without tearing the thread connect the legs and continue to knit the torso.
Legs (2 parts):
Knit Green Yarn
1st row: Ring Amigurumi of 6 loops (6)
2nd row: Raise in Each loop (12)
3rd-4th Series: (12 PRS) (12)
Sew feet on the edge, capturing 3 loops. For stitching we use the thread remaining after knitting of the first leg. After joining the legs begin to tie on the edge, in the joints of the legs make a raise. As a result, after the first general series was made, 24 loops were made.
We continue to knit the torso (in the first row of 24 loops, it is not repeated):
2nd row: (3 PRS, 1p) * 6 times (30)
3rd row: (4 PRS, 1p) * 6 times (36)
4th-6th series: (36 PRS) (36)
7-th row: (7 PRS, 1u) * 4 times (32)
8-th row: (6 prs, 1u) * 4 times (28)
9-th row: (5 prs, 1u) * 4 times (24)
10th row: (4 PRS, 1u) * 4 times (20)
11th row: (3 PRS, 1u) * 4 times (16)
12th row: (2 prs, 1u) * 4 times (12)
We leave a long thread for sewing.
Crown (1 detail):
We collect yellow Yarn 12 VP, lock in the ring and knit on a spiral of 2 rows of PRS. The last row of knitting sequence – 1 pico, 1 prs. How to make a pico-1 loop on the hook, dial 2 more EAP and lock the resulting chain with the help of the SS in the same loop from which the knitting began. As a result, the edges of the crown are cloves. We leave the starting thread for the Crown sewing to the head, the end thread is fastened and hide.
The Assembly remains:
We fasten the eyes on the white head, fill it with a filling. The rest of a white thread slightly stjagivaem a hole that the filler does not climbing. Insert the head into the hood, the ultimate thread of the hood sew the edge to the head. We beat the body, sew the head to the torso. Attach the plastic eyes to the knitted eyes and sew this design on the hood))) hammer and sew the handles. Sew the Crown, hide all the threads. Embroider mouth and Princess-frog ready!
Source :
http://amigurumik.com/slingoigrushka-carevna-ljagushka-shema-vjazanija/