Bertie

Crochet Bee

Click For Crochet Abbreviations List

As promised, I spread the scheme amigurumi bee .
This toy is even easier than the dog-artist , it is less detailed and it fits faster.
If you want to please someone with a bright and positive toy, then bravely grasp the hook and start


Materials and tools.

To knit a bee, we need:
Magic microfiber yarn (black, white and yellow)
Hook No. 1.5
Safe eyes or beads for the eyes
Adhesive gun (easily replaced with a needle and thread)
Scissors
Filler
Pink or white felt for wings
Pink thread for embroidery of a smile
And of course - a good mood


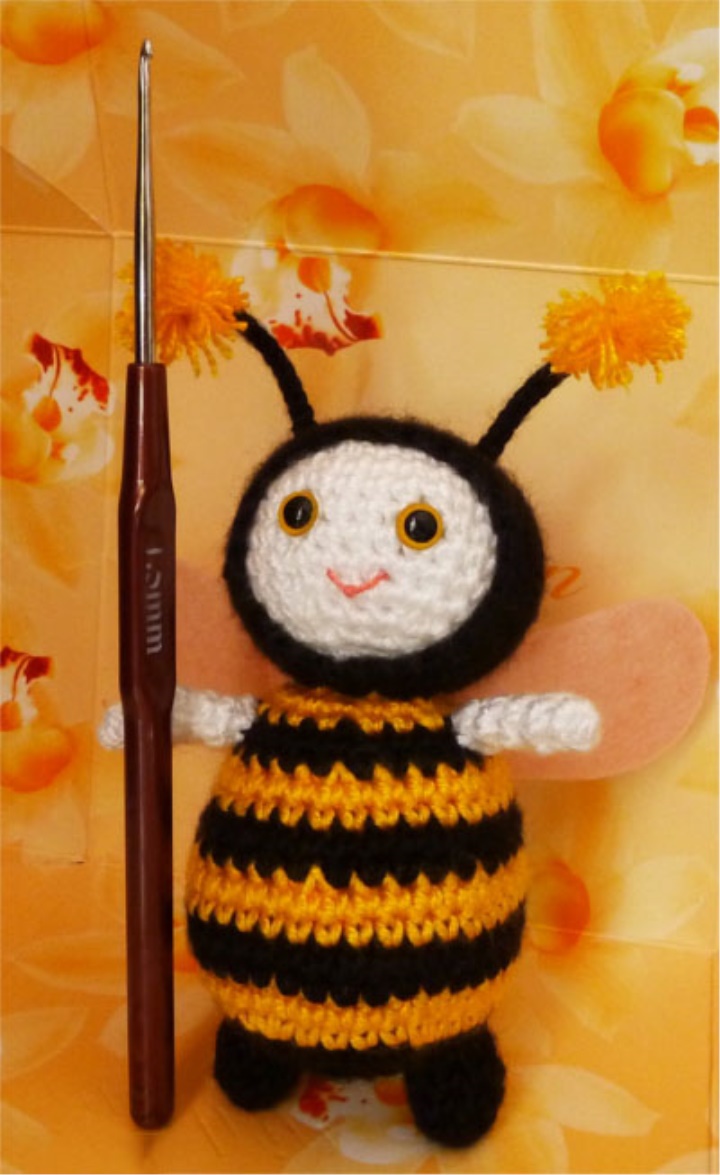
Amigurumi bee scheme

Head (1 piece)

We make a sliding knot and dial a chain of 2 VPs (air loops).

1 row 6 RLS in the second from the VP hook [6]
2 row 6 П (increase) [12]
3 row (1 П, 1 СБН) repeat 6 times [18]
4 row (1 П, 2 СБН) repeat 6 times [24]
5 row (1 П, 3 СБН) repeat 6 times [thirty]
6 - 11 row 30 sc [thirty]
We insert the eyes and start filling with filler, continue to add the filler as needed.
12 row (1 Y (decrease), 3 RLS) repeat 6 times [24]
13 row (1 Y, 2 RLS) repeat 6 times [18]
14 row (1 Y, 1 RLS) repeat 6 times [12]
15 row 6 Y [6]
Hood (1 piece)

Make a sliding node and type a chain of 2 EIs.

1 row 6 RLS in the second from the VP hook [6]
2 row 6 П (increase) [12]
3 row (1 П, 1 СБН) repeat 6 times [18]
4 row (1 П, 2 СБН) repeat 6 times [24]
5 row (1 П, 3 СБН) repeat 6 times [thirty]
6 - 12 row 30 sc [thirty]
13 row (1 Y, 3 RLS) repeat 6 times [24]
Feet (2 pieces)

Make a sliding node and type a chain of 2 EIs.

1 row 8 RLS in the second from the VP hook [8]
2 - 4 row 8 RLS [8]
Handles (2 items)

Make a sliding node and type a chain of 2 EIs.

1 row 5 RLS in the second from the VP hook [5]
2 - 5 row 5 RLS [5]
Torso (1 piece)

We start knitting with black yarn.

Make a sliding node and type a chain of 2 EIs.

1 row 6 RLS in the second from the VP hook [6]
2 row 6 П [12]
3 row (1 П, 1 СБН) repeat 6 times [18]
4 row (1 П, 2 СБН) repeat 6 times [24]
5 row (1 П, 3 СБН) repeat 6 times [thirty]
Change yarn to yellow.
6 row (1 П, 4 СБН) repeat 6 times [36]
7 row 36 RLS [36]
We change the yarn to black.
8 - 9 row 36 RLS [36]
Change yarn to yellow.
10 - 11 row 36 RLS [36]
We change the yarn to black.
12 row (1 Y, 4 sc) repeat 6 times [thirty]
13 row 30 sc [thirty]
Change yarn to yellow.
14 - 15 row 30 sc [thirty]
We change the yarn to black.
16 row (1 Y, 3 RLS) repeat 6 times [24]
17 row 24 sc [24]
Change yarn to yellow.
18 row (1 Y, 2 RLS) repeat 6 times [18]
19 row 18 RLS [18]
Densely stuff the body filler.
Antennae with bombs (2 parts)


We need black and yellow yarn to produce antennae.

Cut 6 strands of black yarn about 20 cm. Take a long needle and pass all 6 threads through the head of the bee (the head should already be in the hood). That is, we stick the needle in the place where we will have the first antenna, and pull it out at the location of the second. When all 6 threads are pulled through the head, divide them into 3 parts with 2 strings in each and weave the usual pigtail. Pigtail length is at your discretion. When the pigtail is ready (we try to make both pigtails of the same length), fix the threads so that it does not dissolve and cut off the excess.

Bombs will be made of yellow yarn. Cut off the yellow thread about 40 cm. The thread of microfiber itself is woven from 4 thin strings. We divide it into separate strings and from 2 thin threads we make 2 bombs. Bombs are sewed or glued to the antennae.

Wings


First, we draw on paper the form of the wings that we like. Then cut out the paper template and transfer it to the felt. Cut out the felt wings and sew or glue in the back of our bee.

Assembly

We put the hood on the head and fix with the needle and thread the desired position. We sew the head in the trunk. Handles and legs are also sewn to the body. We fix the wings. Plait the mustache with the bombs. We embroider a smile and our amigurumi bee is ready!


That's all, now this little hard worker will please you with his bright outfit and a kind smile. I wish everyone a pleasant creativity and do not forget to send your bees to our gallery, I will be very pleased:)


Source : http://amigurumik.com/vyazanaya-pchelka-kryuchkom-shema/


Post your comment

Information!  You need to be a member to comment. You can easily sign up from here.

0 comments