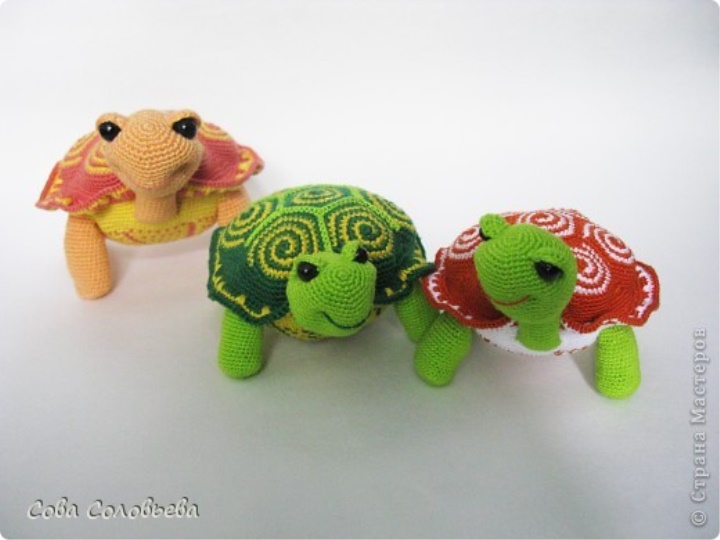
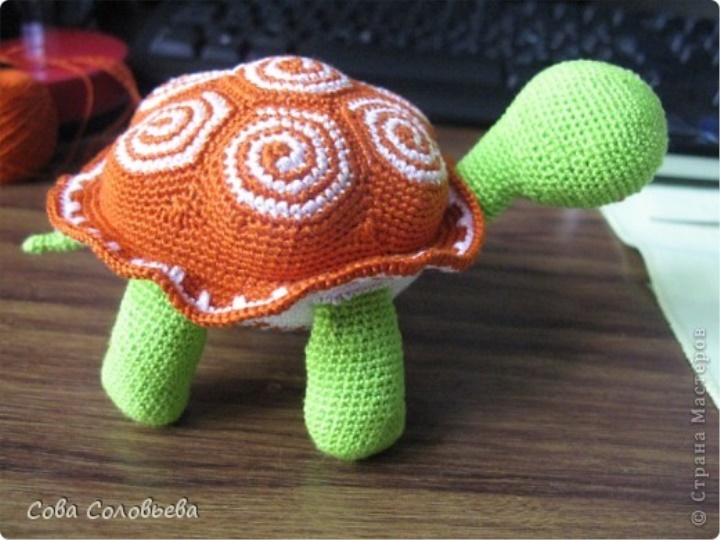
These wonderful turtles from the author Owl Solovyov from the site of the Country of Masters. I quote the author's explanations verbatim.
So. We need three colors of thread, wire, eye beads, a hook under your strings.
on the photo, pay attention to the proportions of the turtles: in the yellow-green turtle, the head-legs-tail are connected from the thread thinner (hook No. 0.9) than the carapace-stomach (hook No. 1.25), peach and red-white-green turtle are connected from a string of the same thickness.
Once you have decided on the threads, we proceed to the most monotonous:
Head.
1. 6 sb in the ring amigurumi
2. (sb, prib) 6 times
3. (2 sb, prib) 6 times
4. (3 sb, prib) 6 times
5. (4 sb, prib) 6 times
6. 36 sbn
7. (5 sb, prib) 6 times
8. 42 sbn
9. (6 сбн, приб) 6 times
10. 48 sbn
11. (7 sb, prib) 6 times
12 -14 ranks 54 sbn
15. (7 сбн, уб) 6 times
16. 48 sbn
17. (6 сбн, уб) 6 times
18. 42 sbn
19. (5 сбн, уб) 6 times
20 - 22 ranks 36 sbn
23. (4 сбн, уб) 6 times
24. 30 sbn
25. 12 sb, (sb, ub) 6 times (this will be the chin, the bottom of the head)
26 - 29 rows of 24 сбн
30. (10 сбн, уб) 2 times
31 - 36 rows 22 сбн
37. (9 сбн, уб) 2 times
38 and 39 rows of 20s
The leg (4 pcs.).
1. 5 in, beginning with the second from the loop hook:
2. 3 sb, 3 sbn in the extreme, 2 sb, 2 sbn in the last
3. Prib, 2 sb, 3 prib, 2 sb, 2 prib
4. Sb, prib, 2 sb, (sb, prib) 3 times, 2 sb, (sb, prib) 2 times
5. 2 sb, prib, 2 sb, (2 sb, prib) 3 times, 2 sb, (2 sb, prib) 2 times
6 - 18 rows (13 rows) of sb in each loop of the previous row
19. 2 sb, уб, 2 сбн, (2 сбн, уб) 3 times, 2 сбн, (2 сбн, уб) 2 times
20 and 21 rows of sb in each loop of the previous row
22. (9 сбн, уб) 2 times
23. 20 sbn
Tail.
4 sb in the ring amigurumi
1. 4 sbn
2. arr, 4 sbn
3. arr, 5 sbn
and then one increase in the row until 14 loops are typed.
with a boring part finished, we take up the "sweet".
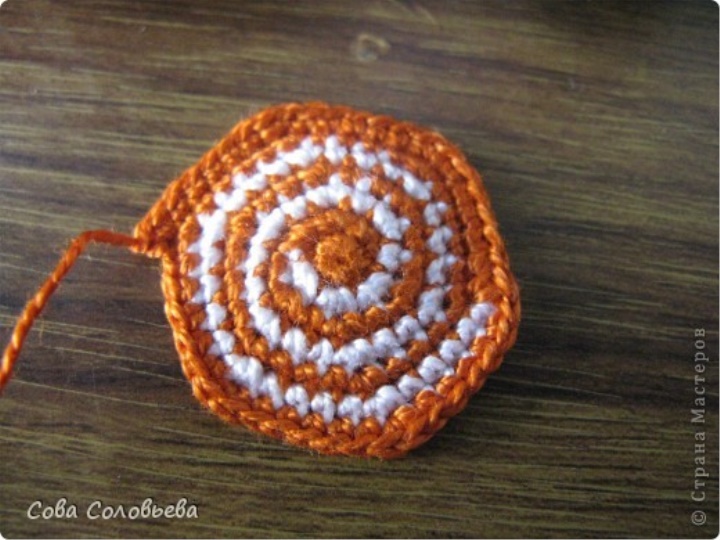
The motif of the shell.
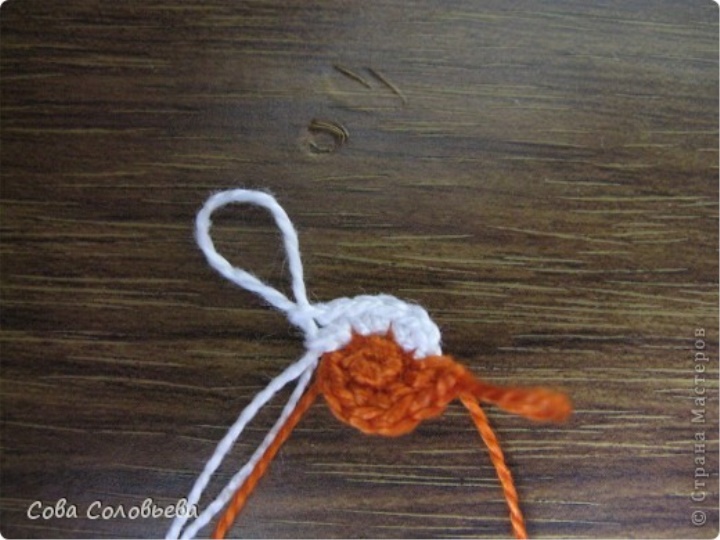
6 in the ring amigurumi
Red 2 additions
In the next loop, attach a white thread, tie 3 increments (starting with the loop next to the one in which you attached the thread)
A red-haired increase in the loop into which you attached a white thread.
We have three white and three red
Next, we knit in a circle, separately in turn by each thread:
Redheaded in white loops (sb, prib) 2 times
White in red loops (sb, prib) 3 times
Redheaded in white loops sbn, prib, (2 sb, prib) 2 times
White in red loops (2 sb, prib) 3 times
Redheaded in white loops 2 ct, prib, (3 cb, prib) 2 times
White in red hinges (3 sb, prib) 3 times
Redheaded in white loops 3 sb, prib, (4 sb, prib) 2 times
White in red hinges (4 sb, prib) 2 times, 4 sb, in the next loop of sb and connecting column, cut off the white thread.
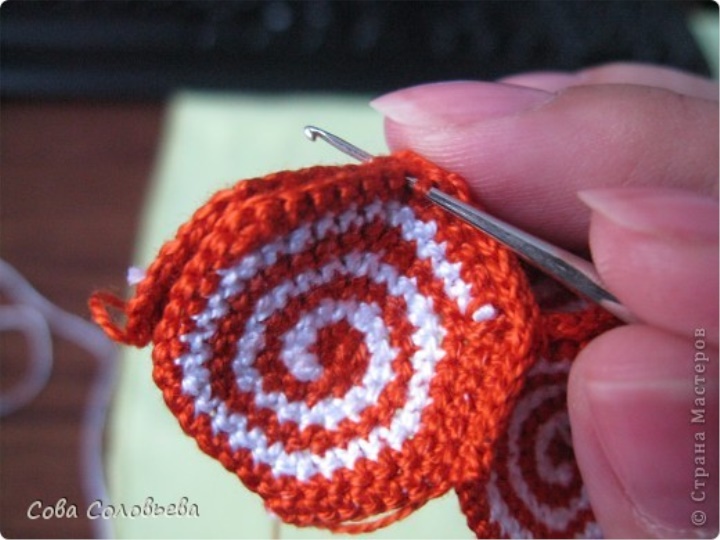
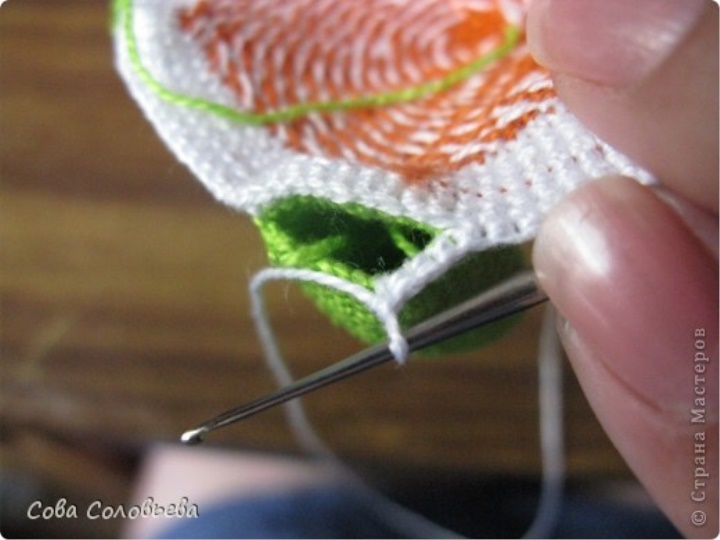
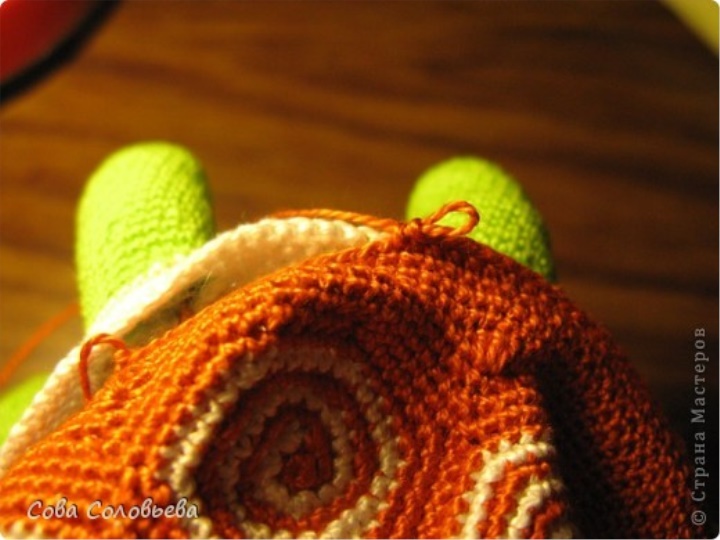
Red-haired in white loops 4 cbn, prib, (5 cbn, prib) 2 times, 5 sb, increase in a red loop (see photo)
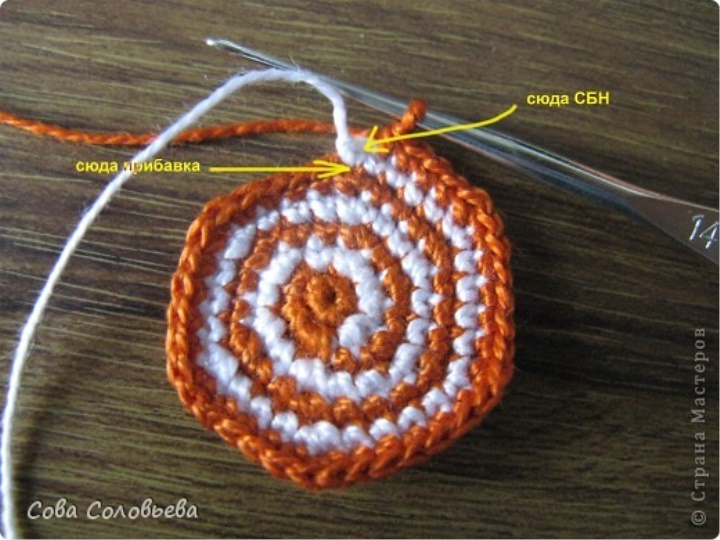
Ginger in red hinges (5 sb, prib) 3 times, finish the job, cut the thread.
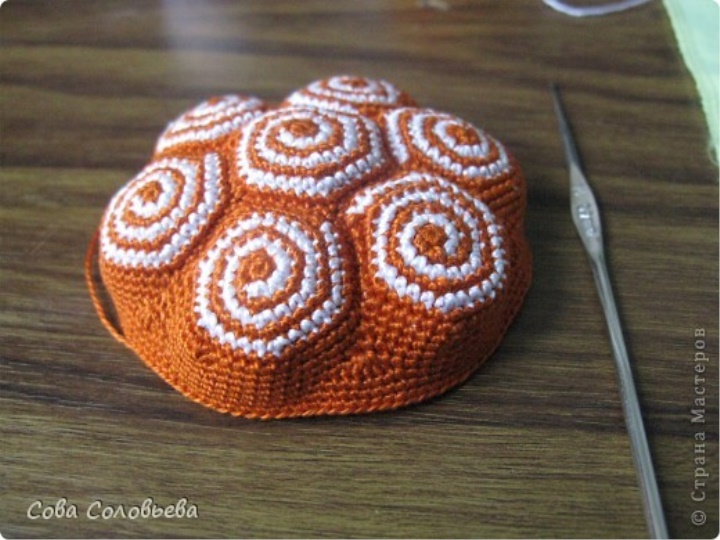
ready-made motive
such motifs we knit seven pieces.
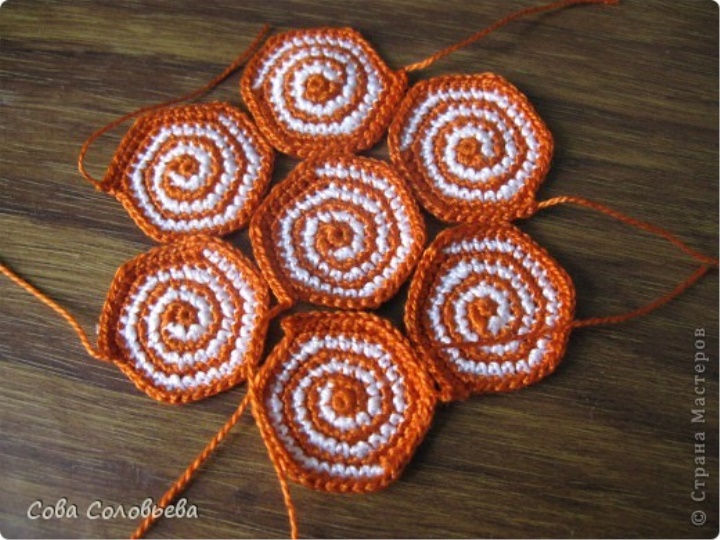
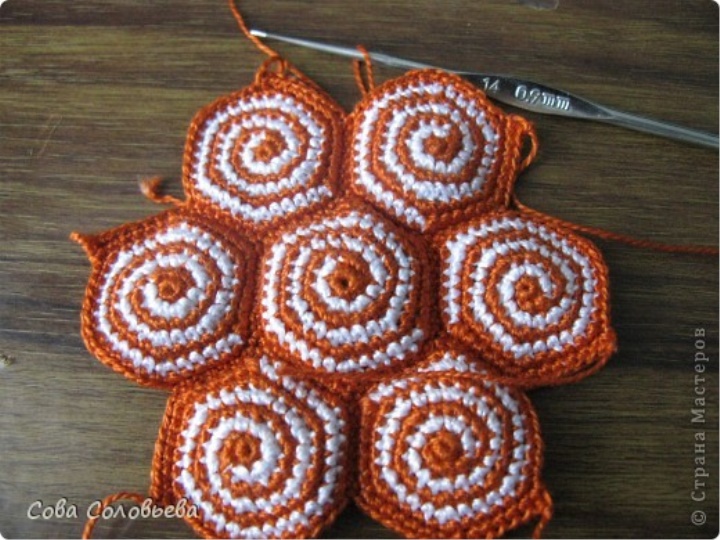
Build the shell.
Motives, folding "face to face," the three sides join together with columns without a crochet.
we obtain the following figure.
Next, we tie around the common outer edge.
1. Slip into each loop (126 loops)
2. Sat, (19 sb, ub) 6 times, and the reduction must occur in the junction between the motives, i.e. you capture one loop of one motive and one loop of another motive and make a decrease (120 loops)
3. (уб, 15 сбн, уб, сбн) 6 times, and сбн between the adjustments should fall in the junction between the motives (in the decrease of the previous series).
4. (psn, 15 sbn, psn, 3 ssn in one loop) 6 times, 3 ssn should fall into the junction between the motives (in the sb between the discounts of the previous series).
5, 6 and 7 rows 120 sbn
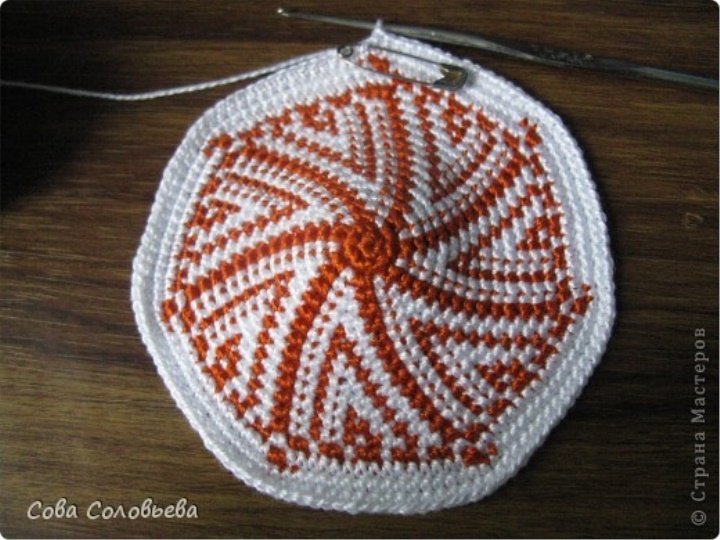
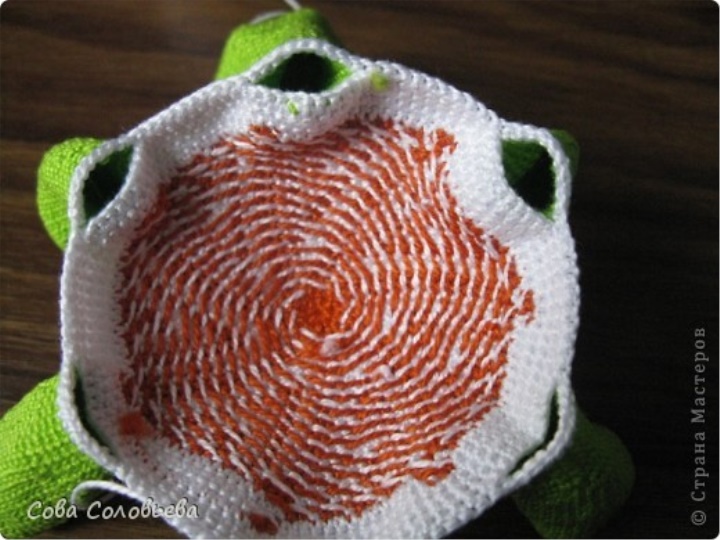
we proceed to the tummy.
The basis of the pattern on the pussy - all the increments are performed with a thread of additional color, as it were, rays from the center.
All that between the rays - at your discretion, you can chaotically insert colored loops (as in my case), you can not make beams, and start a spiral, as on the motives of the shell, you can generally make the tummy monophonic.

1. 7 sb in the ring amigurumi
2. 7 increases
3. (sb, prib) 7 times
4. (2сбн, приб) 7 times
5. (3сбн, приб) 7 times
6. (4сбн, приб) 7 times
7. (5bn, prib) 7 times
8. (6 сбн, приб) 7 times
9. (7 сбн, приб) 7 times
10. (8 сбн, приб) 7 times
11. (9 сбн, приб) 7 times
12. (10сбн, приб) 7 times
13. (11 сбн, приб) 7 times
14. (12 сбн, приб) 7 times
15. (13 сбн, приб) 7 times
16. (14 сбн, приб) 7 times
17. (15 сбн, приб) 7 times
18 and 19 rows of sb in each loop of the previous row, the thread does not break off.
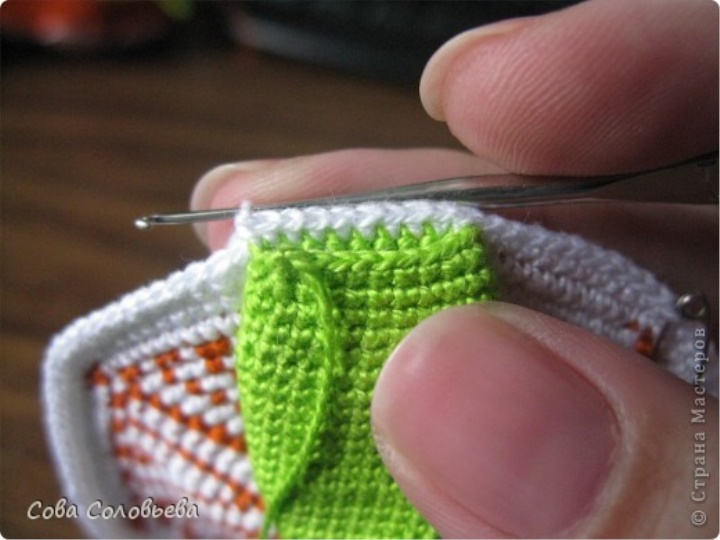
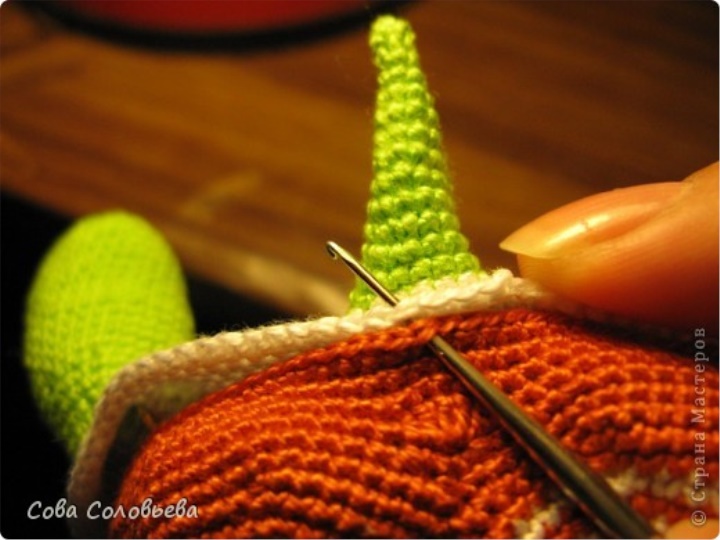
Then we tie to the puziku limbs as follows:
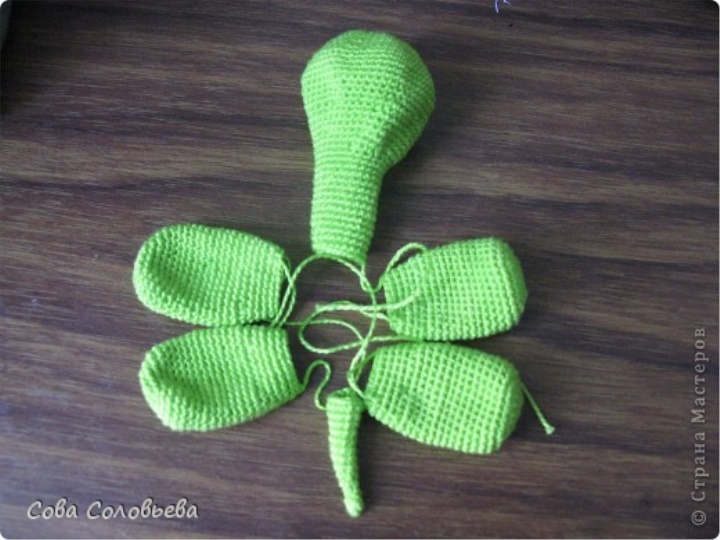
11 sb, 10 cbn grasping the leg (as in the photo), 10 sb, 10 cbn grasping the leg, 10 sb, 10 sb seizing the head (chin to the pussy, remember where the neck is?), 10 sb, 10 sb seizing the leg, 10 sb, 10 sb seizing the foot, 12 sb, 7 sb engaging the tail
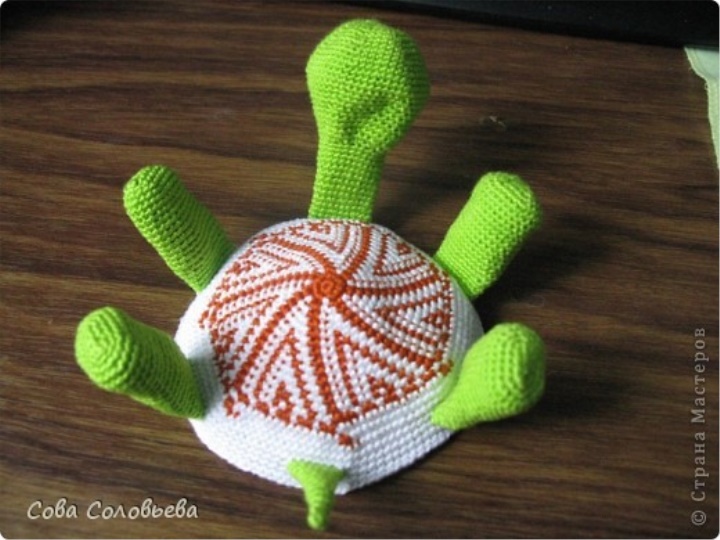
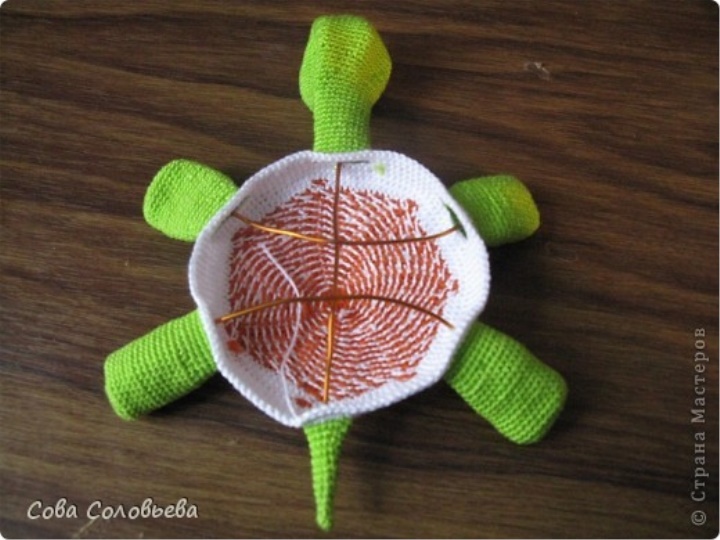
we obtain the following figure.
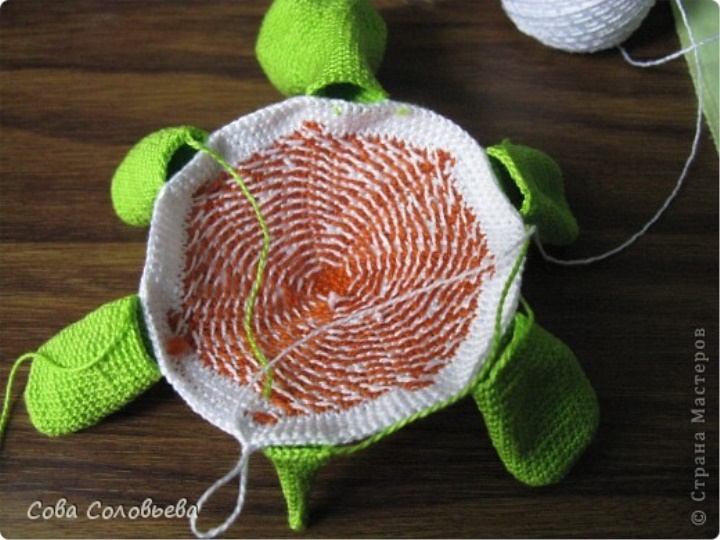
The next row - sb in each loop of the previous row, but capturing the remaining free loops of the limbs and head.
we obtain the following figure.
Two more rows of sb in each loop of the previous row, fix the thread and cut it off.
We make a skeleton. A piece of wire from the tail to the head, and two more, connecting the legs in pairs.
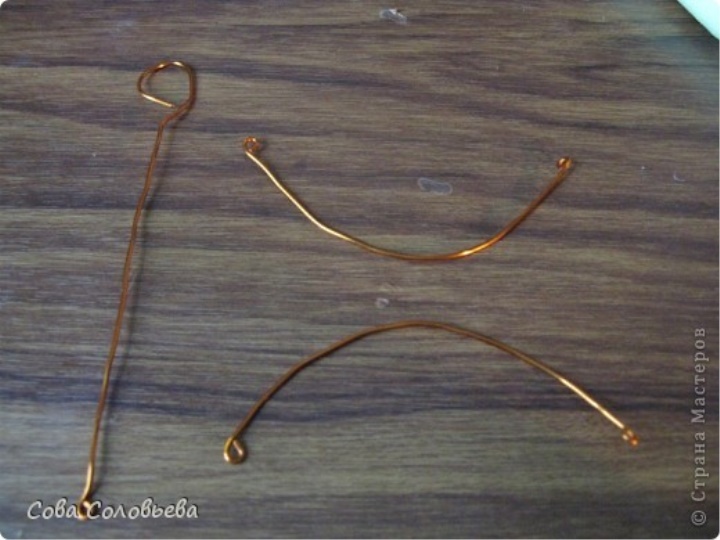
We insert the skeleton. It is not necessary to connect the legs and the ridge together.
After the frame is inserted, we stuff the head and legs. not very tight, so that later it would be convenient to make suits.
Further we bind the armor to the tummy.
First, attach the shell to the resulting organism so that the legs, head and tail are centered between the motifs of the shell.
We attach the thread to the shell and connect the armor and belly loop into a loop. The process is rather tedious, but have patience.
until the end does not bind, leave a hole somewhere between the last leg and tail, and fill the carcass.
first the tummy (under the skeleton), then the shell (above the frame), starting from the far edge, so that the motifs of the shell are prominently highlighted.
we adjoin the series to the end.
Yes, on the shell we have an extra loop (abdomen 119 loops, and armor 120), we hide it somehow in the region of the tail at the end of the row, there it will not be noticeable.
We do not break the thread, we knit it further.
2nd row - 2 sb, until the end of the series.
The 3rd and 4th rows of sb in each loop of the previous series
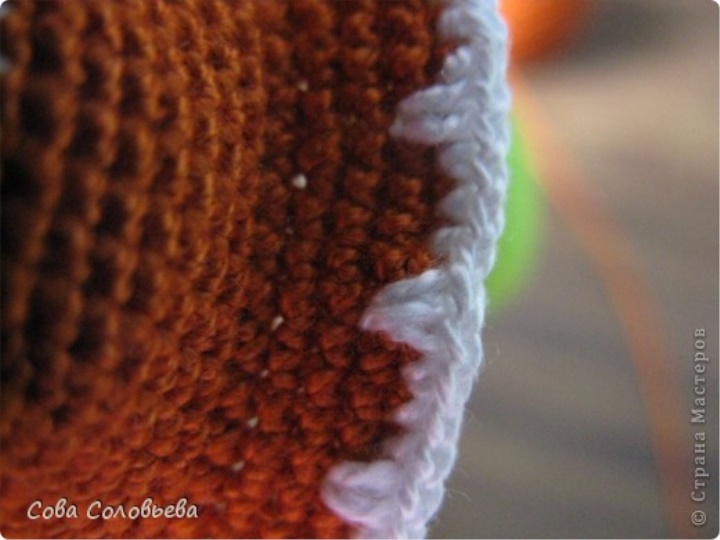
The 5th row of the 3 cd, we add a thread of a different color, and the increments are made in the loop of the previous row (see photo)
6th row we change the thread to the main one, pull each loop of the previous row, fix the thread and cut it off.
admire the fact that we have))
and proceed to the design of the head.
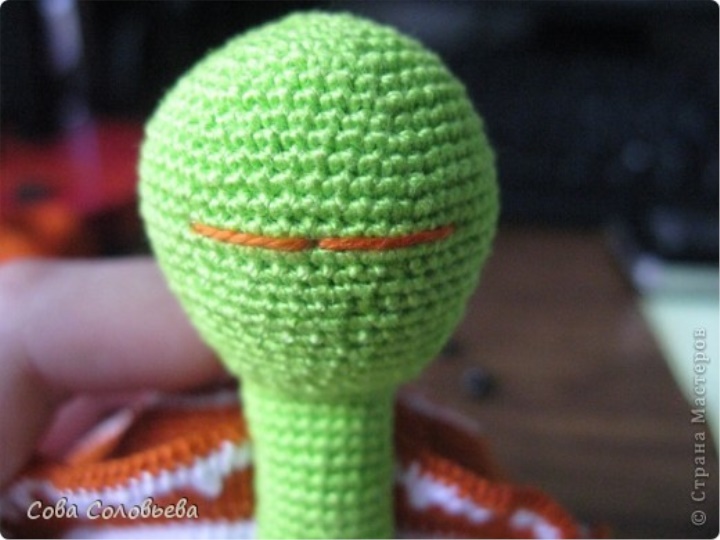
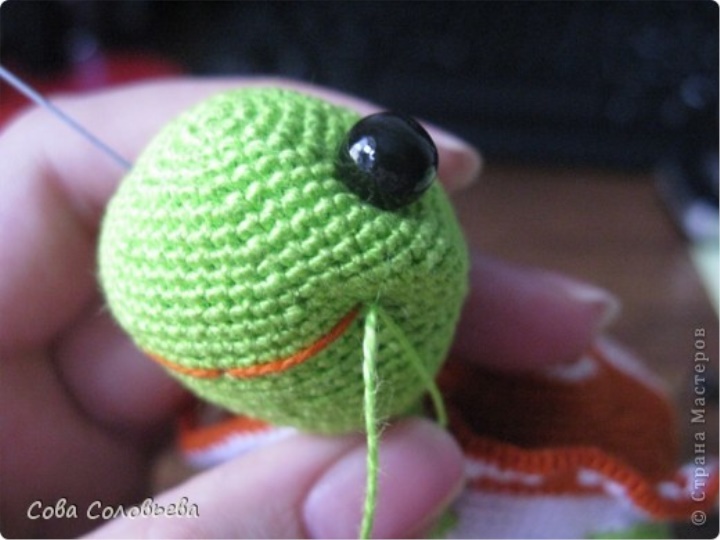
We embroider a mouth so that stitches have laid down exactly between numbers.
we do eyes.
insert the needle into the corner of the mouth, and display in the location of the eye
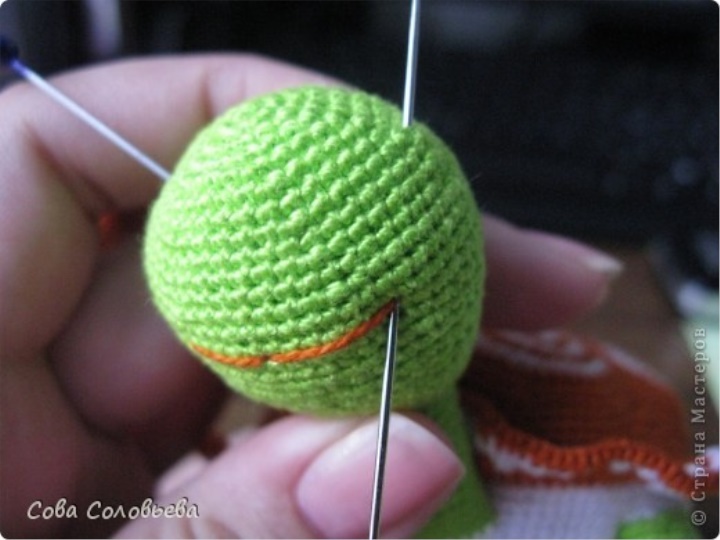
we catch the bead-eye, we inject the needle to where it was pulled out, and we deduce it one loop further than was originally introduced. I hope, at least a little clear what I mean))
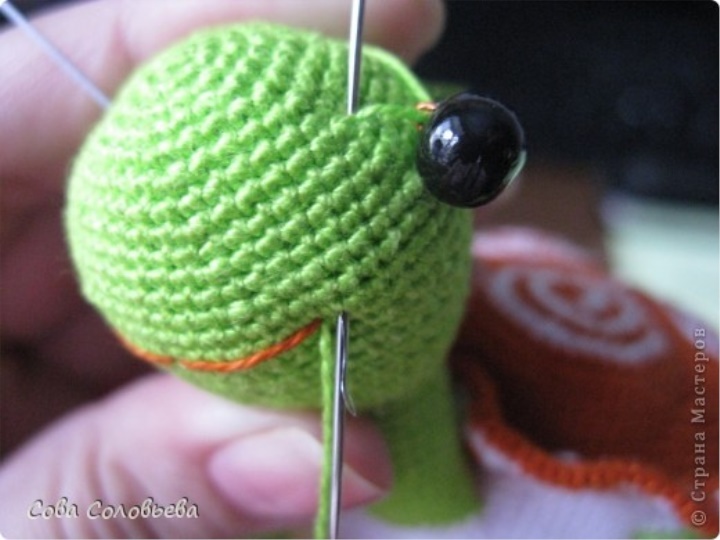
we tighten the cheek: at the same time a smile is formed and the eye is pressed into the head. tightly connect the ends of the thread to fix the position.
repeat the operation on the other side.
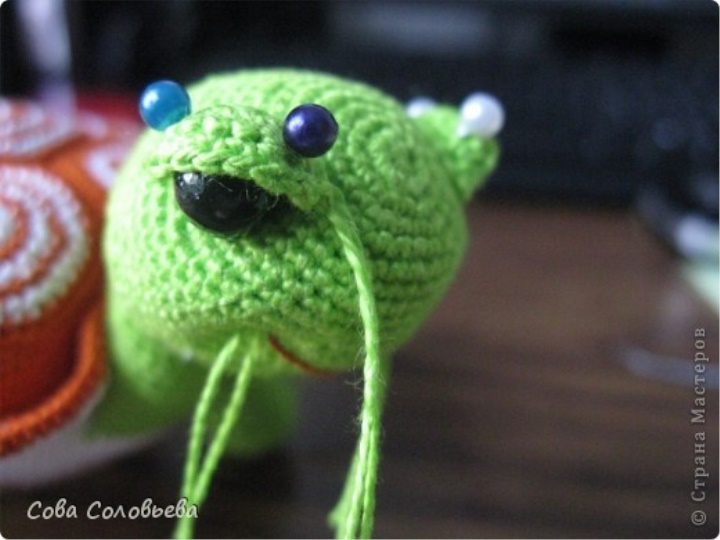
we get already smiling, but a few more inadequate turtles))

to return the lady in adequate, you need to make her eyelids.
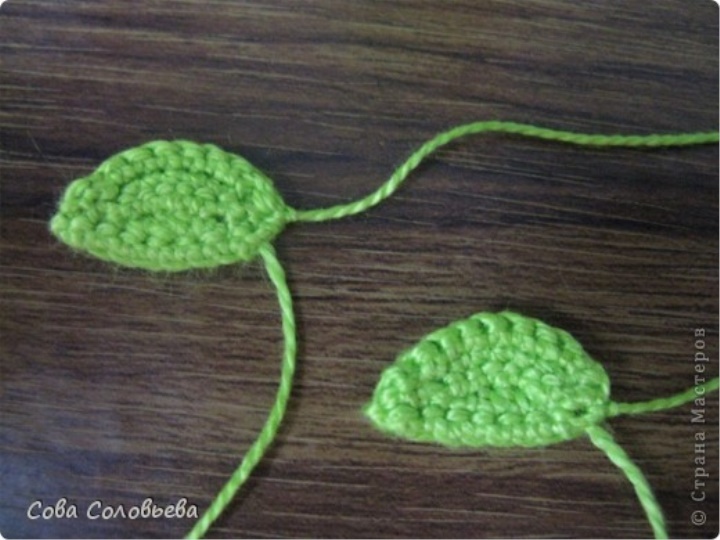
I knitted my eyelids according to the following pattern:
10вп
from the second loop 9 sbn
from the second loop of the ss, sbn, 3 psn, sbn, ss,
cps, 4 sbn, 2 ss, in
from the second loop of ss, sb, prib. 2 сбн, 2 сс, вп
from the second loop ss, 5 sb, 3 ss, in. leave the end of the thread for sewing.
and here, as they say, I found a scythe on a stone. the size and pattern of the century depends solely on the size and shape of the bead that will be the eye of your turtle! so my scheme is more than likely you just will not fit ((
all that I can advise - knit at random, all the while applying to the eye, and make corrections in the course of the case, and write down everything you have done so as not to be fooled even with the second century.
in general, the shape of the eyelids should be approximately the same:
with the help of pins try on eyelids. when you found a position that suits you, we sew the eyelids.
we hide all the ends of the threads inside.
our turtle is ready!