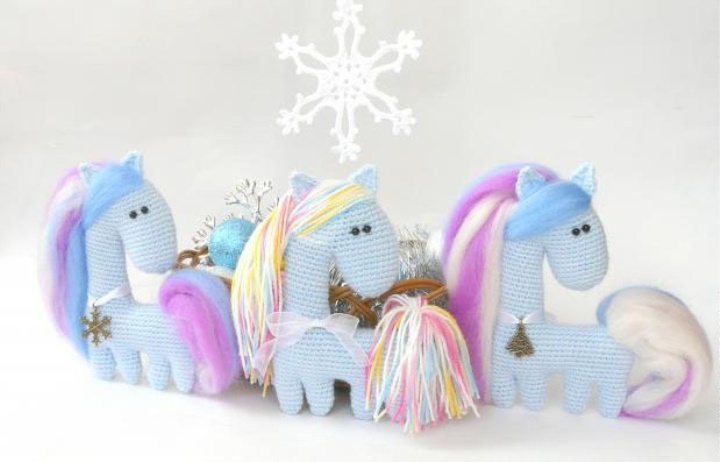
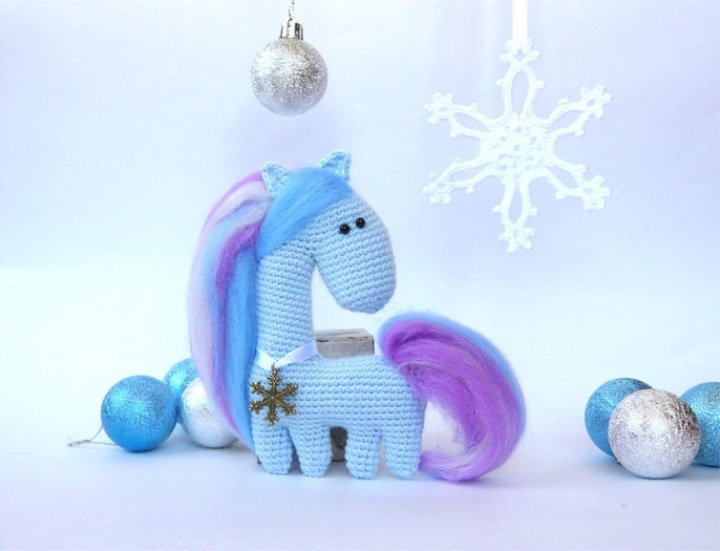
Well, I did not want to publish any more horses, honestly) I've already collected so much, only neck and knit. And then again I met, and even such a gentle Snowflake that I could not resist) The work belongs to the wonderful masteress of Maria Ufimtseva (Mafulya). Many thanks to the author for his inspiration and detailed master-class! By the way, if you do not have time to tie such a horse, you have the opportunity to order it from the author
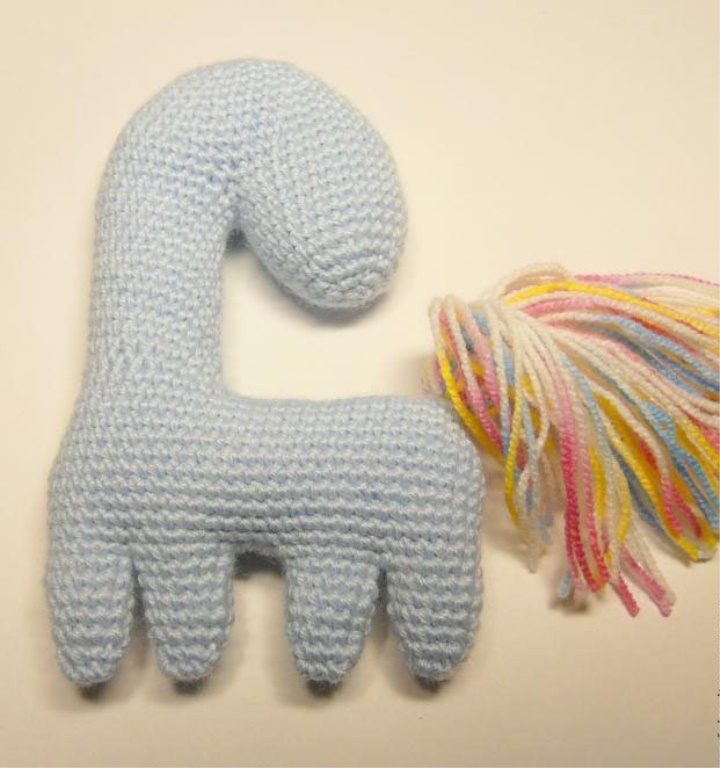
There is a horse only with a support. Next is the author's text.
I used mixed acrylic + viscose yarn, 250m / 100g, hook No. 2.25, the horse was about 14cm tall. You can use absolutely any yarn at your discretion and a suitable hook.
In the description the following abbreviations are accepted:
vp - air loop ss - connecting column
sbn - a column without a crochet pcn - half cushion with a crochet
ssn - a column with a cake ss2n - a column with two crochets
pr - increase - two sbn in one loop of the base
ub - reduction - to tie two sb together (I do this on the front walls of the hinges)
x 6 times - repeat the number of times written in brackets
The total number of loops in a row is indicated in parentheses
We knit in a spiral without lifting loops. Knitting starts from the head
1 row - 6 sb in the loop amigurumi
2 row - (pr) x 6 times (12)
3 row - (pr, 1 sb) x 6 times (18)
4 row - (pr, 2 sb) x 6 times (24)
5 row - (pr, 3 sb) x 6 times (30)
6-7 rows - 30 sb (30)
8 row - (pr, 4 sb) x 6 times (36)
9-10 rows - 36 sb (36)
11 row - (pr, 5 sb) x times (42)
12th row - 42 sb (42)
Now separately we knit a muzzle
13 row - 4 in, skip 18 loops, in 19 loop - sb, 23 sb to the end of the row, 4 sb into the chain from the bows (28)
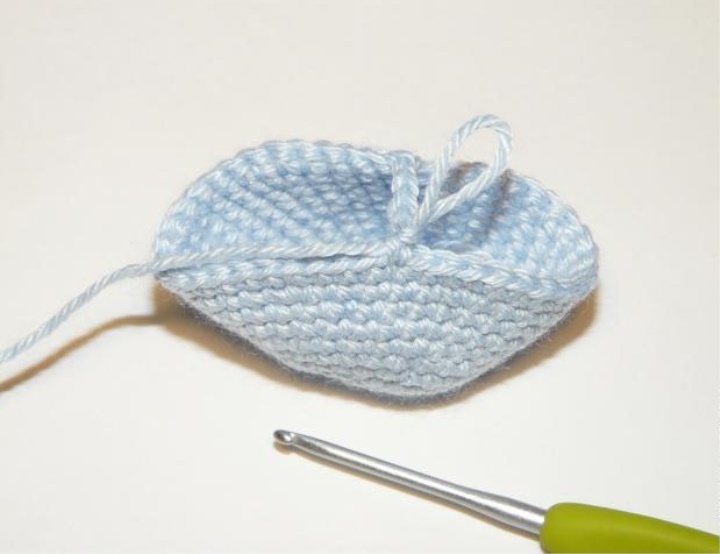

14 row - 28 sb (28)
15 series - 11 sb, ub, 15 sbn (27)
16 row - 27 sb (27)
17 row - 25 sb, ub (26)
18 row - 26 sb (26)
19 row - (11 сбн, уб) х 2 times (24)
20-21 rows - 24 sbn (24)
22 row - (2 sb, ub) x 6 times (18)
23 row - (1 sb, yb) x 6 times (12)
24 row - 6 ub (6), ss
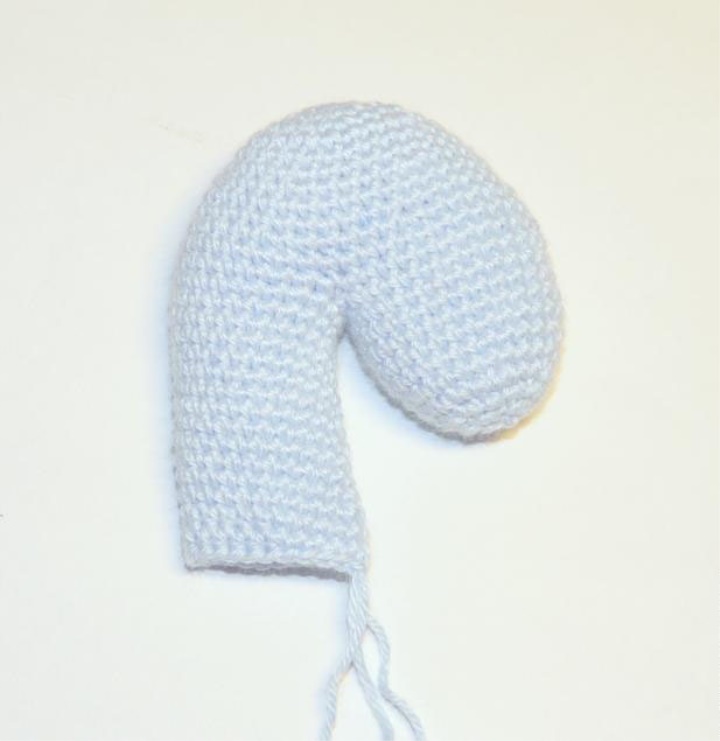
the remaining tail is inserted into the needle and gently pull off the hole, at the end pull up the tail inward
To fill it is not so dense (after all the horse at us should not be chubby) through an aperture for a neck. For the convenience of printing, I use a wooden stick for rolls.

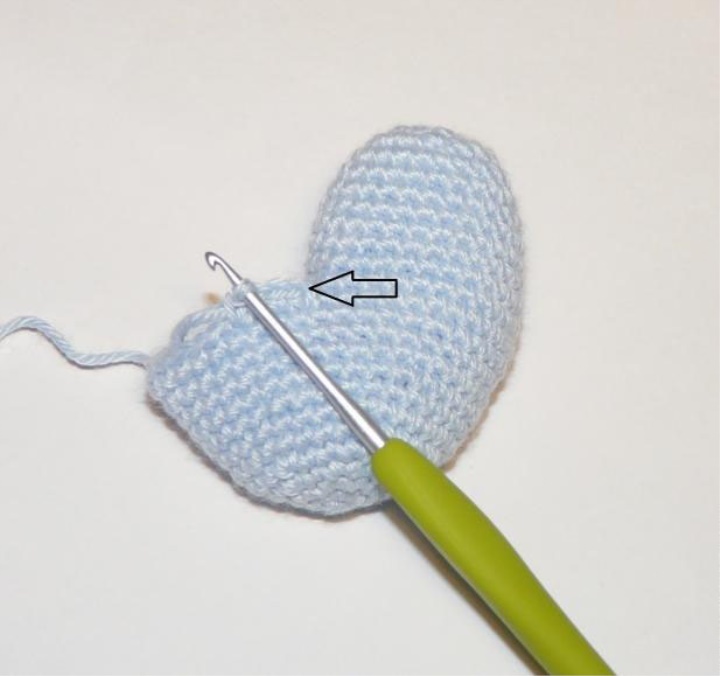
We begin knitting the neck, stuff it in the process of knitting
The arrow indicates where the thread is attached.
1-3 series - 22 sbn (22)
4 rows - 9 sb, ub, 9 sb, pr, sb (22)
5 row - 22 sbn (22)
6 row - 9 sb, ub, 9 sb, pr, sb (22)
7th row - 22 sbn (22)
8 row - 8 sb, ub, 10 sb, pr, sb (22)
9 row - 22 sbn (22)
10 row - 8 sb, ub, 9 sb, pr, 2 sb (22)
11 row - 22 sbn (22)
do not forget to stuff
12 row - 8 sb, ub, 10 sb, pr, sb (22)
13 row - 22 sb (22)
14 series - 8 sb, ub, 8 sb, pr, 3 sbn (22)
15 row - 22 sbn (22)
16 rows - 3 scales, 11 pcs, 8 sb (22)
17 row 1 sbn, 14 psn, 4 sbn - do not connect to the end of the series
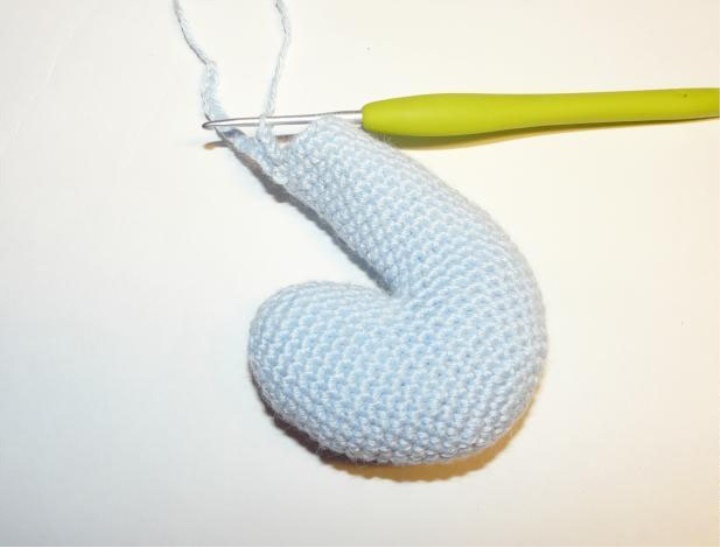
Let's go to knitting the body
Take the thread from the other end of the tangle and knit 15 in, you can tie another number in, this will be the length of your horse's body
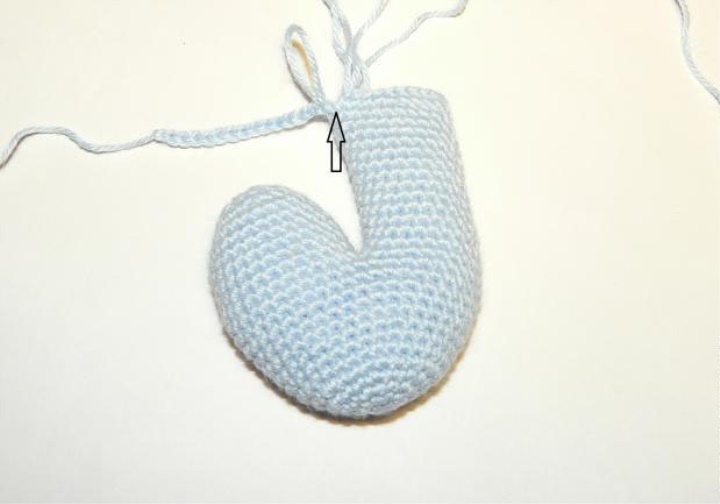
We make the connecting column in the next loop after tying the 17th row of the neck, the thread is cut off, the tip is hidden in the body, for fidelity it can be fixed with a needle.
The arrow shows the location of the chain of the air loops.
Further we knit along the chain Bn
1 row - 14 sb, 3 sb at the last in the chain, 35 sb (52)
2 series - 15 sb, pr, 26 sb, pr, 9 sb (54)
3 rd - 54 sbn (54)
4 row - 16 sbn, pr, 26 sb, pr, 10 sb (56)
5th row - 56 sb (56)
6 row - 17 sb, pr, 27 sb, pr, 10 sb (58)
7-8 series - 58 sb (58)
9 row - 18 sb, ub, 26 sb, ub, 10 sb (56)
10th row - 56 sb (56)
11 series - 17 sb, уб, 26 сбн, уб, 9 сбн (54)
12 row - about 51 sb - do not tie the series to the end and start knitting the first leg
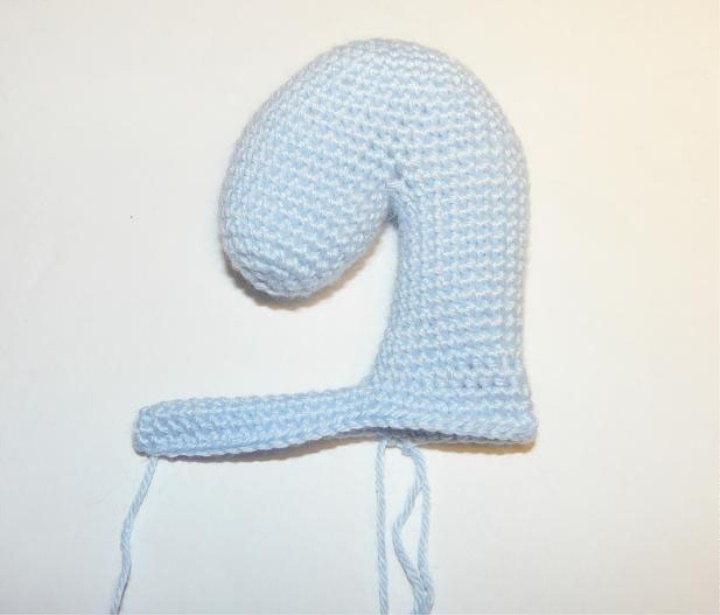
We knit the knit on 12 loops, so it is necessary that on the one hand there were 6 sbn and the other, we count back 12 cms and continue to knit in this last 12th column

Here the rows are difficult to distinguish, so I just write how I knitted in a spiral. And do not forget to fill the part in the process of knitting, the first leg is difficult to fill, because the hole in the body is still large, you can finally fill it through the body when the hole in the leg is already minimal
29 sb, yab (on the outside), 21 sb, yab (on the outside), 4 sb, yab (on the inside), 3 sb, yab (on the outside), 2 sb, yb (on the inside) 2 сбн, сс
Leave the thread to sew the remaining hole. Sewing is better when all the legs are connected.
The second leg is to attach the thread next to the first leg on the front side of our horse, we sew 6 scales, connect it to the other side and knit like the first leg.
Then we knit the back legs, starting with the one that comes from the edge. The arrow indicates where the thread is attached. 41 sb, уб, 4 сбн, уб, 4 сбн, уб, 3 сбн, уб, 11 сбн, уб, сбн, сс
When you join the thread for knitting the last, fourth, legs, leave the tail larger, they sew up a hole that remains on the tummy.
Here are all the legs and ready
Finally stuff the body of our horse and sew a hole on the tummy in 3 loops. Sew up also holes on the legs - 3-4 stitches on each leg.
We hide all the strings in the body.
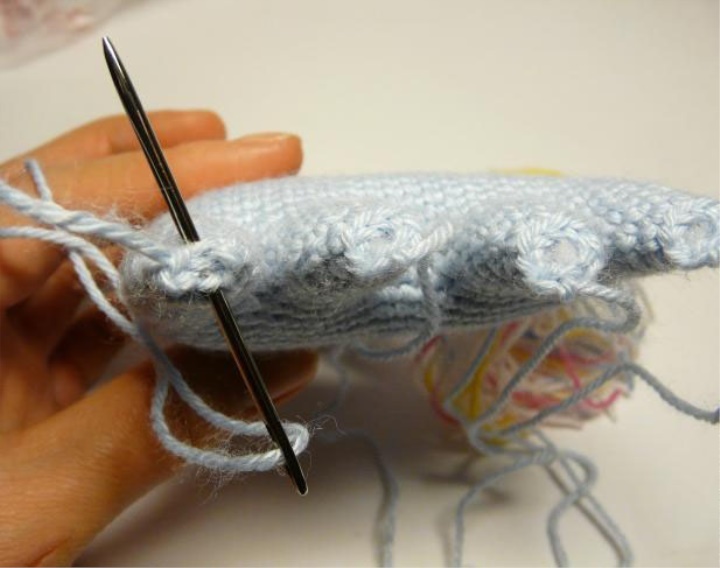
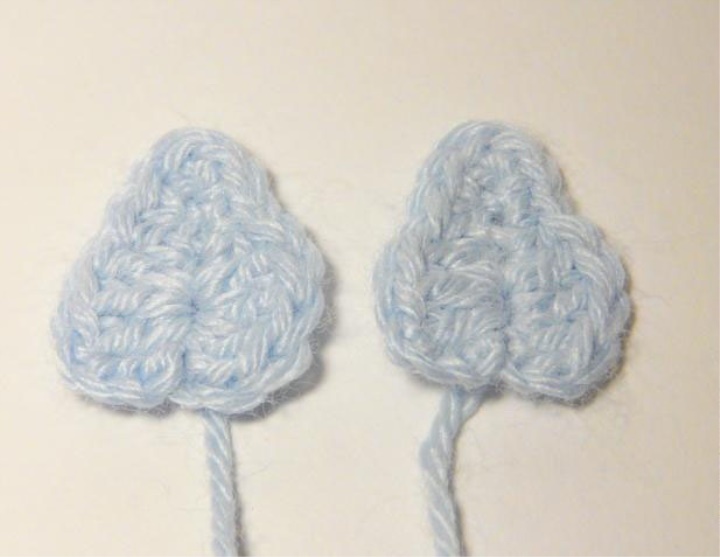
Ears - 2 pieces
7 th, in the fourth loop from the hook - 3 CCN, then psn, sb, 3 sb in the last loop, on the reverse side of the chain - sbn, pssn, 3 ssh, 3 cp and ss in the last loop
Leave the thread to sew the part. Hide and fix the tip from the initial chain.
Try on ears - we have one closer, the other - away. Now we guide the marathon to our horse. I will show two types of mane and tail - from wool for felting and from yarn / thread. We take the wool for felting, tear off one knot 2 times longer than the bangs and tie it in the middle along the rear eyelet.
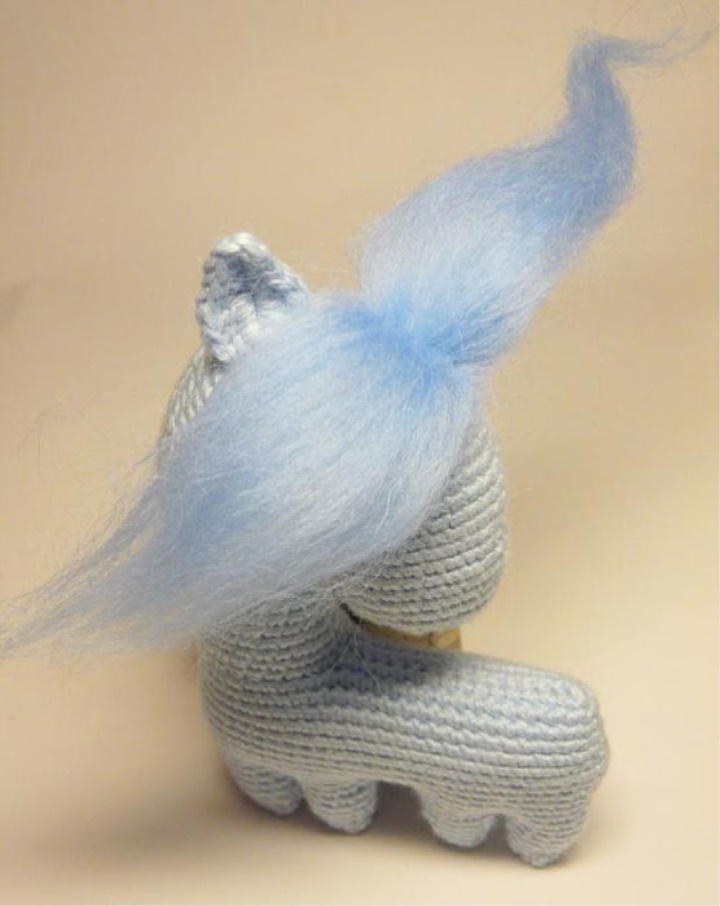
Now we fold the string in half and remove it in the side and slightly attach it around the neck
Mane make according to the same principle. We impose some strands.
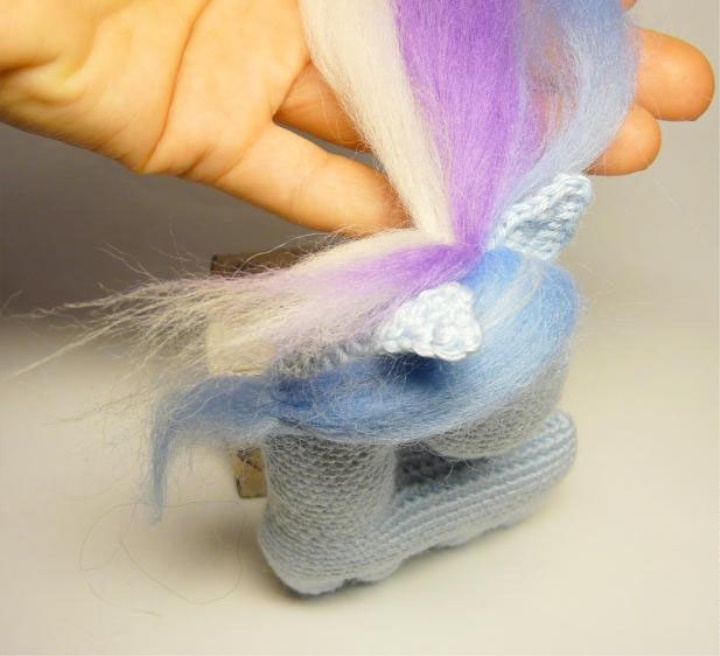
Tip the mane on the back of the leg.

For the tail, we also take a string 2 times longer than the tail and stick it in the middle
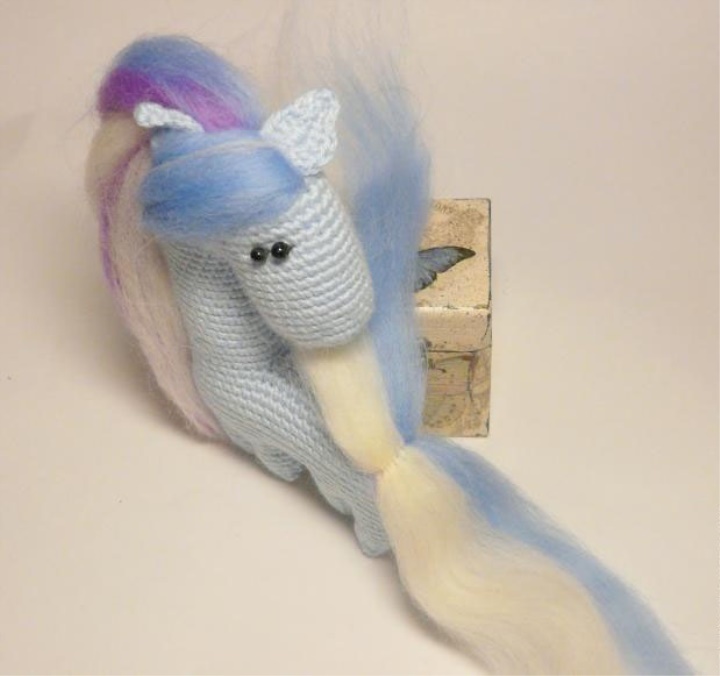
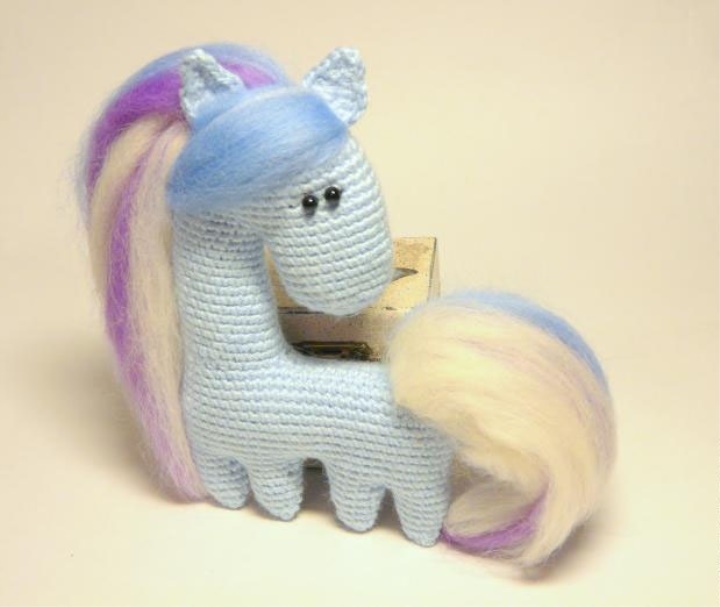
Give the tail volume and tip to seal behind the legs. Here is such a horse-touchy we have obtained
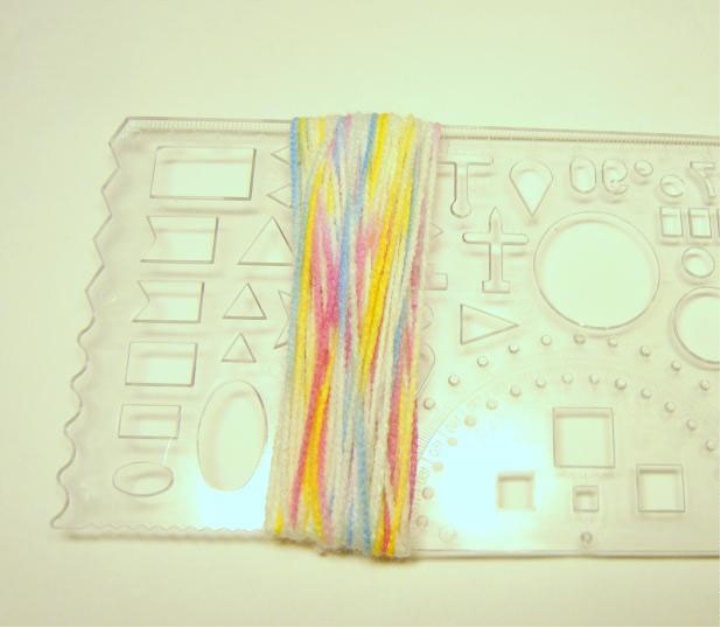
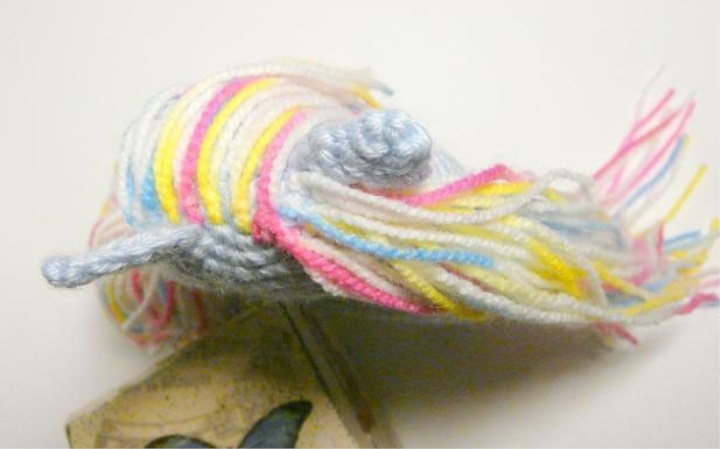
It is purely interior, the mane and tail require careful treatment, and I knitted one of the horses for the action on hand-made gifts for the children's oncological center of Yekaterinburg, and there woolen manes and tail do not fit, so they used yarn for them. I have such a stupid, rather thin, melange yarn, lying for a long time, could not think of where to apply it, here it seems to me it is quite appropriate. Here everything is simple - for the lengths to be the same length, we wind the yarn on some pattern, pull it together on one side, and cut the other side.
The tail was fastened at the stage when there are no hind legs yet. The tip from the thread was fastened from the wrong side and I stitched a few times with a needle. This seemed to me not enough to securely fasten, so I pulled the entire tail on the thread like that of making brushes.
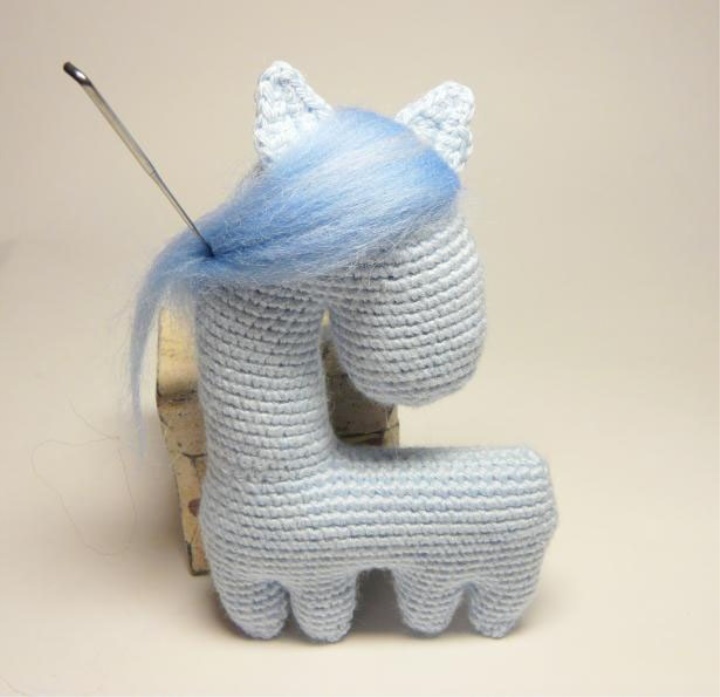
The mane is attached in the same way as the fringe. It is better to use a small hook. The direction of the brace of the bangs and manes.
A bang made in 2 rows. Sideways gathered on a string.
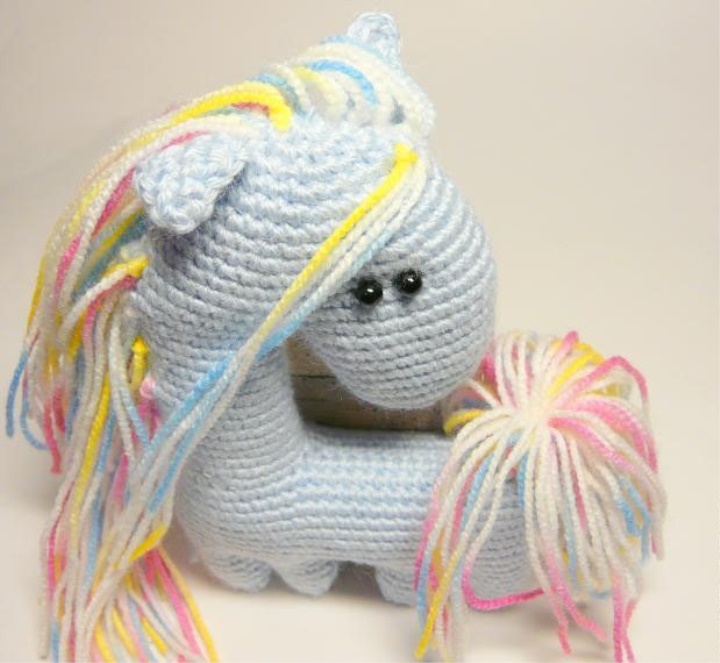
We trim the tail and mane, decorate our horse as you like (I have no embellishments, because small details can not be). If desired, you can embroider your mouth, nostrils, finish the muzzle at your discretion.