teeth and body), it is desirable that they are close to the thickness. Also
for embroidery).
At me a string acryle under a hook 2,5, basically, it is possible to knit by threads
any thickness, the toy needs more or less size.
You can buy in any construction store wire, ask PU NP 2 * 1.5 or 3 * 1.5 od single-core
(it is better copper, as aluminum breaks down quickly), it is necessary to remove the upper braid from it, and
leave the wind, so it is easier to fasten it to the gun.
Synthepon for packing - gut under the ear, for example))) I love under the ears))) and a lot and compact
lies not "scattered" on the third.
I pretend I have questions, I will make a reservation at once, I knit the posts without the crochet, grabbing only one well loop
pigtails. I do this to ensure that the knitting is not too fast, as the second part of the pigtail covers the newly formed tears. I do not tightly stuff, I like the toy to be light. WE ACCESS THE HEAD
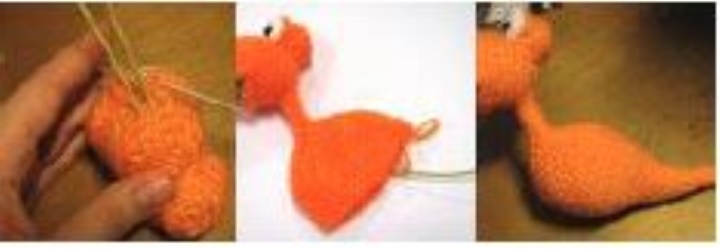
In this part, as much as possible, I will tell you the truth, since it is here that a lot of questions arise. The whole fun is in the muzzle of Ashke
We need to tie an oval element, exactly half of which is orange, and the other half is white. The general principle of such ele- ments is simply that we need to increase
loops, so that each row is larger than the previous one. Additions are made at the points of rounding the oval.
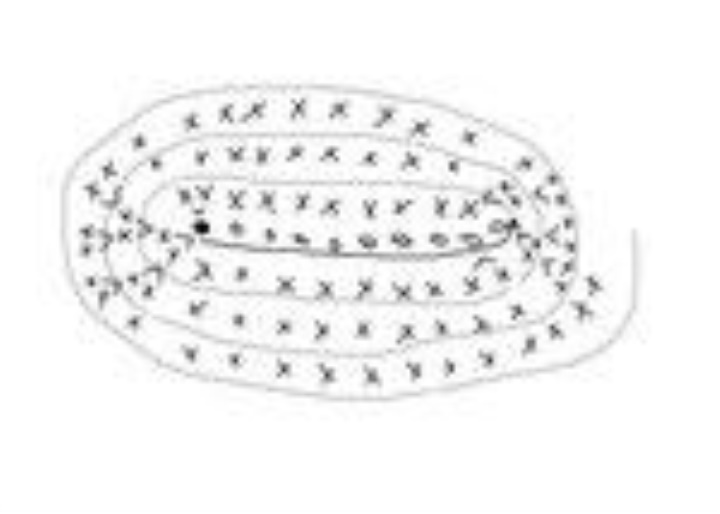
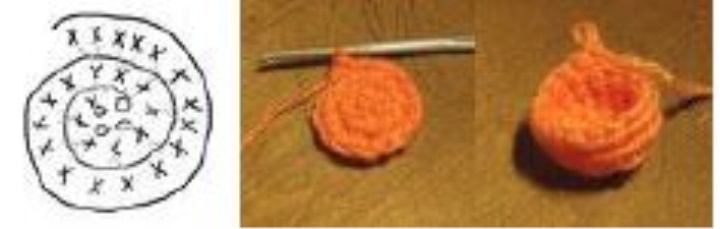
photo1: We knit a string of 10 air loops
photo2: We send her a row of om columns without the crochet, and we sew the last loop in two pieces
photo3: Change the thread to orange and tie the series, completing the circle (or rather, the oval) do not forget
add a loop
photo4 and 5: we knit another row in a circle, changing the thread in the areas of the rounding of the oval.

Now we knit in a circle without any increase, I'm thread in percent of the work in such a way as to get
Two equal halves.
Budte ready, that you will have to bandage several times, at me and at most sometimes a crooked-squid
it turns out ... and then fix it will not work! do not regret, dissolve, and stand up idenally equal
parts! The blessing of the child is small, it needs to be dissolved literally in a dozen times ...
After the replacement, the thread can not be cut off, but can be left by broaching inside, if it is hindered or pulled -
just cut them exactly in the middle.
Loops in a circle I have 32 - 16 each tsveteta.
In total, such half-sided series need to be
From the pizza, she made many photographs, so that you had a complete idea that
we get in the end, we look and compare. here they are:

We still do not have white threads, cut it.
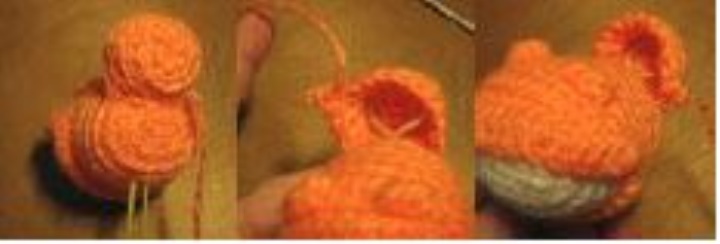
Prod Let's knit in a circle the main color (orange) without additional 5 -6 rows. Now, no
very tightly fill the workpiece with a synopt and start sharp cuts, we tie off the bars without
nakid and skipping each second loop.
As a result, we need to get an oval denture, like the picture below:

Congratulations! The head is ready!
BEND OF LIP
We begin to knit from the left corner of the mouth.
Carefully look at the photo! It is important!
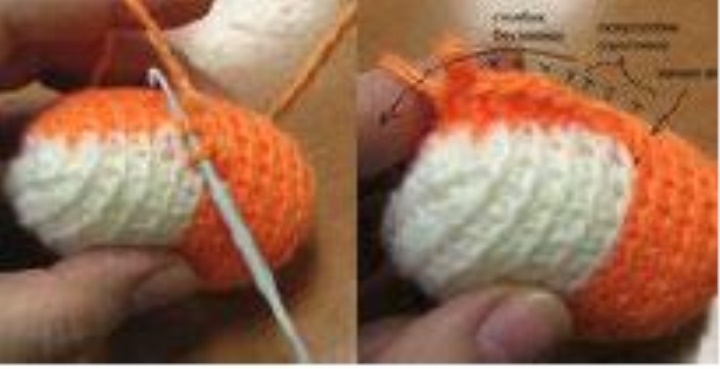
We knit, clinging as a basis, an orange thread from the main billet (head). We make a series on the very
edge, the first three loops - polostolbiki (broach), next to knit along the edge of the upper lip in columns
and the last three loops are again semicolored.
Why do we need this, you ask?
I answer, a row of polostolbikov lower in height and more dense, with this knitting does not work
crumple the corner of the mouth. The mouth will leave a clear and even!
On the first and second photos, the view is just like looking at the other corner and the top view of our first row of top
lips.Further similarly we knit the first row of the lower lip, the first and last two loops are knotted
polustolbikom, and between them we knit the columns without the crochet.
Lips knit in a circle, the upper lip consists of three rows of ovaries, the lower of the two. If it seems to you that
the upper lip is too frayed, in the last third row, symmetrically skip the two loops. If
did not help, dissolve and try again! Kind of imo typing the first row of upper lip you typed
too many loops. I got about 18 of them.
In knitting, the main thing is to feel! That's why all the toys are different ...

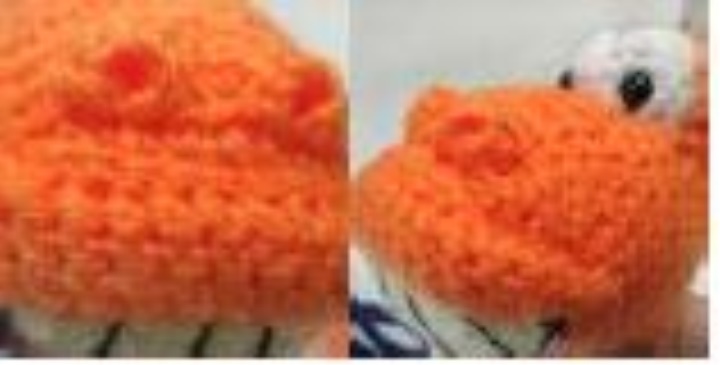
Embroider your teeth with a thin black thread. I use the Iris thread and the spinning needle.
BODY OF NOSRIDIA
Dial symmetrically in a circle of 5 columns without a crochet.
They are so easy to crochet that, I confess honestly, I forgot to shoot the process, just show it big
finished toy:
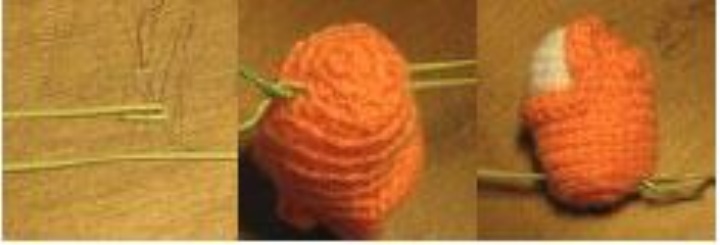
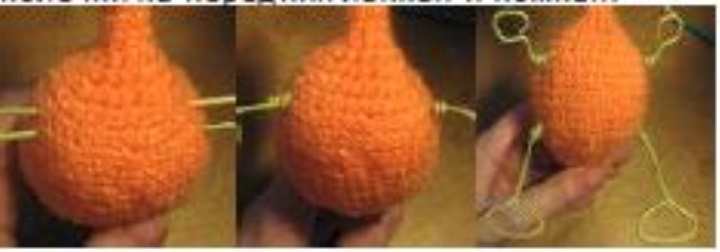
NECK
Cut off a piece of wire with a line of 40-50cm (better then cut off excess, than build up)
We put it like on the photo about one third, in the upper part we twist the loop and
we will stir up a wire in an occipital part. Prick knitting with a distance of 0.5 -0.7 cm, so the head
it should be stronger on the neck. If the wire is thin, take a more d lined piece and fold
in half. The length of the wire should be the same as the length of the tail you want. I knitted different
they are also very cute yat output.
SIDES
Now we'll tie the back of the head.
Type 4 air ear hinges, close the ring o.
Then continue to collect in a circle the columns without the crochet, adding loops (tie over the two in
each loop) until you have a circle about 2.5 cm in diameter (I have a circle of 16
loops). Now we knit three more rows and without increments. It turns out "cap"
For knitters with little experience, I bring the scheme:
Now we apply the "cap" to the back of the head, slightly higher than the middle of the inna, covering the loop from the wire
and sew a crochet or a needle. I usually tear off the thread with a line 50-60 cm and sew it. Later
It is necessary to take another one in the row of columns without the crochet.
The first loop of this row and we attach it to the head, the last one is also fixed to the head (see photo 3)
trace to ensure that both edges of the "cap" are septic-sutured.
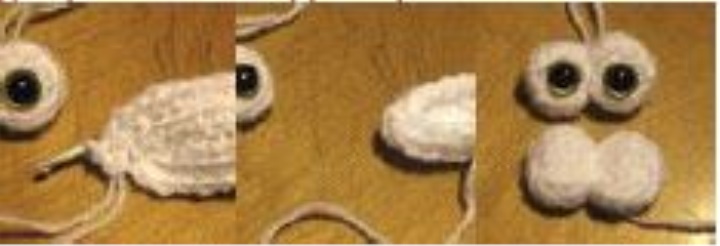
EYES
After a smile, the eyes are the most expressive part of the grinder, the final size depends on their size
form. They do not need to be too small.
You can tie each eye individually, but I usually knit them together at once, so it's easier to do them
od different.
Food is unconstrained, the yarn must be soft and loosely stiff, otherwise it will be difficult to stretch
them by the center.
We knit an oval, with a base of 6 air loops (the approximate scheme of oval mating is given above). is he
There must be a little more than the eyes that you plan to do. I showed it in a special way
a number of finished eyes and a workpiece.
If you have plastic pupils with fastening pendant and, like me, then you should update them on this one
e tape, and embroider your eyes better already on the finished toy
Now we need to tie 1 row through a loop. Finish the knitting exactly in the middle and in the oval (photo 2)
Leave the swabs of the string about 10 cm long. Tightly pull the oval exactly across to get
eve equal parts (photo3)
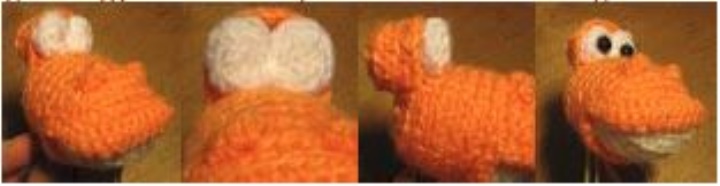
Now we put our eyes in the eye sockets.
Preliminary, the head must be filled by placing a ball of sintepon.
I sew them neatly with a regular reel white thread.
Now they can be embroidered, and my version is ready, the truth, and on this one, I still have teeth
сд елала))) since it was on a couple of "mod firs"
NECK
Now we knit the neck, smoothly crossing the yashchuyu in the trunk.
Gather around 7 wires around the wire without the crochet. U dneee knit the wrong side out, for that
Do not crochet the wire up to yourselves, and hook hook the sinkhole downwards (I can see clearly
explained :)
Knit in a circle about 5-6 rows of ovaries, then start adding loops in the area of piles and, tying
two in one.
Next, we knit 7-8 a number of ovaries without increments / additions, then we begin to reduce the loops in the area of the tummy,
first we subtract by 4, then by 2 and at the end by 1.
Everything depends on the length of the desired tail. If you want a long tail, then at the very end, when in
the circle will remain 8-9 rows of s, you can tie several rows of sashes (2-3) without decreasing, then reduce
one and two or three rows, but without a decrease and so on.
For the success of the newcomers, I calculated the approximate tables for a number of rows (recalling the series in
this knitting is a conditional thing, there is no need for a loop under the yem, everything is knit in a circle, without a seam)
the range of the loop increase / decrease comments
1-6 7 -
7 10 +3 Here and further add loops in the piles area and
8 14 +4
9 18 +4
10 23 +5
11 30 +7
12 36 +6
13 40 +4
14-20 40 - We knit this series without adding
21 36 -4 Now we start to reduce 4 loops around the abdomen
22 32 -4
23 28 -4
24 24 -4
25 20 -4
26 18 -2 we subtract 2 loops
27 16 -2
28 14 -2
29 12 -2
30-40 11 -1
we decrease 1 loop in the y row until it ends
wire or our knitting.
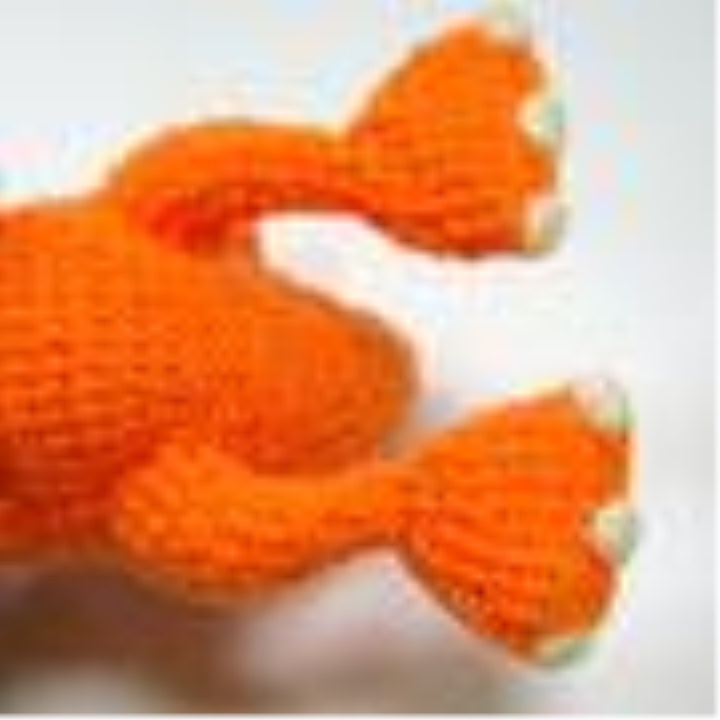
FINGERS
We make paws. Cut off 4 pieces of wire 15cm, 35 cm, 10cm (2pcs). Long segments are placed on the
places of handles and legs, we fix the wire in short lengths, as shown in the photo. We bend
rings in front of them paws and legs.
We bind the front legs.
We dial round a wire in a circle a row of 7 columns without a crochet.
We knit in a circle, for as long as we do not have to expand (round the wire).
Now we type the loops in the row y and bind 2 rows a and 14 loops, now start to reduce,
skipping loops
CREST