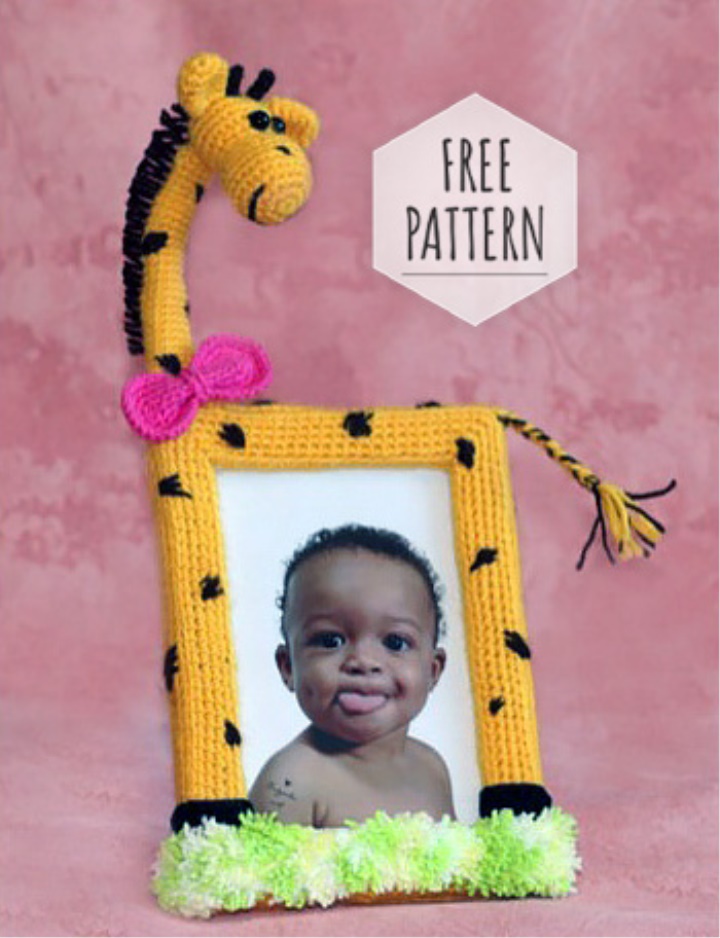
Not everyone has the opportunity to visit Africa, but to have a giraffe at home can now anyone who is even a little able to knit. And this will help you with our detailed master class.
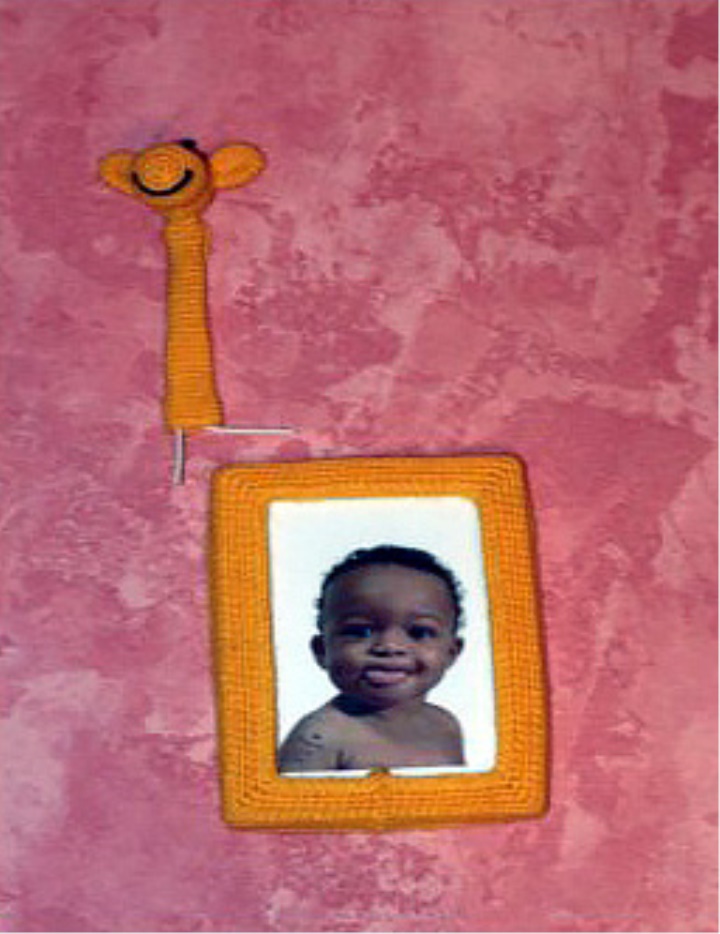
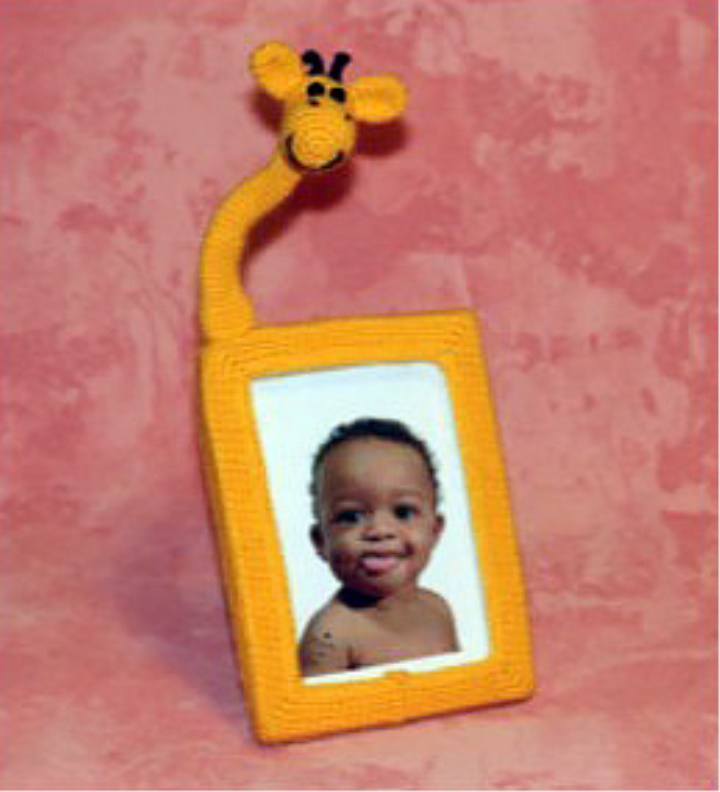
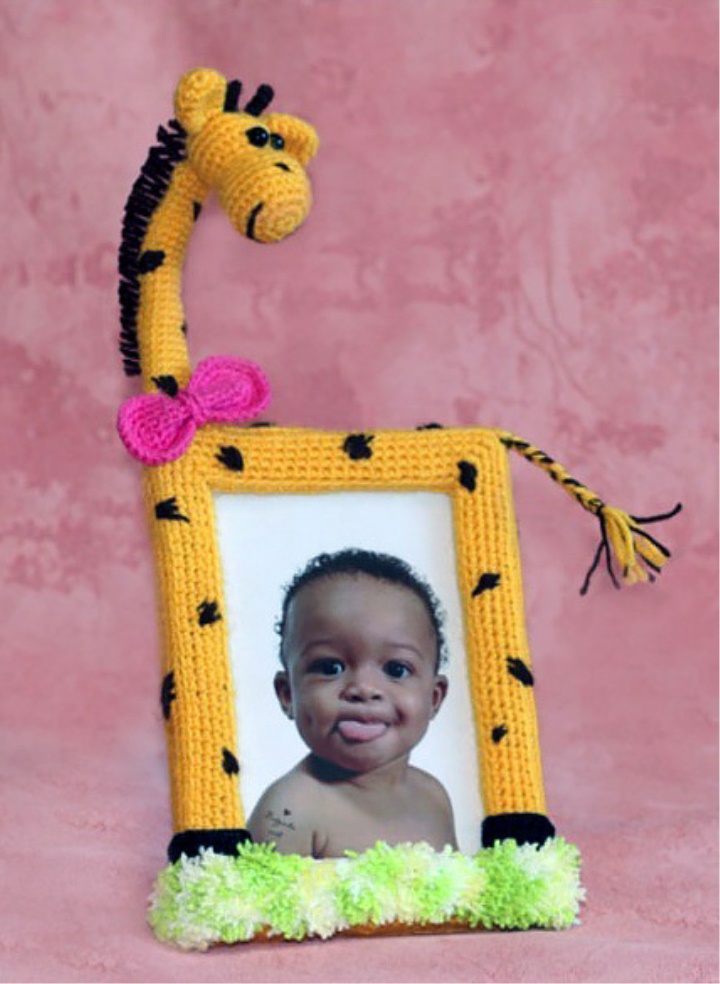
Linking such a frame for the photo, you not only decorate the children's room, but also recharge the positive energy of this sunny and friendly giraffe!
We will need:
Yarn Yellow and brown flowers (I have yarn from Troitsk, Moscow Region, 250m/100g), a little green, black, and a favorite color for the bow;
Hook suitable size (I have 1.75);
Photo Frame (I have 10x15);
2 Half beads for eyes (suitable both beads, and small buttons);
Filler for toys (or synthepon);
Wire
Adhesive pistol (or glue moment crystal);
Good mood and desire to create a miracle with their own hands:)
Reduce:
VP-Air Loop
SS-Connecting Column
RVN-Non-scale column
PR – Increase (2 SBN in one loop)
(...) * N – Repeat the specified in parentheses n times
3 in 1 – Knit 3 bars without a scale in 1 loop
UB – 2 bars without a scale are put together
Dv. Ub. -Knit three columns without a scale with a common top (thus simultaneously reduce 2 columns without a scale)
[..] – The number of loops in a row is indicated in square brackets.
During knitting it is necessary to capture both walls of a loop if about it is not made the separate indication.
Make sure that the knitting is dense enough, otherwise the filler will look through the loops.
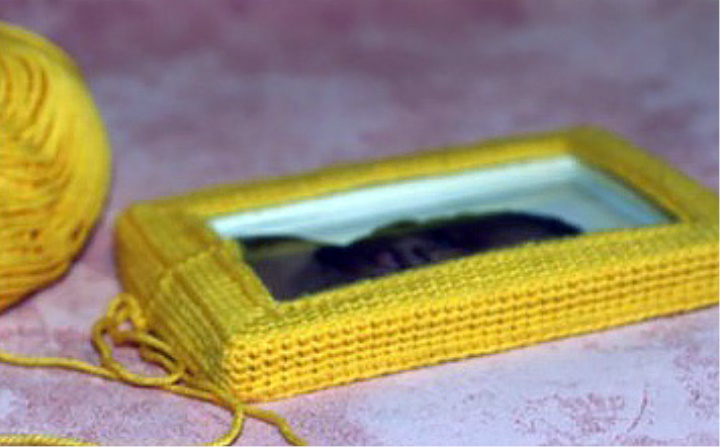
We tie the frame:
Please note that strapping starts from the center! To do this, measure the length of the sides near the glass. In my case, there were sides of 9.5 and 14 cm. That with the use of this yarn and the density of knitting corresponds to 20 and 31 SBN respectively (= 102 RVN perimeter). To make the strapping was exactly necessary increase to do in the corners, for this add 4 more loops. So, it turns 106 loops.
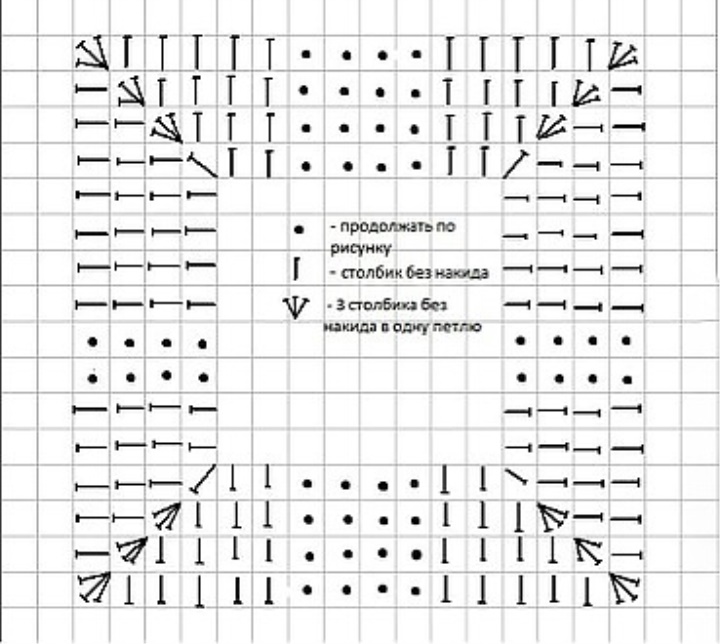
Schematically strapping the front part of the frame looks as follows:
We knit a chain of 106 of the EAP in yellow yarn and connect it to the ring by means of a connecting column. Try to determine whether this chain is placed on the perimeter inside the frame.
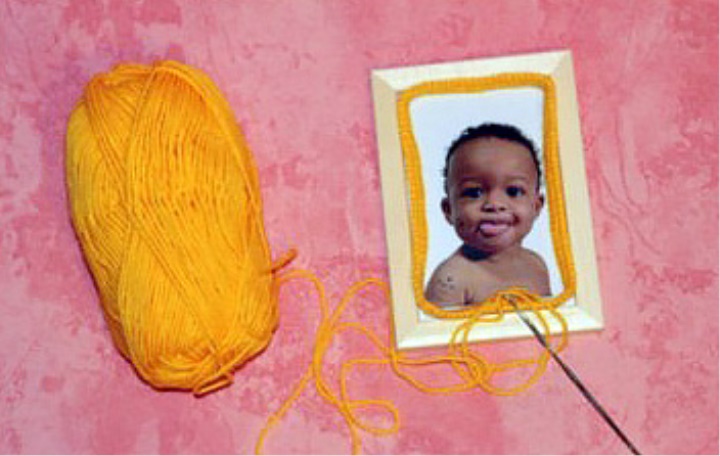
If our calculations are correct, we continue knitting. If not, we make the appropriate corrections.
Attention: We add or lower the air loops only in pairs, because we have two equal sides!
1row: EAP, further on the Circle 106 of the RVN, SS [106]
2 row: Knit behind the back half-loop! VP, 10 SBN, 3v1, 31 SBN, 3v1, 20 SBN, 3v1, 31 SBN, 3V1, 10 SBN, SS [114]
3 row: Knit for both half loops as usual! VP, 11 SBN, 3v1, 33 SBN, 3v1, 22 SBN, 3v1, 33 SBN, 3V1, 11 SBN, SS [122]
4 row: VP, 12 SBN, 3v1, 35 SBN, 3v1, 24 SBN, 3v1, 35 SBN, 3V1, 12 SBN, SS [130]
5 row: VP, 13 SBN, 3v1, 37 SBN, 3v1, 26 SBN, 3v1, 37 SBN, 3V1, 13 SBN, SS [138]
For strapping my frame width of 2 cm 5 rows was enough, the canvas lies smoothly and without additional tension closes completely frame. If your frame wider, then knit the same principle required number of rows, continuing to make a raise in the corners.
6 row: Knit behind the back half-loop! VP, 138 RVN (RVN in each loop), SS [138]
7-9 Series: Knit for both half loops! VP, 138 RVN (RVN in each loop), SS [138]
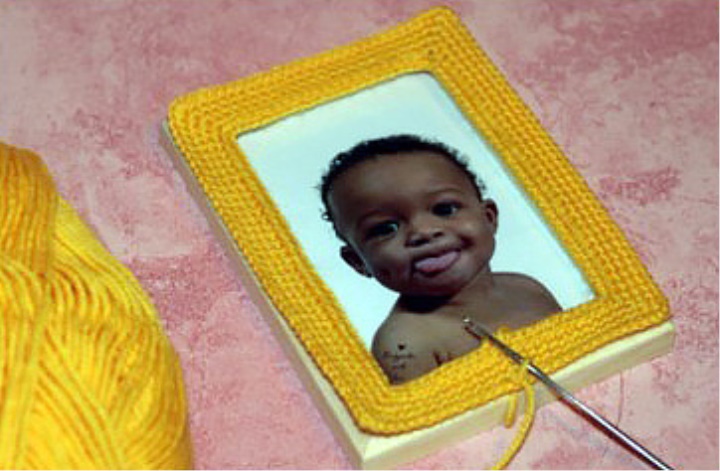
Try again on the frame. This time the strapping should continue in a circle until the edge of the frame is completely closed.
10 row: Knit behind the back half-loop! VP, 138 RVN (RVN in each loop), SS [138]
11 row: Knit for both half loops! VP, 13 SBN, DV. UB, 37 SBN, DV. UB., 26 SBN, DV. UB., 37 SBN, DV. UB, 13 SBN, SS [130]
Try on the frame. Knitting should go to the back wall.
If you are satisfied-we cut the thread. If it is necessary to continue-knit on the same principle the necessary number of rows, continuing to make the Ubavki in the corners.
Attention! If the frame wide, it is necessary to knit further not vkrugovno, and straight and reverse rows, without a connecting column. Otherwise, you simply will not be able to put the strapping on the frame.
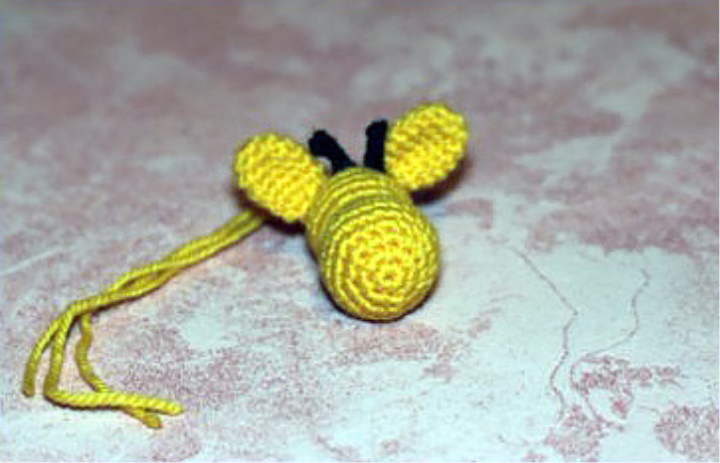
Giraffe Head (1 piece)
Knit yellow.
1 row: 6 in the Amaguumi ring (or 2 VP and 6 in the second loop) [6]
2 row: D in each loop [12]
3 row: (1SBN, D) * 6 [18]
4 row: (2SBB, D) * 6 [24]
5-7 rows: 3 rows of 24 SBN
8 row: (2 SBN, UB) * 6 [18]
9 Row: 18 SBN
10 row: (1 SBN, UB) * 6 [12]
11 row: (1SBN, D) * 6 [18]
12 row: (2SBB, D) * 6 [24]
13-15 Series: 3 Rows of 24 SBN [24]
16 row: (2 SBN, UB) * 6 [18]
At this stage it is convenient to fill the detail with a filler for toys. If you do not have it, it will be suitable synthepon, cut into small pieces, filler from the pillow or in the extreme case-Vata. But that's a very extreme case.
17 Row: (1 SBN, UB) * 6 [12]
18 Row: UB * 6 [6] The thread is cut off, leaving at least 10 cm of length.
Ears (2 parts)
Knit yellow.
1 row: 6 in the Amaguumi ring (or 2 VP and 6 in the second loop) [6]
2 row: Ol in each loop [12]
3-6 rows: 4 rows of 12 SBN [12]
7 row: UB * 6 [6] The thread is cut off, leaving the length convenient for further stitching.
Do not fill!
Neck (1 piece)
Knit in yellow 8 VP and connect to the ring connecting column.
1-5 Series: EAP, 5 rows of 8 SBN [8]
6 row: VP, (3 SBN, D) * 2 [10]
7-15 Series: 9 Rows of 10 SBN [10]
16 Row: VP, (4 SBN, D) * 2 [12]
16-24 Series: 9 Rows of 12 SBN [12]
25 Series: VP, (5 SBN, D) * 2 [14]
26-20 Series: 5 Rows of 14 SBN [14]
The thread is fastened and cut, leaving the length of about 20 cm for stitching. The neck is not stuffed.
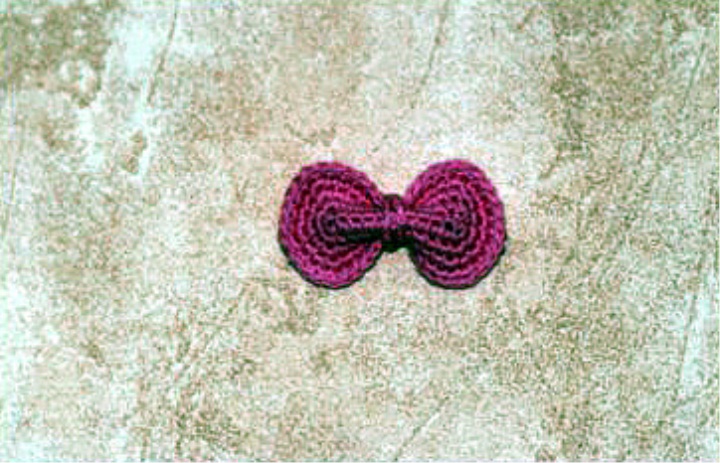
Bow
To decorate our giraffe knit bow (well, or you can tie a scarf, tie or else that will tell your imagination).
For Bantik take any liked threads and knit oval according to the scheme:
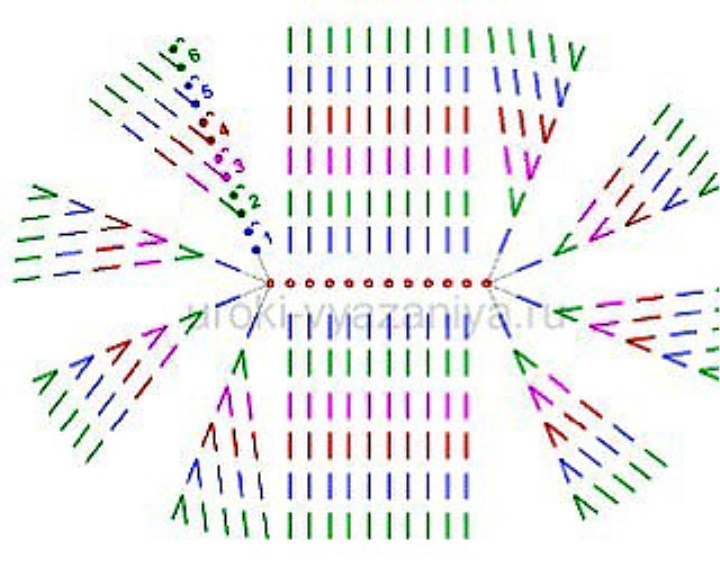
On the diagram I-a column without a scale
V-the tank (i.e. two RVN in one loop)
I tied four rows. The thread is fastened and cut.
Attention! I finished knitting in the middle of the row and left about 20-30 cm of thread in order to immediately decorate it (see below). It is possible to do the same, and it is possible to pass a series to the end, to fix a thread and to cut. Then it is necessary to hide this tip.
Then just a thread or a chain of air loops (I have about 20-25 of the VP turned out of the left thread), drag the oval in the middle and fasten the back. This way we get a cute bow.
Horns (2 parts)
On the head we find a suitable place, cling brown thread and knit horns (if you are so uncomfortable, you can link separately and then sew).
6VP, then in the third from the hook of the VP Knit Connecting column, and then another 3 connecting bars in the remaining air loops. The thread is fastened and cut, leaving the tip length of not less than 7 cm. The thread should not be short so that the end of the thread in the future did not break out of the canvas (and if you plan to tie the horns, the longer).
If you knit directly on the head-the tip of the thread pour into the needle and hide in the head, neatly, not pulling, "walking" needle in different directions, then slightly pulling the needle pulling thread and cut as close to the knitted cloth. If all is done correctly, the thread will hide itself inside the head and "will get fixed" in the filler. In this way all threads are hidden when assembling.
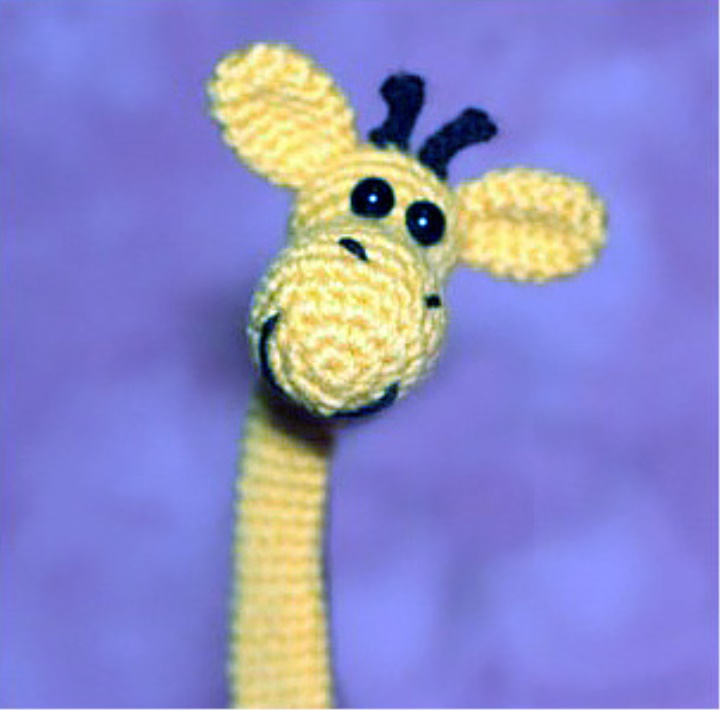
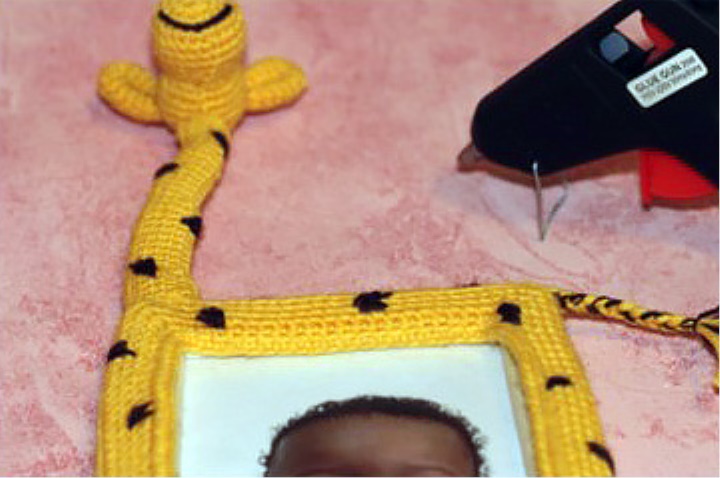
Assembly and Design
Fasten the horns to the head if they were connected separately. Thread after sewing in the way described above ("walking" needle inside the detail in different directions).
The ears are pressed. The ends of the thread are just as straight.
Then we find the position for the eyes, Prishivayem or glue.
Embroider a smile and nostrils. (It is convenient to enter the needle through the untightened hole on the back of the head, leaving cm 5 threads outside. Embroider a smile and again bring the needle into the same hole, there are two tips connect and hide inside.
After that bind a hole on the head. For this purpose insert in a needle a tail of a yarn which at you has remained at a knitting of a head, and stretch by means of a needle under each of 6 eyelets a row with the same external party, slowly thus pulling a thread that a hole was tightened with. I stretch the thread only under the front half loops. Then we fasten the thread and hide it inside the head.
Sewing the head to the neck, the threads are hiding in the neck.
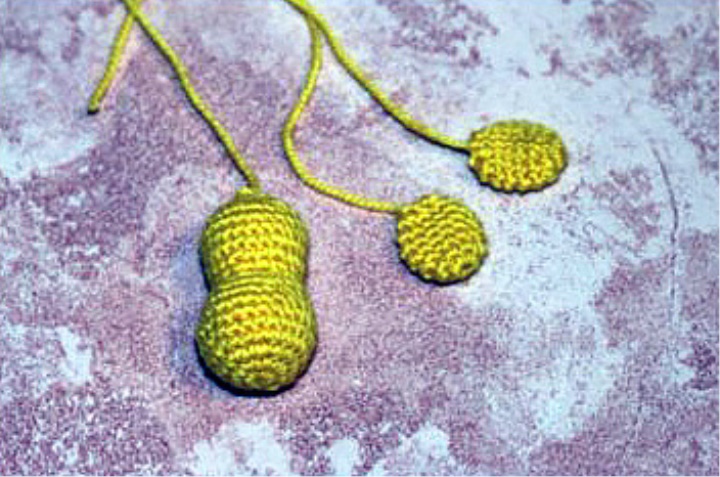
Neck length 11 cm. Take the wire 30 cm, bend in half and insert into the neck.
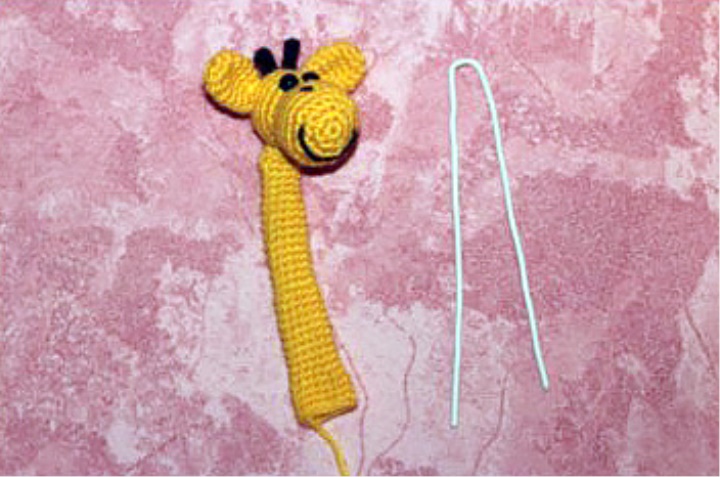
The ends of the wire bend in different directions, as pictured below. They will help us to give the "stability" of the neck so that it can take different positions under the mood.
Find a place for the neck and fill the wire under the knitting cloth. We don't fix it yet
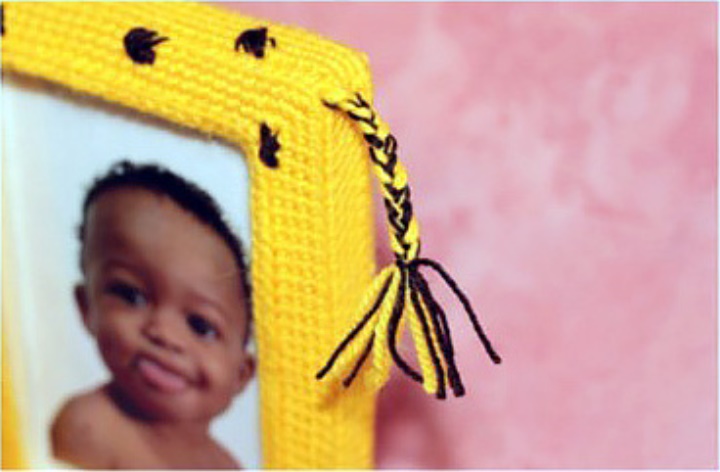
Then pour the brown thread into the needle and begin to embroider specks of our giraffe. We do it in a chaotic manner, any way you like.
It can be just stitches, or tied in advance circles, of different sizes, you can even embroider spirals with a tampon seam or just draw specks of acrylic paint. As you like. I went out.
Our giraffe needs a ponytail. Here too space for your imagination. I have sold a couple of eyelets brown and yellow threads (each 6 pieces) and plaits braid. It is possible to make a tail from a knitted chain (for example, from 10 air loops).
We have to decorate the bottom of the frame and decorate the legs of the giraffe.
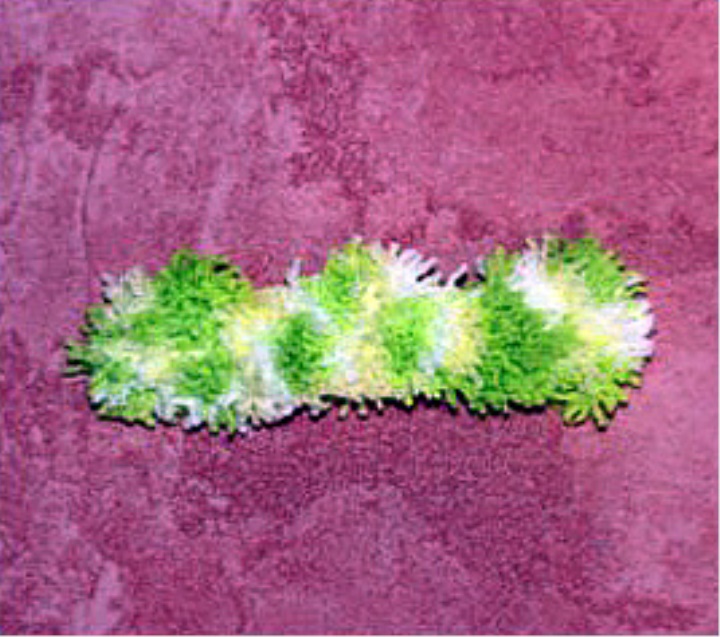
Knitting grass
Green threads (I used the sectional color of the crumbs from the Nazar) knit columns with or without scale, as you like, the rectangle, the upper edge I made wavy. The size of the rectangle should be sufficient to close the entire front of the frame to the bottom and bend on the sides backwards. For my frame size was 18 cm in length and height 2-3 cm.
Description: 24 VP (try directly to the frame), then three rows of 23 SBN, and the last row alternating randomly in random order SBN, Polstanki and columns with the scale, so we get uneven edge. I had "waves" (SBN, half-column with a scale, 2 PRSs, a half-column with a scale, SBN)
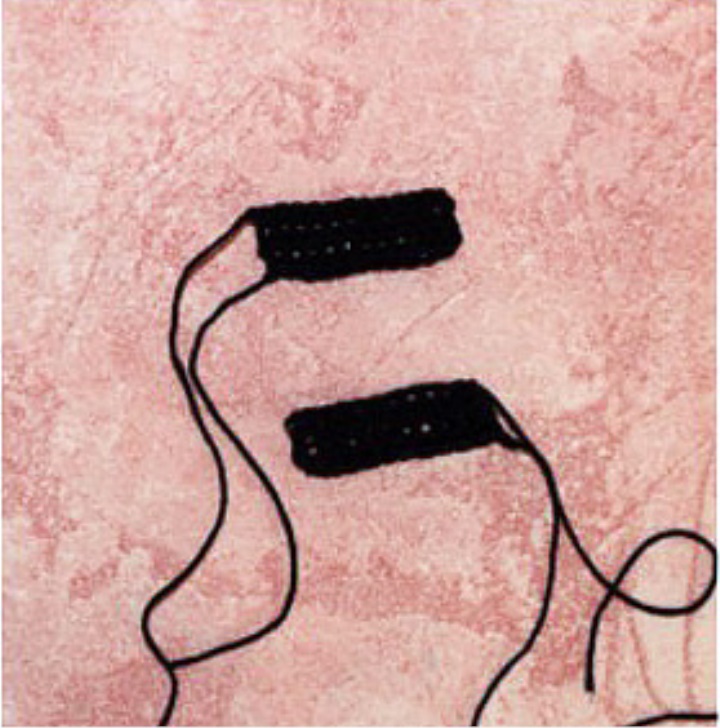
Knit Hoof (2 parts)
Black, we dial a chain from the EAP, trying it on the frame. The hoof should start from the inside of the frame, pass through the front part, through the rib on the lateral part and go back exactly as much as you have there strapping. So the final version will look neater.
Knit RVN, straight and reverse rows. In my case, there was a rectangle 6 cm in size on 1.5 cm
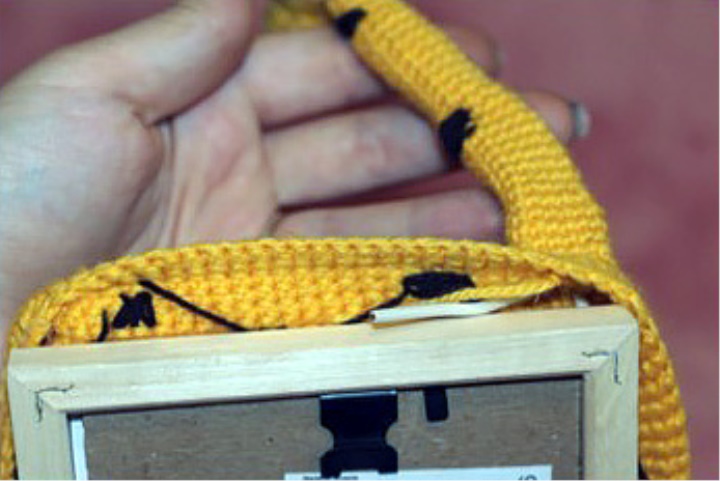
It remains only to fix all our details on the frame! But this is the most important stage!
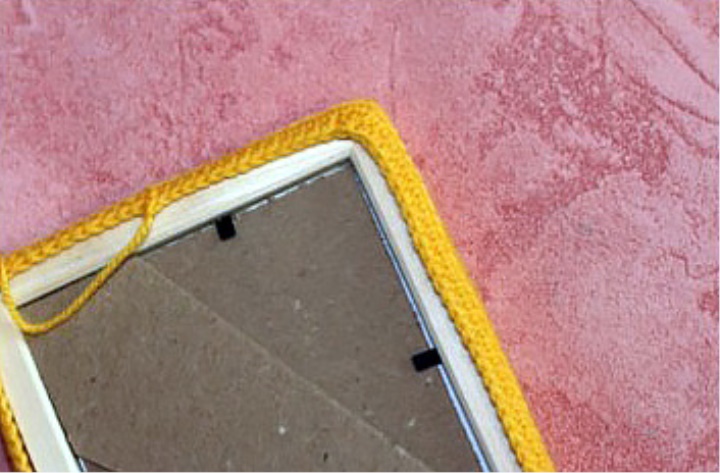
We start just like strapping – from the inner edge of the frame. Carefully apply glue on an edge and, aligning, press a cloth. We make sure that our "bends" due to the vyvyazuju behind the back half-loop, went straight. This will greatly affect the appearance of the work. Take your time, but try to act fast enough that you have the opportunity to align everything before the glue grabs. (the upper inner part of the strapping is fixed in the photo)
So gently fasten on all four sides inside.
Then proceed to gluing the front of the frame.
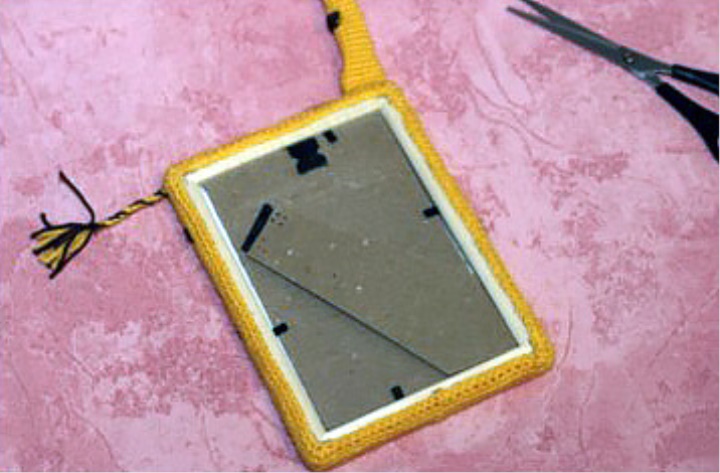
To do this, turn off the canvas on each side (see photo), Apply glue, (just try to align and combine all facets) and press. While the glue did not grasp-straighten.
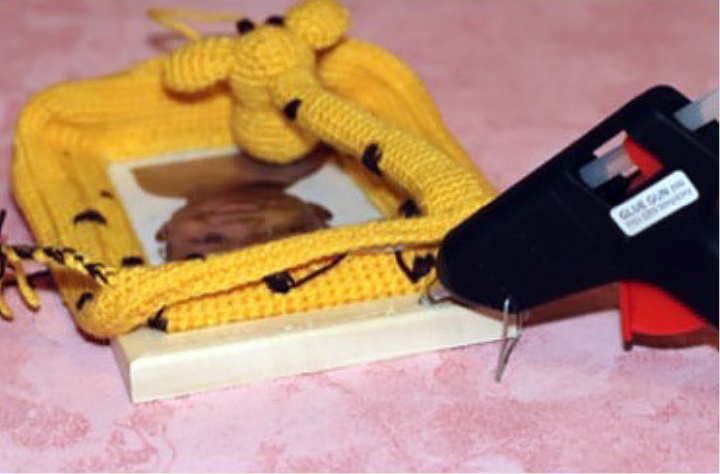
After that we proceed to fastening of end parts.
It is necessary to start from the place where the neck will be fastened, i.e. from the upper left corner. We need to fix not only the canvas, but also the wire.
If the wire is not fastened, then the stability of the neck will not be very reliable. Plus, the unfastened end of a wire can in the course of operation get out through a knitted cloth. This will affect not only the appearance of the final product, but also its safety.
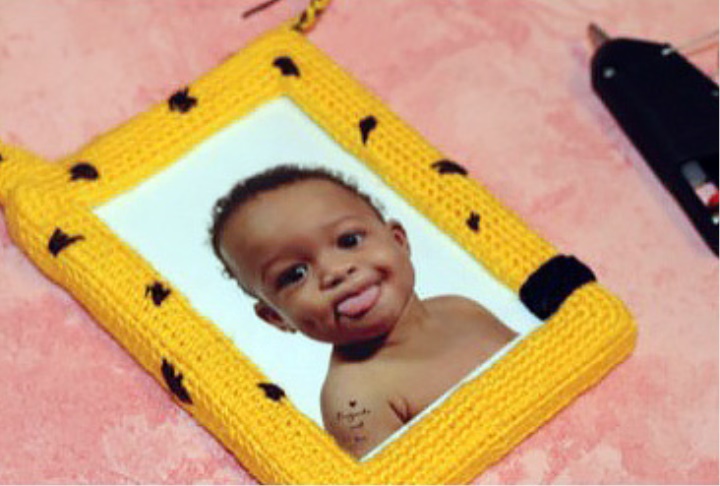
Therefore, we straighten the wire on the spot, put a little more glue, press and wait until grasp. Paste the rest of the sides and the back of the frame on the same principle. The final form should be as follows:
Glue the hoof (on the photo-black):
Then glue the grass (see photo below).
The last touches are left!
Making our Giraffe mane
For this, cut the yarn into pieces twice as long as the fringe. To make it easier to do, wrap the yarn around a piece of cardboard, the width of which is equal to the length of the fringe. Then cut the yarn from one side. Fold the pieces of yarn in half, pour the folded ends into the cloth (starting from the space between the horns and down the neck) with the help of the fingers or the knitting hook, then the loose ends of the fringe stretch through the formed loop and tighten well.
The diagram below shows the principle of fastening the fringe on the edge of the product. In our case, the only difference is that we cling the fringe to the middle of the canvas by selecting the SBN and skipping the loop around it. Then we descend on 1 SBN below and repeat.
When the whole mane is fastened – carefully cut it to the desired length.
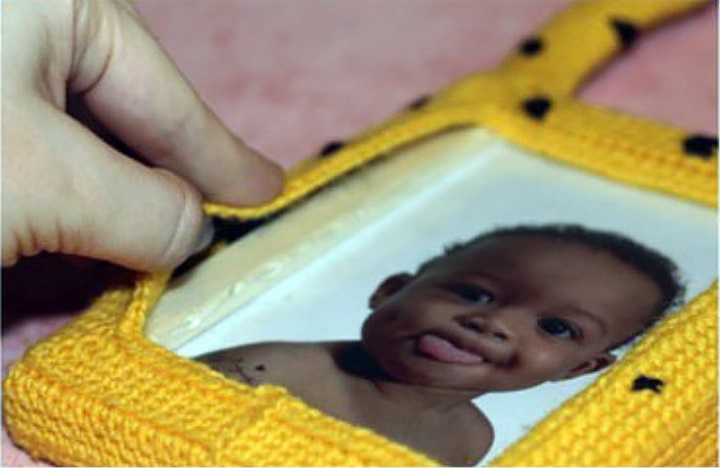
Decorate our giraffe with a bow, scarf, tie or whatever your heart desires. Bend his neck, insert your favorite photo and praise yourself for the work done!
Separately apologize for the quality of the photo, catastrophically spoiled quality when reducing the size.
I would be glad, if you need this master-class, and always glad to new subscribers!
Enjoy your creativity!