Materials: Knitting threads, knitting needles, cardboard, PVA glue, toy filler, needle with wide ear
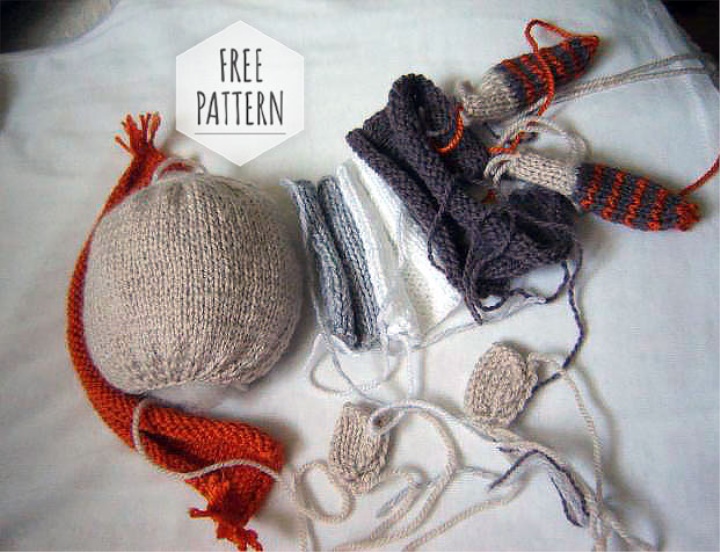
We will need:
Thread 5 colors: Dark gray, gray, white, orange, light beige. Practically leftovers can be used. The main thing-all of them must be of the same thickness.
corresponding spokes.
I got a string of acrylic.
Needle with wide ear.
Cardboard-size 23-30 cm, PVA glue
Synthesizer or other filler.
The details are not ironed.
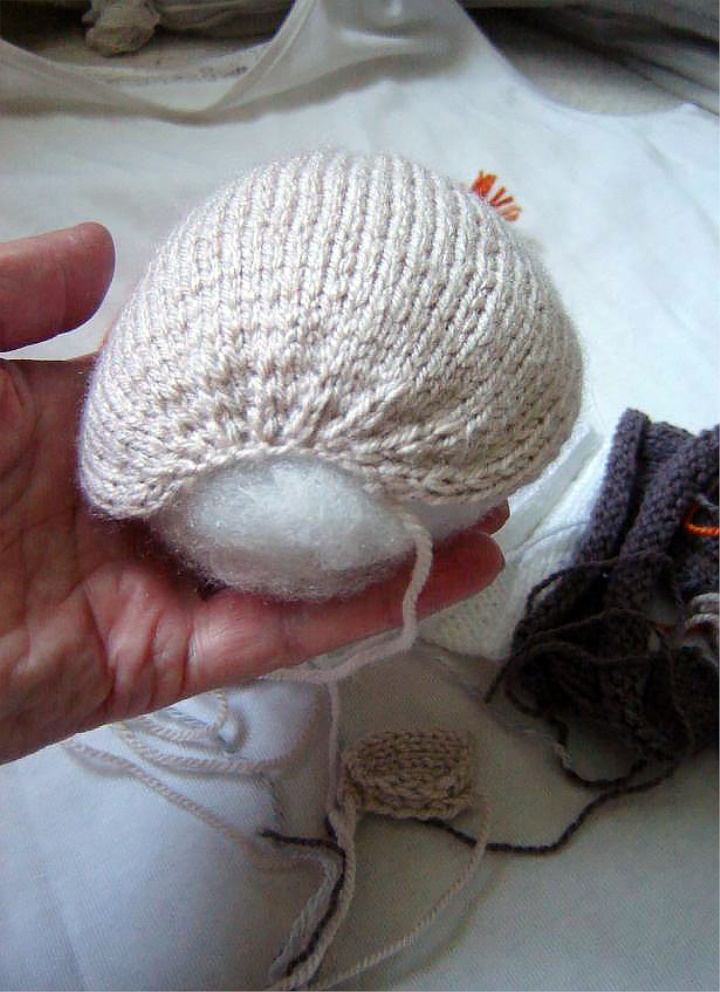
Head: We dial 10 loops with the light-cutting threads.
1 p.-Vyvyazit from 1p.-2 facial and so to the end of the series. 20p.
2r and all even-purls on the figure.
Add loops: 3r-"from 1-2 loops, 1 persons."-to the end of the series-30 p.
5r-"of 1-2 hinges, 2 persons."-to the end of the series-40p.
Then there are 26 rows.
Lower loops-in reverse order.
First a row of 2 together through 2 facial loops, then in the next Lyceum-2 together through 1 loop, then in the next Lyceum row-on the 2nd together all in succession. And after tying the Iznanochnogo series close the loops. The head was tied.
We dial the light-grey threads 18p.
Knitting according to the scheme: 6p. Facial, 6p. Purl and 6 p. Facial. It turns out as if gum. Seamy Series-according to the figure.
There are 24 rows. and close the loops.
Also the most knitting white threads and Projazin 26 rows-close.
It's a calf.
Knit a dark gray skirt: We collect 50 loops and knit the front smooth of 17 rows. Close
CAP: Collect 50 loops and knit 17 rows and close. On the upper corners we make brushes.
Handles-2 parts.
We collect 12 loops, a face smooth knitting of 7 rows, in 8 row reduce: on 2 together cherez1l. Loop. Tear off the thread and stretch through the remaining loops. Tighten and fasten the thread.
Legs 2 Children:
We collect 14 loops and knit a face smooth 10 rows of light-beige threads. Then we turn to the dark gray. and knit the 12 rows, changing the thread to get the strips. Lower: The next row of 2 together through 2 loops. And in the next Lyceum on 2 together through 1 loop. Tear off the thread and stretch through the remaining loops. Tighten and fasten the thread.
For a background we collect white 60 loops. and knit facial smoothness of 22-23 cm.
Here it is possible and to dream up. What background will be and what to knit. It is possible and a hook if to someone it is easier for them to knit.
Immediately the background can be pasted on the cardboard, let it dry. Glue apply finely and smoothly, so that the fabric is not soaked. Align edges and angles. We cut off the extra cardboard. You can squeeze the edges of something, books, for example. To have a good foothold. Be careful that the book is not glued.
Assembly.
Remind. There is no need to iron anything. In this feature and skirts and hats and blouses-all twisted and stingy.
Legs and handles are sewn together. The head of a handle and legs fill with a filler. The handles are slightly, the legs are half, but the head is denser-you will get half a head. Those who make up a pillow or a bag-my advice, that the synthesizer did not stick out and did not draw a background, it is necessary to cut a cardboard circle on an oval of a head and having inserted it in a head, having made as though a basis, and only after that to stick to a background. And who makes a puppet panel, it is not necessary to do. Just stuffing.
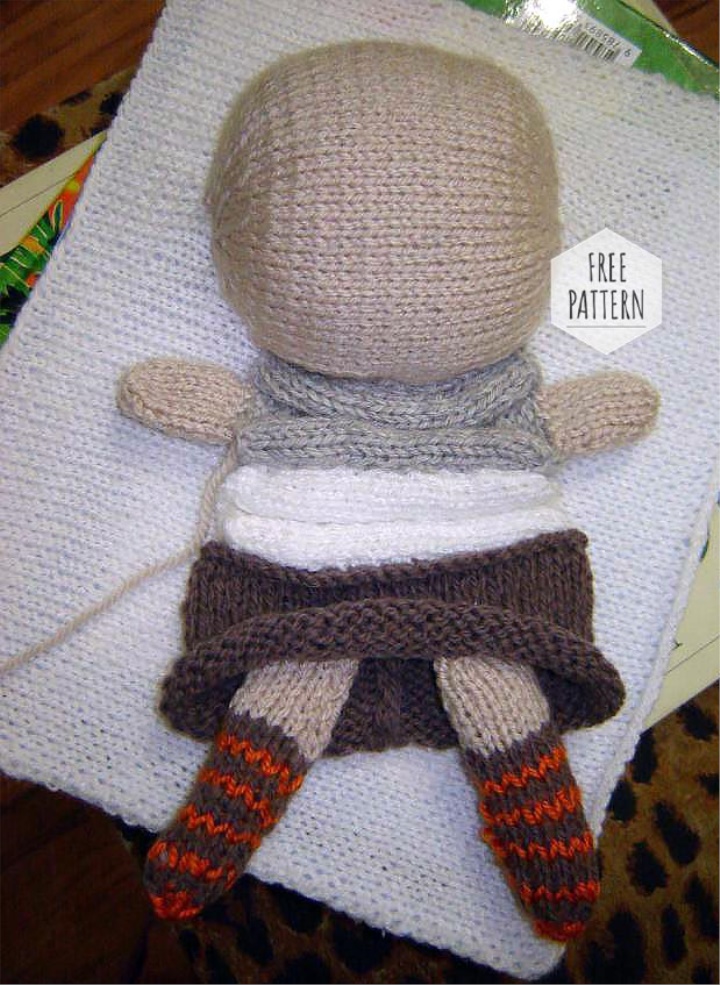
To make it easier to arrange the girl, sew it first without a background.
Sew a head and a light grey part of a blouse to each other from a reverse side: put them to each other obverse parties and sew. A stitch on the head, a stitch on a blouse, etc. even it is possible to sew not on the edge, and having receded, poddej as though not the most extreme loops and in the second on a blouse and the third columns of loops on a head.
Then try to sew the white part to the light grey, in the same way, but the white part on the two rows is longer, so it seems a little prisobryrothe.
Then came the pens-look at the photo. The handles are sewn on the purls of the light grey part of the blouse.
Then sew the skirt on the back seam already on the front side. Stitch on the right, stitch on the left, etc.
We put a skirt on a blouse. I folded the skirt in half so that the back seam was at the back of the middle and nailed to the front of the skirt, and the back was like the bottom of the skirt. In the picture you can see that the top edge of the skirt is slightly bent forward. It was also sewn from the wrong side and not for the very edge.
Legs flattened on the top edge and came under the hem, on a scythe, that they had direction in different directions.
All. That's how I did it.
Take the background. Embroider flowers, birds-I embroidered, piercing cardboard. In order to set the direction of the doll left the right rope swing. I just pulled a string. From the wrong side.
Now the doll is stacked along the thread-swing and start to sewing from the head. On a circle of a stitch on a background, a stitch on a head. You can fix the pins first to make sure everything is straight. We have a blouse to eat.
I sewn it with a few stitches on the left and right sides, literally fixing where there will be hands, the skirt a little stretched and a couple of stitches made on the sides of the skirt lower part-hem left in the free flight.
There is a cap: put it on the head and a few stitches sew to the head. Everything is clear from the photo. Try to close the cap side of the head, where we added and reduce the loops. Brushes a little pull and these places of a hat literally a pair of stitches attach at a background.
On the head embroider eyes. Just the same stitches-a square. I still got my mouth out. Added Bangs. And the second rope swing embroider and "saddle" under the doll.