I think that on the eve of the new Year it is very useful.
For the snake I used the green and white Trinity Yarn "beauty"-92% Acrylic, 8% metanite. Black cotton for face and tummy styling.
Filler. As filler I used hollofayber.
• Eyes, Kappronova black tape for cilia.
Description:
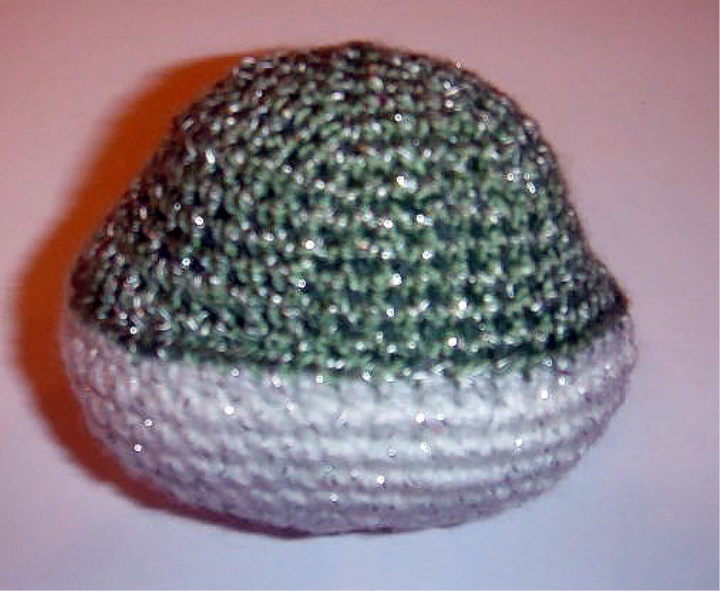
Head: Green Yarn
1r – 6SBB in a ring of Amaguamie
2r-* p * 6 times = 12
3r-* 1SBN, p * 6times = 18
4r-* 2SBB, p * 6times = 24
5r-* 3SBN, n * 6times = 30
6r-* 4SBN, p * 6 times = 36
7-10 R (4 rows) – per loop = 36
Starting to shape the cheeks
11R-4SBB, 5p, 13SBN, 5p, 9SBN = 46
12R-5SBN, 1PSSN, Ol of PRSPs, 1PSSN, Ol of PRSPs, 1PSSN, Ol of PRSPs, 1PSSN, 16SBN, 1PSSN, Ol of PRSPs, 1PSSN, Ol of PRSPs, 1PSSN, Ol of PRSPs, 1PSSN, 11SBN = 52 SBN
Then knit the white yarn.
13p – 52 in the rear half-loop
14-16 R (3 rows) – per loop = 52
17r-5SBB, 5u, 17SBN, 5u, 10SBN = 42
18r-4SBN, u * 7times = 35
19r-* 3SBN, U * 7times = 28
Fill the head with filler (especially in the area of cheek), giving the head the desired shape.
20R-* 2SBN, U * 7times = 21
21R-* 1SBN, U * 7times = 14
Add filler.
22r – 1SBN, * 1sbn, 4 times, 1 SBN = 10
Do not bind, the hole of the head leave open. The thread is fastened and spun.
Add filler.
Top of the nose: white yarn
1p – we dial 6 air loops:
In the 2nd loop from the Hook 1sbn, 3SBN, 3SBN in the last loop,
Turn on the second side of the chain, 3SBN, 2 in the last loop = 12
2p-P, 3 SBN, * p * 3 times, 3SBN, * p * 2x = 18
3r – per loop = 18
4r – 1, 3, 4, * 1SBN, n * 3x, 3SBN, * 1SBN, n * 2 times = 24
5r – in Each loop = 24
6r-SBN, U, 7SBN, u, 2SBN, u, 5SBN, u, SBF = 20
Fill the nose with filler. We fix the thread, leave the long end for the stitching.
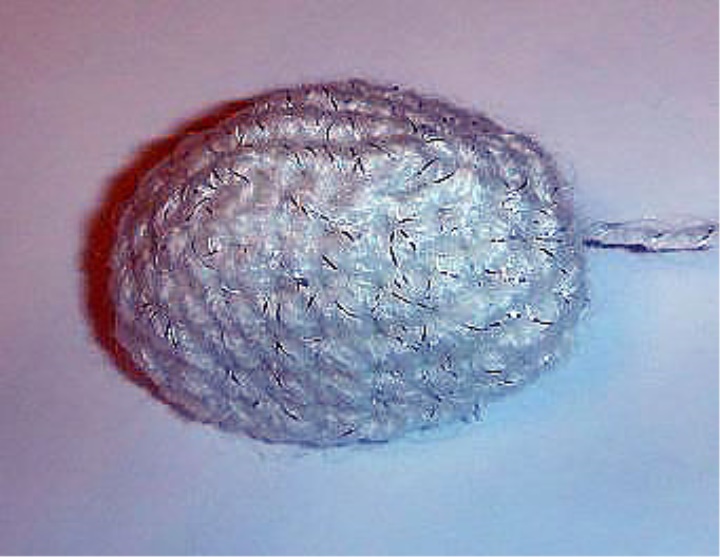
Lower part of the nose (jaw): white yarn
1p – we dial 6 air loops:
In the 2nd loop from the Hook 1sbn, 3SBN, 3SBN in the last loop,
Turn to the second side of the chain, 3SBN, 2SBB in the last loop = 12
2p-P, 3 SBN, * p * 3 times, 3SBN, * p * 2x = 18
3r – per loop = 18
4r-U, 5SBN, 2u, 5SBN, u = 14
5r – per loop = 14
Lightly stuffed with filler. We fix the thread, leave the long end for the stitching.
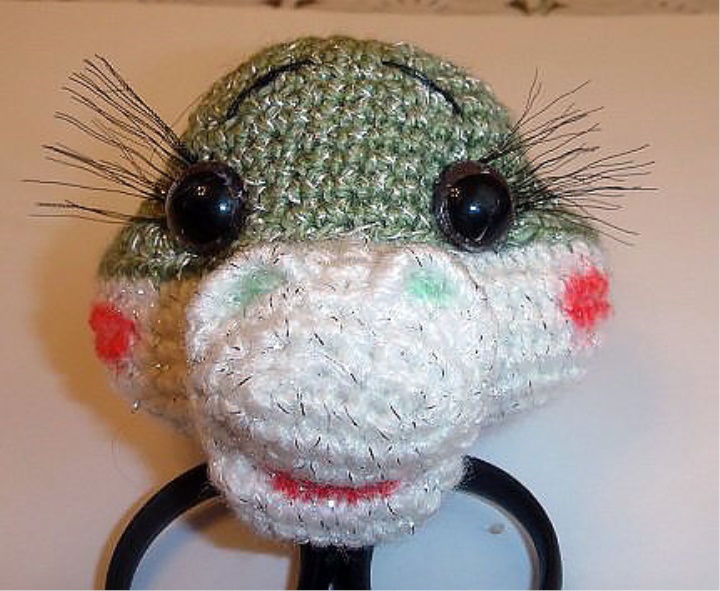
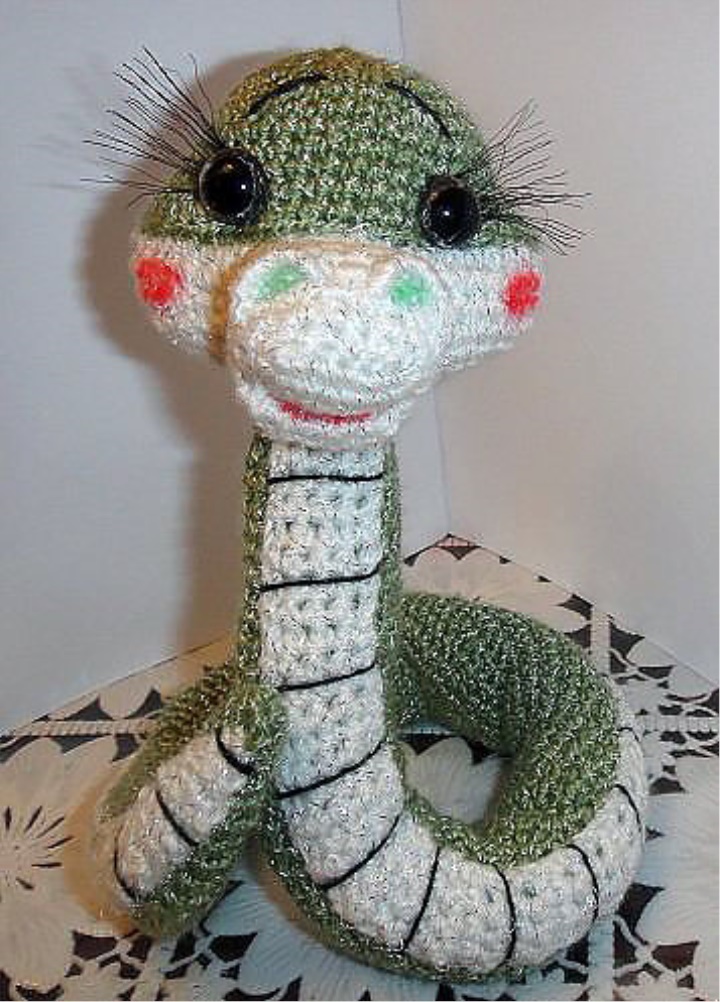
Design of the muzzle of Marfushi:
1. At the level of the border of two colors between the cheeks, first the upper part of the nose.
2. Then we attach the lower part of the nose – the jaw.

3. Plan where the eyes will be located, and make a duck. Then glue the cilia and eyes.
It is possible to sew black beads instead of glutinous eyes, and to make on them acrylic paints white glare.
4. Make eyebrows with a black thread.
5. In the upper part of the nose make the nostrils. For this white yarn dial 6vp, fasten and trim the thread, leaving a long end for the stitching. The half-circle is pressed.
6. Watercolor pencils or acrylic paints tint the mouth and cheeks. I made Marfouche a bright, Christmas toning.
7. A green watercolor pencil slightly toning the inner part of the nostrils.
The muzzle is ready. You can proceed to the torso.
Body: Green yarn
1r – 4SBB in a ring of Amagurami
2p-P, 3sb=5
3p-P, 4sb=6
4r-6SBN
5r-P, 5SBN = 7
6p – 7SBN
7r-P, 6SBH = 8
8p-8SBN
9p-P, 7SBH = 9
10p – 9SBN
11R-P, 8SBH = 10
12r – 10SBN
13p-P, 9SBN = 11
14p – 11SBN
At this stage of knitting insert in the trunk of the wire of the desired length, bending its end so that the wire is not out of the toy. The end of the wire I also Obmatatya paper tape.
We begin to fill the torso with filler, and continue to gradually stuffing in the course of work. I've been stuffing my torso every five rows.
15r-P, 10SBH = 12
16p-12SBN
17r-P, 11SBH = 13
18p-13SBN
19r-P, 12SBH = 14
20p-14SBN
21R-P, 13SBN = 15
22p – 15SBN
23R-P, 14SBN = 16
24r-16SBN
25-114 R (90 rows)-16SBN
We fix the thread, leave the long end for the stitching. Well stuffing the upper part of the trunk.
Bend the end of the wire, roll it with paper tape, and insert into the head.
The head is pressed to the torso.
Tummy: White yarn
1p – Dial 2VP, 1s1 in the second from the Hook Loop, VP
2p-P, VP
3r – 2SBB, VP
4r-P, SBN, VP
5-12 R (8 rows)-3SBN, VP
13p-P, 2SBB, VP
14p-4SBB, VP
We get so many rows that the tummy corresponds to the length of the trunk.
We are pressing the tummy to the torso. We make strips on the belly with a black thread.
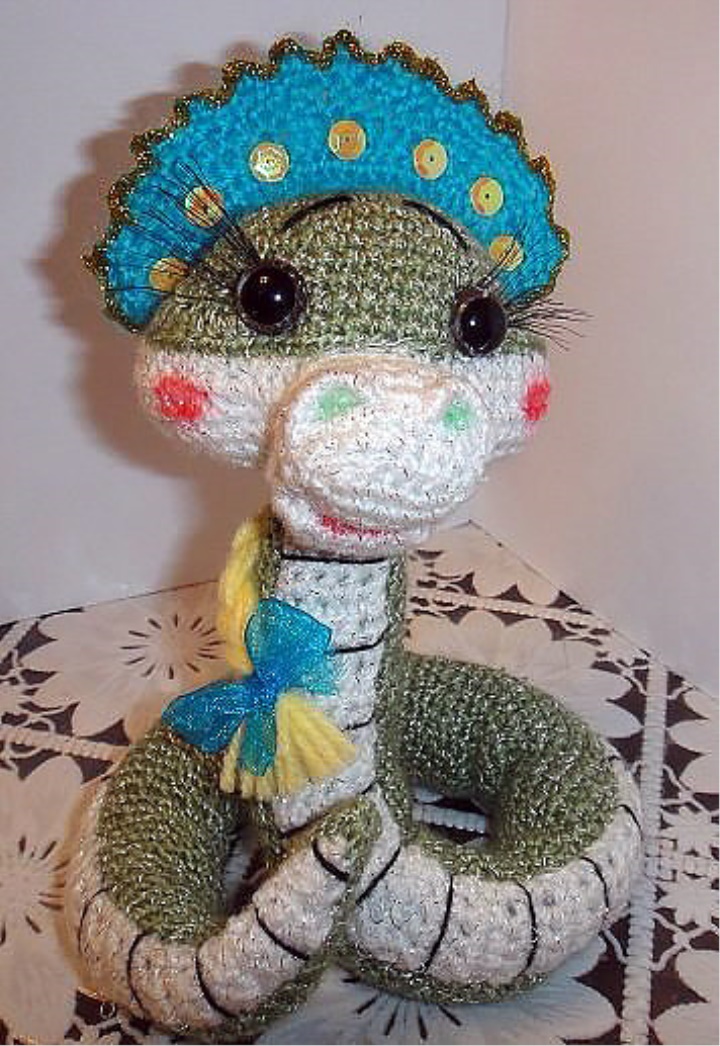
Attach the desired position to the snake. It can be different. Like this.
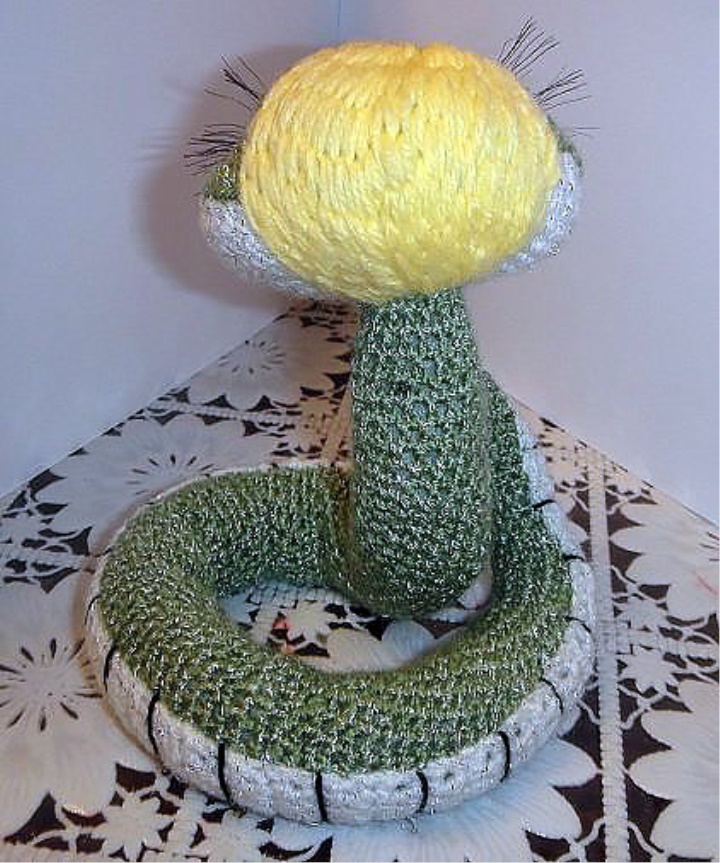
Braid: Light Yellow yarn
On the back of the head with large stitches stitch embroider a light yellow thread hair.
From the nape of the head with the help of a needle cling light-yellow thread (as a fringe)-braid in the braid, tie the Ribbon.
Crown: Blue Yarn
1p – We recruit 24 VP,
In the second loop from the hook, * p, SVN * 11 times, 1 VP = 35 Turn the work
2p-Skip 1 loop 31sbn, y, 1 VP = 33 Turn Work
3p – Skip 1 loop 4sbn, 9PSSN, 5SSN, 9PSSN, 3SBN, u, 1VP = 31 turn work
4r – Skip 1 Loop 5sbn, 8PSSN, 3SSN, 8PSSN, 4SBN, u, 1VP = 29 Turn work
5p-Skip 1 Loop *, Pico * 13 times, Y-thread fasten, leave long end for stitching.
* Sko, Pico * was the following way:
* SBN, Dial 3VP, in the second of the VP is a half-column without a scale, in the next column *
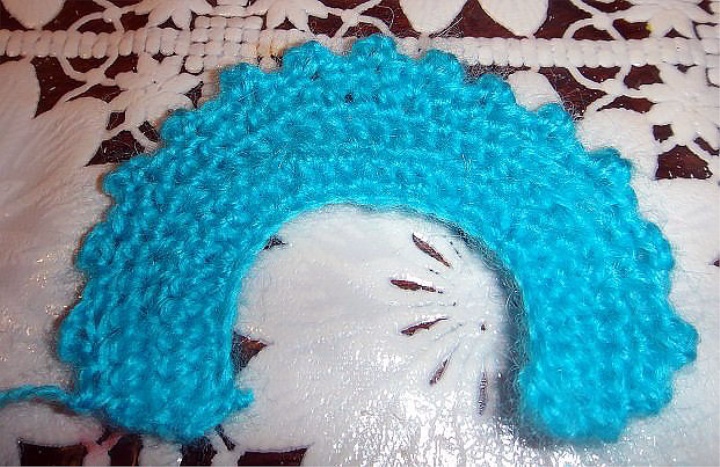
We decorate the crown, and we stick it to the head along the line of hair from cheek to cheek.