I offer you a simple and useful toy for your child, which you can very easily make with your own hands. I think many people know such a wonderful thing as slingburs. These are special beads for a child, sewn or knitted from natural materials and having different fillers inside, such as: wooden beads, cotton thread or fabric, crumpled by a ball. I offer you a mix slingbus and toys for the baby. A bright, unusual and absolutely safe toy will become his reliable and favorite companion at home, on the street and at a party. Made in accordance with the recommendations set forth in this article .
- cotton yarn of different colors. You can also take a thread with 50% cotton and 50% acrylic, such as cotton jeans or alara lanoso. This thread is not shaggy, soft and comfortable to use. Alternatively, you can use floss;
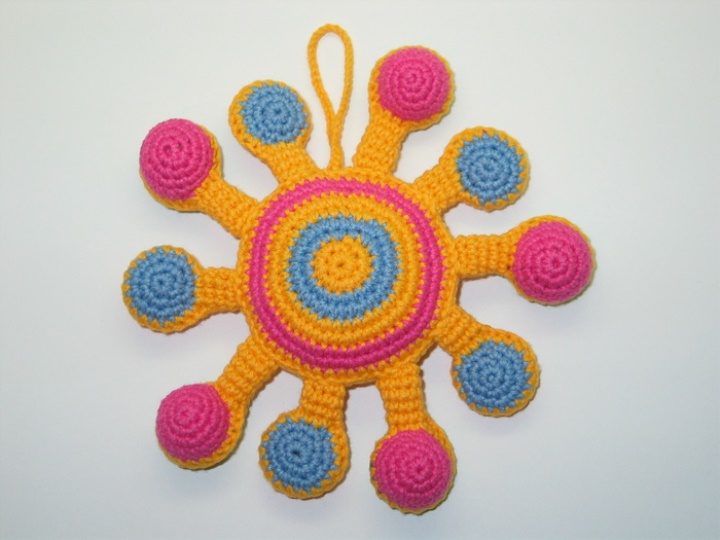
Our sun consists of rays of different lengths with two-sided multi-colored balls at the ends with fillers in the form of beads, cotton thread and flat without filler.
1 row - dial two air loops and tie out 6 st.b.n. (columns without crochet) into the second loop from the hook.
2nd row - 2 st.b.n. in each st.b.n. .n.
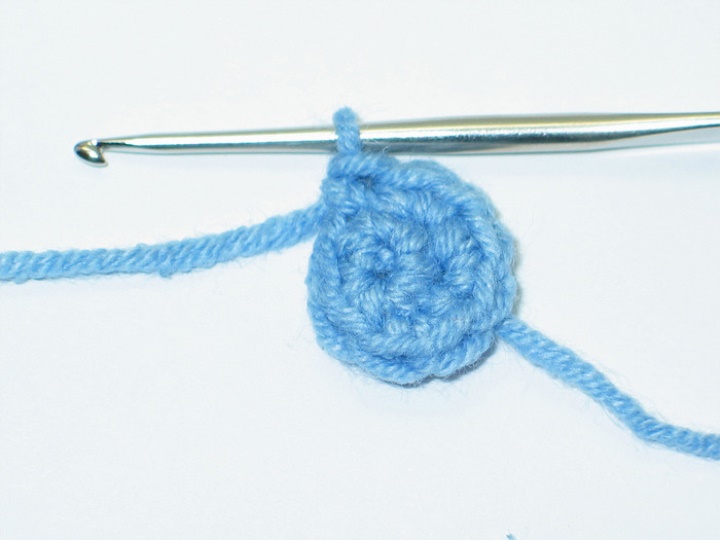
3 row - 2 Art. BN. In every second Art. BN. The previous series - a total of 18 Art. BN.
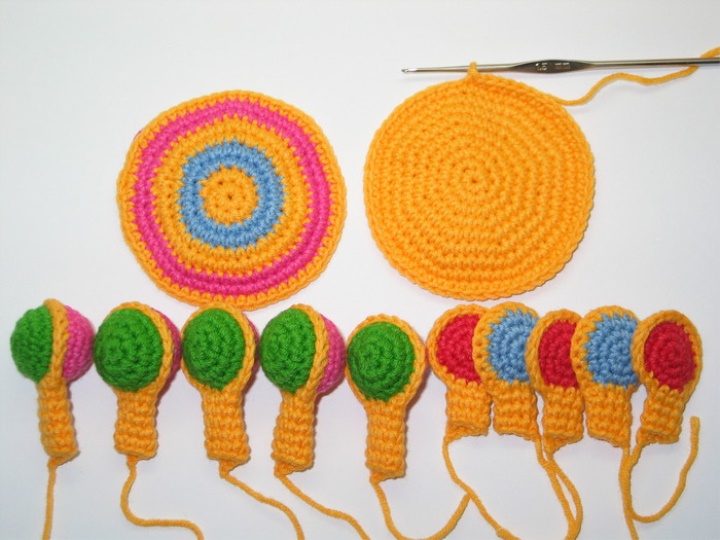
After tying up the third row, make two half columns, fasten and cut the thread. Link thus two pieces of different colors.
Vyvyazyvanie ray with a bead inside:
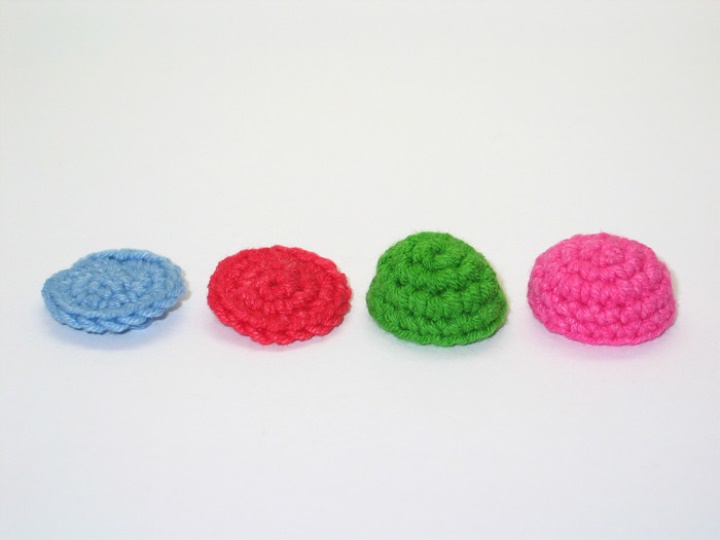
1,2 and 3 rows - knit the same way as flat.
4 and 5 rows - knit without increments of 18 st.Bn in each row.
After tying up the third row, make two half columns, fasten and cut the thread.
Attention! I used beads with a diameter of 17 mm. If your bead is larger, be sure to try on the hemisphere connected to the fourth row, whether the bead will have a diameter across the connected part and, if necessary, associate another one or two rows with the additions. Increase to do in every 3rd Art. in the 4th row, in every 4th art. bn in the 5th row, etc., until the hemisphere reaches the desired diameter. After that, tie the required number of rows with no increments so that the part covers the bead by half.
The related hemispheres are as follows.
Tying a ray with a cotton or rustling filler:
It is made just like a ray with a bead, but instead of a bead we insert a lump of cotton thread. Stuff more tightly. The rustle is pre-sewn between two cotton circles.
The connection halves of the balls and tying legs ray:
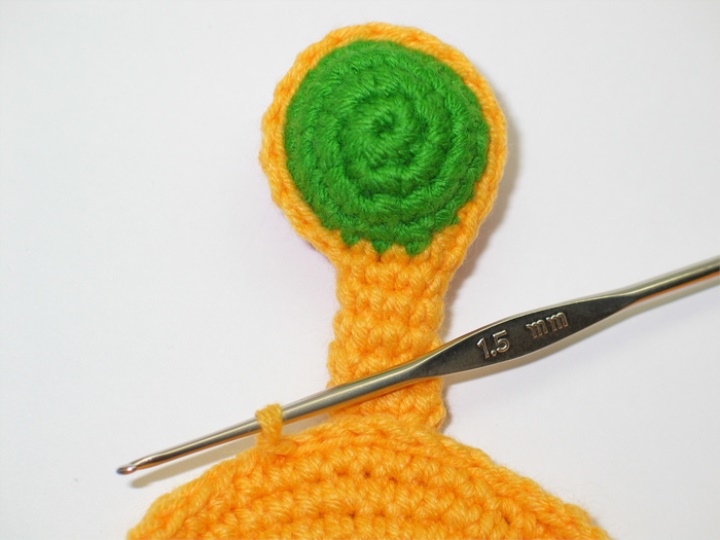
Insert a bead between the hemispheres, take a yellow thread and connect the ball details alongside in st. tying together the columns of the last rows of the halves. The ends of the thread hide inside the ball.
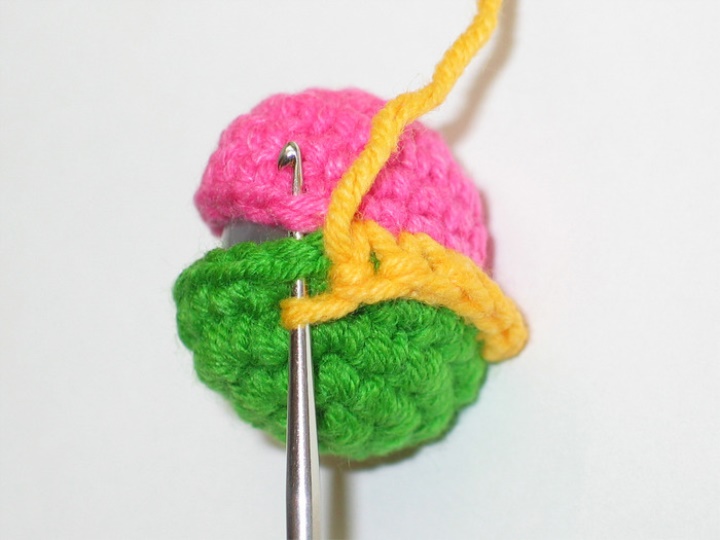
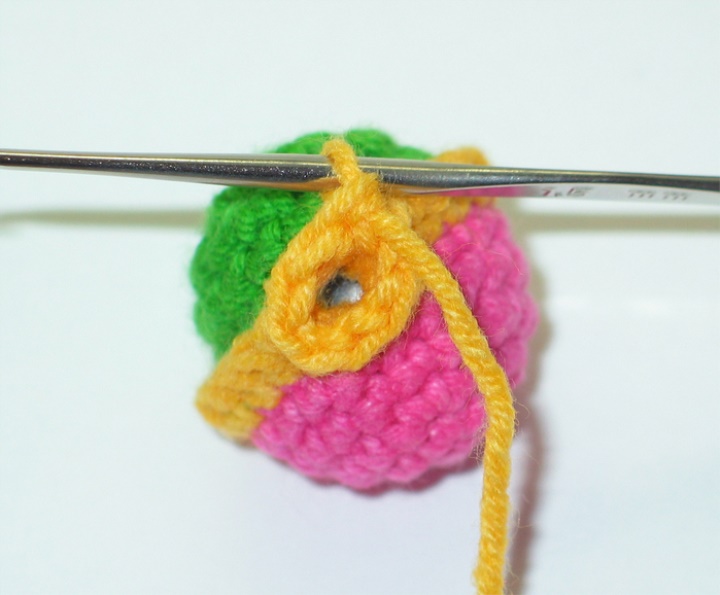
When connecting the hemispheres, the last 2-3 columns should not be joined, but tied around 8 st.b.n. in a circle, forming a leg for the ray. For a volume leg we knit 5 circular rows, for a flat one - 3 circular rows. Finish knitting as shown. It is necessary to finish in the same position for each part in order to avoid different inclinations of the rays when assembling the sun. Knit 1-2 ce, fasten and cut the thread.
In the next figure, to the left and to the right, there is the same pair of rays only from different sides.
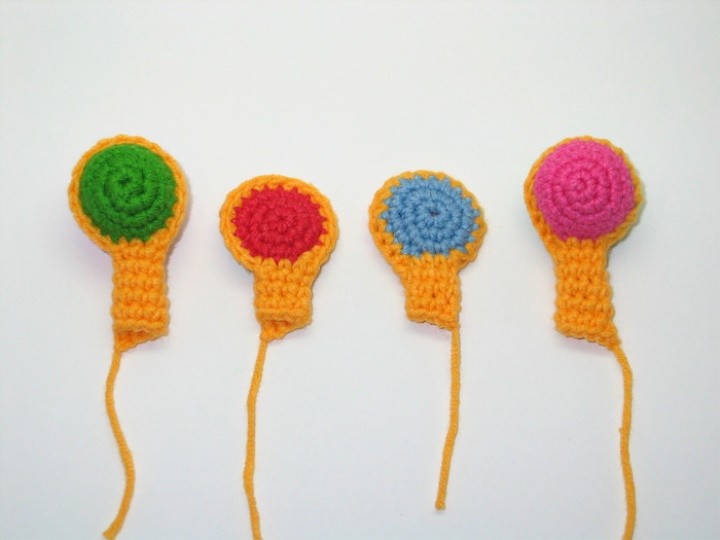
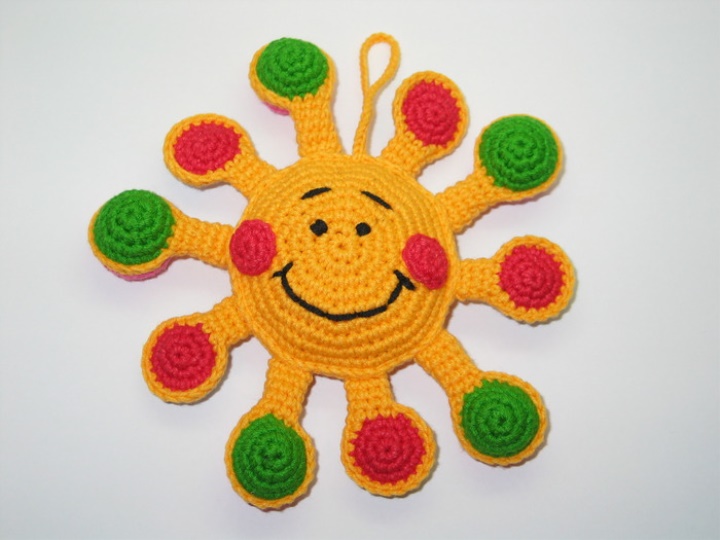
My sun has 10 rays. 5 long and 5 short.
You can make them as many as you want and in any size. To calculate the main circle of the sun, count the number of the resulting rays, and multiply by 6 - this will be the amount of senior biological science that you need to get in the last row of the circle. 10x6 = 60
Vyvyazyvanie main circle of the sun.
1 row - dial 2 vp and knit 8 st.b.n. (columns without nakida) in the second loop from the hook.
2 row - 2 Art. NB in each Art. BN. The previous series - a total of 16 Art. BN.
3 row - 2 Art. BN. In every second Art. BN. The previous series - only 24 Art. BN.
4 row - 2 Art. B.N. in every third Art. B.N. of the previous series - a total of 32 St.N.
5 row - 2 articles. Bi. In every fourth article. Bi. The previous series - only 40 articles. Bi.
6 row - 2 Art. B.N. in every fifth Art. B.N. previous row - only 48 Art.N.n.
7 row - 2 Art. BN. In every sixth Art. BN series - only 56 Art. BN.
The 8th row - 2 Art. B.N. in every fourteenth Art.N.c. of the previous series - a total of 60 Art.N. (in this series, the number of increments must be adjusted to the calculated final number of columns).
9 row –without increase.
Link two such details. Knit the top part last and do not cut the thread, we will assemble it.
Build the sun
It is produced by a working thread with a tapestry needle “needle-back” seam or is connected with a hook by a number of connecting posts. Fold the parts of the main circle inside out and join for the three columns of the last row of the upper and lower parts. Insert a long ray between the parts of the circle and connect all three parts for the last columns in the sequence: the upper circle, both walls of the leg of the ray, the lower circle. Thus to capture all the loops of the ray with three loops of the upper and lower circle.

We hide all the strings between the circles. Next, connect three more columns of the upper and lower circle.
Attach a short ray and attach it as well as a long one. Again connect the three columns of the upper and lower circle without a ray, and again engage a long ray. And so on. Having thus connected more than half of the length of the circle, insert two circles cut out of a strongly rustling package and insert a bit of synthetic wool between them, or a pair of synthetic padding circles of the same diameter as the main circles. Continue connection until the end.
For cheeks, tie two circles according to the following scheme:
1 row - dial two air loops and tie out 6 st.b.n. (columns without crochet) into the second loop from the hook.
2 row - 2 articles. Bi. In each article. Bi. N the previous series. Leave the thread longer and sew the cheek to the sun with the help of a tapestry needle. To embroider the mouth, eyes and eyebrows with black thread. Thread securely, hide the tip between the main circles.
It should be such a sun (Photo right - rear view).
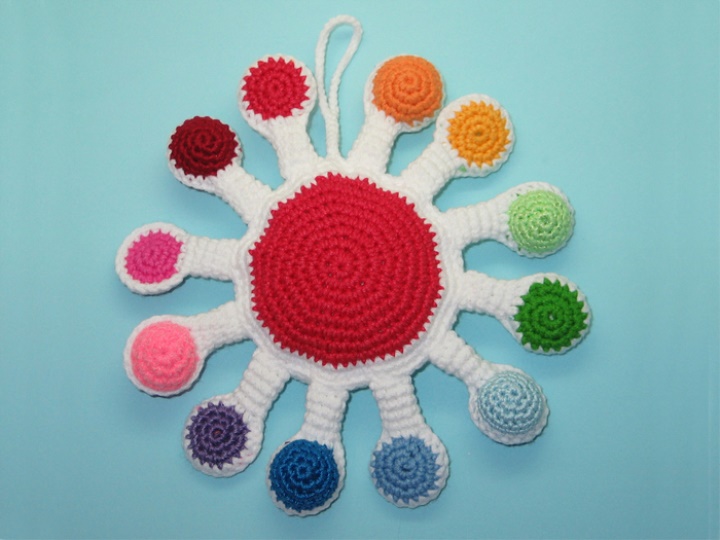
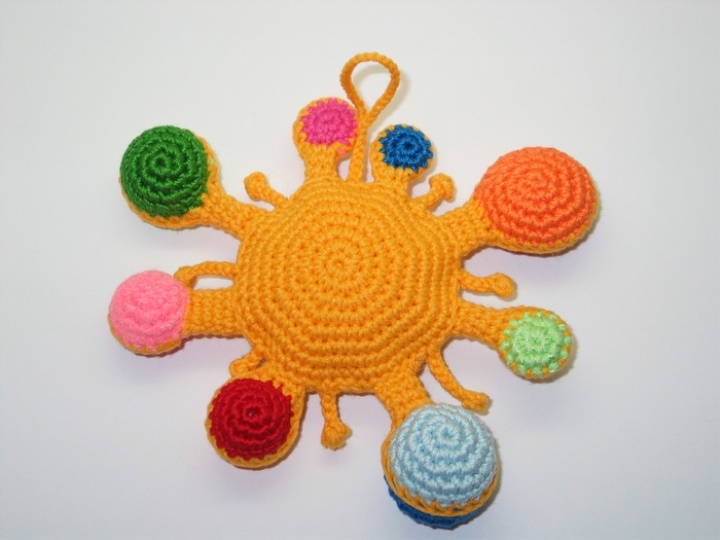
By connecting the imagination and the number of colored threads in the range, you can associate different suns, with rays of different colors, diameters, and their number.
Rainbow sun:
Abstract sun
Embroider the name of your baby on the back side, or make a sewing appliqué. In any case, create a toy so that you like it and you are no less than your kid, then both of you will be doubly pleased to play with her . And of course, do not leave crumbs up to half a year alone with any toys, no matter how safe they may seem.