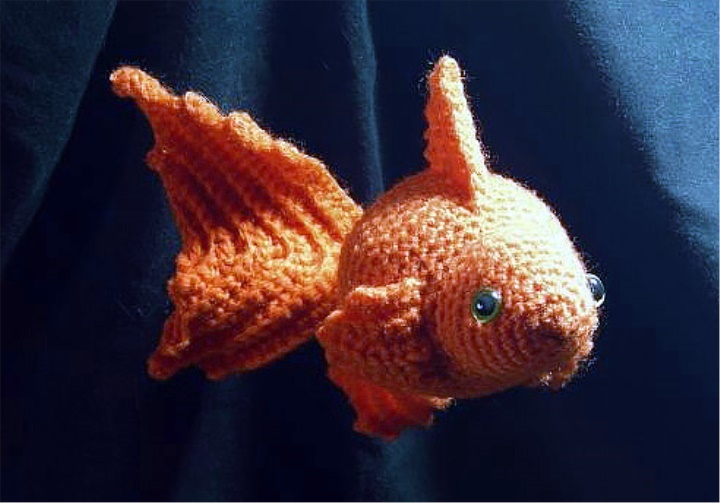
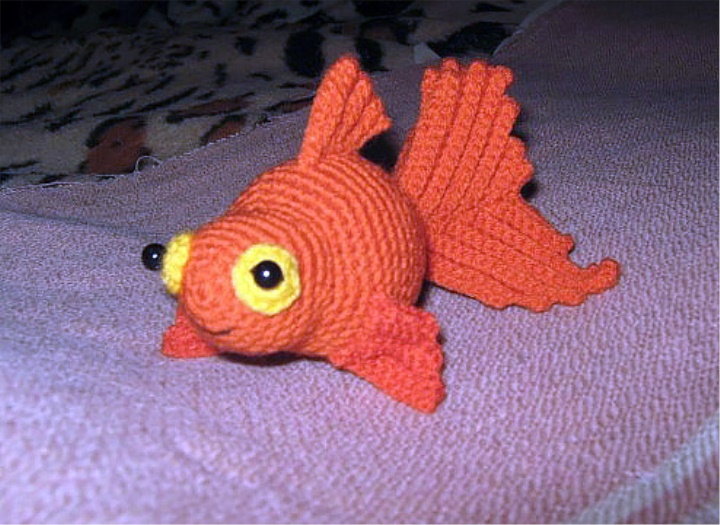
These funny goldfish are knitting very quickly and you can have a whole aquarium of knitted fish! Fish can be not only golden, but also orange, black, white and yellow. Experiment with the color solution of fins, adding other colors to the main. Or make your fish any color of the rainbow!
You will need:
Approximately 75 m of basic color yarn;
Hook F (3.75 mm);
Eyes with a safe fastening or the remains of a yarn of contrasting color;
A small amount of floss suitable for the mouth;
Sewing and blunt needle for yarn;
loop marker;
or any other filler.
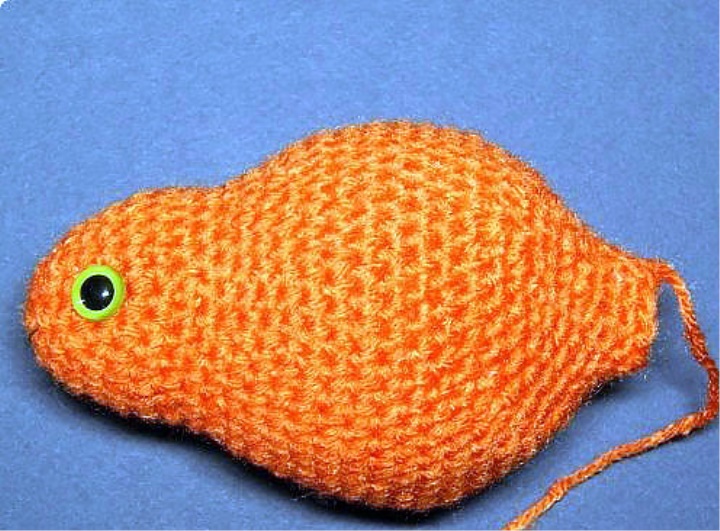
Body:
The body of a fish is knitted continuously in a circle. Use the loop marker to know where the beginning of the circle is. The number of connected loops is indicated in parentheses.
1 Lap: Engage 6 in the Amaguumi ring
2 Round: 6. 12
3 Lap: * 3 Sat, a-B. *-Repeat 3 times (15)
4 Lap: * 4 Sat, Prib. *-Repeat 3 times (18)
5th round: * 5 SBN, Prib. *-Repeat 3 times (21)
6 Lap: * 6 SB, Prib. *-Repeat 3 times (24)
7th round: * 7 SBN, Prib. *-Repeat 3 times (27)
8 Round: * 8 SB, Prib. *-Repeat 3 times (30)
9th round: * 3 SBN, UB. *-Repeat 6 times (24)
10 round: 24 SBN
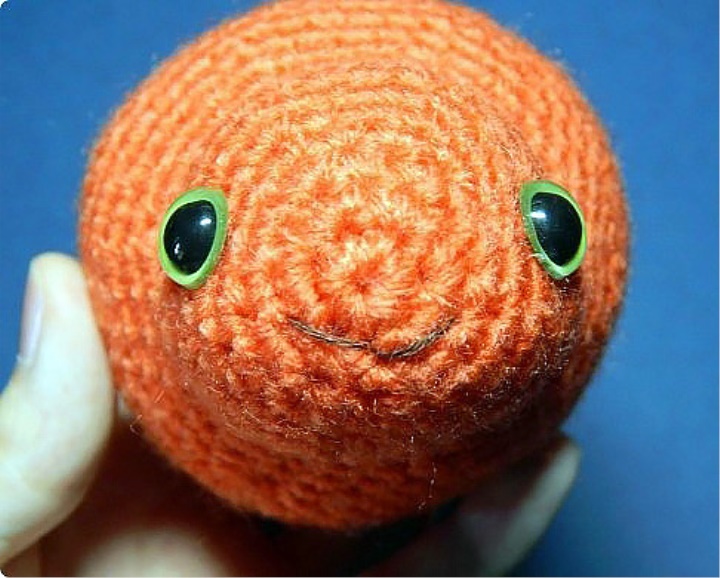
So we tied the head. Now let's stop to make face. You can embroider the eyes with threads or attach special with a safe fastening, or sew instead of eyes buttons. Whichever option you choose, your eyes must be at the 6th circle level. And to embroider a small mouth, use a sewing needle and thread muline; Smile should be on 1 or 2 laps.
11th Round: * 3 SBN, Prib. *-Repeat 6 times (30)
12 Round: * 4 SBN, Prib. *-Repeat 6 times (36)
13th round: * 5 SBN, Prib. *-Repeat 6 times (42)
Then knit 8 laps to form the body of the fish.
13-20 laps: 42 m.
Start stuffing the product.
21 Lap: * 5 SBN, UB. *-Repeat 6 times (36)
22 Lap: * 4, UB. *-Repeat 6 times (30)
23rd Round: * 3 SBN, UB. *-Repeat 6 times (24)
24 Round: * 6, UB. *-Repeat 3 times (21)
25th Round: * 5 SBN, UB. *-Repeat 3 times (18)
26th Round: * 4 SBN, UB. *-Repeat 3 times (15)
27th Round: * 3 SBN, UB. *-Repeat 3 times (12)
Fill the body with a synth.
28-30 laps: 12
Sew the hole and leave the thread length of 25 cm.
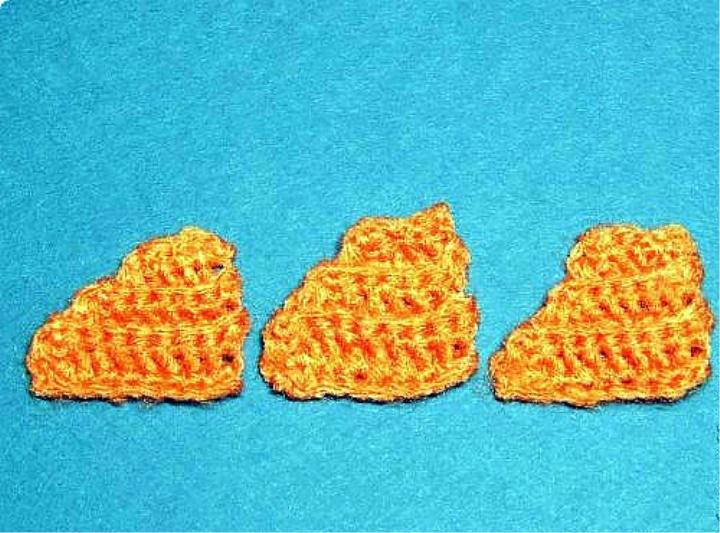
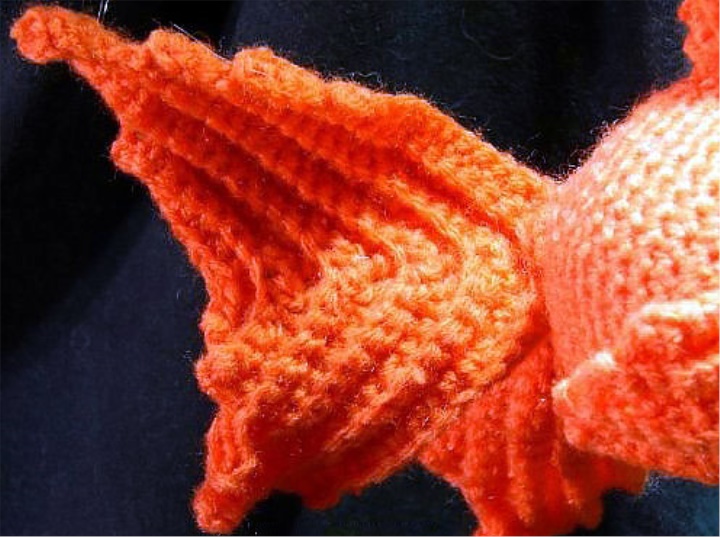
Fins (3 parts):
All rows of fins are knit behind the back wall. Each new series begins with an aerial loop for lifting. The first one is knit in the 1st loop of the previous row. The lifting loop is not a.
Dial 10 vp.
Knit behind the back wall,
1 Circle: 1 VP, 8 SBN, UB, rotate knitting.
2 lap: 1 VP, UB., 7 SBN, rotate knitting.
3 lap: 1 VP, 6 SBN, UB, rotate knitting.
4 Lap: 1 VP, UB., 5 SBN, rotate knitting.
5 Lap: 1 VP, 4 SBN, UB, rotate knitting.
6 Lap: 1 VP, UB., 3 SBN, rotate knitting.
Finish knitting.
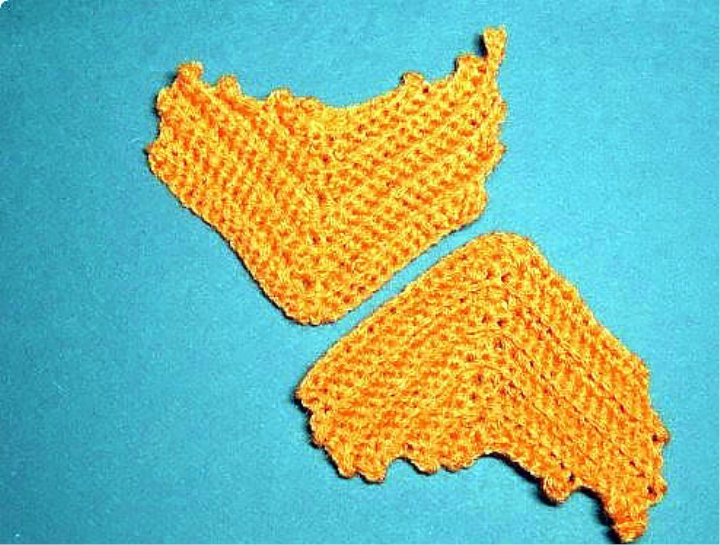
Tail (2 parts):
For our fish to look like real, you need to make two tails! If you want a small fish, you can do only one... But then your fish will not be stable.
I promise that the tail is not as difficult as it may seem at first glance.
Dial 32 of the VP.
Knit behind the back thread,
1 Circle: 1 VP, 15 SBN, 2 UB, 13 SBN, 3 VP, turn off the job.
2 Round: 1 VP, 15 SBN, 2 ub., 14 SBN, 2 VP, turn off the job.
3 lap: 1 VP, 15 SBN, 2 UB, 14 SBN, 2 VP, turn off the job.
4 Lap: 1 VP, 15 SBN, 2 UB, 14 SBN, 1 VP, turn off the job.
5 Lap: 1 VP, 14 SBN, 2 UB, 14 SBN, 4 VP, turn off the job.
6 Lap: 1 VP, 17 SBN, 2 UB, 10 SBN, remaining loops left unmade, turn the work.
7 Lap: 1 VP, 9 SBN, 2 UB, 13 SBN, remaining loops left unmade, turn the work.
8 Circle: 1 VP, 12 SBN, 2 UB, 5 SBN, remaining loops left unmade, turn the work.
9 Circle: 1 VP, 4 SBN, 2 UB, 7 SBN, remaining loops left unmade, turn the work.
10 Lap: 1 VP, 6 SBN, 2 UB, 2 SBN, remaining loops left unmade, turn the work.
Finish knitting and fasten the thread
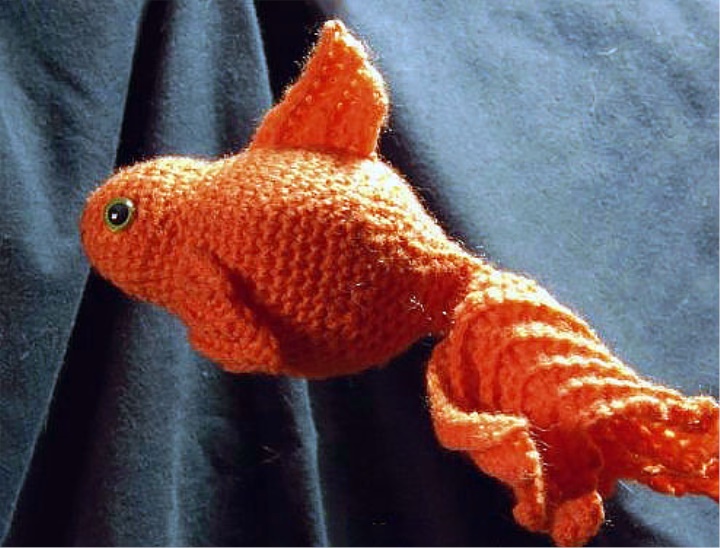
Assembly:
Sew over the edge of the main yarn top fin to the body left side (see photo fins); Fin must be at the level of 15-20 and perpendicular to the muzzle of the fish.
Sew over the edge of the main color yarn side fins to the body right side (see photo fins); They should be placed on 12-17 rows of trunk.
Sew the tail to the back of the fish's torso using the remaining tip of the yarn. Sewing so that the needle passes immediately through the first part of the tail, the back of the body, and then through the second part of the tail. The details of these should be positioned symmetrically.
It is left to hide all ends of threads, and here-your fish is ready to swim!
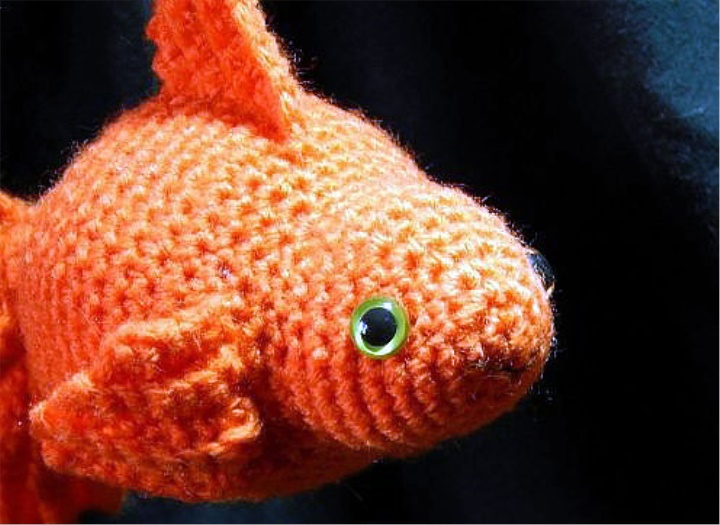
The side fins can be placed in this way:
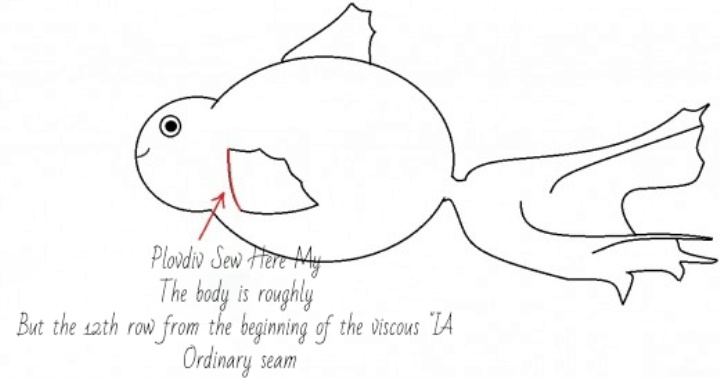
This fin can be represented as a rectangular trapezoid: lateral side, perpendicular to the larger base, we and fasten to the torso so that the lower base was at the top.
And the top of the fins is at the eye level or slightly lower.