Master class from Larisa (Rosettes). Larisa will tell you how to tie a toy - amigurumi Hello Kitty.
This is a “translation” of the shemak with some explanations. Since There are no detailed explanations on one piece of paper, and there are enough details here - I decided to make a small master class on how to knit and assemble Hello Kitty.
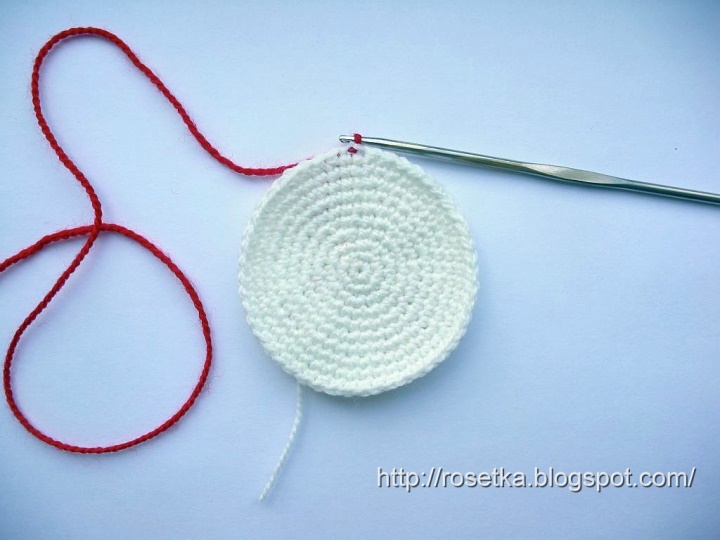
So, let's start ... with the head Hello Kitty. We knit it, starting from the top, according to the scheme, pokrugu. Each circular row begins with the VP (air loop) lift and end the SS (connecting column). The chain of air loops is the 0th row, we do not consider it. The 1st row is the first row of the sc (single crochet). Here it is in person.
The finished, unfilled head detail looks like this. Do not be confused by some unevenness of this detail - we did the increment in a spiral, when we fill it, it will take the correct shape of the head Hello Kitty.

All other parts, with the exception of the legs, we knit, starting with the ring amigurumi. We wind the thread around the index finger twice, remove the resulting ring from the finger and knit the first 6 sc in it.
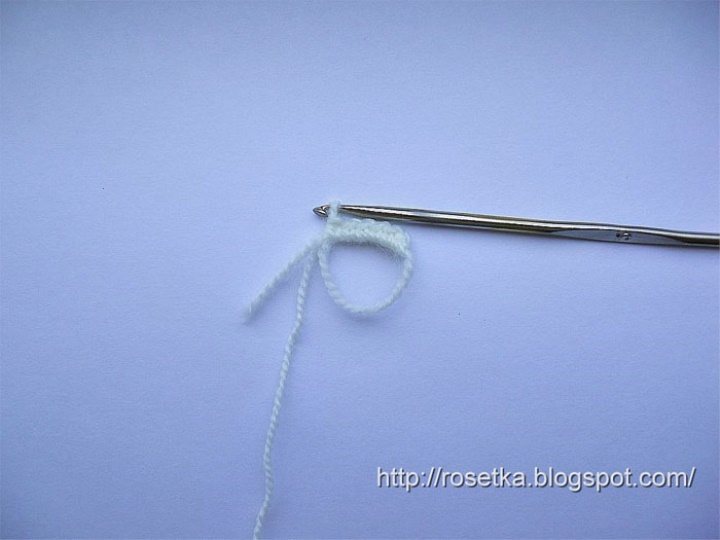
Then pull the short tip of the thread and tighten the sc into a tight ring. Thanks to this knitting start method, we will not have a hole.
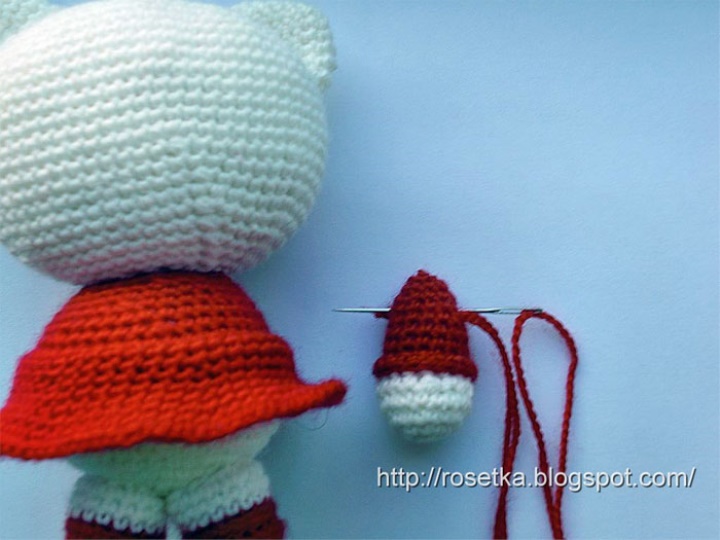
We knit the ears and tail, starting with this ringlet according to the scheme.

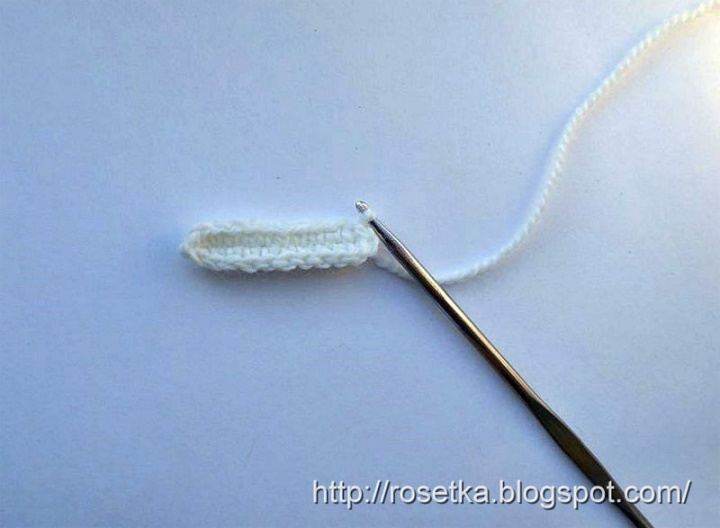
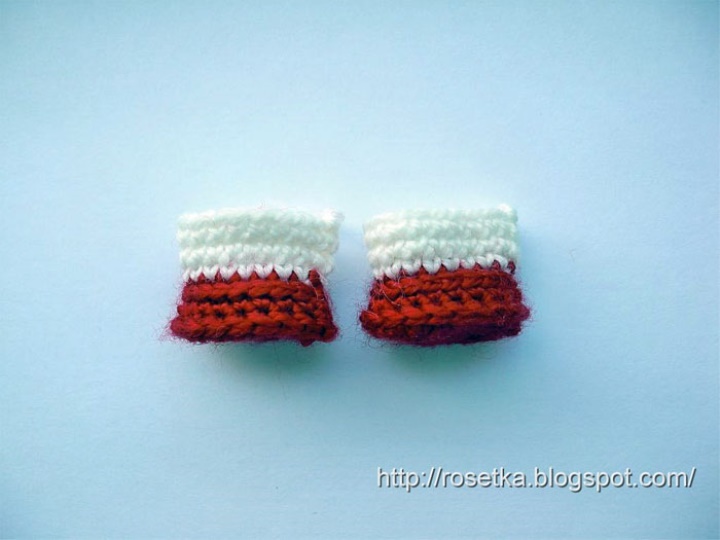
The legs begin to knit from the sole with a red thread. 4th row knit SBN, introducing the hook is not in the pigtail of the previous row, but for the SBN itself, introducing the hook from the wrong side. Thus, the pigtail that we did not knit into would be outside, helping the shoe to take shape.
The 5th row is knitted in the usual way, and the 6th is exactly the same as the 4th.
Starting from the 7th row, we knit with the thread of white color the last three rows. These are the details of the legs should work.
Pens begin to knit with 6 SBS in a ring amigurumi thread of white. In the 6th row, enter the red thread and continue to knit according to the scheme until the 12th row. Here we leave the knitting unfinished and proceed to tying the frill sleeves. We tie this part to the 7th row of the handle part (the second row with a red thread). The number of RLS of the first row should be 15. As much as in the 7th row of the handle details. To do this, we fold the part so that the 7th row becomes the fold line.
After the detail of the frill sleeve is finished, fill the part with padding. Here you can use an ordinary pencil.
When the part is filled, we finish it with the last two rows according to the scheme.
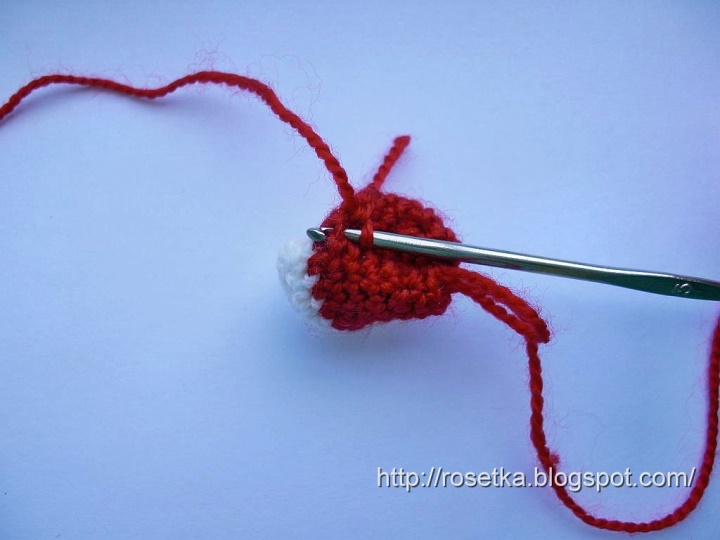
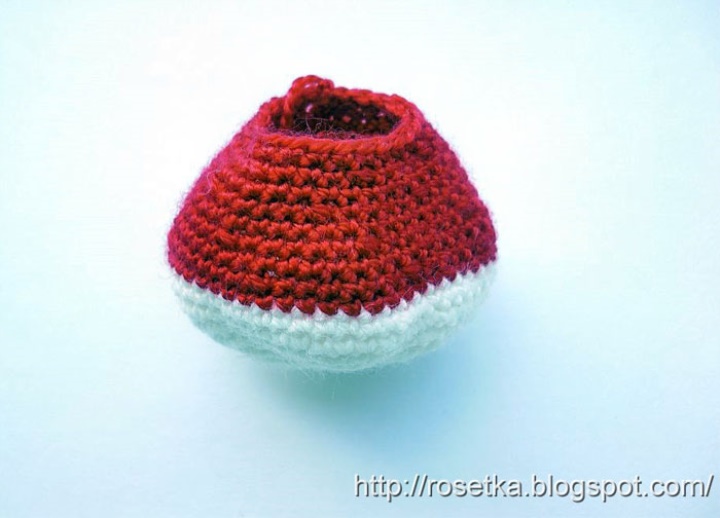
Then proceed to knit torso. We knit 10 rows of RLS with a white thread according to the scheme; In the 11th row, enter the thread of red. It is more convenient to immediately make a VP on a new color thread and enter it with a connecting bar at the very end of the 10th row.
We continue to knit pokrugu thread of red, making the subtraction according to the scheme. It should be such a detail.
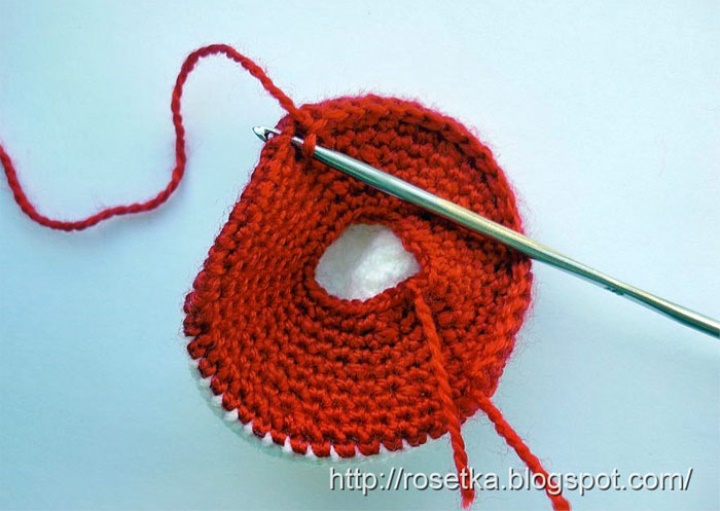
Now proceed to knitting skirts. Important here! We tie the skirt to the 12th row (this is the second red row), it is in this row that the number of RLS is 42. To do this, bend the torso so that the fold line becomes the 12th row. To this row we begin to tie the detail of the skirt.
We continue to knit pokrugu, making uniform increases according to the scheme.
So, we have all the details ready. We start filling and stitching.

Let's start again with the head. Filling it, we give it a shape with our hands, slightly flattening it and priminaya from above, so that it takes the shape of the head Hello Kitty, and not a ball.
Now sew the ears. We do not fill the ears. We try to place them so that already at this stage the shape of the head Hello Kitty is guessed. A guide here can serve as a crown - the beginning of head knitting. The ears begin to grow right around the edges of it.
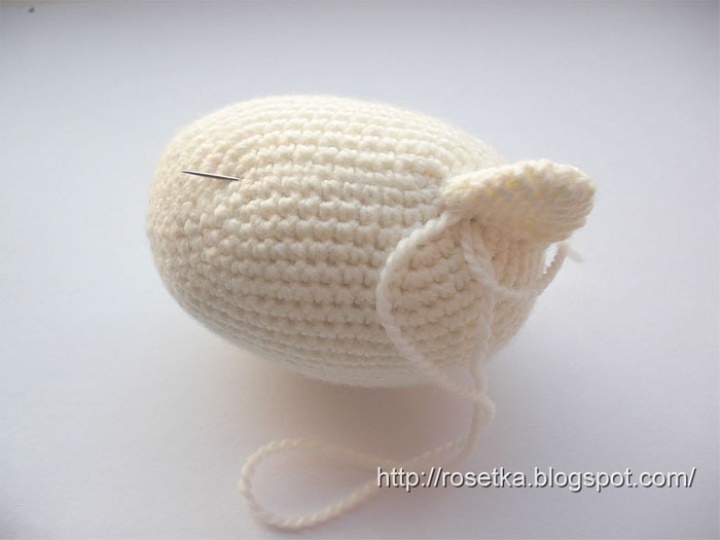
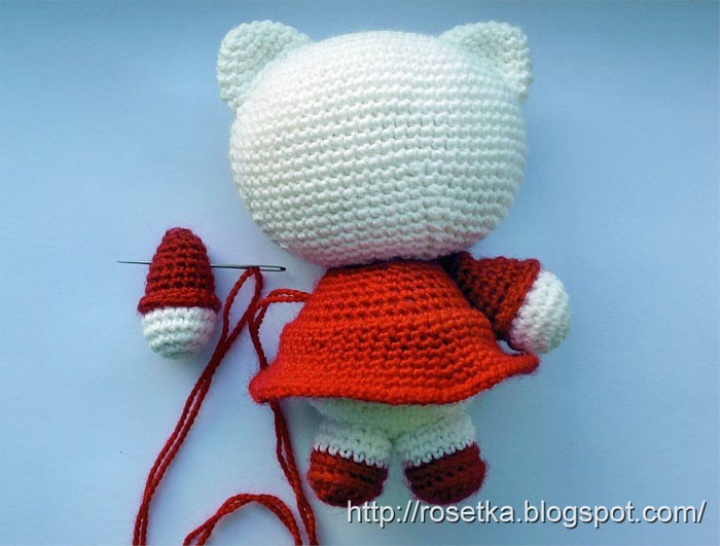
Then we fill the torso and sew the head to it. Fill the legs and sew them from the bottom to the torso. Now, when the legs are sewn, it will be easy for us to center the tail and put it in its rightful place.
Pens can be simply tightly sewn to the sides, or you can sew them with the help of a hinge - so that they move, spin…
We start with the fact that we take a double thread to match and tie a knot on the tip. We thread the thread through the handles so that the knot is on the side that will fit the body.
Now we thread the thread back, we also thread it through the body.
We pass the second handle with the same thread, continuing the maneuver. We, as it were, strung our parts on a thread - a pen + torso + pen.
And now we thread the thread back through all three parts. We do this procedure a couple of times, slightly tightening the parts together. We take the thread under the skirt, where the thread is cut off from the needle, we tie the knot and with the help of the hook we hide the knot inside.
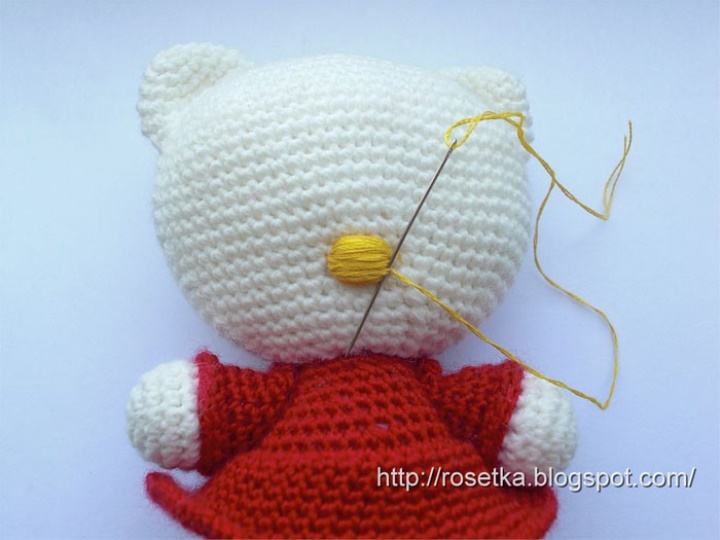
Getting to finish the faces. Eyes and nose, of course, you can cut and glue or sew from felt, but I did not find this. Therefore, for the spout, I took the hook No. 1, the threads of the floss yellow in two additions and tied it as follows:
0th row: 3VP + 1VP lifting, further knit pokru.
1st row: in the first two VP on 1SBN, in the third VP - 3SBN, in the next two VP on 1SBN, in the third VP - 2SBN, we finish a number of SS.
2nd row: RR elevation, 2СБН in the first loop, in the next loop - 1СБН, in the next three loops of 2СБН, then 1СБН and in the last two loops of 2СБН, we finish the row of SS.
Sew the nose to the face.
Just the sewn nose looks a bit like a stigma ... because of its relief, something ... so I suggest putting stitches on the surface over it. If you want it not to be voluminous, you can embroider quite a bit. I like more volume, that's why I make more stitches. At the end of embroidery, I skip stitches not under the spout, but only on top of it, making small stitches on the sides. Thus, the edges become smoother.
The eyes fit in the same way as the nose. I used a thin woolen thread, so I didn’t begin to embroider on top with a satin stitch ... and I don’t need extra volume.
Council In order to properly position the eyes and nose, you can sketch out their location on the paper and, when you are satisfied with the final version, i.e. you will see that Hello Kitty is looking at you, you can sew eyes and nose, correlating their location with the pattern.
After that we sew short mustaches with wide stitches. One tendril - one stitch.
We decorate the dress, shoes and head with Hello Kitty roses.
We will need roses of medium and small size.
I suggest not to dwell on the decoration with roses. The
dress can be tied in a different color and with a completely different finish. In general, for the flight of your fantasy space abound. My Hello Kitty, for example, has such a girlfriend.
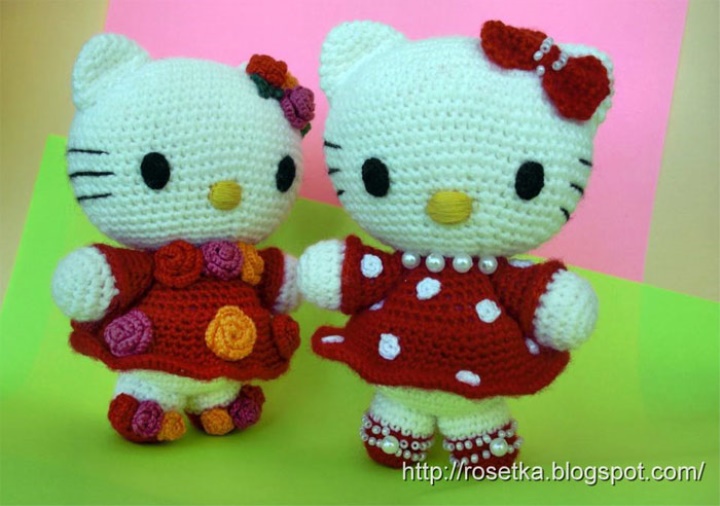
And this Kitti dress is associated with beads