How to reduce edge irregularities when forming the neck
This scheme and the formula of armholes for the plug-in sleeve came up and calculated for itself for one single reason. Each designer and author in the descriptions of their designs offers their calculations of the formation of armholes, and each time to adapt to the different description just became uncomfortable and tiring, especially when there are not very correct cases of descriptions of armholes or they Not very convenient for the further process of stitching or finishing the edge. My calculations are convenient because it turns a neat and smooth edge, which not only looks perfect on the reverse side, but it is also very clear and clear, where to make stitches when stitching or how much to type loops for the strap. The edge turns out very mathematical and schematic, and at Furnish we deal only with closed loops at Podmyshka, immediately passing in a chain of edge loops. And more: I will never have to break my head every time, how to calculate and execute the Armwell, which is suitable, has a beautiful rounded line and on which, even, I hope, as it is very mathematical, you can calculate the perfect sleeve of the sleeves. I want to share it with you.
The formula is very simple, execution too. Let's find out how many loops we need to close/reduce for each armhole. We take this figure either from the description, or we calculate by the measurements and density of knitting. The number of loops for an armhole can be even (kppch) or odd (kppnch).
(KPPCH-2)/2 = the number of loops that are closed at once in the armpit area, and this is also the number of repetitions of each second row. Left two loops, one of which is lower at the edge immediately after the closure of the loops in the armpit, the rest is lower in the fourth row after all the decrease in each second row (see diagram).
(Kppnch-1)/2 = number of loops, closed at once in the armpit area, and this is also the number of repetitions of the decrease of each second row. The last decrease is done in the fourth row. There is one loop, which is lower at the edge immediately after closing the loops in the armpit area (see diagram).
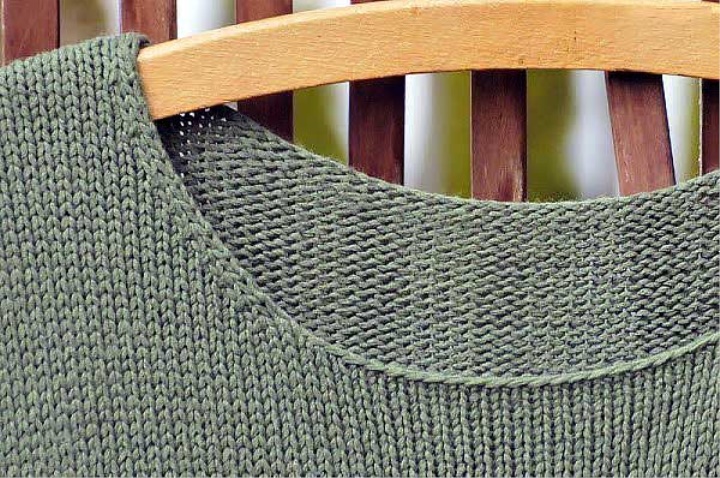
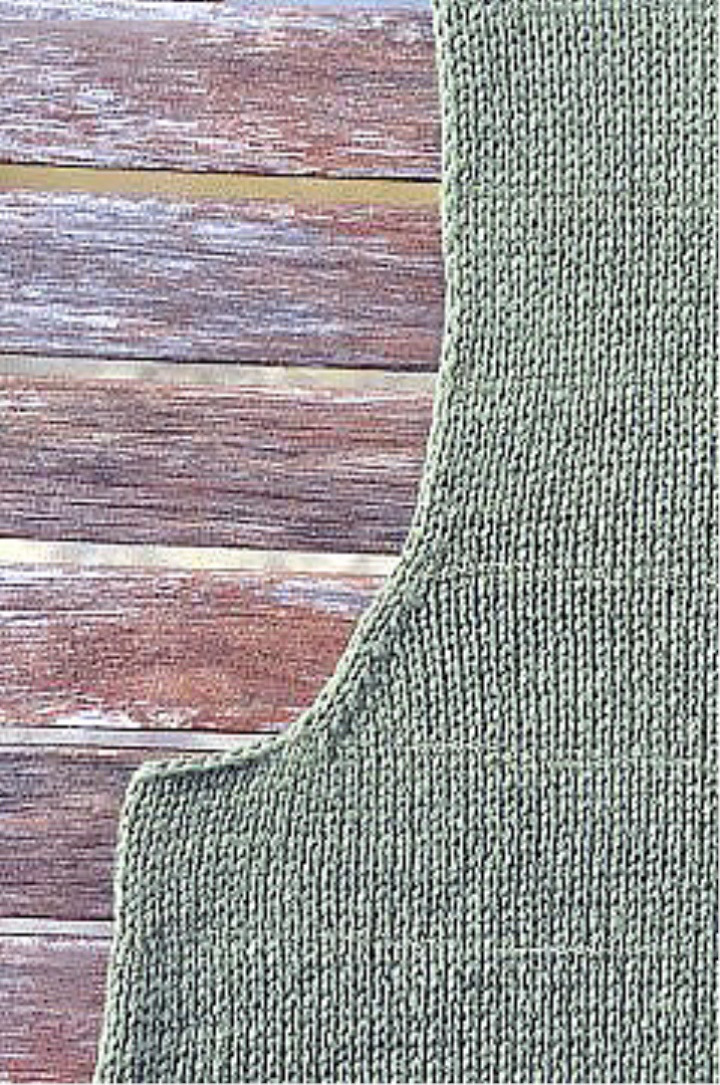
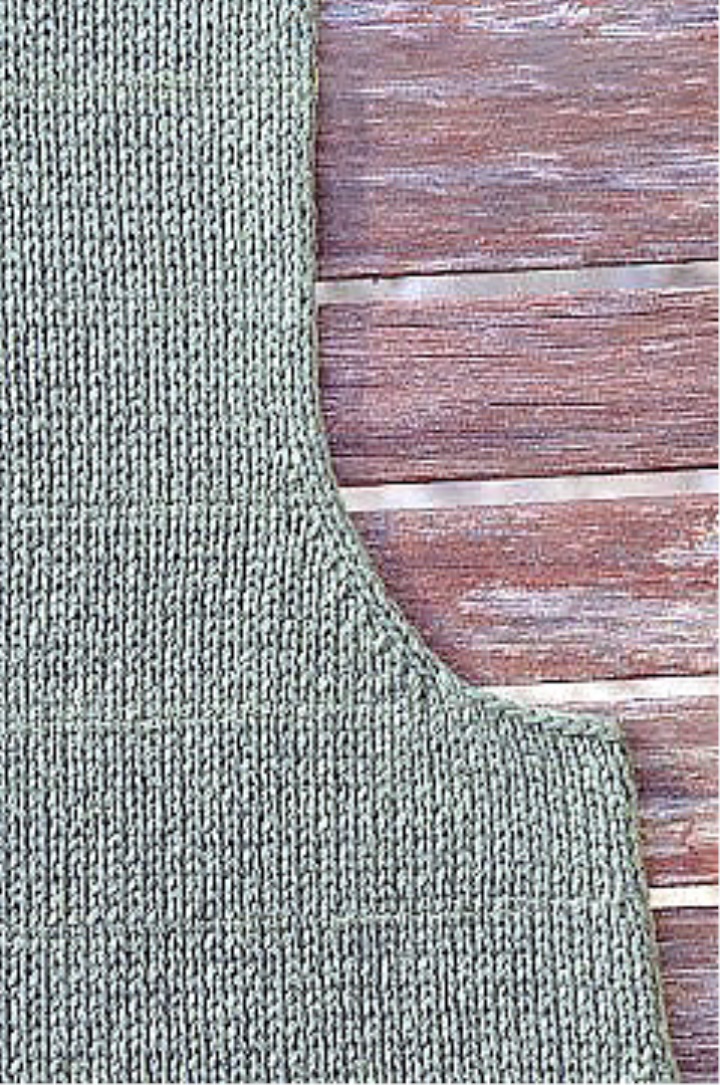
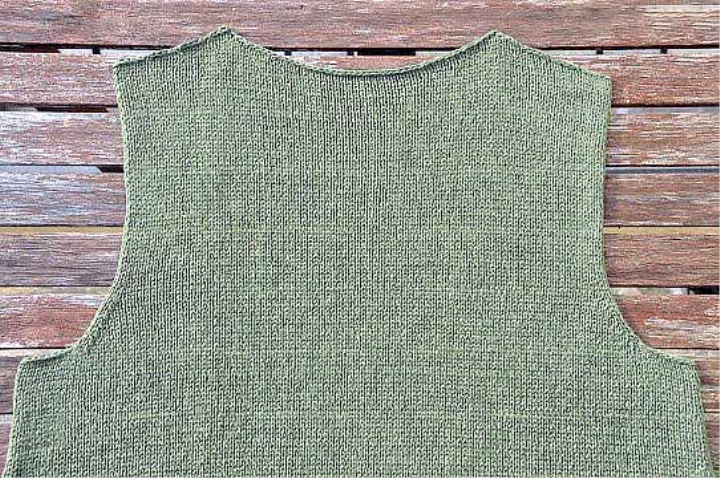
I used this formula and scheme not in the same model, and here I show how the armholes, connected in this way, look. My models are Slope and prickly Poppy (shown purl side. This model is knitted by reading the schematic on the reverse side of the product, as on the front side-Izanochochnaja surface, see diagram, note No. 3)
Part Two. Left side of neck
It would be all good if the left side of the beginning of the formation of the neck would not form a hollow between the braid straight closed loops, joining a new Motochka and further running decreases. This hollow is formed between in different directions of bent loops (it is given a neck of unfastened products), and even under a lath sometimes it is difficult to hide it, especially if knit thick, slippery threads, or a lath is made by a method Ketleki. Next, I'll tell you what to do. All the familiar situation:
1. Raise an arrow The specified loop on the right spoke, Poarachivaem work and hide it crossing with the next loop (change places). We bind them together reverse and seamy the series to the end. Further knit on the other side of the circuit of the armholes, exposed above.
2. We get this result, and it is enough to continue to type loops for the strap (collar) or to stitch (to Priketlevat) them. The hollow is closed. This method I have been using for a long time for all the neck of unfastened products.
3. But for the untreated edge such result will be dissatisfied and it is necessary to process further. Take a hook and stretch the tip of the thread, which remained from the joining of the new Motochka, through the first loop of the braid closed loops. Then stretch the thread again from the other side through a slightly visible loop at the back (indicated by an arrow). So we formed the missing loop of the braid, connecting the braid of closed loops and edge curved edges. The tip of the thread is woven.