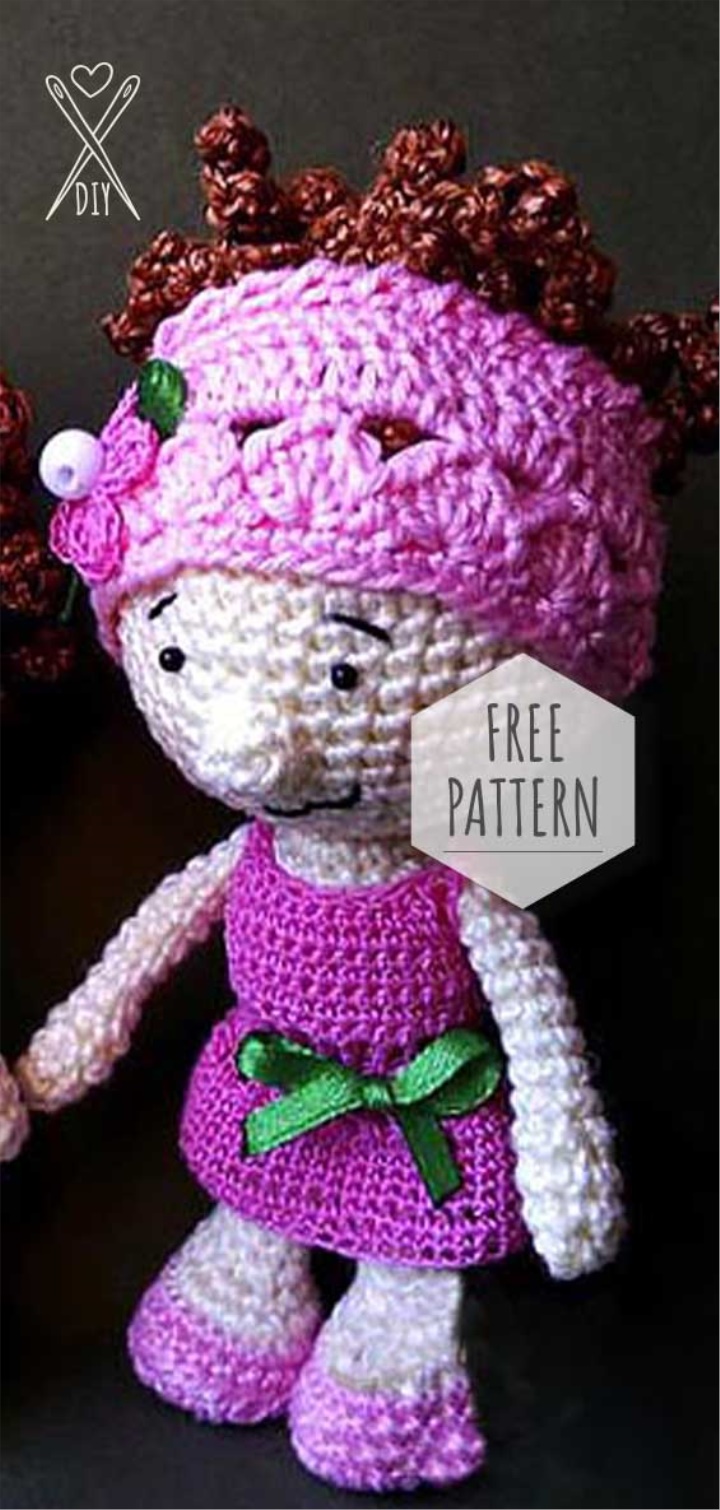
I love all sorts of little things. So I suggest you tie a little doll to me. Of course she's a princess.Well, since it's still small,
The bridge is 11 cm (without crown).Here we will succeed in the end:
So, let's begin:
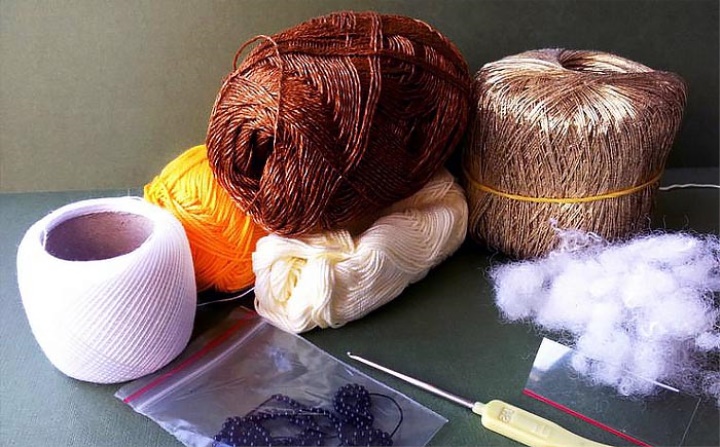
Tools and Materials:
-Yarn 100% cotton "Begonia" (50 g/169 m)-milk and yellow;
-Yarn for hair (I have cotton with viscose)-brown;
-"Gold" yarn with lurex for crown;
-"Iris" thread (for the dress);
-Kappronova tape, width 0.6 cm (length 10 cm);
-Black beads for eyes;
Hollofayber
-A piece of plastic (for the soles);
-Hook 1.2;
-The needle is large with a blunt end.
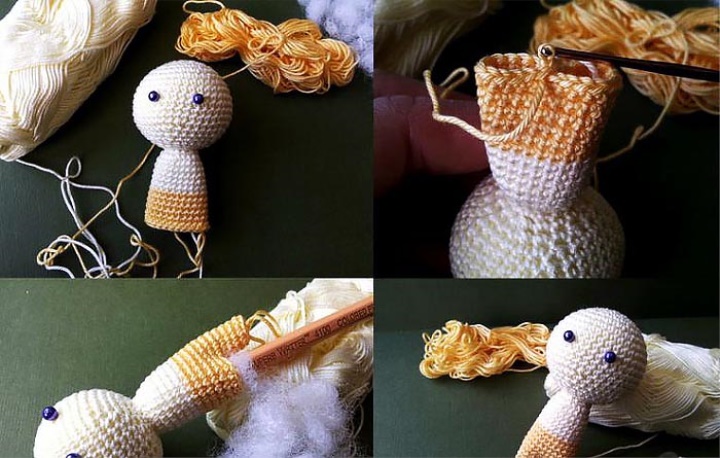
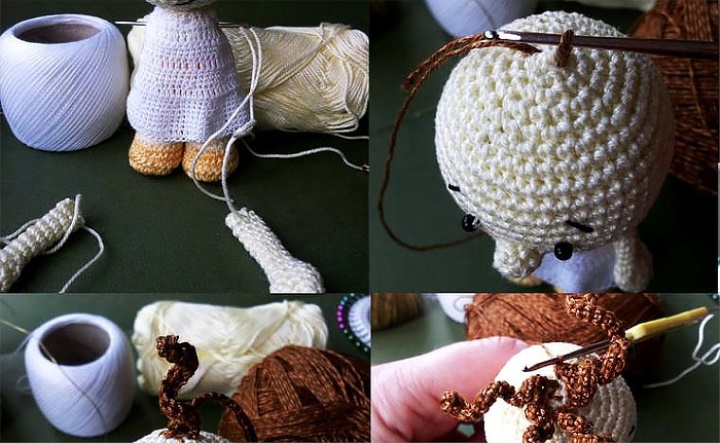
Let's start with the crown:) We collect three air loops, lock them in a ring. and knit "pancake". I add loops in random order. By the end of the sixth row there should be 44 loops in a circle. As a result, we should get a "ball". The rule is this: if we make a raise for 6 rows, then knit the same six rows in a circle without increments, then, in the process of knitting the next six rows, the loops diminish
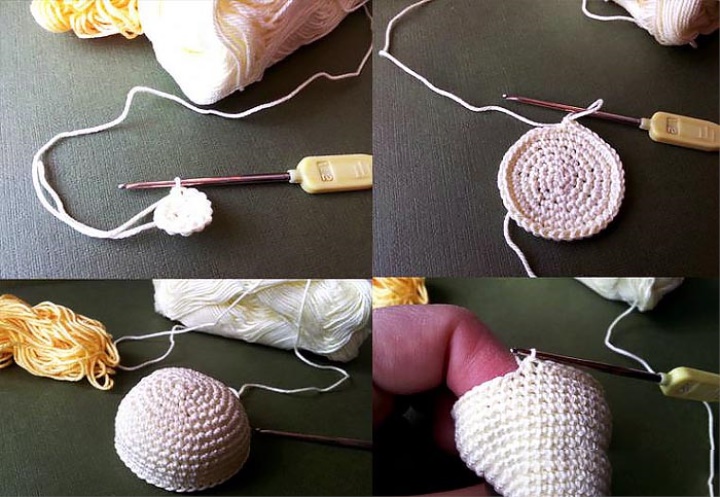
We stop when we have 12 loops left. Then we fill the head with Hollofayberom. I'm stuffing very tight. The heavier the head, the "smarter" the princess:) Then knit one row without increments (neck). And then from each loop we tie out two, that turned out 24 loops. and knit six rows without increments (torso).
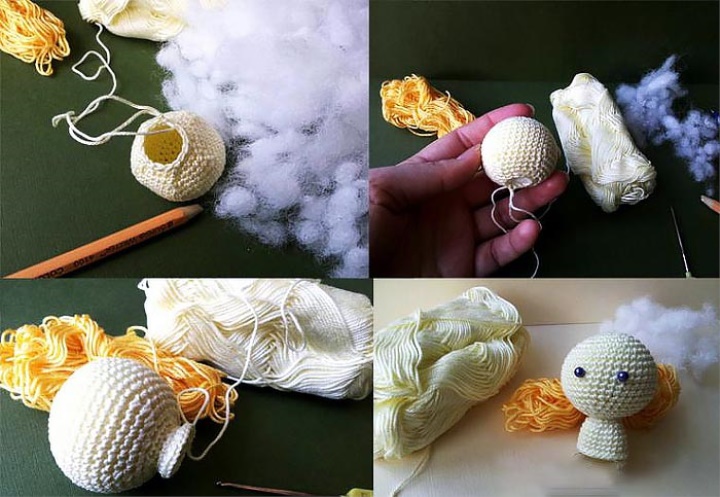
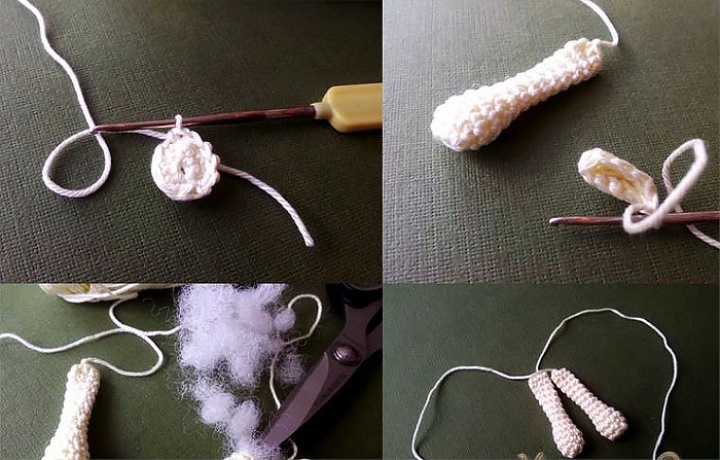
Tied up to the waist. Now it's time for the pants to not knit them afterwards separately. Change the thread to yellow, and knit six more rows. Stuffing the torso. After that we share knitting in half (on 12 p.) and begin to knit legs. First one to the end of the leg, then the second. Five rows.
Then again change the thread on the flesh color and knit four more rows. Then we begin to form a foot. In the fifth row we make a raise: in the front in three central loops-add one (+ 3), behind-one loop. In the sixth row also. In the seventh row there is three loops in the front. Do not forget to fill tight legs hollofayberom.
Then knit the shoes: Again change the thread to yellow. Make a raise in front of the first row of 3 loops centered. The second row is knit without increments. Cut the thread. You should have 26 loops
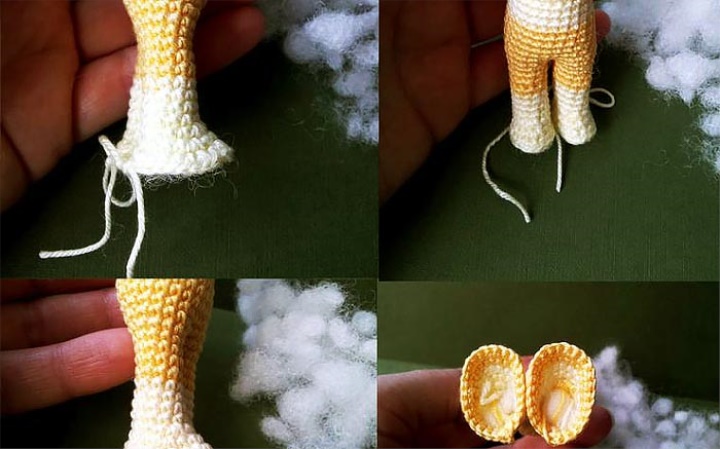
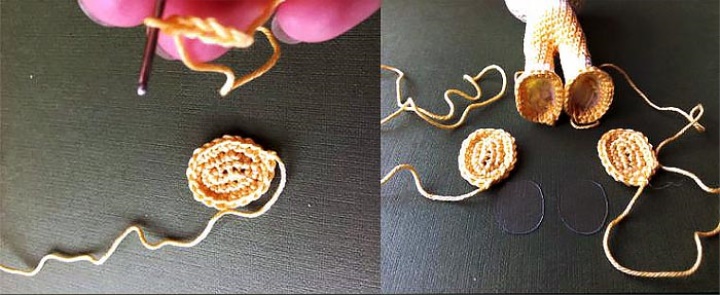
Next we make the soles.
From a piece of plastic cut out two ovals, on size less on a pair of millimeters, than a foot.
We collect three air loops and knit ovals, making a raise on the tops of 3 loops. Knit until the size of the soles does not coincide with the foot. I leave a long thread to sew the sole to the foot.
I put the left thread in the needle with a blunt end and start to pull the "braids". When there is a small unsewn area, I fill a leg to the end and insert a plastic insole. I sew it to the end. Yarn inside the LEG
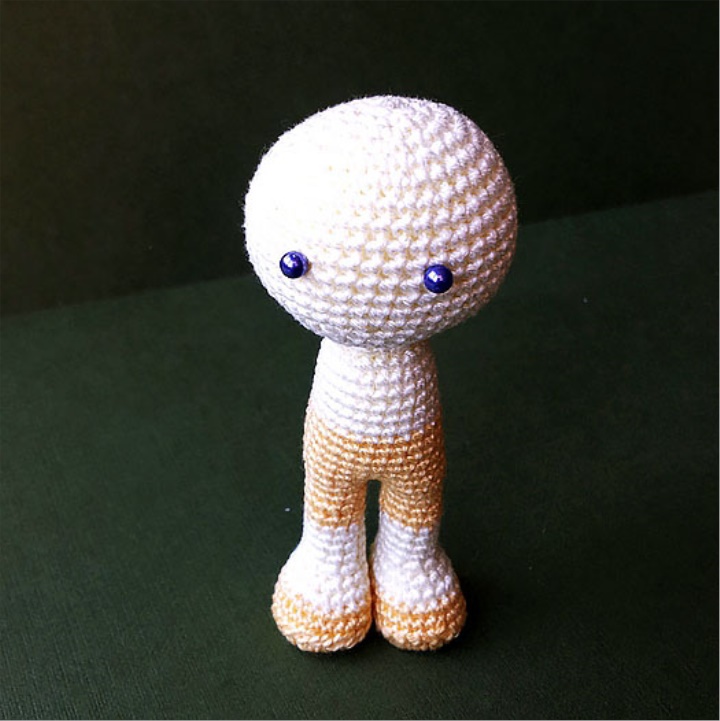
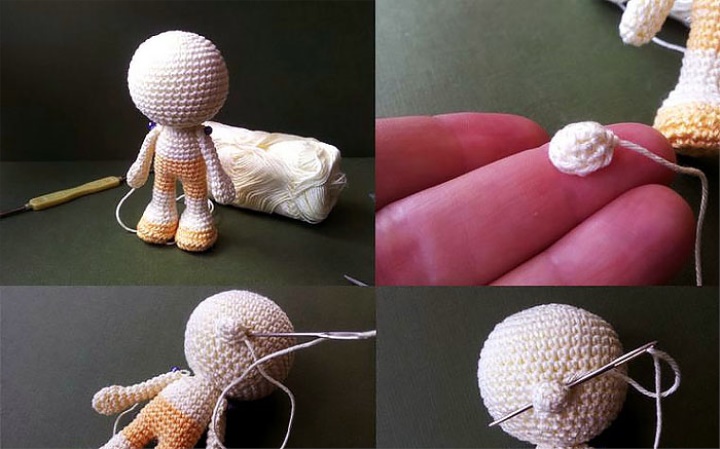
So this is the "carcass". She is already able to stand well and firmly on the legs and watch pins, waiting to continue. I can see exactly how she wants her mouth to chat:)
I forgot that she needed her pens too. Even before the Rottika:) Knit handles. We collect three air loops, lock in a ring and make a raise to 9 loops. Knit "palm" three rows. After that we make a two-sided decrease on one loop. and stuffing the palm just a little, she is a princess, she is not a sledgehammer waving:) Then I do not fill the handle at all. Knit in a circle of 7 loops. The length of the handle is 4 cm. Close the hinges.
Again is not the time to do the ROTK. First the spout:) Again, we dial 3 air loops. Lock it in the ring. and knit in a circle, adding loops to 8. The button is obtained. It's a spout:) Reattach. The top edge of the spout must be at the center point of the face
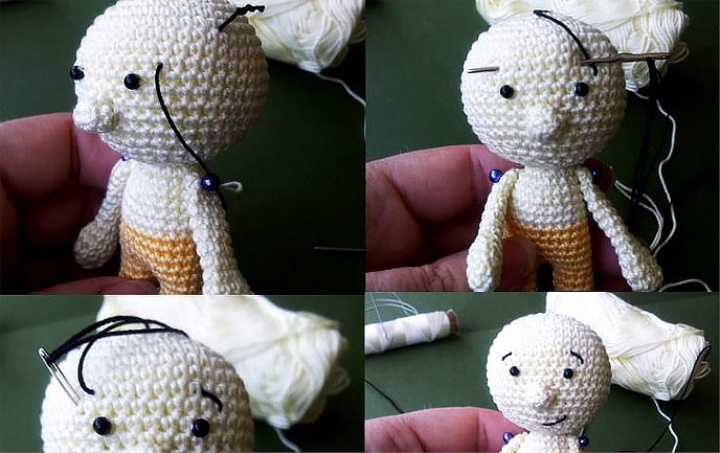
Finally, the mouth:) And with him and everything else. We're doing beads. Then embroider one thread: eyebrows and mouth.
That's it... Now she wants to dress up more quickly. But she also... Bald. The dress still begged:)
For the dress I took a thin thread "iris". gained an arbitrary number of loops, and by applying, made a decrease in the course of knitting. It turned out to be a cone. Dress up:)
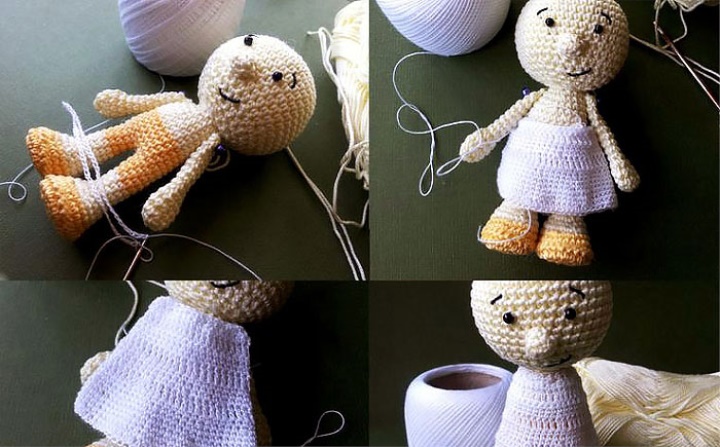
Then stick the handles. and start the hair. Let's start with the crown. We draw a thread from the top and collect 20 air loops. Then we go back to the head, torturing them. We make the "step" aside and again we dial 20 air loops... So the spiral of knitting hair.
They twist themselves in such spirals. When the circle reached the forehead, then continue to knit already back and forth closing the nape. The hairstyle is ready:)
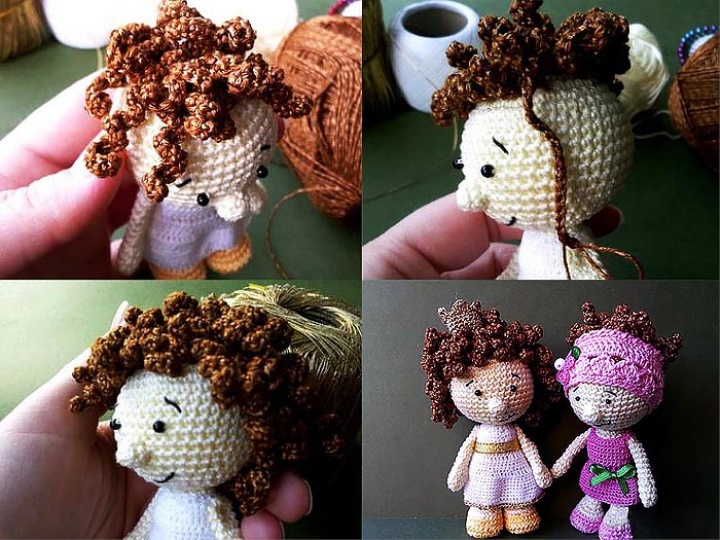
There are details left. For a crown we collect 15 loops "gold" a thin thread, lock in a ring and knit 3 rows. Then we make the teeth (alternating p/St, St, and art. with a scale). The Crown is ready:) The same thread I knitted hem dresses. And around the waist a ribbon was tied.
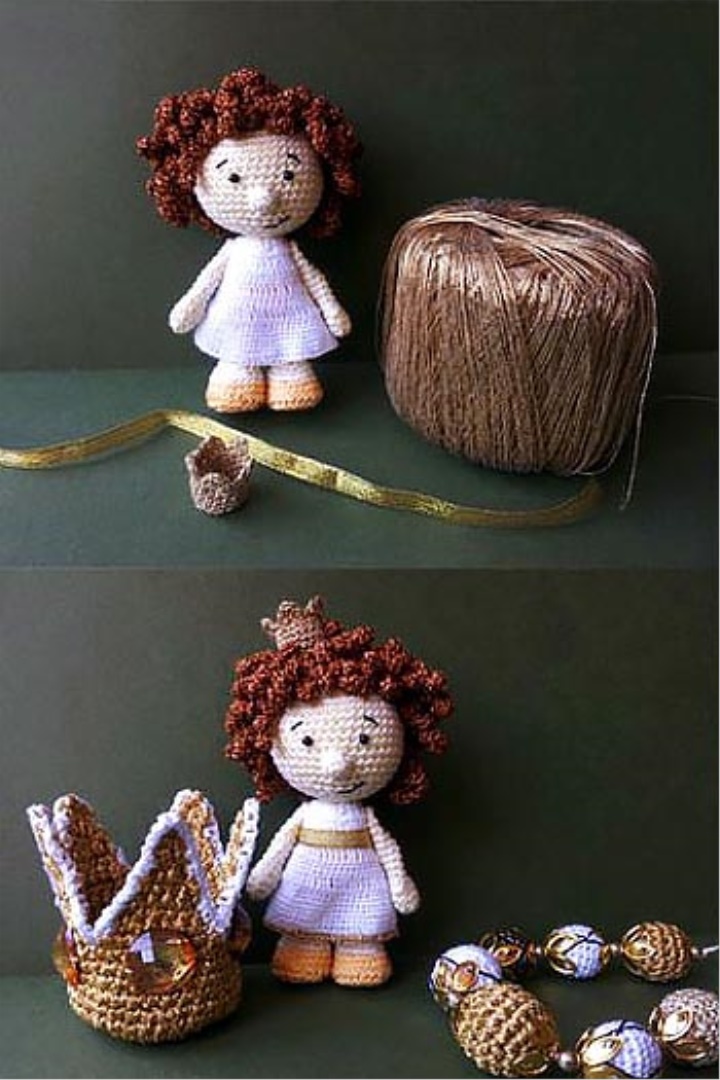
All. Our princess is ready.
Final photo session: