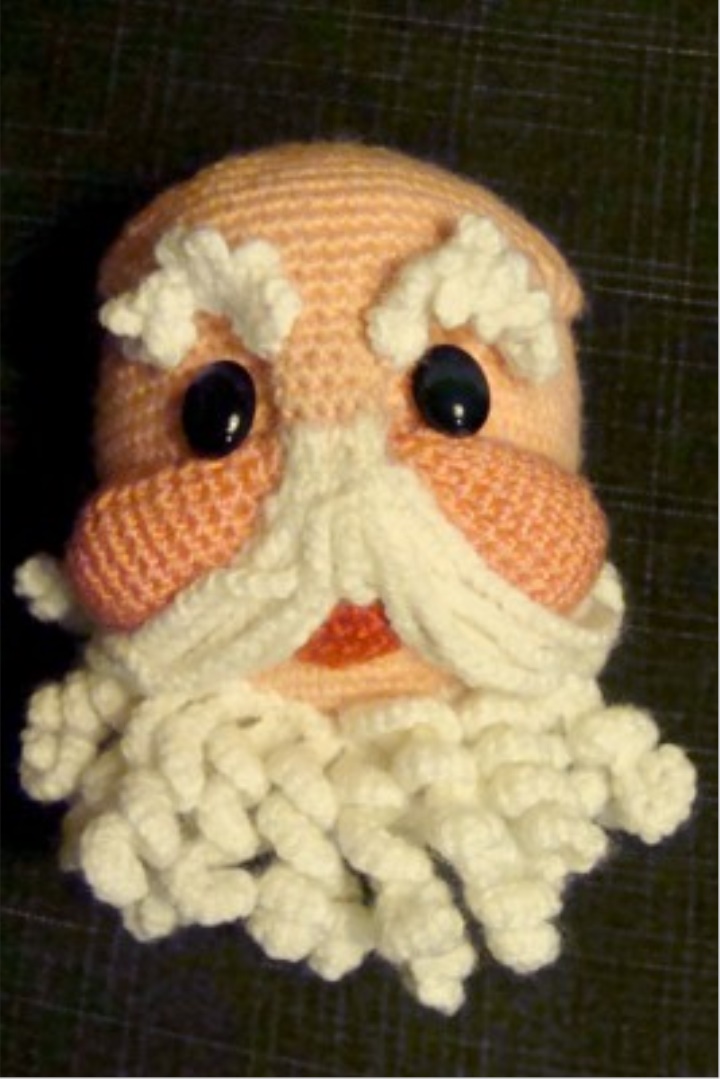
Two years ago I tied Santa Claus to a general New Year's contest. Now I was asked for the scheme, and I decided to try to tell me how I knit it. If anyone is interested - join.
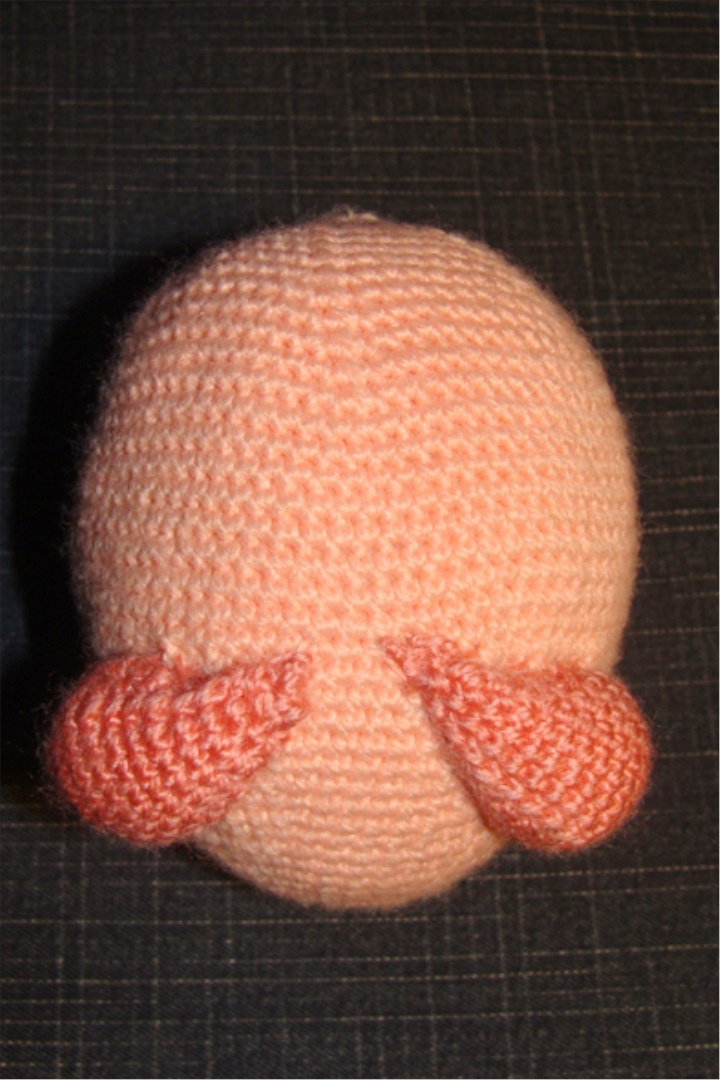
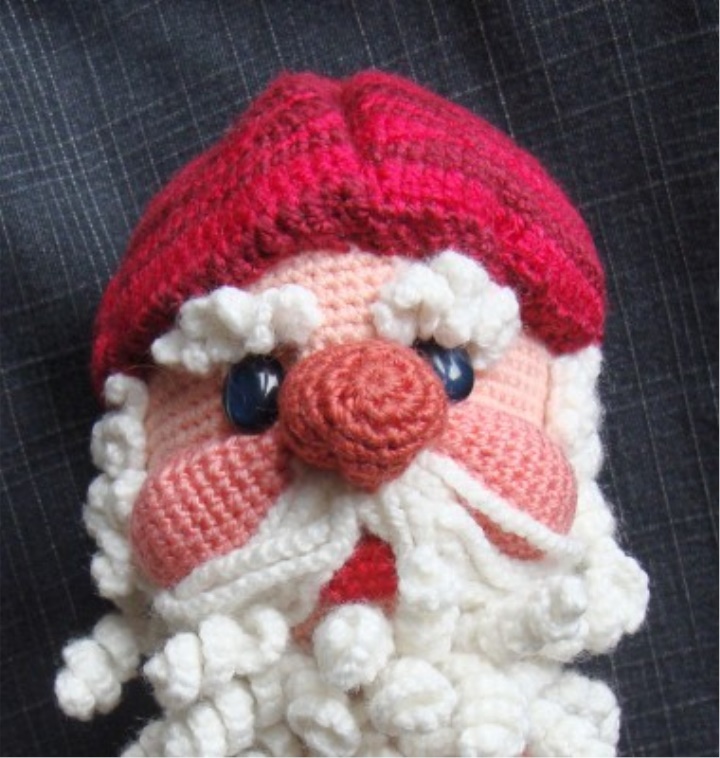
All parts of the toy fit in a spiral, that is, we never make loops for lifting at the beginning of the row (there is simply no beginning of the row itself). In the process of knitting all the details I stuffed with padding polyester. It is necessary to knit tightly enough so that the packing does not peep between the posts. Ready-made cheeks sew to the head with small stitches about as in the photo.
I think I need to talk about the legend. Sorry to be late, but better late than never. It seems to me that not many people use such a recording scheme, although it is simple, concise and very convenient for recording a toy scheme.
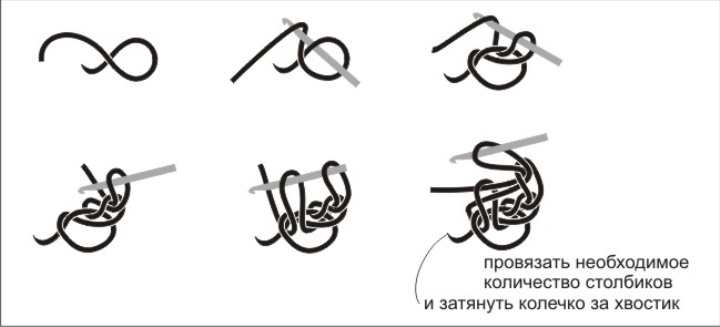
The number and the sign of the diameter after it denotes how many columns without crochet must be tied into a tightening ring. How to tie a tightening ring is shown.
The number and the V symbol signify how many non-crochet columns should be tied into one loop of the base (add).
The number and the ^ symbol denotes how many unlinked columns with no crochet need to be knit with one loop (subtract).
The number without icons indicates how many columns with no single crochet should be connected in a row, one to each loop of the base.
The multiply icon and the number indicate the number of repetitions. If the icon is after the bracket, then the contents of the bracket are repeated the necessary number of times.
In the scheme of the forehead, new elements appear: the
number in front of the letter обозначает indicates the number of air loops;
pr is a broach closing 8p in a ring;
the V icon with a bow indicates that the next 10 columns are knitted under an arc of air loops.
Whiskers begin to knit on the first 10 columns of the forehead.
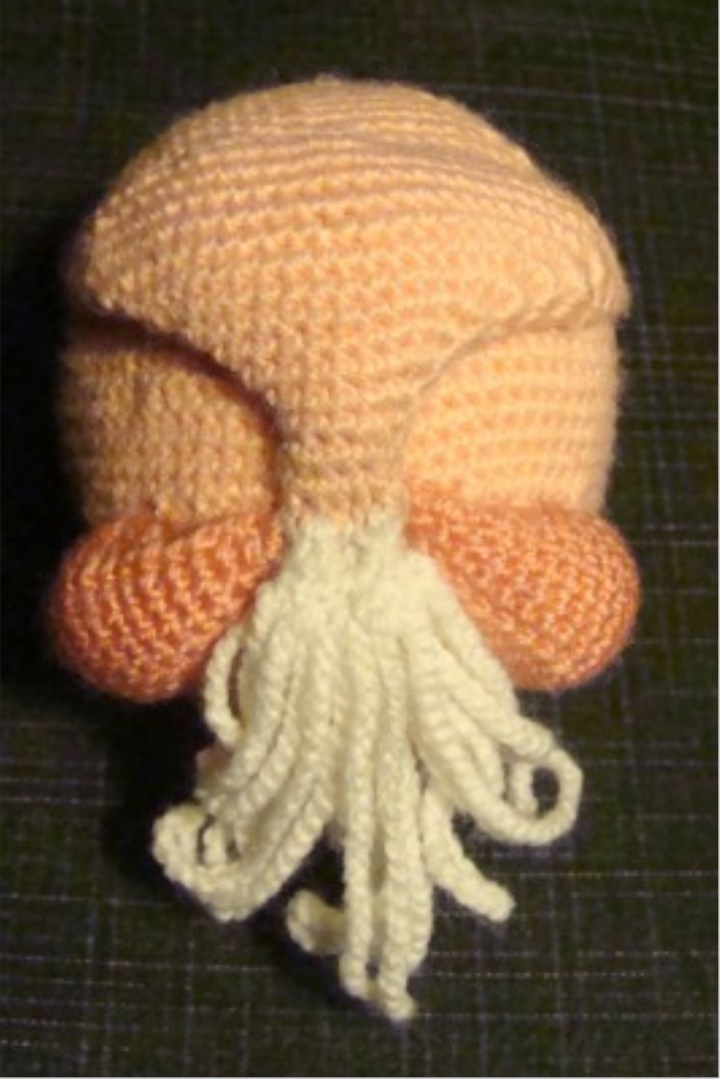
Then we fill our forehead, giving it a flat shape, sew up the upper posts and sew to the head as in the photo.
We will not knit the upper lip. She still would not have been visible from under the mustache. And the lower lip is a small tube, which is more convenient to knit with the wrong side out. Sew lip between cheeks so that grandfather smiled.
We divide the mustache in half and sew behind the cheeks.
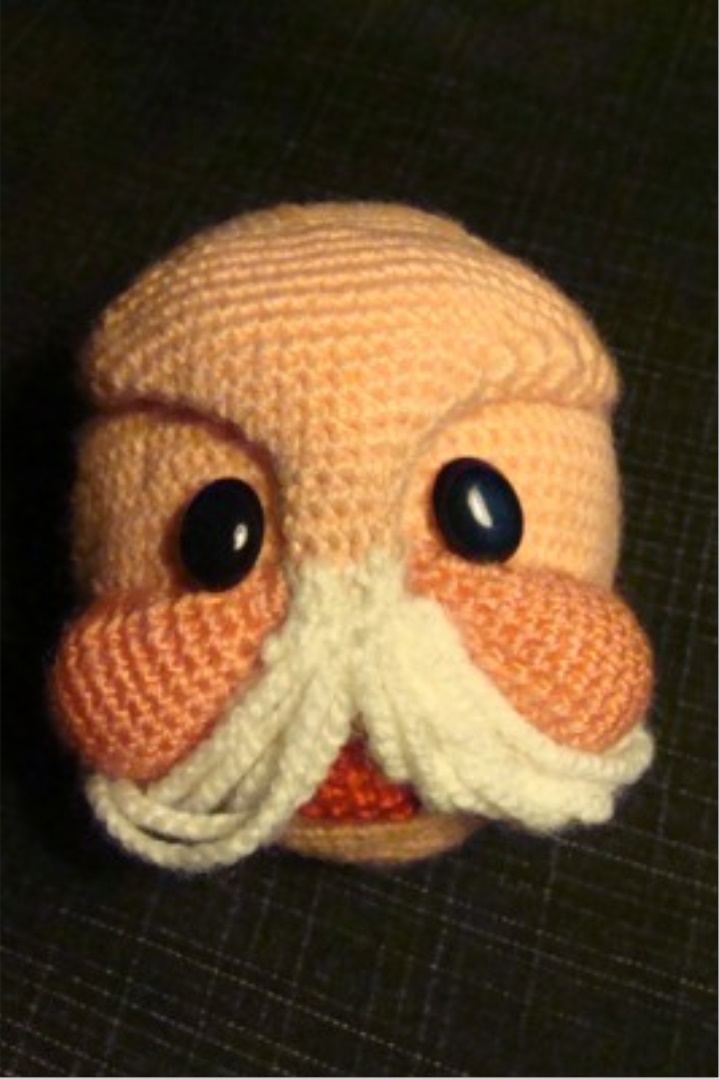
For the eyes, select the appropriate color and size buttons.
Now it's time to tie the beard. To do this, we knit 15 - 20 air loops, and then we knit 2 columns without a crochet into each loop of the base, without a single crochet, going back to the beginning of the chain. And so we repeat several times. I did not knit the whole beard at once, it was more convenient for me to tie several strands of 5-7 curls of different lengths, and sew them to the chin in several rows. By the way, someone who prefers a beard can knit chains of 50-70 loops and more.
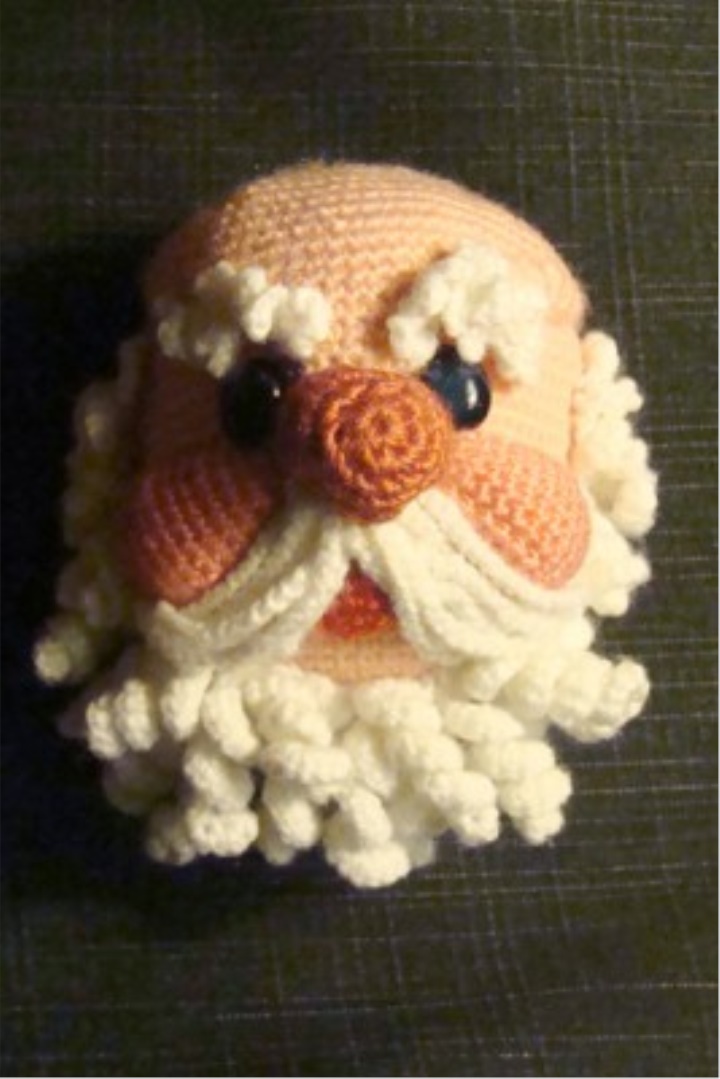
Eyebrows are probably the smallest element of this toy, but probably the most important one. From how they will be sewn depends on the expression of his grandfather. If the eyebrows are sewed close to the bridge of the nose, he will be angry, if he is far away - then stupid, if high - surprised, if low - frowning. It is necessary to play enough with the not yet made toy to understand what you want, and whether your desire coincides with the desire of the future Santa Claus.
In the diagram, the down arrow in front of the figure indicates that this column should be made in the same loop of the base as the previous one.
The nose could have been tied up earlier, but then he would have been very disturbed by sewing other parts. And in the future, when we sew a hat, the thread will constantly cling to it.
I knit 100% acrylic in 100 grams of 427 meters with the threads of the Semenovskaya factory "Carolina". When I am in Moscow I buy a pair of hanks of each color I like, so over the long years of my needlework I have accumulated a good collection of colors and shades (over 200), there is plenty to choose from. You can knit from any thread, the main thing that they were at least about the same thickness. If the threads are different, then you have to change the number of columns to achieve proportionality of the details. I propose to tie a toy from "Iris" in one, two or three threads. I myself have tied a lot of toys from "Iris". In one thread, of course, it is thin, but the toy will turn out to be jewelry, 3 times less (for reference, the linked grandfather Frost is 35 cm high).
At the bound circle, lay an opposite crease over the middle of the forehead, and at the back of the head, fold. Put the hat on the grandfather's bald head and sew it, placing a little padding pad under it.
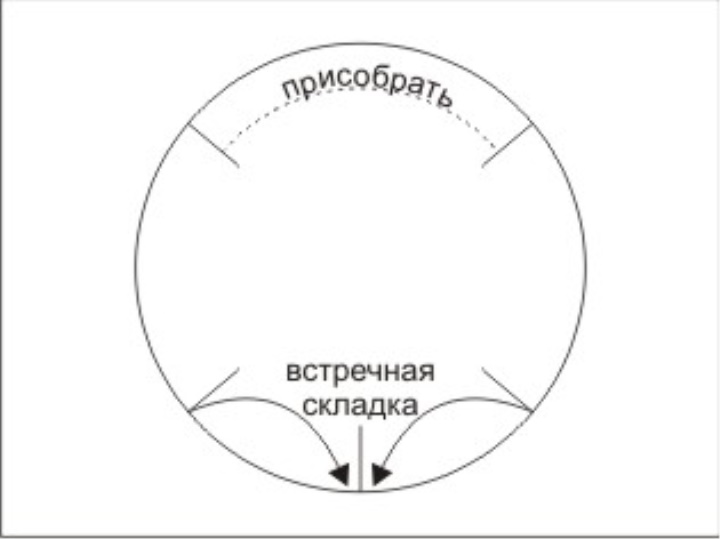
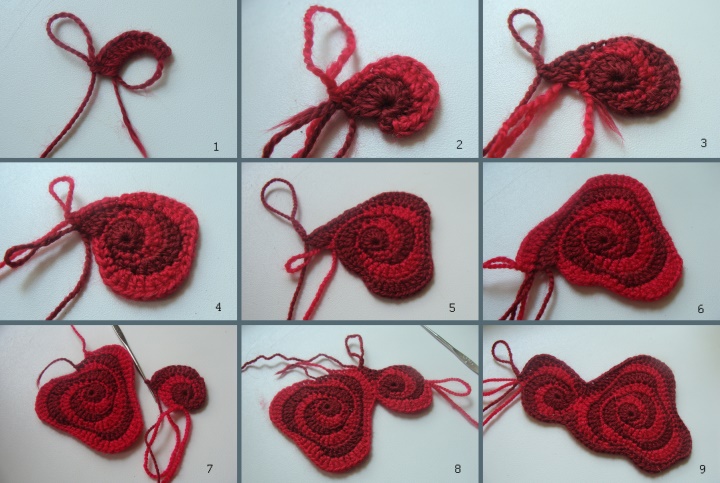
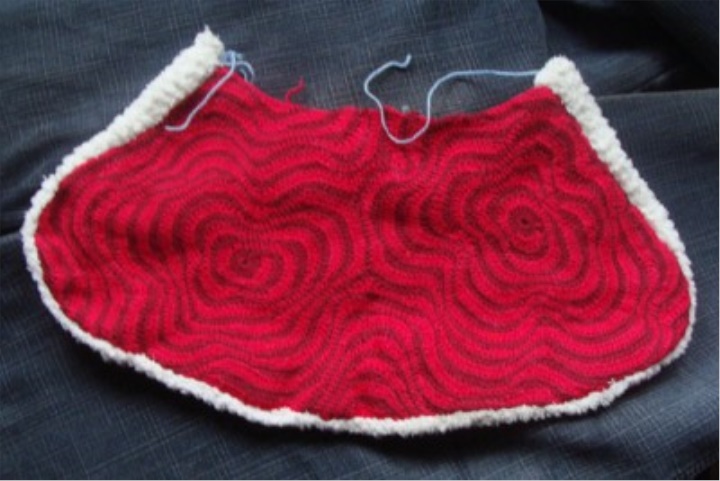
There is no Santa Claus without a hat, it means you need to tie it. Pattern for the cap is a circle with a diameter of approximately two times the diameter of the head. I knitted this circle in a two-color fantasy pattern in a spiral. The beginning of the knitting process of this pattern, see the photo.
1. Tie 2 - 4 columns with a single crochet into a tightening loop, a pair of semi-columns, 7-9 double crochets. Loop tighten.
2. Attach a thread of a different color anywhere and tie the blank to the end of the row with single crochet columns, half-column, double crochet. Constantly add columns, tying two in one loop of the base. And make sure that the canvas is not shrunk and did not volunteer.
3,4,5,6. All rows of this figure are an alternation of groups of single crochets and double crochets, between which one or two semi-columns. I never count the number of groups and the number of columns, so the drawing is made differently each time.
7,8,9. When the pattern becomes monotonous and inexpressive, I cut off both threads and start a new element from point 1. Then I will attach a new fragment to the previously connected one. The rows of the envelopes of two or several fragments are more tortuous, and the drawing as a result is more elaborate.
When the bound fabric in its size approaches the size of the pattern, I adhere it to the pattern, which can be cut from a spunbond (non-woven fabric). If the next row rests against the outline of the pattern, then in this place the thread is cut off and further the fabric is tied up in short rows, each time attaching the thread at one border of the pattern and cutting off at the opposite border.
At the bound circle, lay an opposite crease over the middle of the forehead, and at the back of the head, fold. Put the hat on the grandfather's bald head and sew it, placing a little padding pad under it.
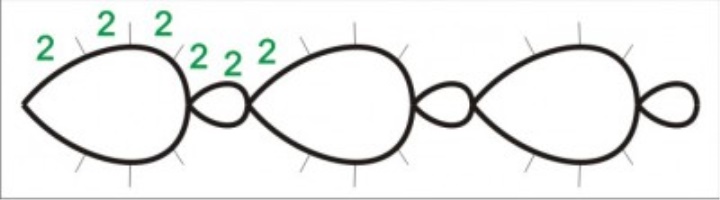
The lapel of the cap is a strip tied on the spokes with a pattern of a putanka (persons, in chessboard pattern). True, for him I took a beautiful decorative thread with a terry effect. For decoration woven braid tatting technique, see the diagram. He sewed this braid to the bead with beads and beads.
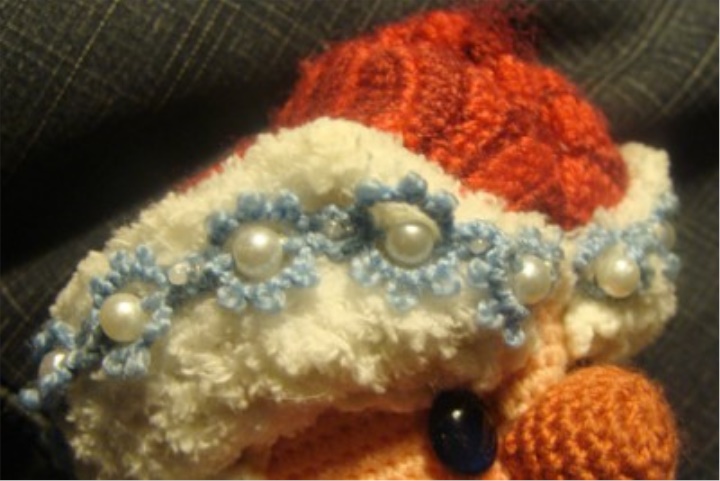
Now, after 2 years, I would probably do it differently: I would tie a strip with white “weed” and no decorations. The fur rim will turn out - not bad either.
When the neck and chest (this is one monolithic detail) are connected, we fill them tightly with a synthetic padding and sew. In the process of stuffing it seemed to me that my grandfather was getting too pot-bellied. Long wondered whether this was good or bad. I decided to make it slimmer and quilted it in the abdomen area, making the part more flat.
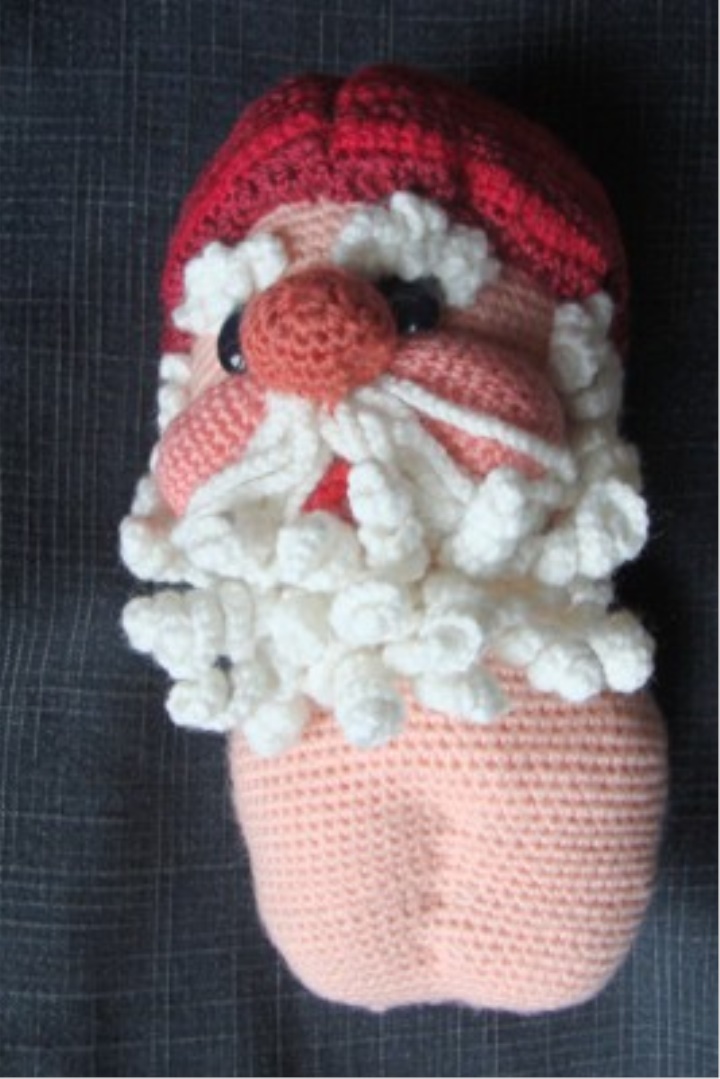
And so on. It remains for us to tie the lower half of Santa Claus.
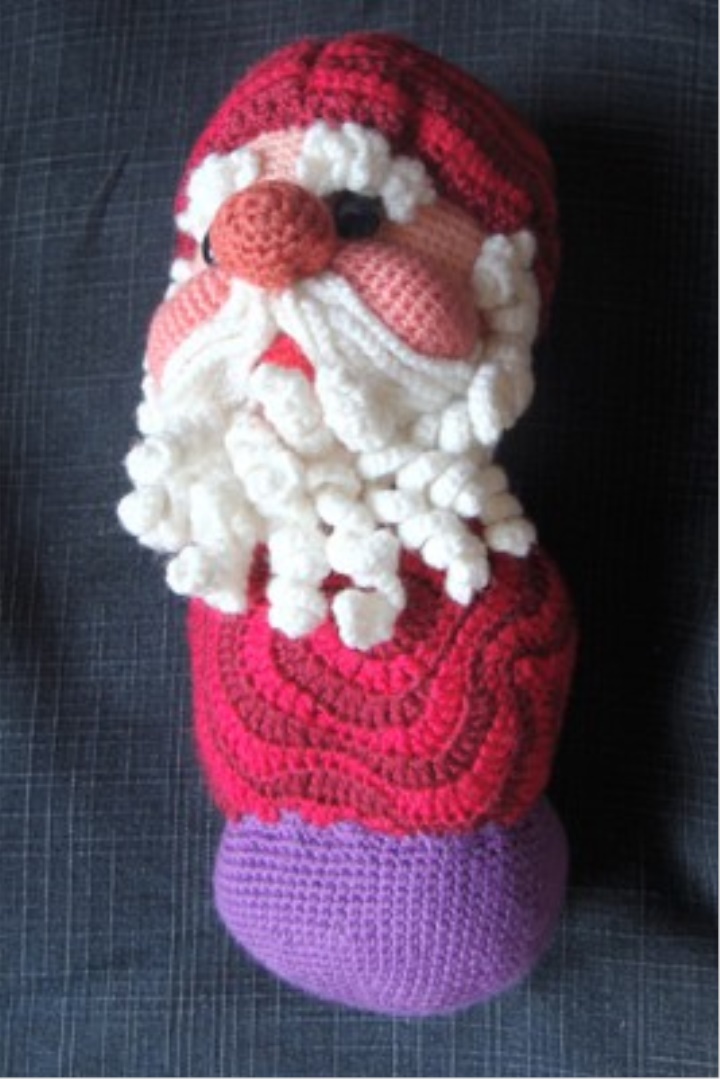
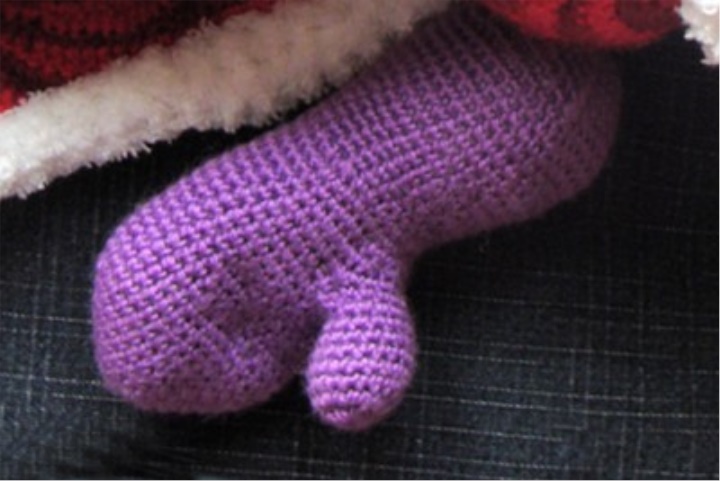
I have some difficulties, (maybe contrived), I do not know how to decently name the part that we will knit next.
Sew this detail below the back, slightly shifting back to indicate the natural deflection of the person in the lower back. In the future, this part will be sewn feet. Since the grandfather will wear sharovary pants, it doesn’t matter what color this piece will be connected
Knitting a grandfather coat, we begin by tying the upper part of the body (still pink) with a fantasy pattern, like a knitted hat. We apply the associated detail not to the pattern, but directly to the toy, repeating all the bends of the body. A fur coat can be tied a little more spacious and lay small wrinkles on the belt. We knit in a circular, without seams and fasteners, so in the end you have to knit directly on Frost, a bit uncomfortable.
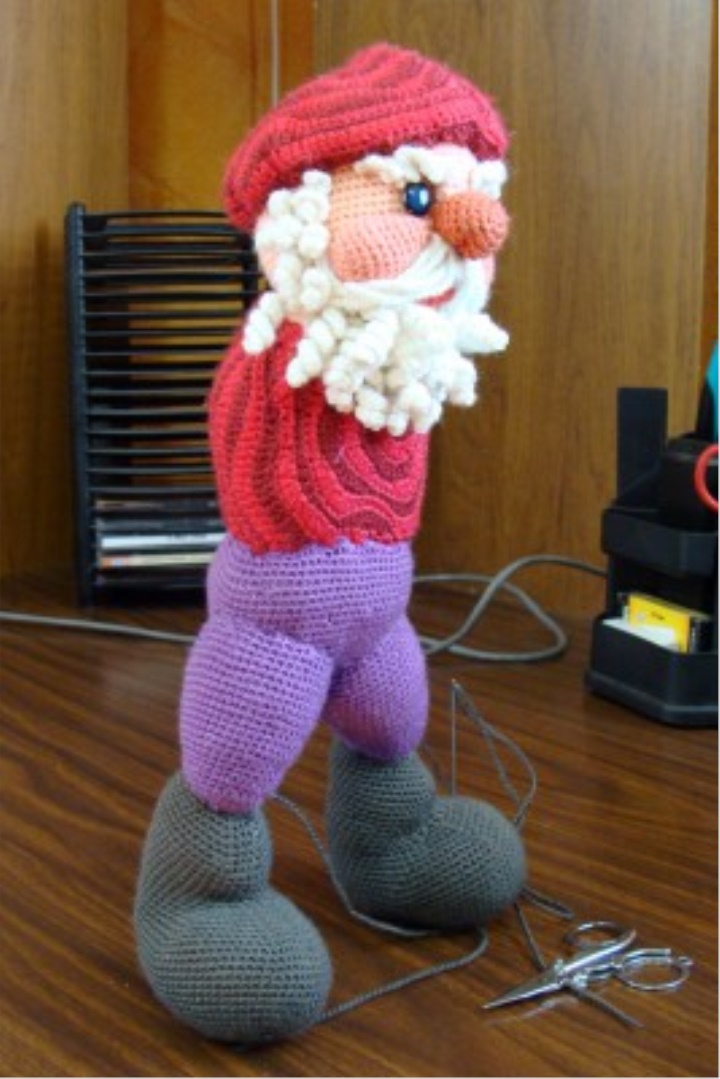
Knit a pair of legs and a pair of boots for them. Feet sew slightly forward, and felt boots at a slight angle back. Santa Claus should be mute leaning forward with legs bent at the knees.
With the help of fittings, make a pattern of the hem of a fur coat and tie it with the same pattern as the cap. This detail of the fur coat must be clean from the face and from the inside, so we make all the color transitions along the edge of the pattern. The ends of the threads will hide under the future white rim.
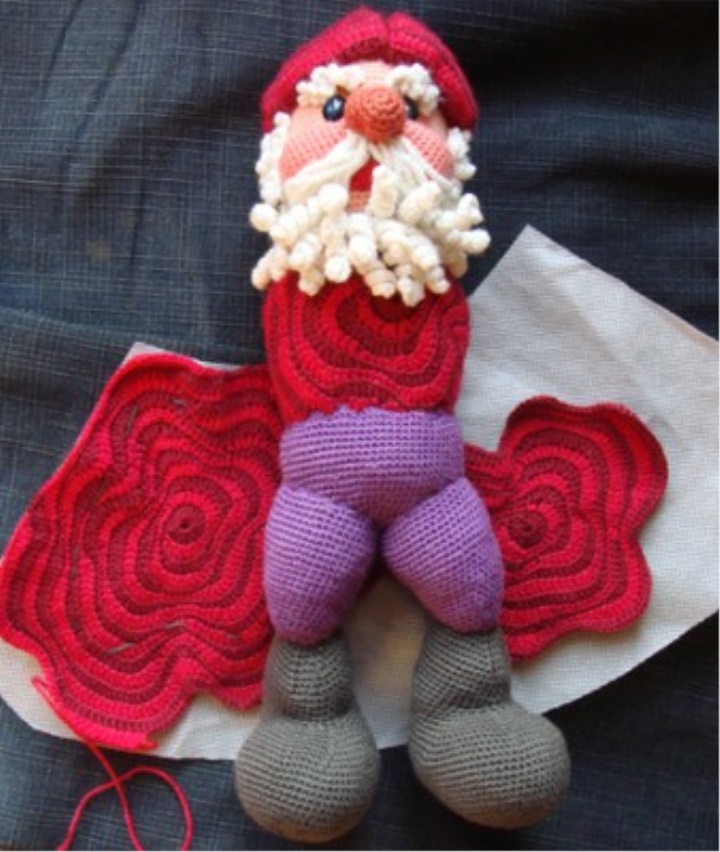
This is how the hem of a fur coat looks from the face and from the inside after:
1. tied a white strip of the rim of a fur coat
2. folded it in half and sewed along the hem
3. sewn tatting tape
4. and decorated it with beads and beads
However, the technology is the same and on the lapel cap.
The left hand from the right differs only in the location of the thumb. The hands are mirror-symmetrical, so two schemes.
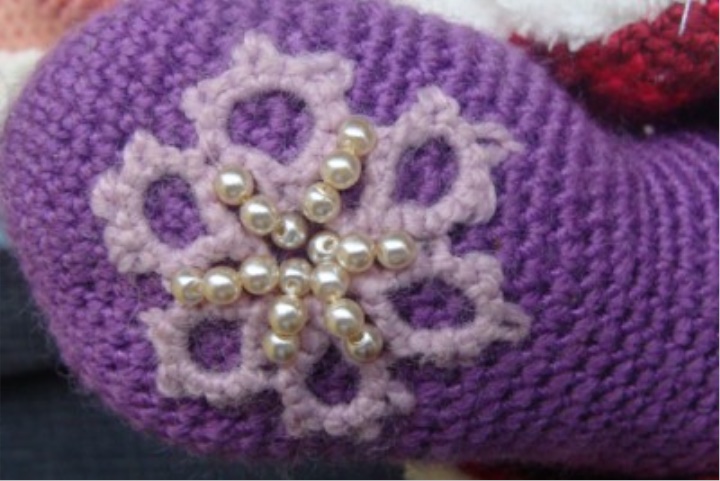
I decorated mittens with a small tatting snowflake and small beads.
The sleeves should be tied similarly to the hem of a fur coat, put on a mitten arm and sewn together to the body.
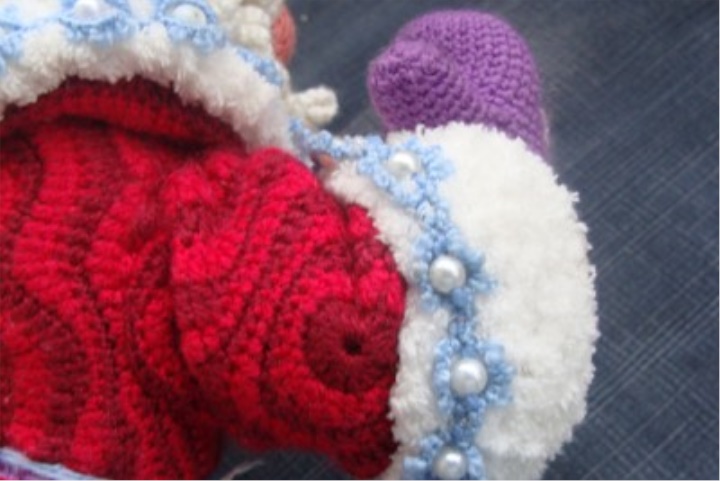
Before the end of the fur coat, it remains to tie only the collar. To do this, tie a strip of white fringe of the required length (from the belt through the chest, along the neck behind the head, again along the chest to the belt). Still need to tie the color of the coat fur coat according to the scheme.
The pivot is sewn to one side of the fringe in the center. Then fold the resulting detail along in half, decorate with frivolite braid and beads, and sew it in its place to a fur coat.

We go to the finish.
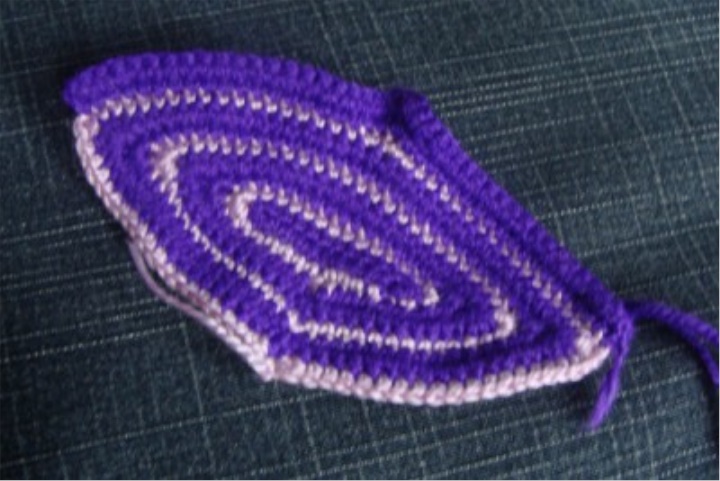
I wanted to knit Santa Claus' pants in two-tone - purple with a light lilac stripe.
Ready-made pants sew right on the grandfather on the line of stripes.
This is how the grandfather looks before sewing the hem of his fur coat.
The belt can be crocheted or knitted, I wove it using a half-woven bobbin technique. The tied belt closes the seam on the fur coat and completes the Santa Claus costume.
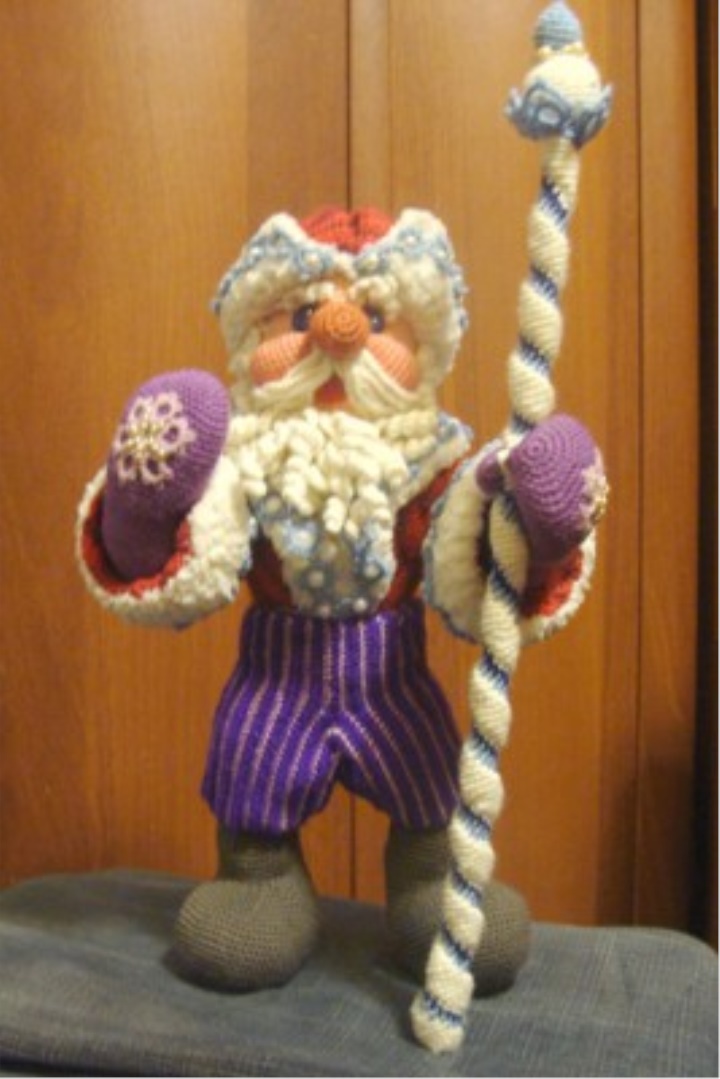
Only the accessories remained - the bag and the staff. I think you can link them yourself.
That's all. Thank you all for your attention to my work. Sorry for such a long explanation. And although before the New Year more than a month, all with the coming. Good luck to all.