On the hot-water bottle there are a lot of small parts that are better made from thin yarn Therefore, in order to tie and sew all this beauty, it will take quite a lot of time and patience.
But these details will make your house unique and inimitable.
Materials:
yarn of different colors and thickness;
black yarn for windows;
brown yarn for the door;
thin yarn (cotton is best - “iris”, “chamomile”, “coco”, “rose”) for flowers and leaves;
beads, beads, sequins and the like for finishing the product;
wire and two beads for the eyes of a snail;
snail body filler;
Read more about yarn in the text.
Crystal Moment Glue or other all-purpose transparent glue;
monofilament or thin thread in the color of yarn (it is convenient to use floss of different colors).
Optional:
acrylic paints;
charms (metal pendants in the form of a lock, key, kettle).
Instruments:
crochet hooks;
sewing needles;
needle with a big eye (the so-called "gypsy");
brushes for acrylic paints.
Terms in the text:
increase - two columns in one loop; decrease - we knit two loops together;
Amigurumi ring - we wind the yarn (two turns) on the finger, tie the resulting ring with crochets. We remove from the finger and tighten, pulling the free end of the thread.
The details of the heater are knitted in a spiral, that is, without lifting loops (unless otherwise indicated).
Acrylic, half-woolen or wool yarn of medium thickness is best suited for the warmer base.
Yarn Alize ecolana (100% wool, 220 m / 100 g), Alize lanagold (wool, 240 m / 100 g), Alize fine (wool, 390 m / 100 g) in two threads.
Roof
Attention! Knit in the back half.
1) We knit six columns without single crochet in the amigurumi ring (first row).
Knit five rows, making one increment through the row, starting with the second row.
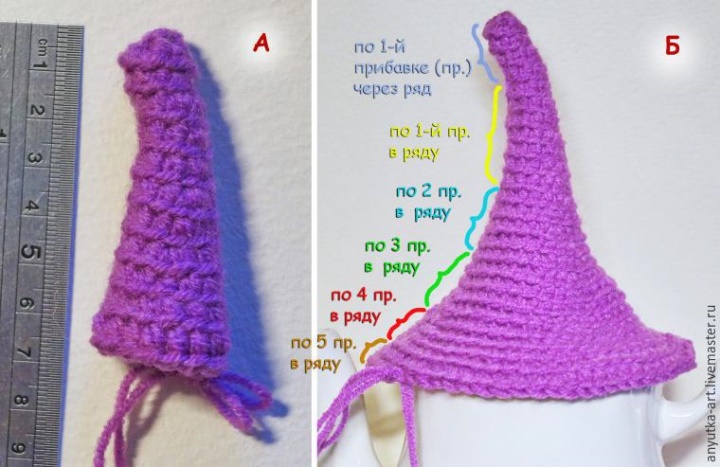
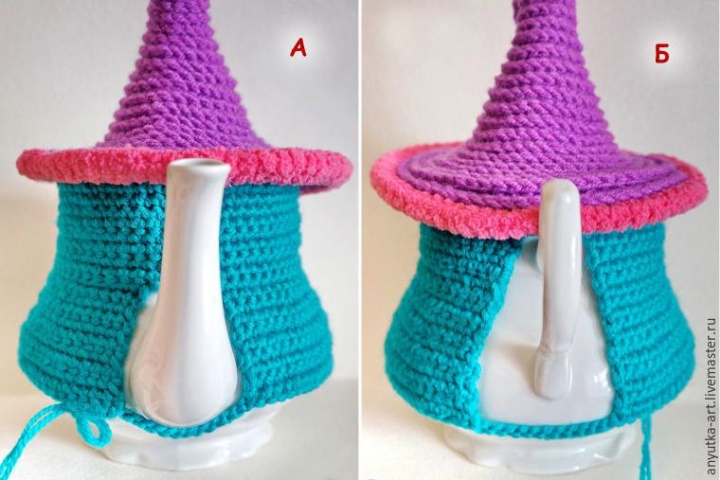
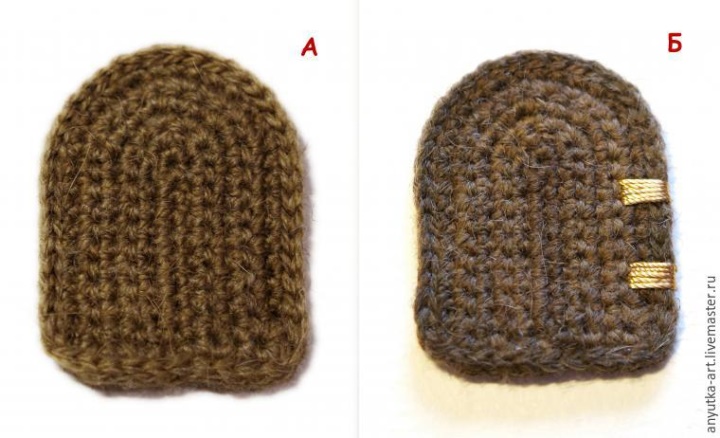
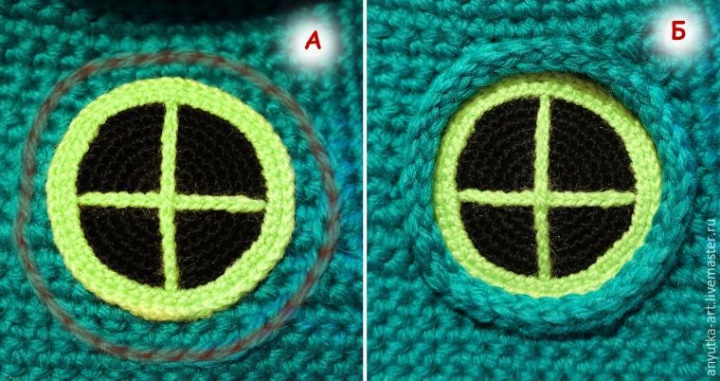
Next, knit several rows, making one increase in each row. The number of rows depends on how high you want to make the top of the roof. The photo shows how long the top of my heating pad turned out after I had tied 12 rows (photo A) .
Then knit, making two increments in a row, three increments, and so on (photo B) .
During knitting we try on the roof on the kettle.
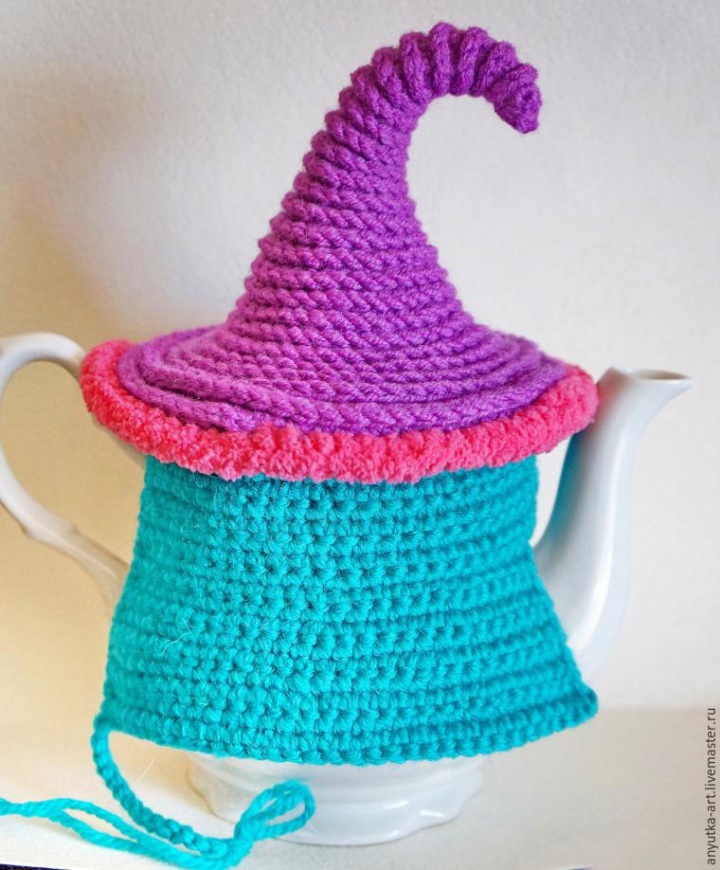
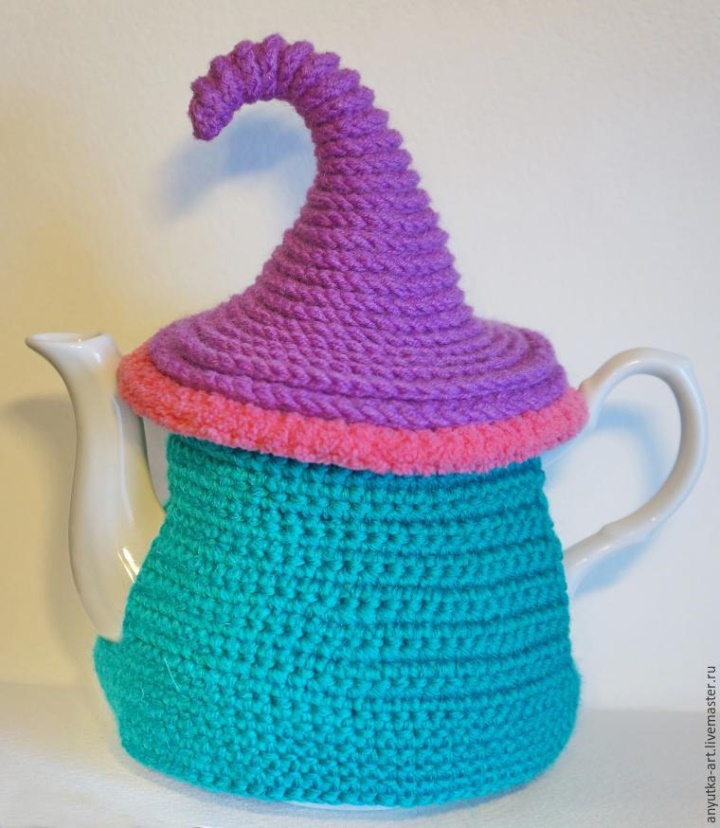
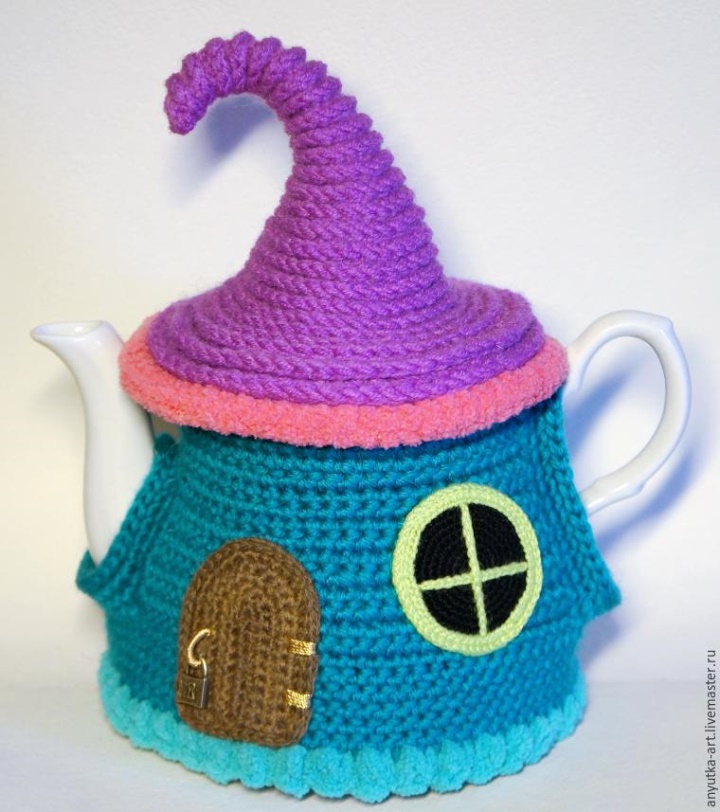
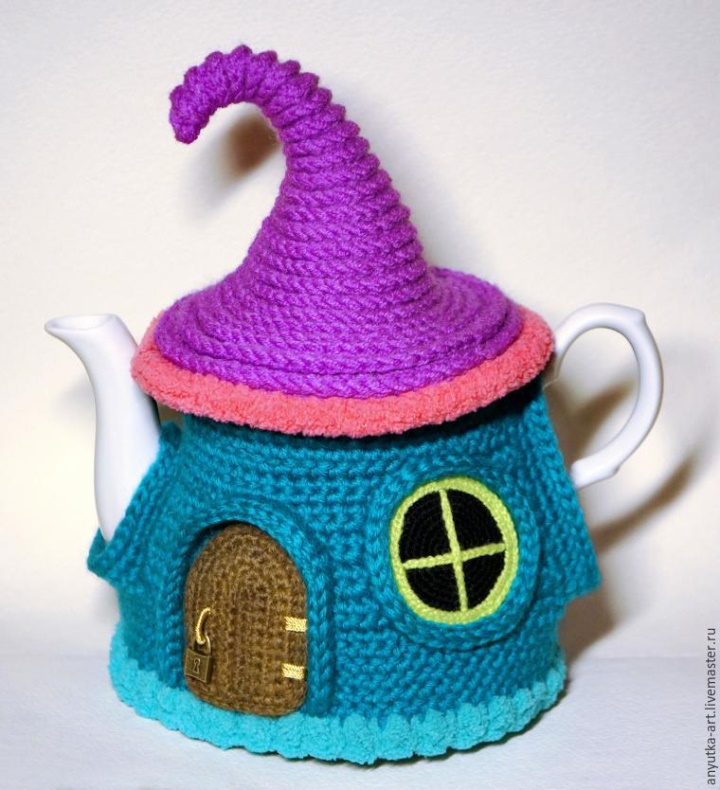
And so, our roof looked like a wizard's hat and completely covers the lid of the teapot (in my case also the sides).
Now we knit, making six increases in each row, forming hat fields (I forgot to take a picture, but in the following photos you can see what happens in the end).
Do not get carried away too much! Fields should not close the spout and prevent the handle from taking up!
We finish knitting with a connecting column. The thread is not cut.
The roof we get a pattern "ribbed" because of the unpaired facial half-net.
2) Expand knitting and knit connecting posts on these unpaired half-stitches, moving to the beginning of knitting (photo AB) .
When finished knitting, we leave a long "tail" of yarn.
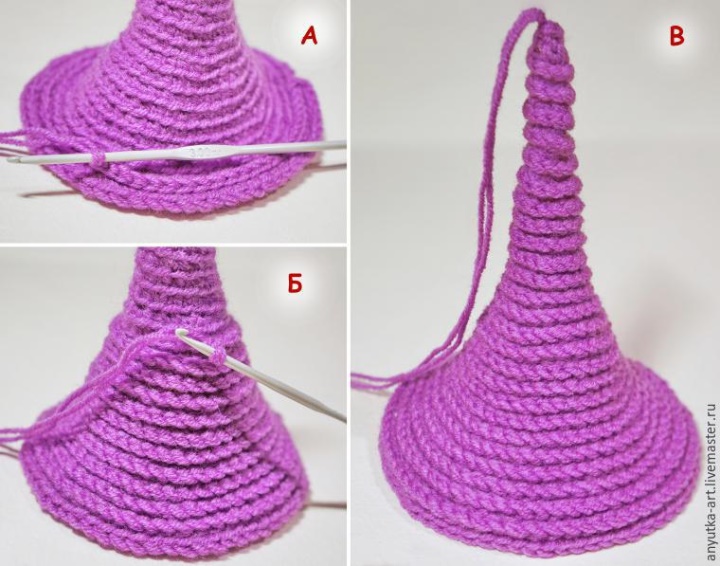
Tail tucked into the needle and skip along the entire fabric to the edge of knitting.
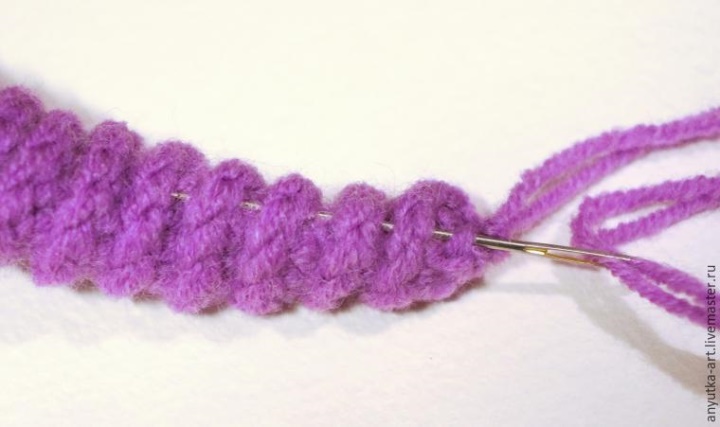
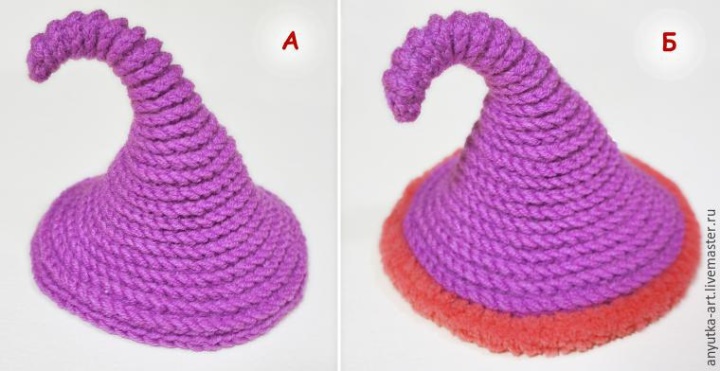
We tighten, so that the crown is bent. We fasten the knot on the seamy side of knitting (photo A) .
3) We tie the edge of the roof with yarn of a different color. I made a strapping in two threads, with single crochets, Alize softy yarn (100% micropolyester) (photo B) .
The roof is ready!
The basis of the house
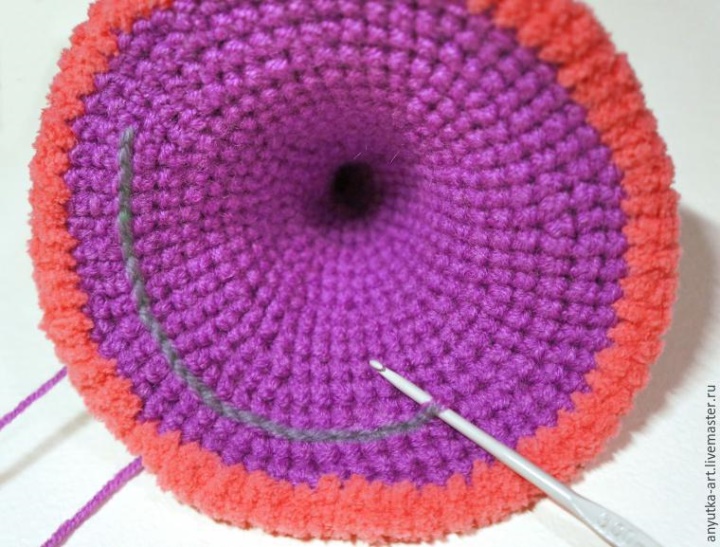
1) Putting on the roof of the kettle and pin marks the places where the roof is in contact with the kettle.
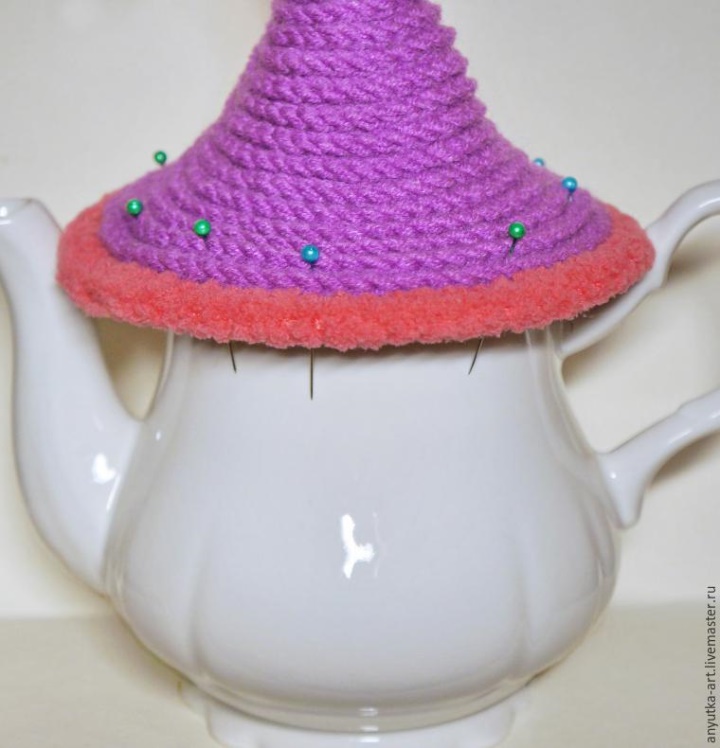
2) We turn the knitting inside out to ourselves and along the circumference marked with pins we knit a series of connecting columns (chain stitch) of the same yarn that knitted the roof (in the photo it is marked in gray).
If you, like me, knit the roof in two threads, then make a chain stitch with one thread.
To pins do not interfere, you can remove them, pre-drawing a circle with a disappearing marker or chalk.
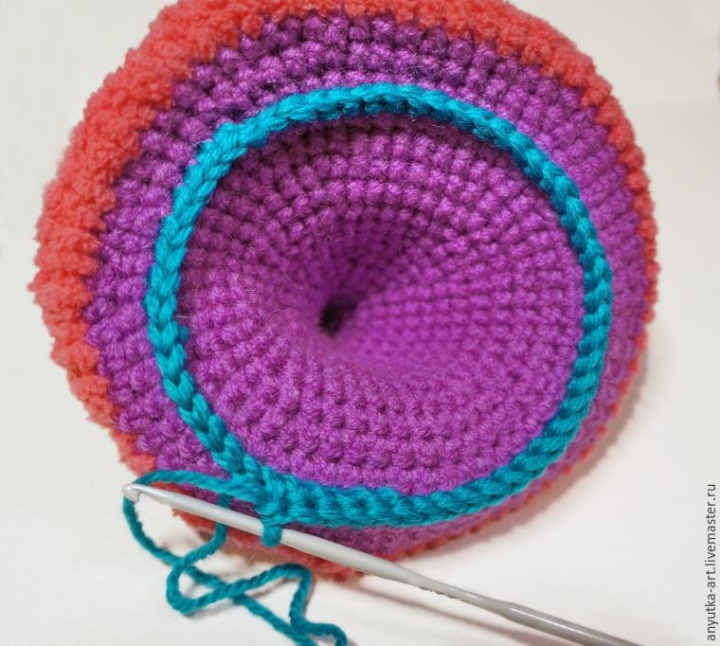
3) Attach the yarn of a different color and knit on the resulting loops with single crochets.
When the spout and handle are attached to the upper bases, we knit the two side walls of the heaters separately if the spout and handle are on the same or almost the same level. In this kettle, the upper base of the handle is higher than that of the spout. Therefore, I continued to knit the rotary rows in one web. For a cutout under the handle left three loops untied.

Having tied up to the upper base of the spout, she continued to knit the two halves (sidewalls) of the heaters separately.
The kettle at the top is almost straight. Therefore, you can knit without increments. The increase (one in each row, on each side of the heater) began to do when the kettle began to expand.
When knitting, often try on a heating pad on the kettle and adjust the number of increments according to the shape of the kettle.
When you tie the first half, tie a chain of air loops, then you will need it to connect the two halves of the heating pad.
I recommend when knitting the first half of the heater to record how many additions you have made. Then, without problems, tie your soulmate symmetrically to the first.
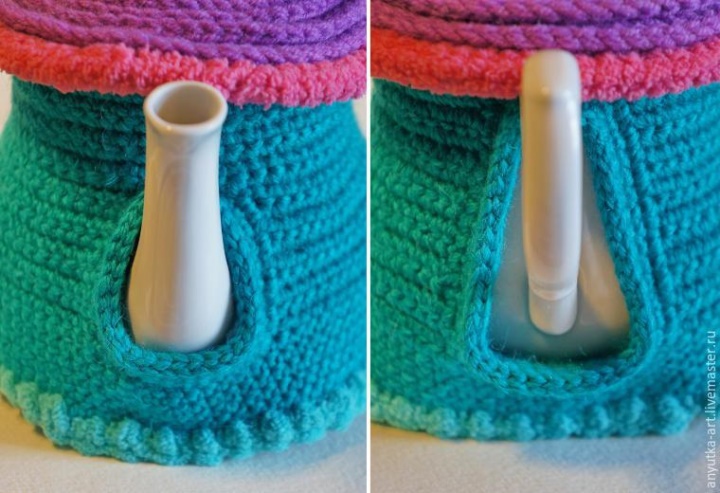
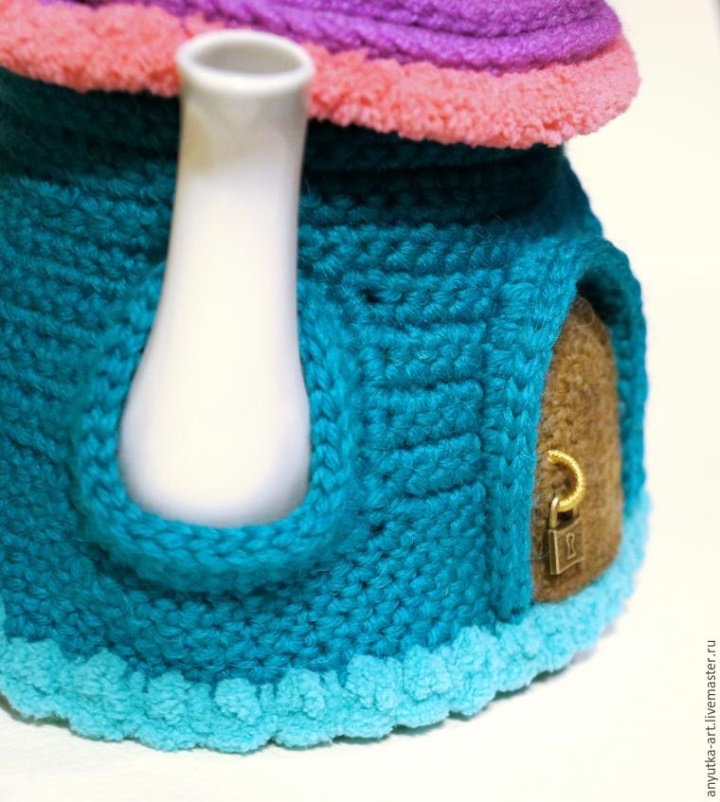
4) When the two halves of the heating pad are connected, we connect them with chains of air loops under the spout (photo A) and under the handle (photo B) .
The shape of this kettle allows you to knit a heating pad without a button. But, nevertheless, I made a hole under the handle large enough so that the heating pad could be removed and put on without problems.
If you want to make a heating pad with a fastener under the handle, then watch the master class “Knit a Heating Pad on the Hedgehog Kettle” .
5) Then again knit in a spiral. Knitting finish, a little before reaching the bottom.
6) We make strapping with magnificent columns.
I knitted yarn Alize softy.
Magnificent columns. In the first loop of the series we knit a column without a nakida. In the second loop we knit a magnificent column of 3-5 crochets, then knit an air loop and again a single crochet into the third loop of the row. So knit the whole row. A more embossed pattern is obtained if you knit not a single crochet between the puffy columns, but a connecting bar.
7) Tie holes for the spout and the handle with 2-3 rows of single crochet columns and one row of connecting posts (can be tied with a “stride step”).
The basis of the house is ready!
Before further work, it is worth to moisten the heating pad from the puller and dry it on the kettle.
Windows
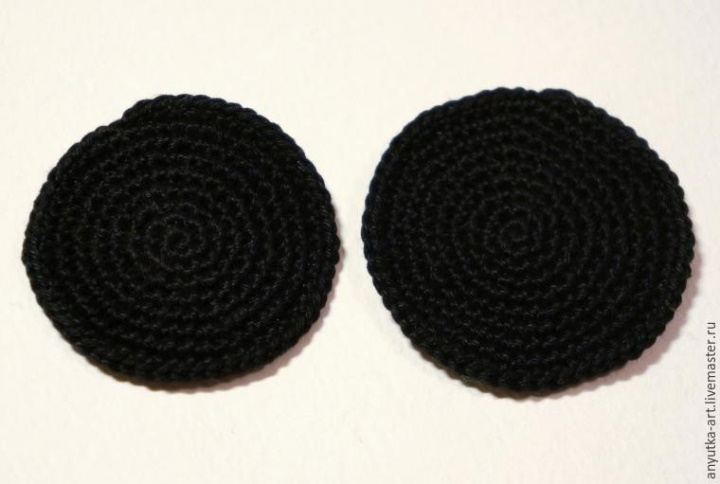
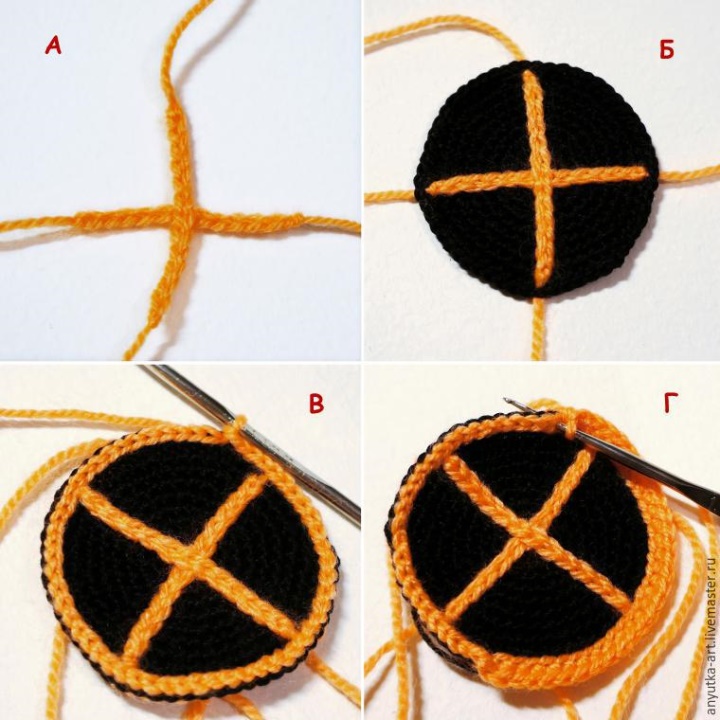
1) Windows knit with columns without nakida according to the scheme of a circle. Increments do with offset so that you do not get a hexagon.
I was knitting windows made of Iris yarn.
Determine the size of the circle, based on the size of your house.
2) From colored yarn, tie two chains of air loops.
When knitting the second chain, knit the middle loop through the middle loop of the first chain, forming a window cover (photo A) .
3) Using a hook, attach the binding to the window (photo B) .
Tails can be fastened with knots on the seamy side or hide when knitting the frame.
4) At the edge of the window, tie a row of connecting posts (photo B).
5) Tie a row of non-crochet columns, introducing a hook into the middle of each loop of the chain (photo D) . The result was a window frame.
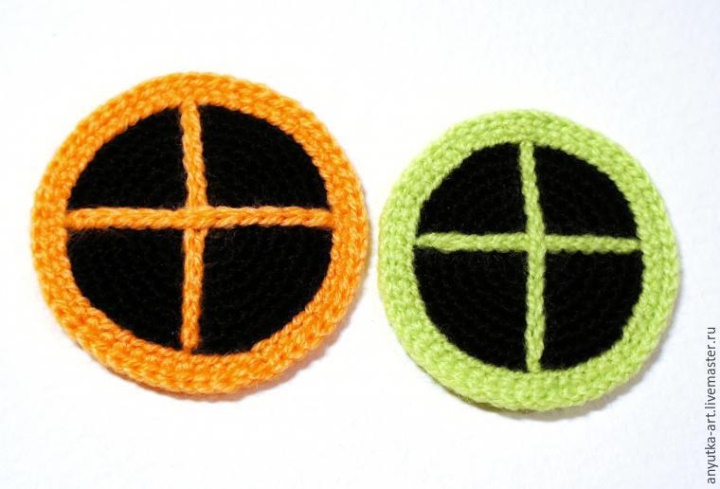
If you knit a frame of thicker yarn than knit the window itself, then knit it without increments. If the yarn is the same thickness, then make six increases, as with the usual knitting circle.
Our windows are ready!
Door
I knit by eye. But you can pre-calculate the number of loops you need to knit the door.
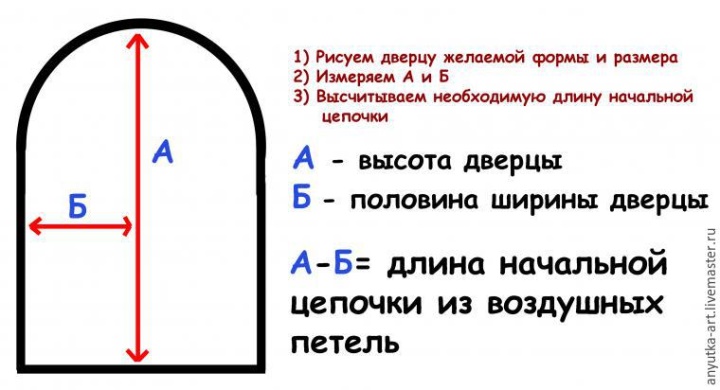
1) Knit the door according to the scheme of semi-oval. Number of rows on the scheme conventionally - knit as many rows as necessary for the desired size of the door.
I knitted a door of medium-sized woolen yarn (I don’t know the brand and the yardage, as these were the remains). It can also be knitted from another yarn, the main thing is that it should be of a suitable color and not very thick.
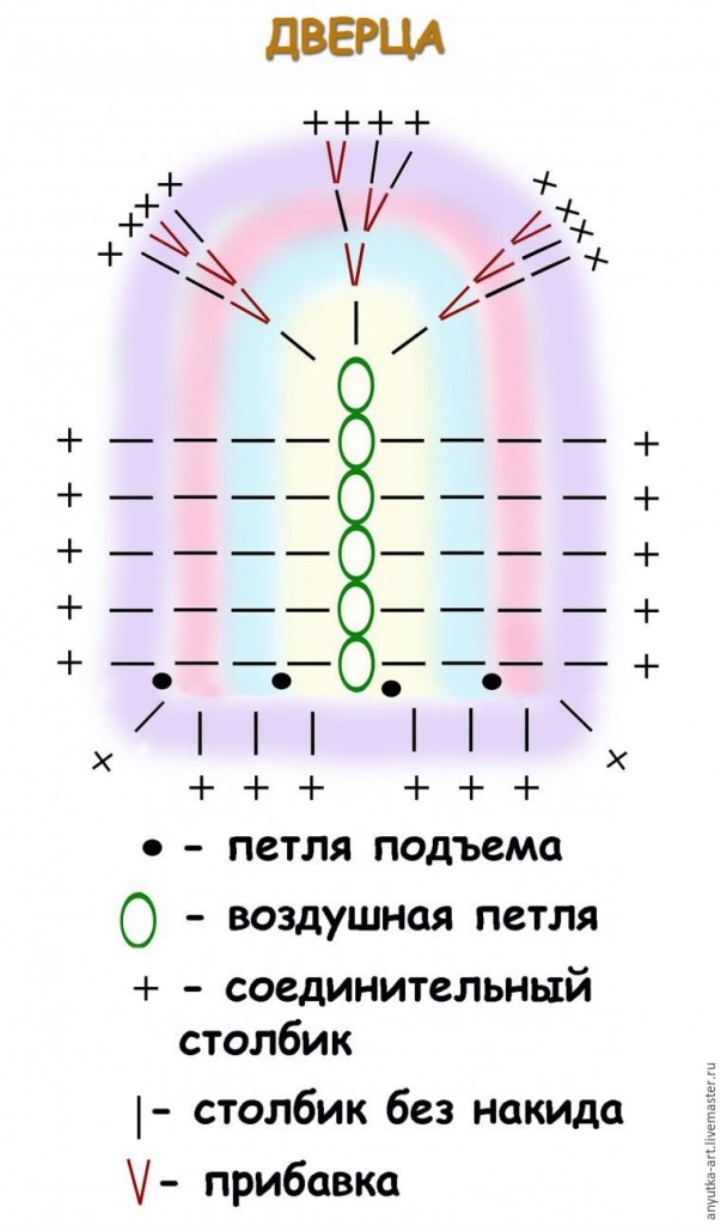
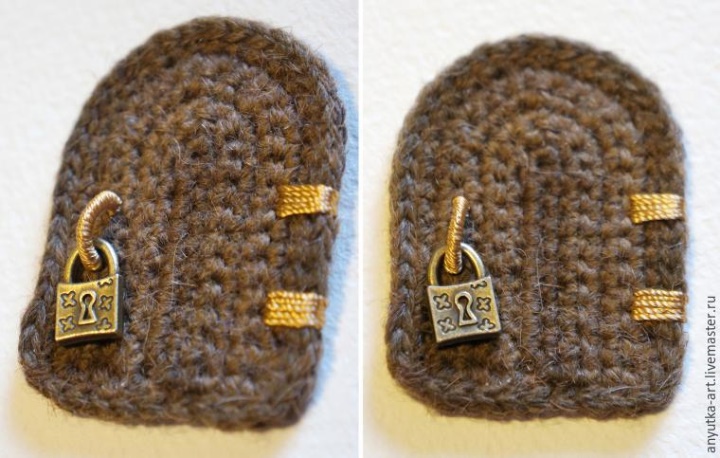
The door is ready (photo A).
2) Embroider the loops (photo B) . I used Tulip YarnArt yarn .
3) Make a handle for the door. To do this, fasten the thread on the wrong side and bring it to the front side.
Take some stick of suitable thickness (I have this hook) and make a few stitches, as if sewing the stick to the canvas.
I made a door with a lock, so with each stitch I passed the thread through the handle of the lock.
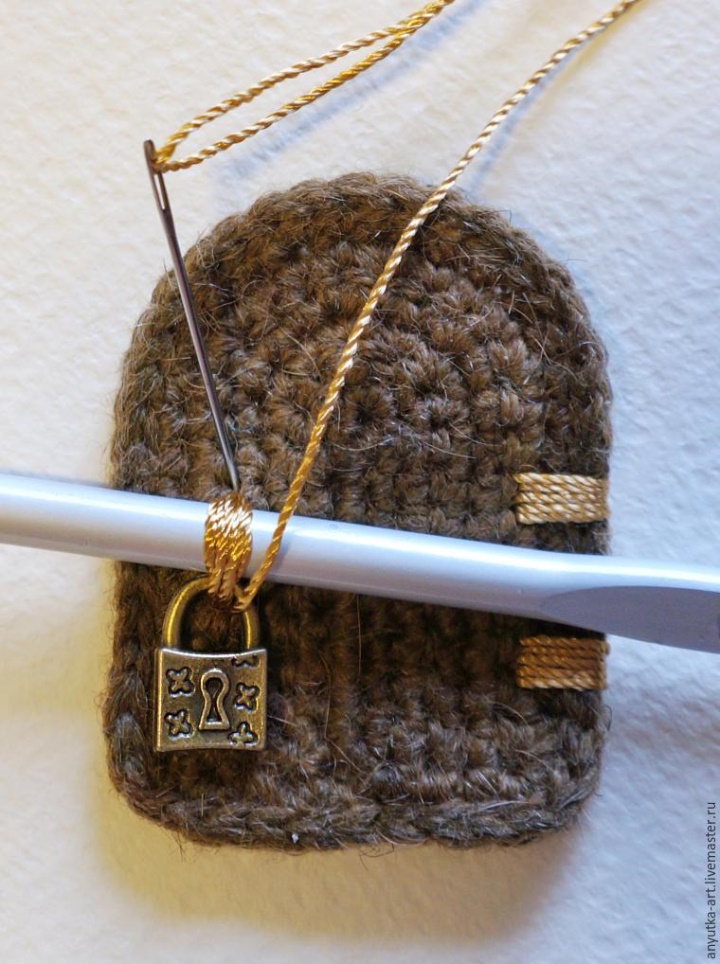
Fasten the thread on the wrong side and bring it back to the front side.
Pull out the wand and wind the resulting loop. Lay coils close to each other, without overlaps.
When finished winding, bring the thread on the wrong side and secure.
Making hot water bottles
1) Sew windows and doors.
2) Knit the outer frame.
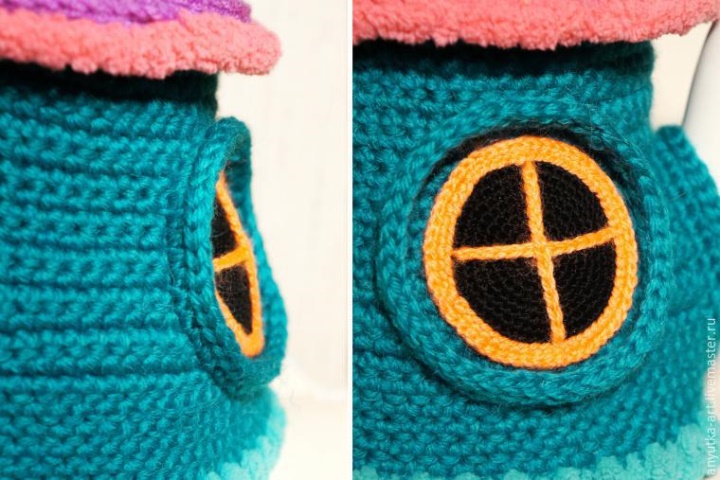
We lay the chain stitch around the window (in photo A it is marked with color).
Knit one row of columns without nakida. When knitting, make 4-5 increments so that the frame does not twist to the window.
Make one row of connecting posts (photo B).
3) Similarly make out the door. Knit in different columns, forming a visor. On roundings, we do symmetrically 1-2 gains.
That's what happens.
4) On the other side of the heater also make out the window.
5) Knit mushrooms
We decorate the house
Decorate the house to your liking. On the Internet a huge number of schemes of various flowers, twigs, leaves.
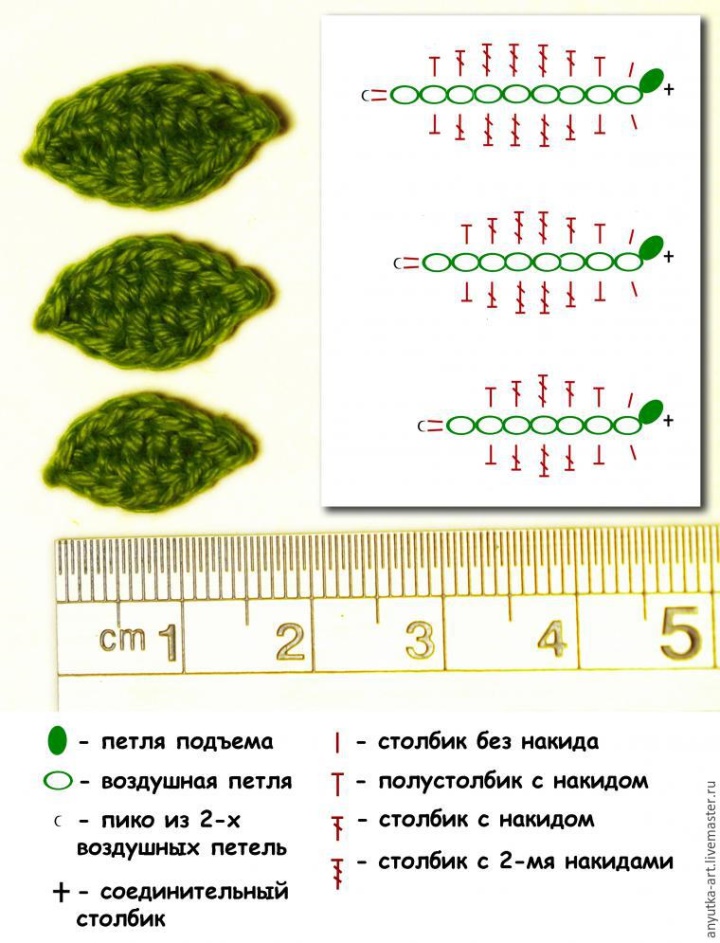
We knit the leaves according to the scheme. If the leaves are needed longer, then we increase the length of the initial chain and, accordingly, the number of columns with two naquids.
Beautiful leaves are obtained from sectional dyeing yarn. But you can toned the leaves themselves. To do this, moisten the leaves. Diluted with acrylic paint in dark green color, tint the base of the leaves.
How to link flowers and twigs:
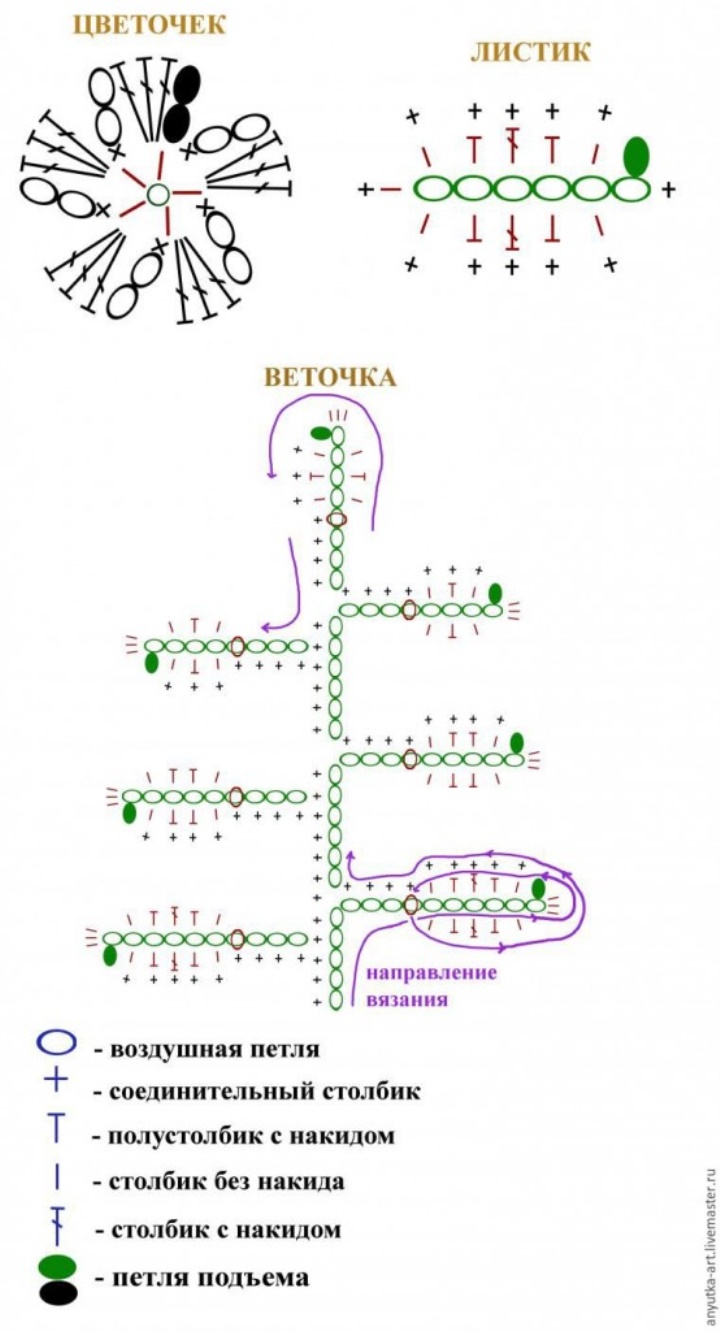
Sew the leaves along the central vein for 2/3 of the length. In this case, the edges and the tip of the leaf remain free and the leaf looks more lively.
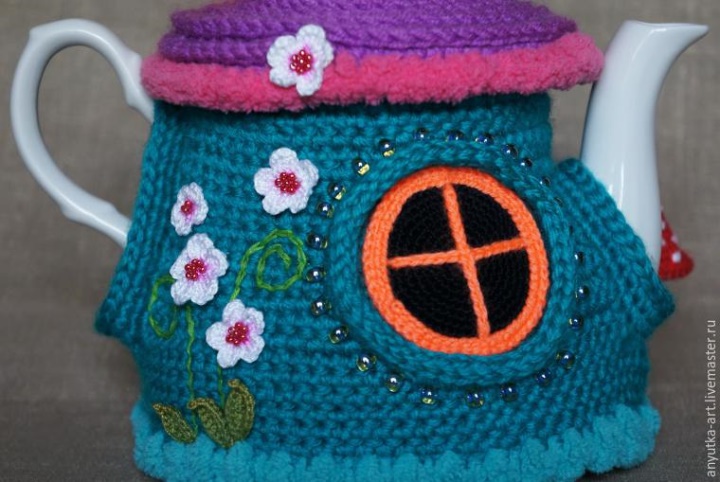
You can sew flower beads, sew a bead or sequins.
You can make berries from beads.
Imagine!
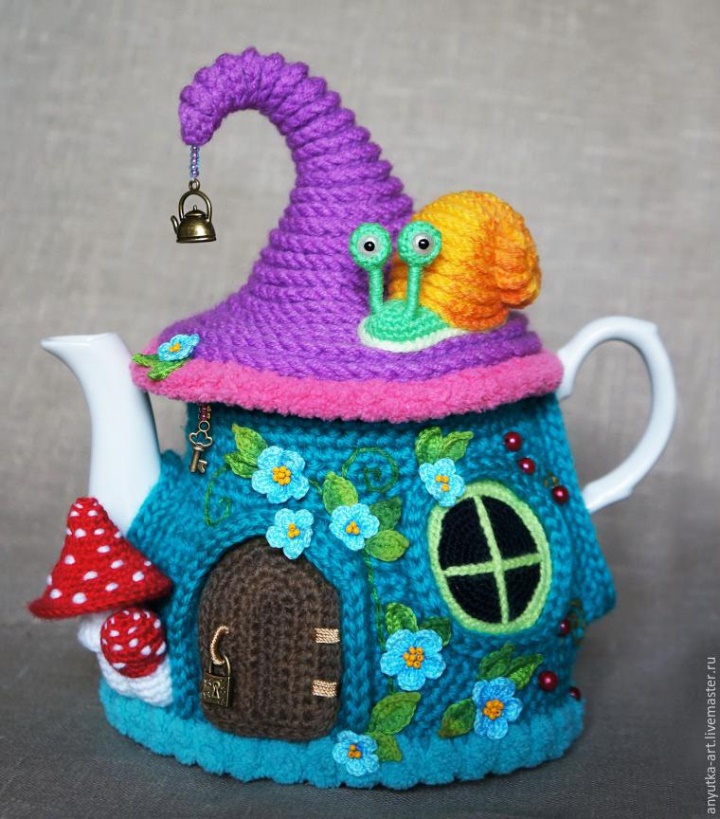
snail knitted from other yarn.
Alize fine washbasin , baby novelty body (acrylic, 200 m / 50 g).
Snail sewn to the roof around the perimeter of the body. Additionally, sew a shell to the side of the roof with a few stitches so that the snail does not collapse to the side.
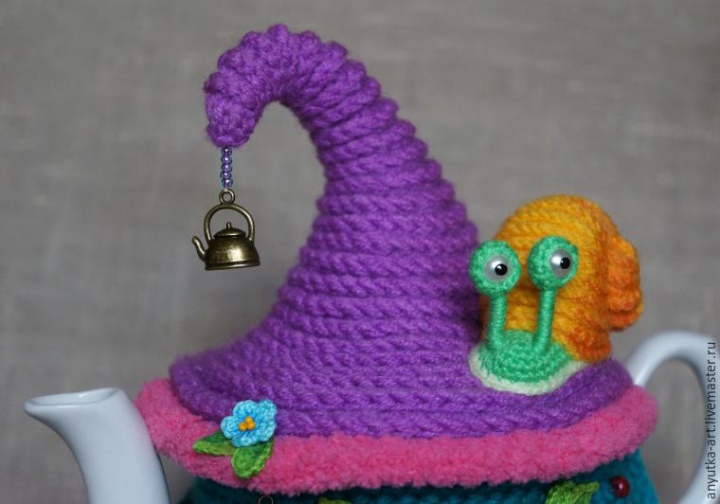
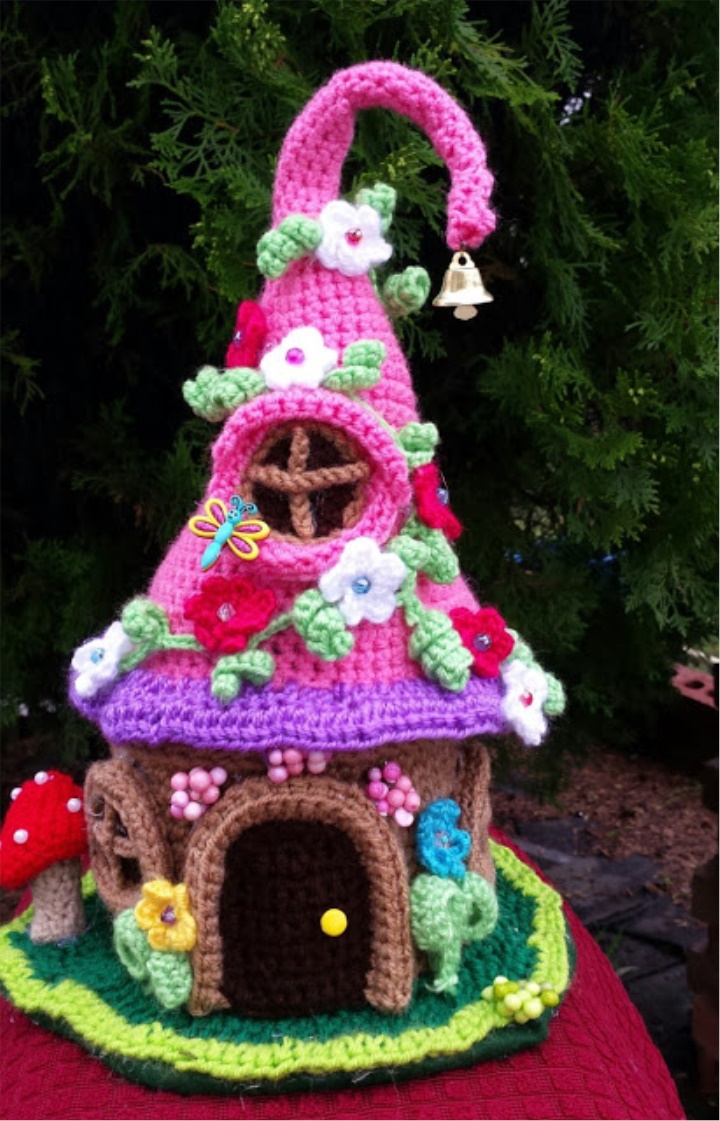
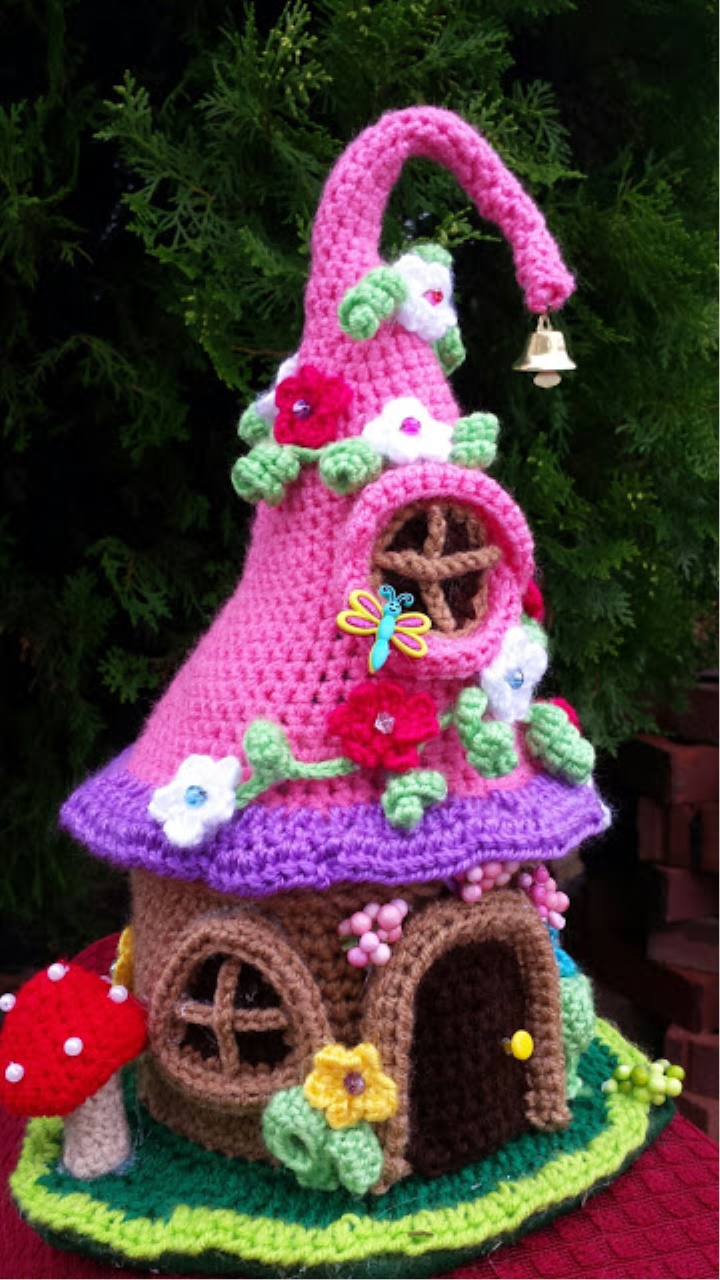
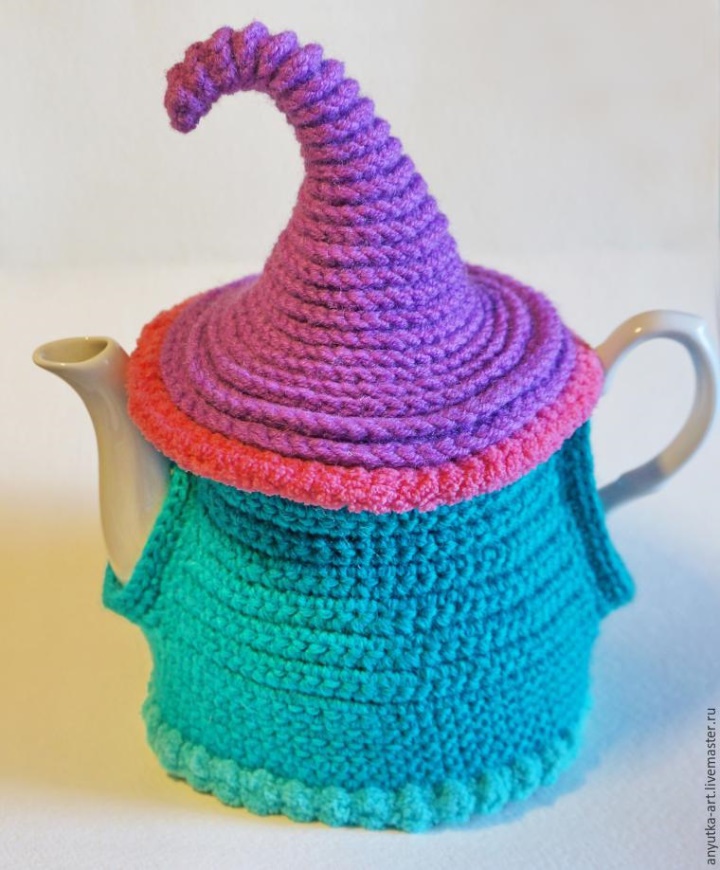
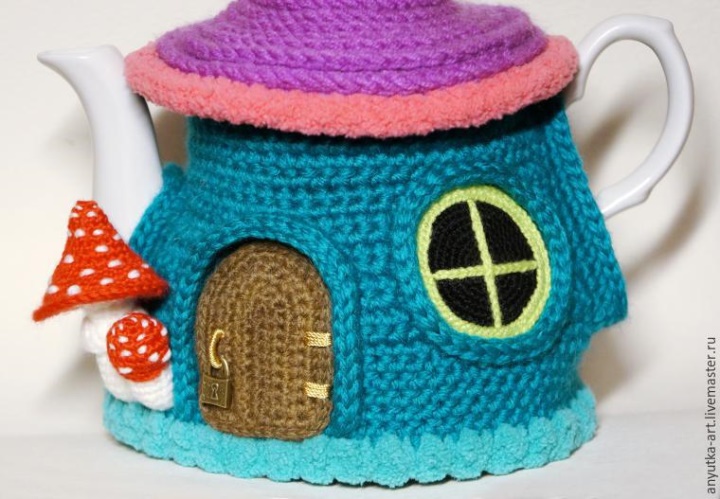
That's how a hot water bottle looks from different sides.

Successes! Warmth and comfort to your home!
And a few more wonderful houses connected by the needlewoman EmCrafts
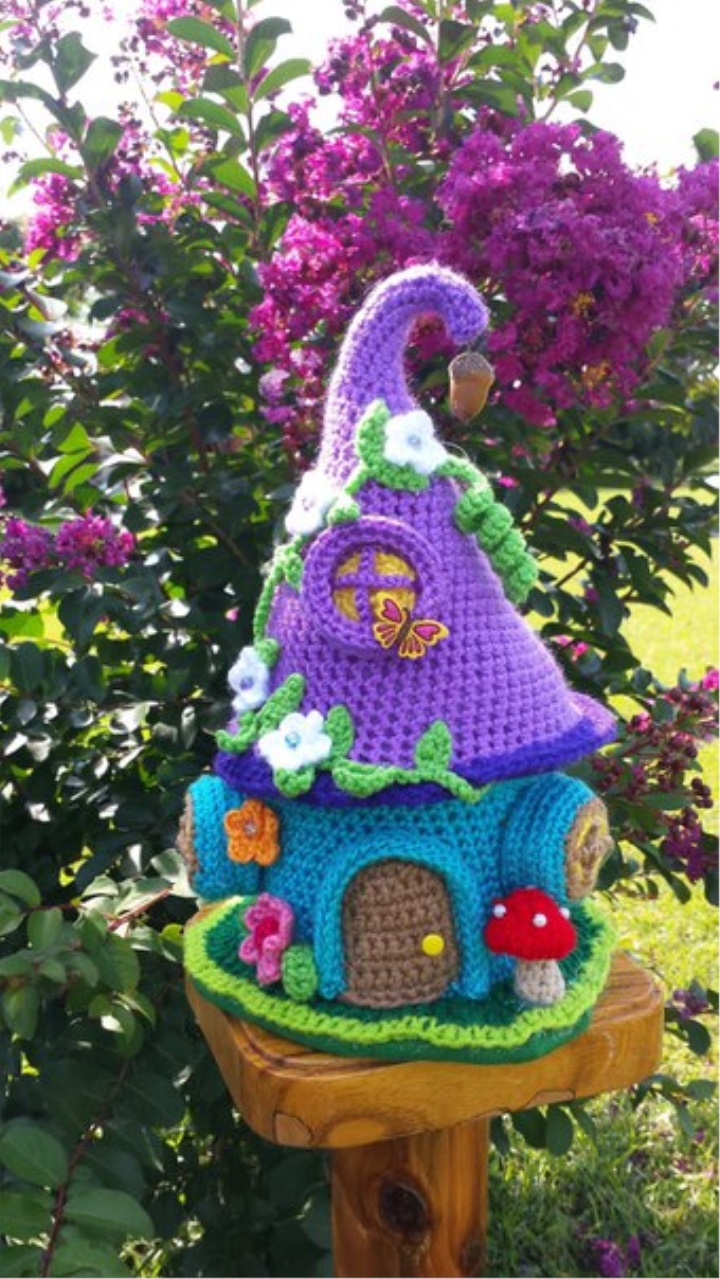
Fantasy and the ability to see the world detskmm rejoice