These stunning coats fascinate with their beauty, despite the fact that they are connected with ordinary facial loops.
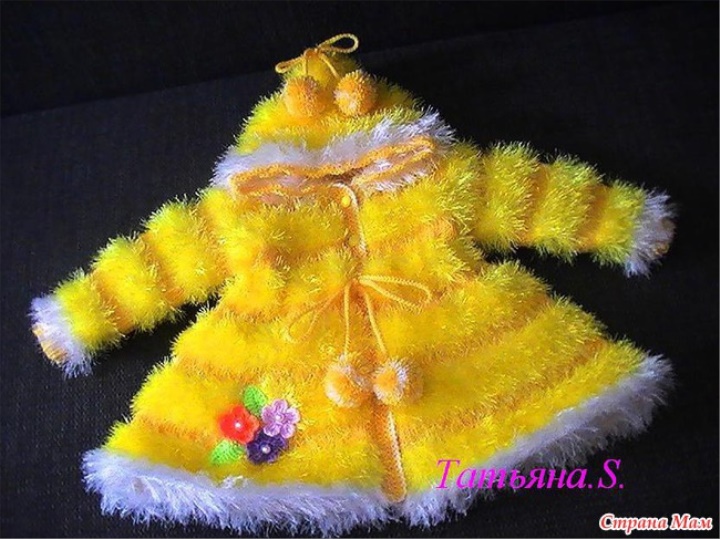
on such a coat it takes three and a half 100 gram hanks of weed 150 m each and two woolen ones 130 m each.
The author of these works, Tatyana Solokhina, kindly shared with us the job description:
"I do not make any patterns! At the age of two years I gather 230 loops (you can even 250 as you like) with grass, the coat is knitted with one cloth up to the line of armholes! 20 loops in a row and tie 8 rows (210 loops on the needles), then we knit five grass, also in the first row, make a uniform decrease of 10 loops, tie 14 rows! lane will be more than 120 make more delays to fit the required number) Next we divide the canvas into shelves and back, knit everything individually starting from the shelf-30tetel, expand the work, close 5 loops about the armholes. tie 10cm with the front satin stitch ( close the neck for the okat once 4,3,2,1,1 in every second row, tie the second shelf similarly! The back is for armholes to close on each side 5 loops, then knit the desired length and close all loops in the same row!
There is no specific description, she knitted herself on the model in the photo, which she realized then and imposed!
Sleeves: type 40 loops with a regular thread, tie the desired length with an elastic band 1 * 1, add 10 loops in the last row, knit 14 rows of grass with the front stitch on the first strip, then switch to regular drinks and knit 8 rows (alternate to the desired sleeve length) at the same time additions on both sides for bevel sleeves with 1 loop in each 6 row.
Sew the sleeves sew, crochet stbn around the edges of the shelf making holes for buttons! You can tie the collar according to any scheme or the hood also according to any scheme for children's blouses a great many of them in the internet. "
Sewing collar closed with corners
The collar is knitted separately from the product according to the pattern. To construct it (Figure 1), one takes half the size of the width of the notch of the neck of the back (aV = b cm) and half of the size of the width of the notch of the front neck (Ba = 11 cm).
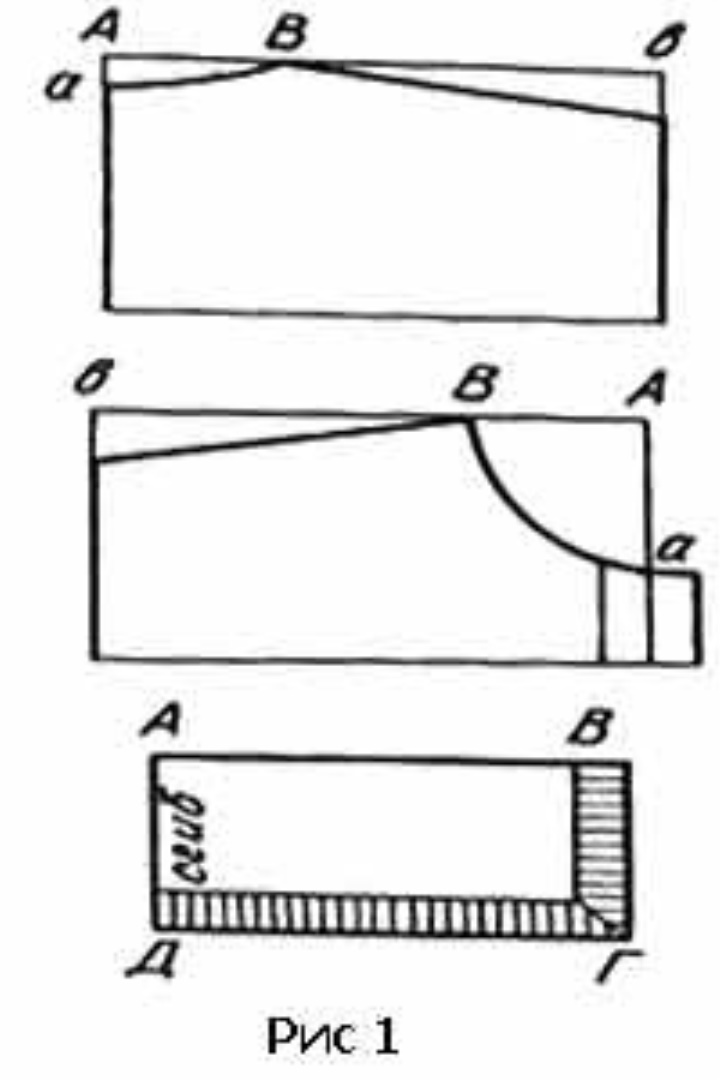
Build a rectangle AUGD. Its long sides are equal to the sum of the taken sizes: 6 cm + 11 cm = 17 cm, the short ones - the width of the collar, suppose 8 cm. The line HELL is the middle of the fold of the collar.
An example of the calculation of loops.
In 1 cm - 3 loops, in 17 cm will be: 3 loops * 17 = 51 loops. For the entire collar: 51 loops * 2 = 102 loops + 2 edge loops = 104 loops.
Begin to knit the collar on the 104 loops of the main pattern, and on the edges of it perform a finishing strip. It can be associated with the angle. If the product has a crochet finish, the collar can be crocheted. In this case, the finishing strip is not knotted.
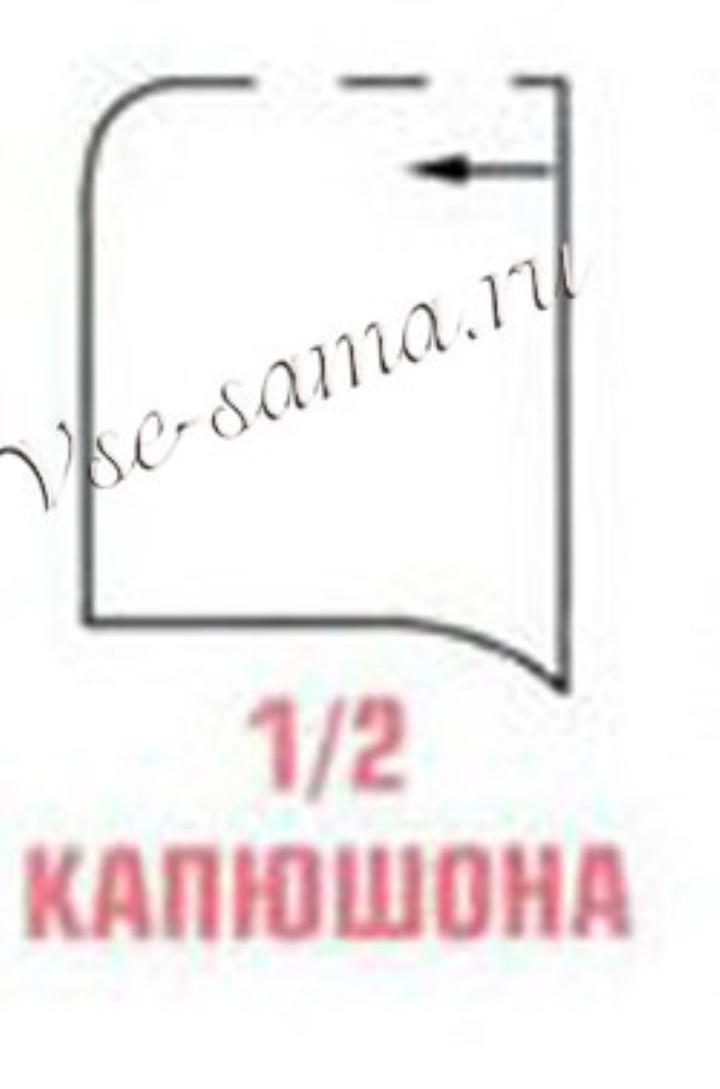
How to knit a hood?
For a classic hood, you need to dial the loop on the edge of the neck. In order to be neatly dial on the front side. Fasten the thread at the beginning of the row and using needles (or hook), start through the loop on the product to pull the working thread. The hinges remain on the needle. Typing loops need to associate 2 rows of a simple facial satin.
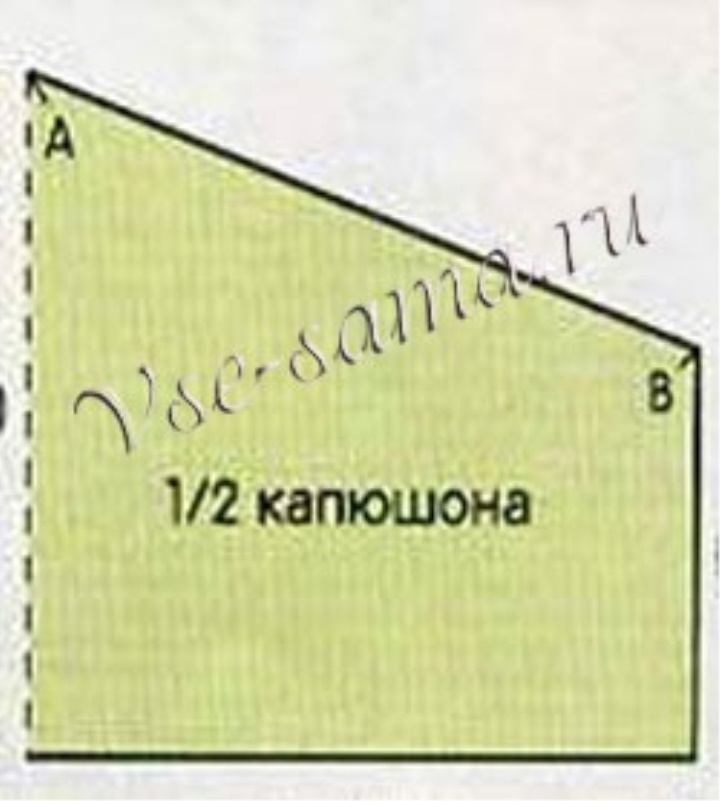
Next, the hood knits shortened rows. To do this, knit the next front row not up to the end, turn the knitting, make a nakid, and again without finishing the row with the side loops, turn the knitting. Thus, at first one side part of a hood knits, then the second one knits. Thus, we knit the hood of the desired length. Then close the hinges of the sides.
After that, the middle part fits. When knitting the middle part we pick up the side loops and finish knitting. Several rows along the edge of the hood can be knitted with an English elastic band or crocheted with a tracery. Here so the approximate scheme of a hood looks.
The hood-collar
In knitting, along with the classic hood, resembling the heel of a sock, the hood-collar is especially common. There are several ways to do it. Here is the most simple of them.
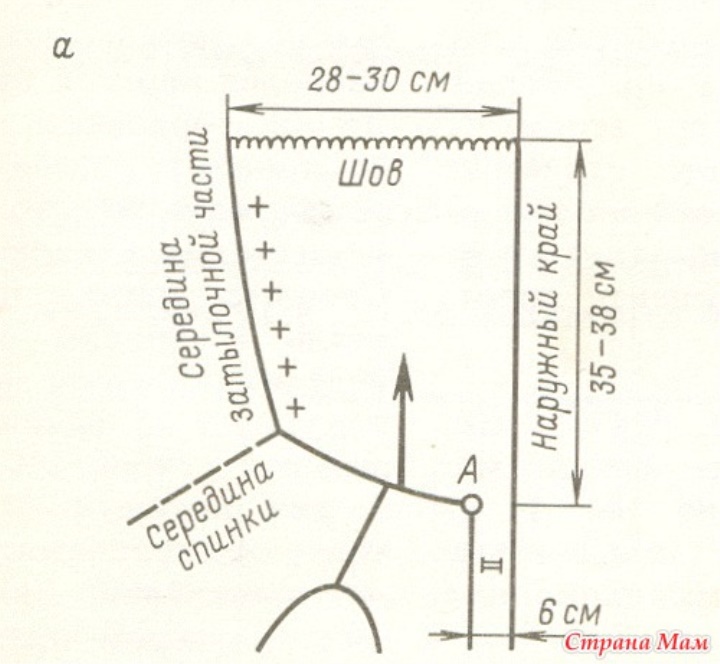
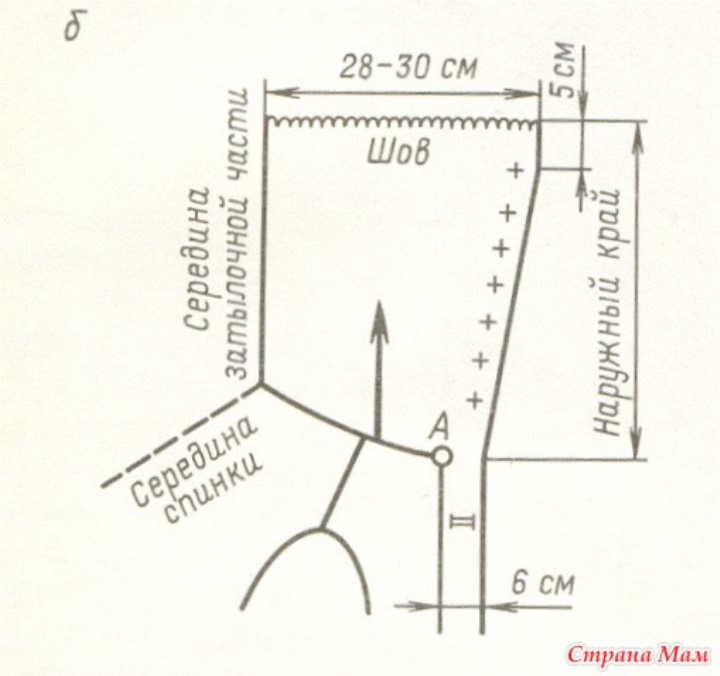
The line of the neck on the pattern-based back and front remains unchanged, only mark the size of the strap-fastener and hood. Tie the back and the shelves, leaving the neck loops open. Sew the product, put hinges on the knitting needles on one needle and, starting from point A, on the front side of the work, knit a row with face loops. Loop to point A, re-shoot on the right needle, not knitting. Next, follow the hood pattern strips, such as garter stitch, adding a loop in the middle of the hood at the back (see the sign "+") or along the edge of the hood.
There is another way to knock out the hood.
To do this, you need to connect a rectangle of the required length and width - this is the back and top of the hood. Then loops are gathered along the side edges and then knit with a simple cloth. A few rows at the end also need to be knit with shortened rows.
In such ways you can knit any form of hood - cap, collar - hood or anorak. In different cases, just add a binding part of the hood.
Hood can be knit and crochet. To do this, you must link a chain of air loops of the desired length. The length is measured by the length of the neck. Then tie 2-3 rows according to the pattern you chose. Now diminish one loop in each row. Linking so 4 cm, from the start of mating, we continue to knit without subtraction. After 19 cm from the beginning of knitting, the hood is divided into two parts and each part is knitted separately. To round the back of the head, you need to reduce 2 loops in two rows. The loops decrease at the end of the row, i.e. from the inside. Then 23 cm from the start of knitting, we finish knitting on both sides of the hood. We make a seam by stitching two parts of the hood.