Click For Crochet Abbreviations List
"Bell" or hat for buttons.
r.48-52 You will need : - the yarn "Lotos" of the Kirov NPK 250 m / 100gr approximately 1 skein of the main (purple, blue, white, etc.) and a little green (or its shades) colors: - hook number 2; -Transparent beads for decoration. Abbreviations VP - CN air loop - double crochet sc - Double crochet column RS - embossed or convex stobik: PCH-double crochet, RSBN - single crochet. Legend: Cap. At the base of the cap is a beret, shown by Dove in MK.
Therefore, especially without going into details, I will reveal only some moments.
So,
1 p. 6-7 VP closes the ring 2P
. 12 SSN (I do not mention lifting 3 VP = 1 SSN) 3p. Immediately I start the relief columns, alternating them with SSN. The total number of columns is doubled = 24 columns. It turns out: 3VP lifting, * PCH, CCH, * and so on from * to * Distance from * to * = 1 sector. In total, there should be 12 parts = 12 sectors. (3VP = 1 SCH) In this row they will still be poorly viewed, but in subsequent ones they will be seen very clearly. 4p. In each sector I add 1СН. RSN I knit clearly over the RSN of the previous row.
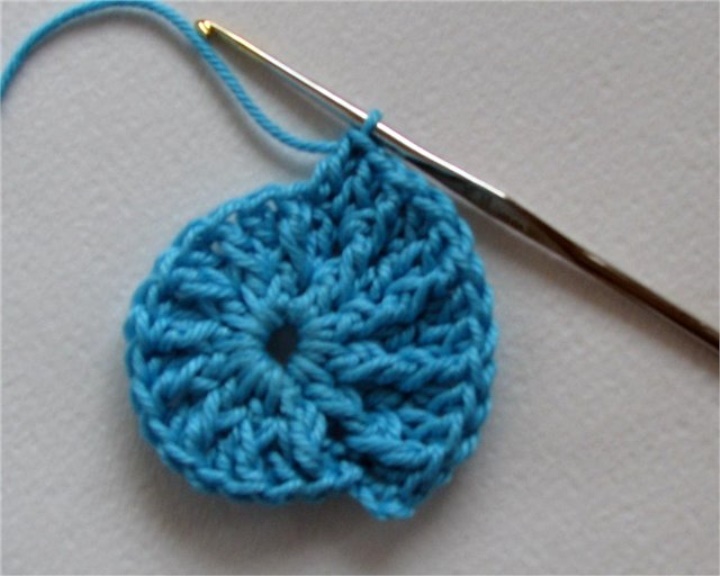
5r. * In each sector I add 1CCH. *
From * to * I repeat until the size of the circle reaches the required diameter. All this is described in detail and described in MK Dove! Subsequent series knit without additions. Consider not to be mistaken! I got “exit” 8 CCH between RSN. These 8 and should be saved to the fields of the "bell". So that the embossed stripes do not curl, but go straight, I do this: I alternate rows with knitting the first after the RSN CLH to different places. I make a row like this: the following is this: The holes will not be noticeable: And, thus, to the required height:
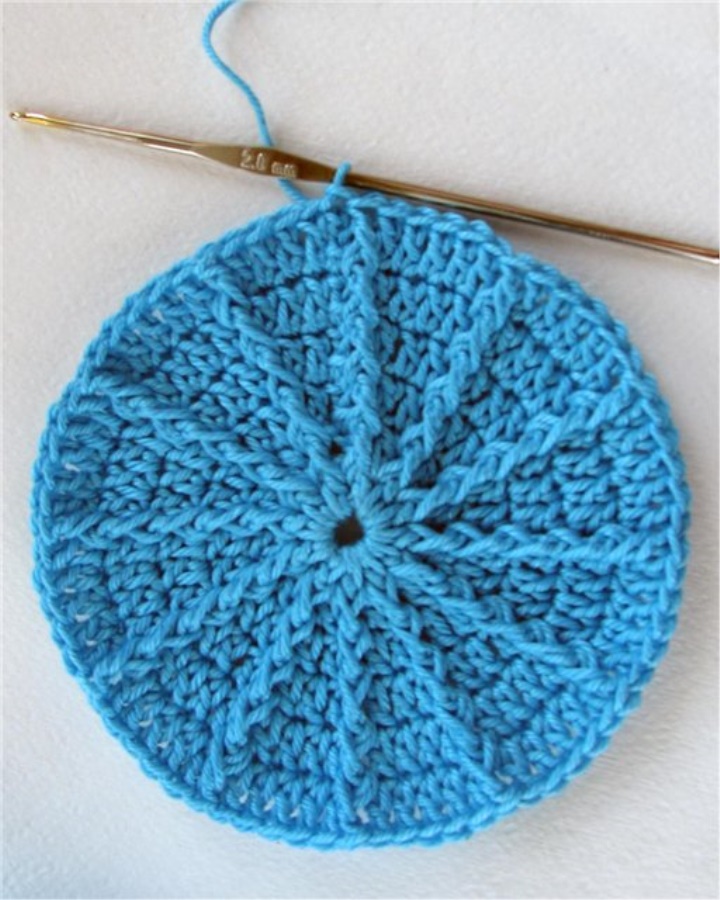
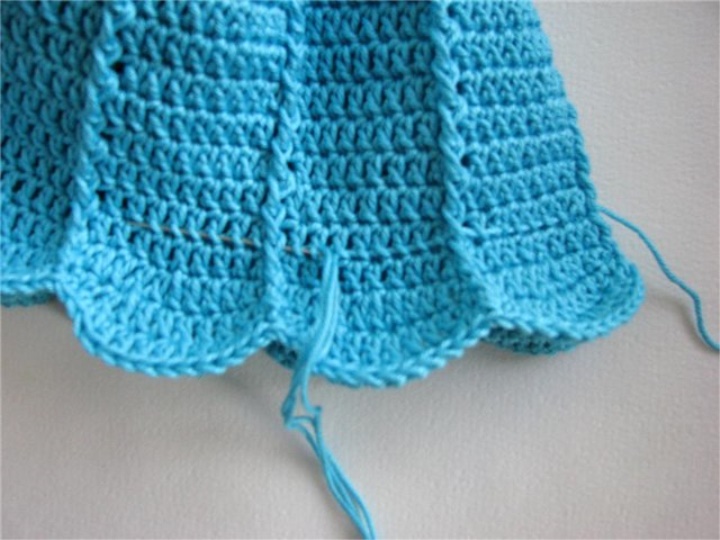
Bell Fields = 4 rows.
1 p. We increase each sector by 2 SSN.
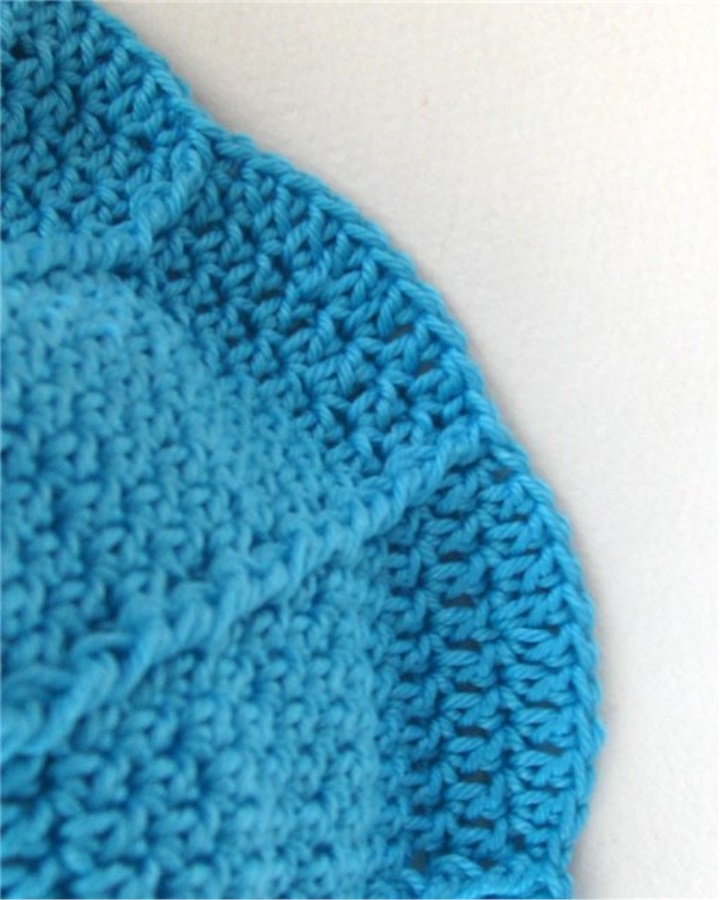
Hereinafter we replace the RSN with RSBN until the end of the work. 2p. In each sector we knit * RSBN 2SBN 9 SSN, 2SBN, * RSBN. It turns out that I am increasing by only 3 columns in one sector: 1 along both edges and 1 in the middle. To prevent holes, I increase the number of columns in the middle of the sector, inserting the hook directly into the column of the lower row, so: Next, 3 row (not shown in the figure!) Is similar to 2p: I continue to increase the bars by 3 in each sector: 1 at both edges and 1 in the middle. The last row can be knit, increasing the sector by 1 CCH in the middle.
At the request of the field can be tied sc. In the blue cap, I did not. The cap is almost ready. However, it will be too big for a child's head. I thread the thread (the same one I knit) into a needle and draw it between the rows (4 and 5 from the bottom). I do not sew, namely I pull, under the loops. Images are enlarged by a mouse click. Then I adjust to the size I need + 1 -2 cm. I fasten it from below. Here it is: almost imperceptibly! You can also stretch the gum, or you can tie a string from the VP and stretch it between the CCH, bring it out and tie it with a bow, and hang the beads at the end.
You can use satin or nylon tape. But I wanted reality - therefore, my choice is as follows. Smile
I knit the pedicle like this: I close the loops into a ring with 10-12 loops and tie the required number of rows in a sc (or cs). The number of RLS increase by 2 at the most sepals. The leaves themselves can be knitted in several ways: 1 way: like the petals of a chamomile, (see MK "Chamomile" above) without tearing off the thread immediately, as a single whole with the pedicle. 2 way: Tie 5 leaves separately, sew them. (see MK "Chamomile" above: the leaves of chamomile) Or this: For the decor, I used beads from a daughter's hair tie .
Cock
Like this: Beads are on the stem and with beautiful edges. The legs after sewing are not visible, but the "dewdrops" shine like living ones.