Click For Crochet Abbreviations List
Briefly, baby sling or feeding beads is a jewel for a young mother, which attracts the attention of the child during feeding / wearing in a sling and pursues such goals as
Distract the attention of the child from the hair of the mother and the desire to tug them
To teach a child the simplest concepts: colors / numbers, etc. It is clear that in a month he will not study all shades, but this is an easy way to begin acquaintance with the world around.
In continuation of paragraph 2. - develop not only visual, but also tactile and auditory sensations (through the use of various materials, noisy fillers, etc.)
Mom gets a beautiful and useful accessory, which in some cases can be worn and just as a decoration
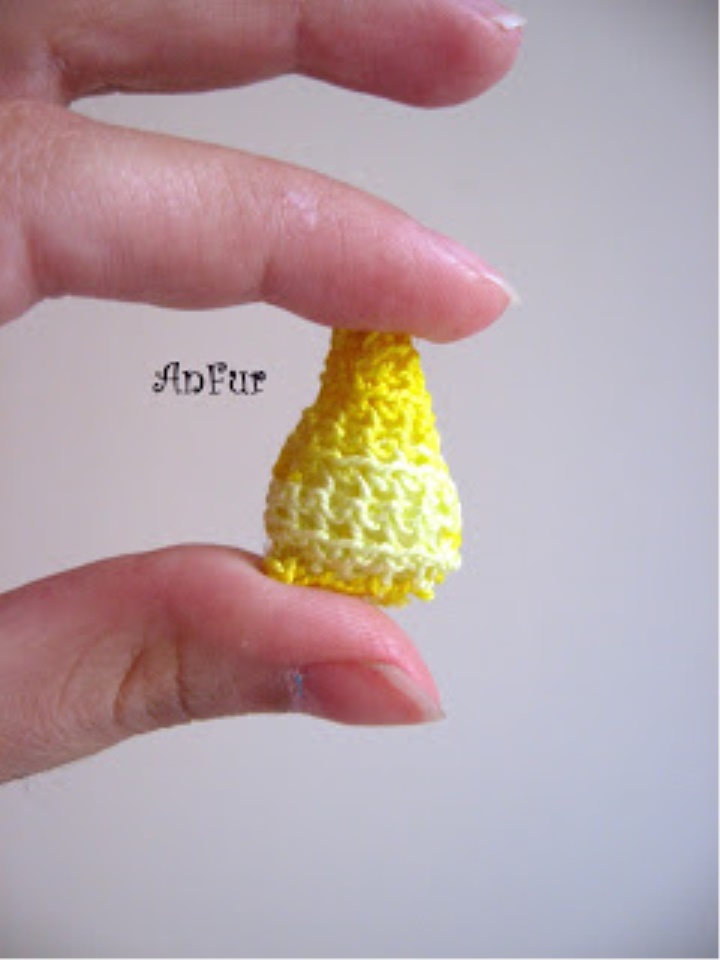
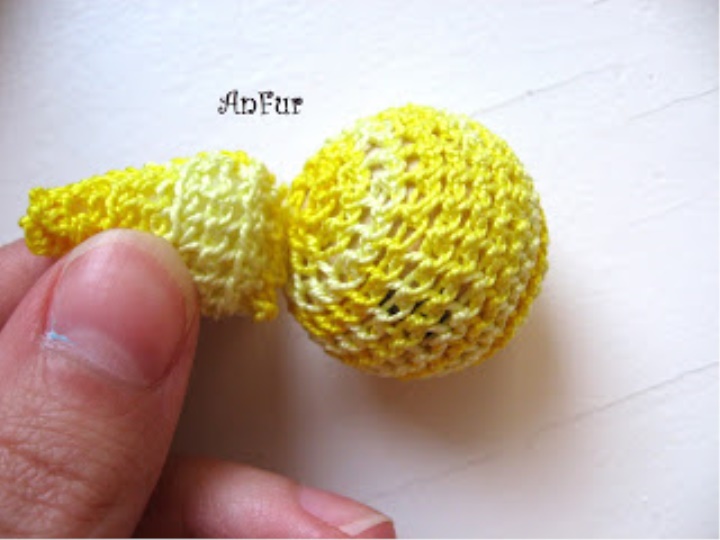
So, the main requirements for sling buses resulting from their purpose: SAFETY, environmental friendliness, resistance to chewing and other contaminants (and the possibility of washing), brightness, interest for the child. A lot has been written on how to make sling buses, I will not repeat. I recently received an order for suspension slings. Those. we made ordinary knitted beads and 3 pendants for them, which can be attached to them or to something else with a tape (by tying). The pendants were astrologically ideological, the dream of the alchemist was the month, the sun and the asterisk. MK by the stars I found at NM, and I will not repeat it, but I’ll tell you how the Sun came up with the month. We will need: a wooden bead (preferably unvarnished), I have a diameter of 3 cm (the size of the sun depends on it), an iris thread and a suitable hook for them (1 ball is enough), a needle, scissors, a filler (I took a synthetic winterizer), a ribbon, a thread color matching tape. Difficulty : 2-3 out of 5 Time : for 2 pendants - 5 hours
Sun :
We tie a bead with an iris (MK is very much about this, I will not repeat it). We fix the threads and hide
We knit a chain of air loops and see what its length should be, so that the bead can cover it at the “equator”. I got 27 loops.
We calculate: I decided that I will have the Sun with five rays, then 27: 5 = 6 (rounded up). This means that the base of each ray of our sun will consist of 6 air loops (important note: the rays will be voluminous and part of the length of the base will go into the volume.) This means that the rays will not be close to each other. more loops).
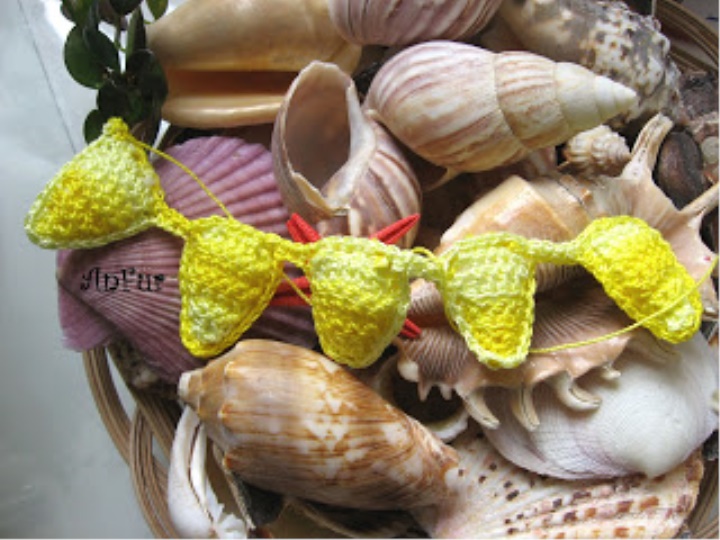
We knit 10 blanks for the rays (we will fill them, so each ray consists of 2 halves) as follows:
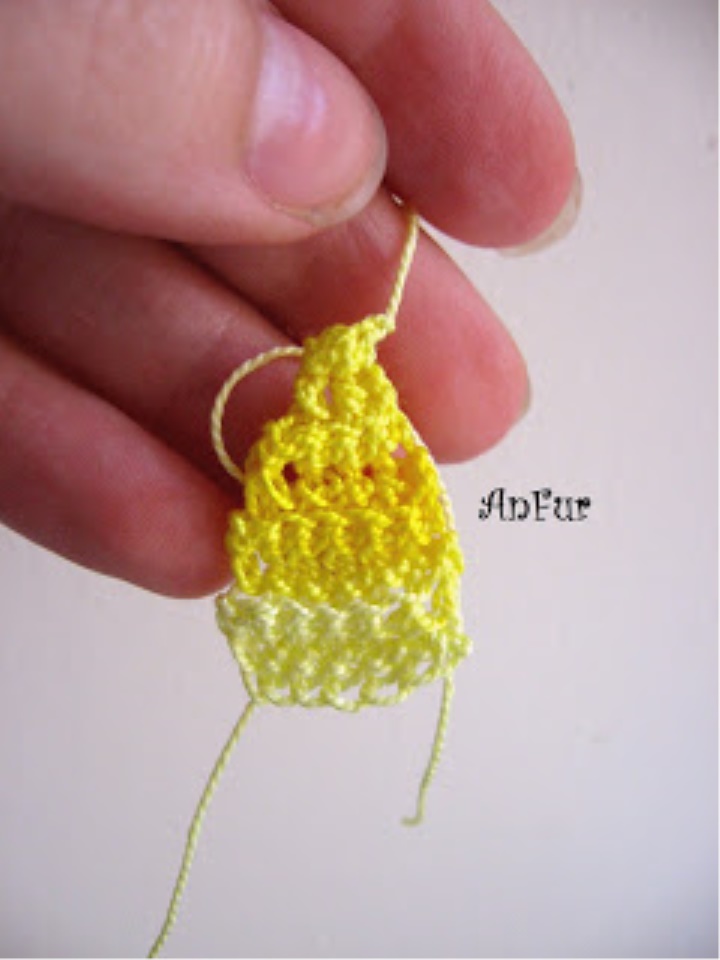
6 bp, a loop for lifting, 4 rows of 6 stbb, then 2 rows of 4 sts. (the last 2 loops on each side are knitted together), then 2 rows of 2 st.b. (extreme 2 loops on each side are knitting together). We tie threads, we don’t cut the ends at the root (ideally, 12 cm of thread remain)
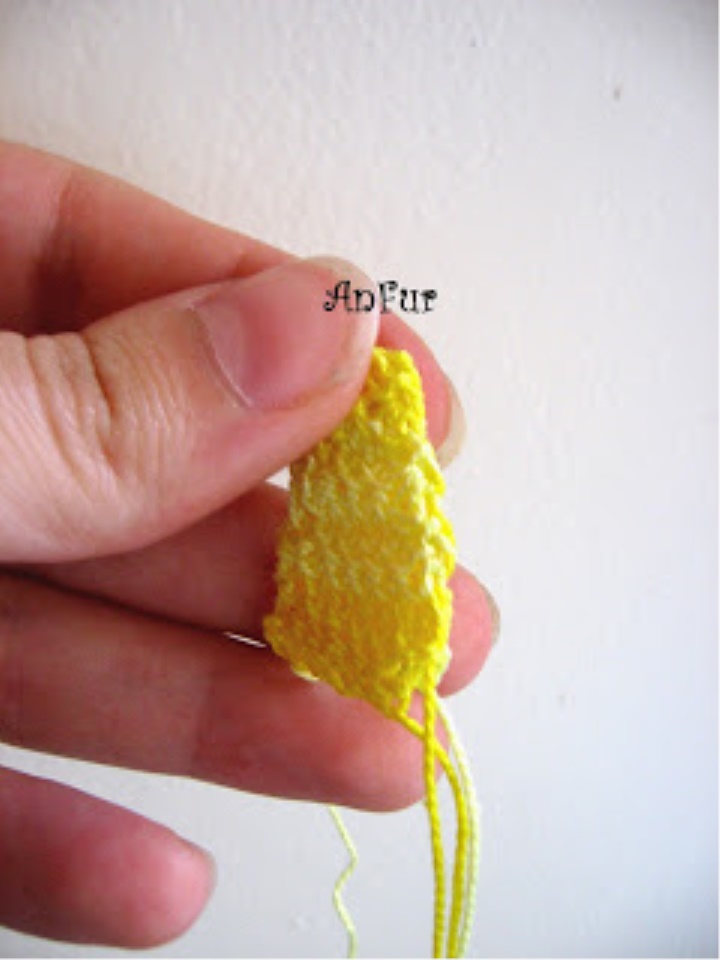
5. Use a needle to sew blanks by 2 (for sewing, I used tails of blanks, so fewer thread connections came out), first from 2 sides, then we fill with filler and sew together, removing all excess remaining tails of the inside. Received 5 rays.
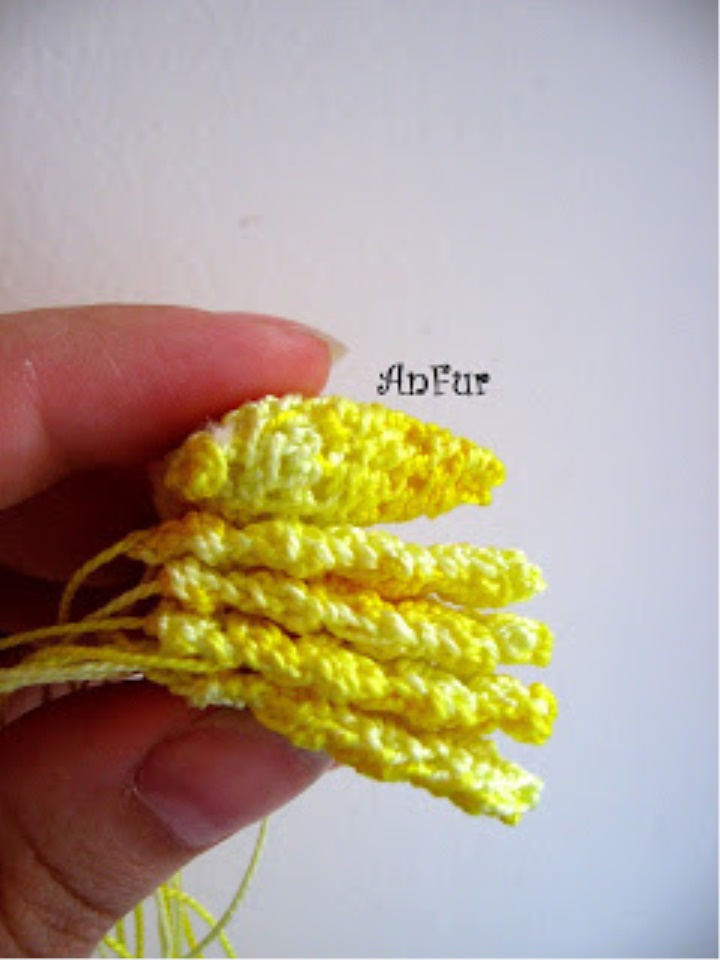
6. To make the product look aesthetic, I tied the rays outside the perimeter of art. b. n as follows: We tie the first beam on 2 sides (except the base), then 2-3 ce, then take and begin to tie the second beam (also 2 sides without base) and so on with all the rays. When we tied the second side of the fifth beam, turn our "garland" and tie the st. b. n all bases of the rays made by air loops between the rays are also tied with art. b. n We cut off the working thread, taking into account that we will sew rays to the sun with it.
7. Implementing your plans in step 6, sew rays to the bead-sun. We do it on conscience, since the baby is only weak in appearance and cannot tear anything away . We fix the threads, mask
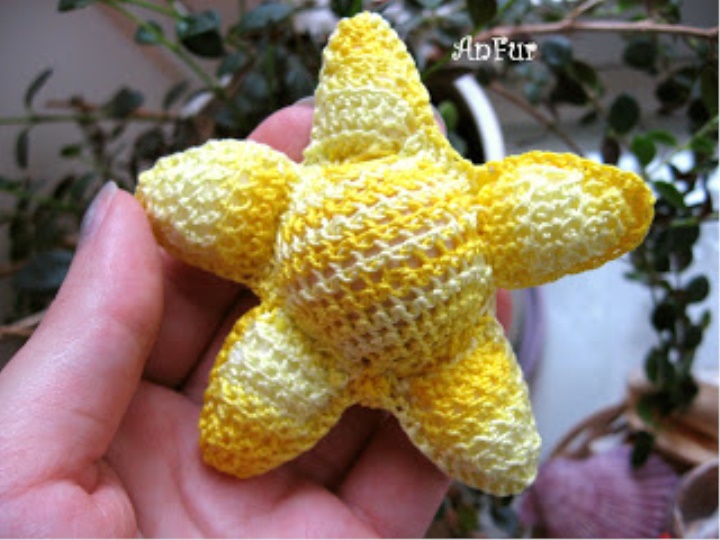
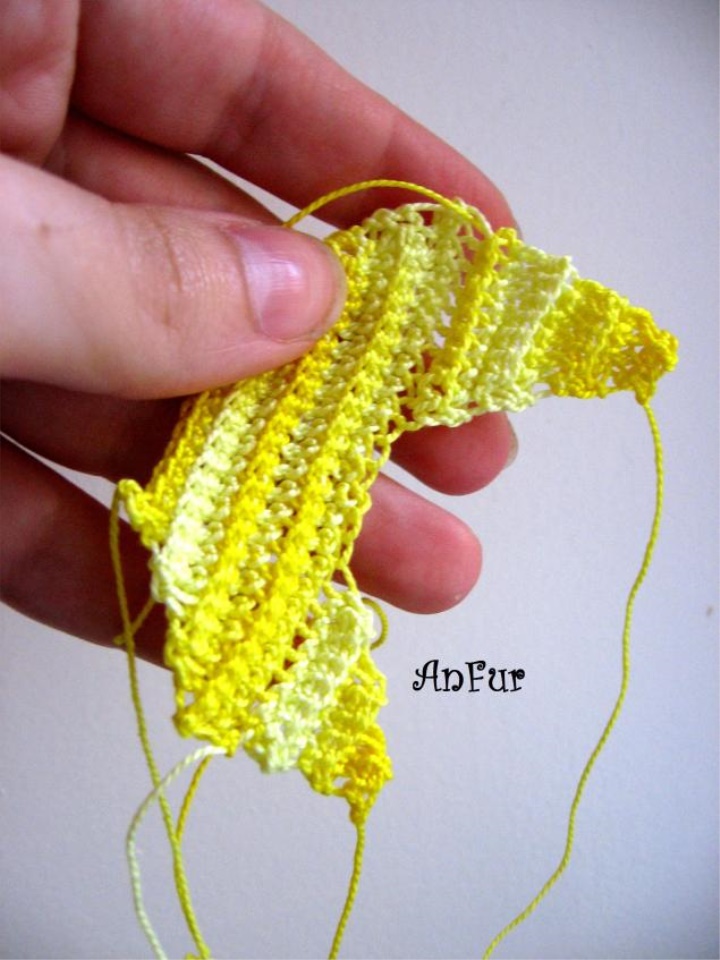
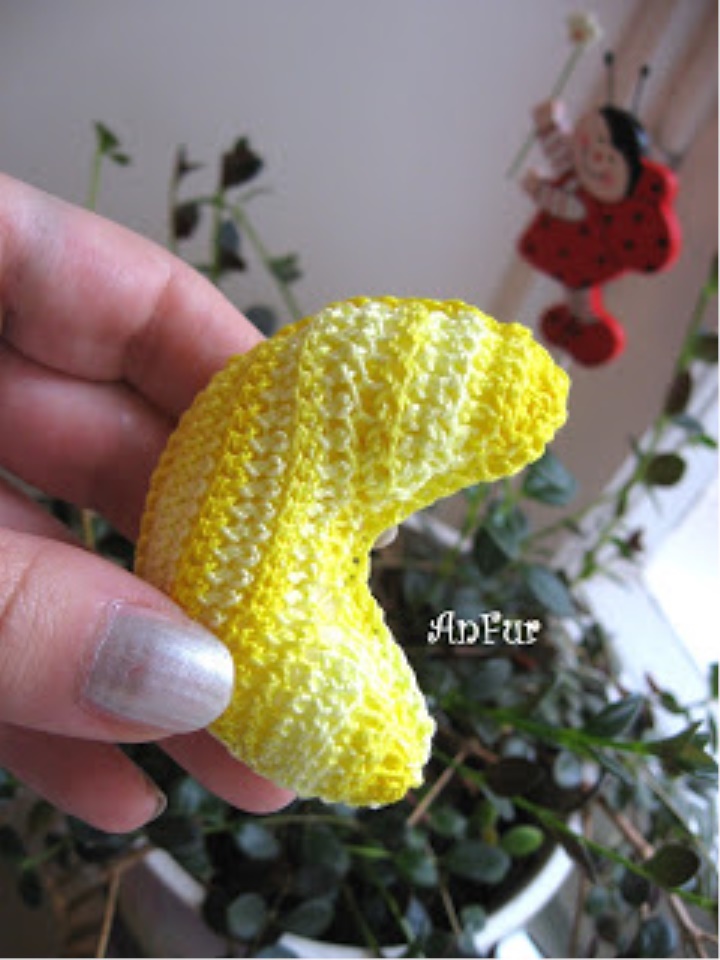
the ends.8. We sew the right color with the thread from the side we think is the wrong one, tape. The Council does not make the area sewn very large. Otherwise, it would be inconvenient to tie the ribbon to beads and other structures of small diameter. Month: 1. We knit 2 blanks as follows: type a chain of 20 points, 1 loop for raising the row, 2 rows of 20 st.Bn. Next, we continue knitting with no crochet, in each row, tying the two extreme loops on each side together. We knit until we have 4 st.b. n. Crop the thread, leaving see 10-12

2. We knit to the blanks the horns of the month — from the wide side — we knit in step 1 of the trapezium from the edge with 9 kn.b. (clinging to the base of the trapezium), a loop for raising the row, then continue knitting, in each row knitting together 2 loops from the edge that is closer to the center of the month. We knit, until there are 2 loops, we fasten the thread and cut. Symmetrically knit the second horn on this canvas (between the horns, thus, there will be 2 loops (20-9 * 2)). The same operation is done with the second workpiece. ATTENTION! The proposed option can be changed according to your wishes - you can knit loops together not in each row, but, for example, through a row - then the forms will be smoother. Similarly, you can vary the size of the month.
3. Sew the edges of the blanks. I did it with knitting threads. Stuffing month in the process of flashing. We remove the inside of all the excess tails of thread, we mask the tails of working sewing threads. 4. Tying the month around the perimeter of art. b. n.
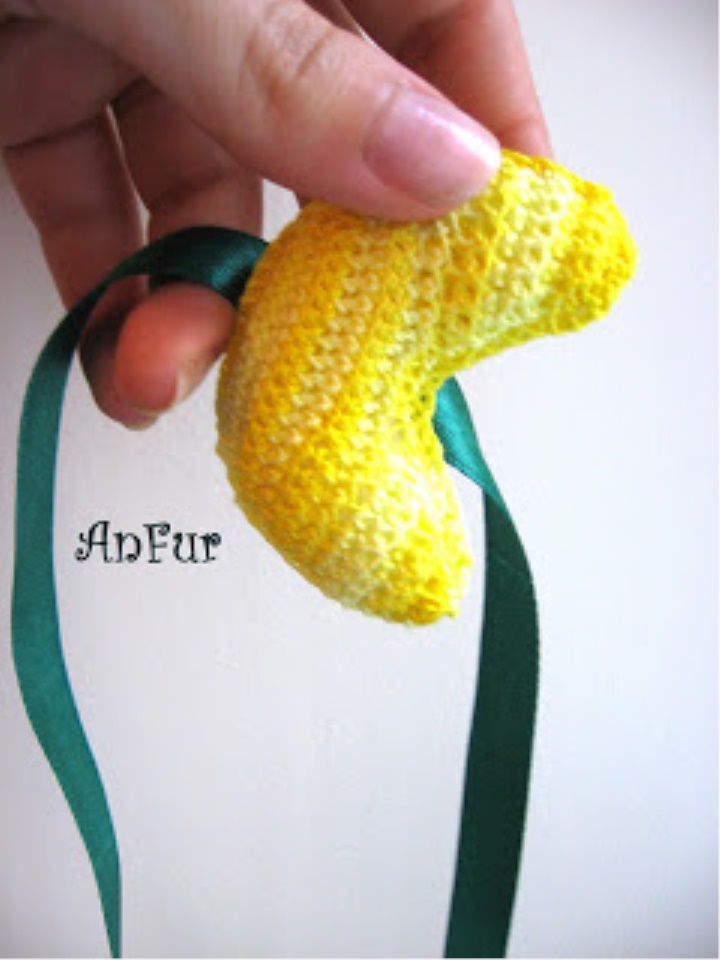
5. Sew on the back of the ribbon (on this point everything is true, previously said for the sun).
... and enjoy the result!