Scissors, needle, glue moment crystal, Termokleevoj gun
Head:
1st row: Make the ring Amigurumi, dial 6 loops
2nd row: (1 PRS, 1p) * 3 times (9)
3-nd row: (2 PRS, 1p) * 3 times (12)
4th row: (3 PRS, 1p) * 3 times (15)
5-th row: (4 PRS, 1p) * 3 times (18)
6th row: (5 prs, 1p) * 3 times (21)
7th row: (21 prs) (21)
8-th row: (6 prs, 1p) * 3 times (24)
9th row: (24 prs) (24)
10th row: (3 PRS, 1p) * 6 times (30)
11th row: (4 PRS, 1p) * 6 times (36)
12th row: (5 prs, 1p) * 6 times (42)
13th row: (6 prs, 1p) * 6 times (48)
14th row: (7 PRS, 1p) * 6 times (54)
15th-18th rows: (54 prs) (54)
19-th row: (7 PRS, 1u) * 6 times (48)
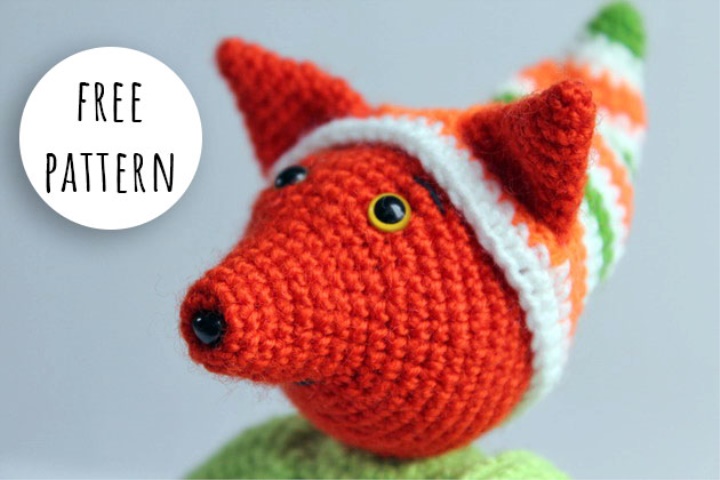
Attach the eyes and nose, start to fill the head with filling.
20-th row: (6 prs, 1u) * 6 times (42)
21-th row: (5 prs, 1u) * 6 times (36)
22nd row: (4 PRS, 1u) * 6 times (30)
23rd Row: (3 PRS, 1u) * 6 times (24)
24th row: (2 prs, 1u) * 6 times (18)
25th Row: (1 prs, 1u) * 6 times (12)
26th row: (1u) * 6 times (6)
Fill the head with a filling through the remaining hole with tweezers. Carefully steal and sew the hole, hide the thread.
Torso:
1st row: Amigurumi Ring 6 loops (6)
2nd row: Raise in Each loop (12)
3rd row: (1 PRS, 1p) * 6 times (18)
4th row: (2 PRS, 1p) * 6 times (24)
5th row: (3 PRS, 1p) * 6 times (30)
6th row: (4 PRS, 1p) * 6 times (36)
7-th row: (5 prs, 1p) * 6 times (42)
8-th row: (6 prs, 1p) * 6 times (48)
9th-10th series: (48 prs) (48)
Change the yarn, start knit jacket.
11th row: 48 PRS for the front hinge wall (48)
12th row: 48 prs for the back walls of the 10-row loops.
The embossed edge of the jacket is obtained. Then continue to knit as usual for both walls of loops.
13th-15th series: (48 prs) (48)
16-th row: (6 prs, 1u) * 6 times (42)
17th-20th series: (42 PRS) (42)
21-th row: (5 prs, 1u) * 6 times (36)
22nd row: (36 prs) (36)
23rd Row: (4 PRS, 1u) * 6 times (30)
24th row: (30 PRS) (30)
25th Row: (3 PRS, 1u) * 6 times (24)
26th row: (24 prs) (24)
27th Row: (2 prs, 1u) * 6 times (18)
Finish knitting 1 ss, break the thread, leaving the long end for the sewing head.
Hands:
1st row: Amigurumi Ring 5 Loops (5)
2nd row: Raise in Each loop (10)
3rd row: (1 PRS, 1p) * 5 times (15)
4th-5th Series: (15 PRS) (15)
Change the color of the yarn.
6th row: (15 prs) (15)
7th row: 15 PRs behind the front hinge wall
8-th row: 15 prs for the back walls of the loops of the 6th row.
It turns out the same rib, as on the edge of the jacket.
9th-18th rows: (15 prs) (15)
Finish knitting 1 cc, leave the thread for sewing.
Feet:
1st row: Amigurumi Ring 6 loops (6)
2nd row: Raise in Each loop (12)
3rd row: (1 PRS, 1p) * 6 times (18)
4th row: (2 PRS, 1p) * 6 times (24)
5th row: (3 PRS, 1p) * 6 times (30)
6th-8th series: (30 PRS) (30)
9-th row: (3 PRS, 1u) * 6 times (24)
10th-11th Series: (24 PRS) (24)
12th row: (2 prs, 1u) * 6 times (18)
13th-14th Series: (18 PRS) (18)
15-th row: (1 prs, 1u) * 6 times (12)
Slightly beat the feet, sew the hole, leave the thread in order to subsequently sew the paws to the torso.
Ears:
1st row: Ring Amigurumi 4 Loops (4)
2nd row: (1 PRS, 1p) * 2 times (6)
3-nd row: (2 PRS, 1p) * 2 times (8)
4-th row: (3 PRS, 1p) * 2 times (10)
5-th row: (4 PRS, 1p) * 2 times (12)
6-th row: (5 prs, 1p) * 2 times (14)
7-th row: (6 prs, 1p) * 2 times (16)
8-th row: (7 PRS, 1p) * 2 times (18)
9-th row: (8 PRS, 1p) * 2 times (20)
10-th row: (9 PRS, 1p) * 2 times (22)
Leave the thread for the sewing part.
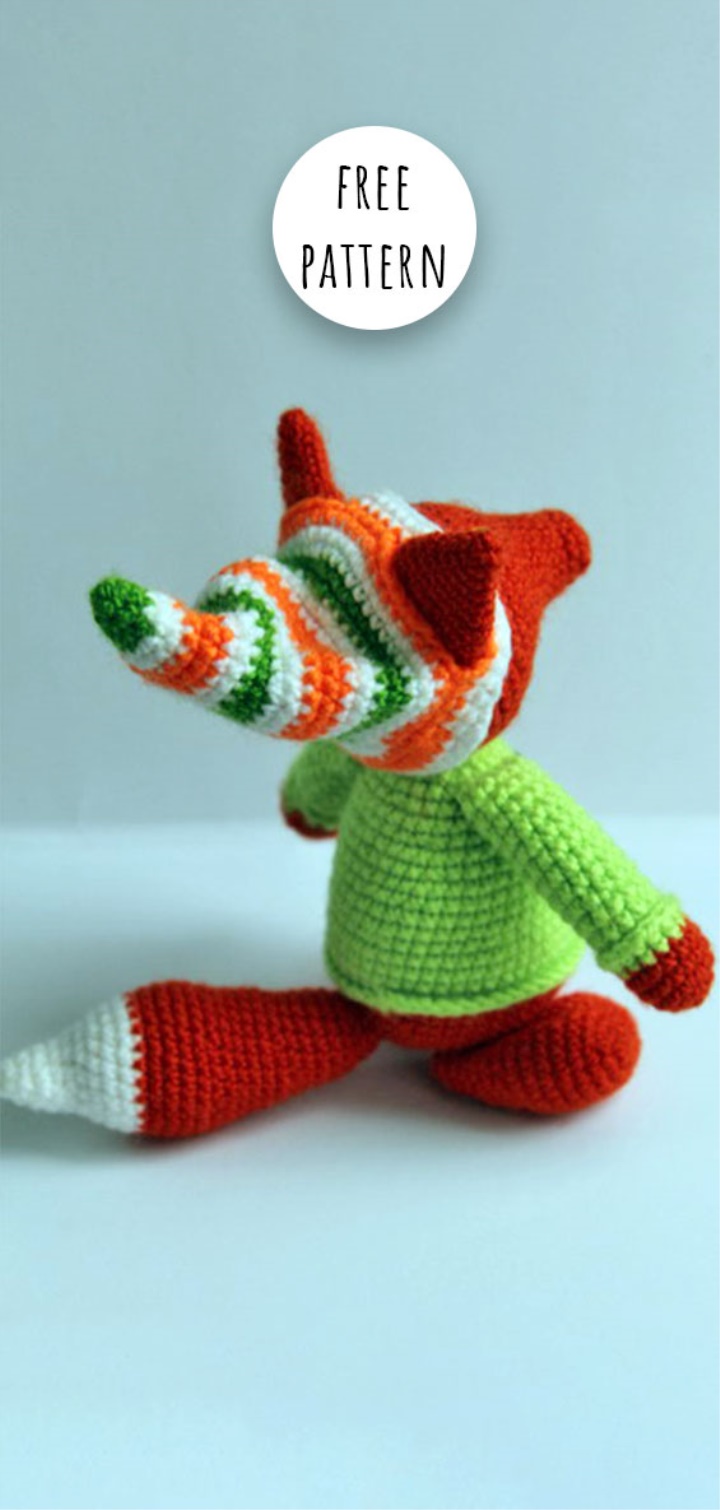
Tail:
We start knitting with white yarn.
1st row: Ring Amigurumi 4 Loops (4)
2nd row: (1 PRS, 1p) * 2 times (6)
3-nd row: (2 PRS, 1p) * 2 times (8)
4-th row: (3 PRS, 1p) * 2 times (10)
5-th row: (4 PRS, 1p) * 2 times (12)
6th row: (2 PRS, 1p) * 4 times (16)
7-th row: (3 PRS, 1p) * 4 times (20)
8-th row: (4 PRS, 1p) * 4 times (24)
9th row: (24 prs) (24)
Change the yarn to red.
10th row: (24 prs) (24)
11th row: (3 PRS, 1p) * 6 times (30)
12th-14th Series: (30 PRS) (30)
15-th row: (3 PRS, 1u) * 6 times (24)
16th-18th rows: (24 prs) (24)
19-th row: (2 prs, 1u) * 6 times (18)
20th-23rd Series: (18 PRS) (18)
24th row: (1 prs, 1u) * 6 times (12)
25th Row: (12 prs) (12)
Leave the thread for the sewing part.
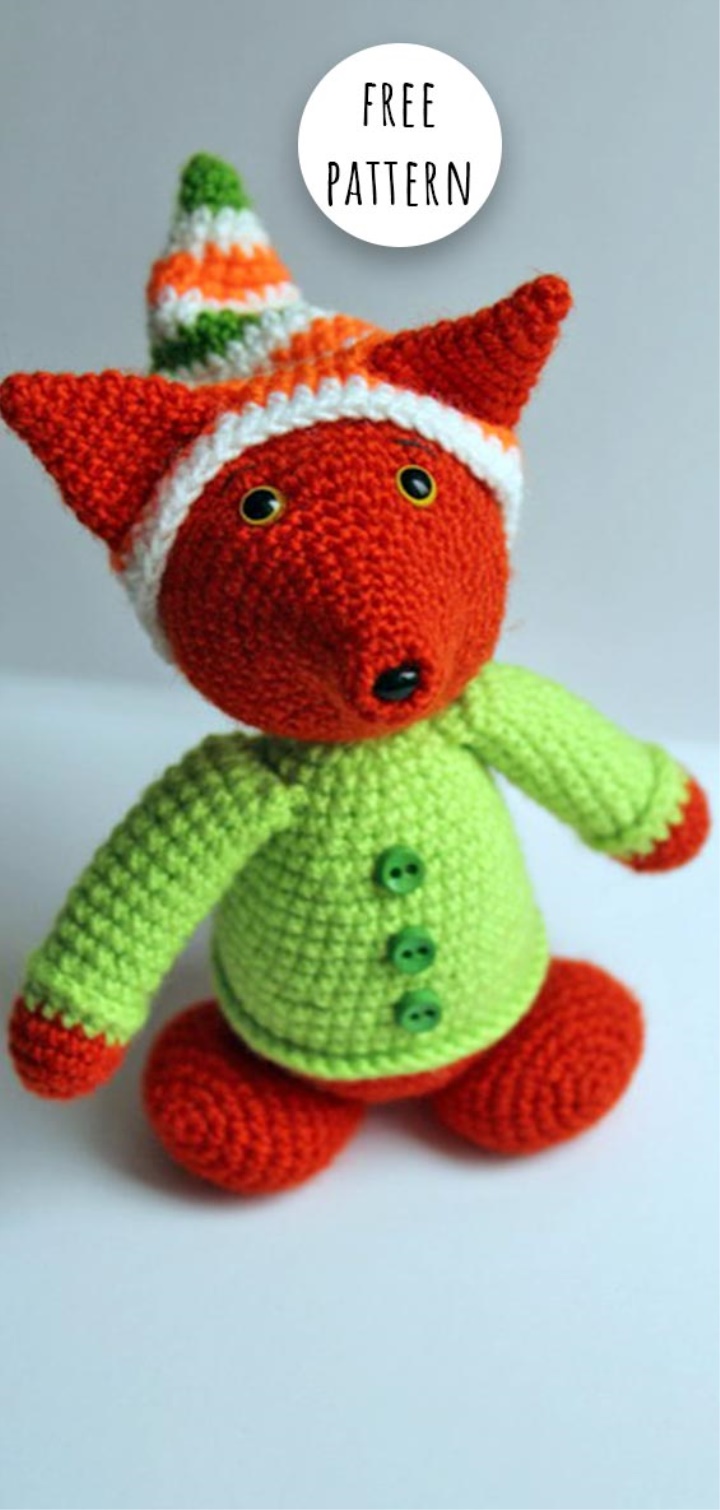
Hat:
If you want the cap to be striped, change the color of the yarn every 2 rows. The CAP should be knit after assembling the fox to be able to measure the CAP and properly position the holes under the ears!
1st row: Ring Amigurumi 4 Loops (4)
2nd row: (1 PRS, 1p) * 2 times (6)
3-nd row: (2 PRS, 1p) * 2 times (8)
4-th row: (3 PRS, 1p) * 2 times (10)
5-th row: (4 PRS, 1p) * 2 times (12)
6-th row: (5 prs, 1p) * 2 times (14)
7-th row: (6 prs, 1p) * 2 times (16)
8-th row: (7 PRS, 1p) * 2 times (18)
9-th row: (8 PRS, 1p) * 2 times (20)
10-th row: (9 PRS, 1p) * 2 times (22)
We continue to knit with two raises in a row, until the hat will not work without problems to pull on the head. I unfortunately lost the outline of the scheme of caps, but to knit rows with raises ceased approximately on girth in 48 loops.
In order to make slits under the ears, it is necessary to link several PRs in a row, then a chain of 10 air loops, further to count in the last row of 10 loops and to continue to knit in the 11th on the account. That is, it turns out as though a chain attached to the edge of the Vnatyag cap. Provjazav a few PRS (pre-measure the distance between the ears) and make another loop of 10 VP. Well then knit the rows as usual, using chains of air loops. In the place where you knitted the chain, there will be holes under the ears of the fox.
Assembly.
Sew the head of the fox to the clogged torso with the thread remaining at the knitting of the body. Sew the ears to the head. The upper paws are filled with a filler, fold and sew ends, then we fasten them to a trunk. Bottom Paws sew so that all filler was in the front part of paws, so the toy will be steady to stand. We are hammering and sew a tail.
Remains to decorate the fox. I glued with the help of Termopistoleta three mini-buttons him on the jacket, and the hat to decorate did not become, just glued her glue the moment crystal to the head.