knit according to the scheme of the ball, that is, we pick up 2 cn, then in the first crochet we bind 6 stb, then in each footprint. row we add evenly to 6 n, when the circle reaches the size you need, we knit right up to the required height, then we close the ball, i.e. in each row, we evenly reduce 6 loops, when the hole is 3-4 cm, we fill the ball half filler, put the container with beads / beads, then fill it to the end and close it further.
knit stb, according to the cone pattern, I will write approximately: 2in, in the 5th we sew 5-6p, then in each second we add 4 loops. See how it turns out, here you can vary as you please.
knit stb, start with the circle, when you reach the desired diameter, knit directly behind the back wall of the loop, another row straight, start to reduce again behind the back wall of the loop, the remaining rows with decrements knit usually Lopasti
: here I'd better draw a rough outline, , see how long you are satisfied, I will draw a scheme for 15 Vp:

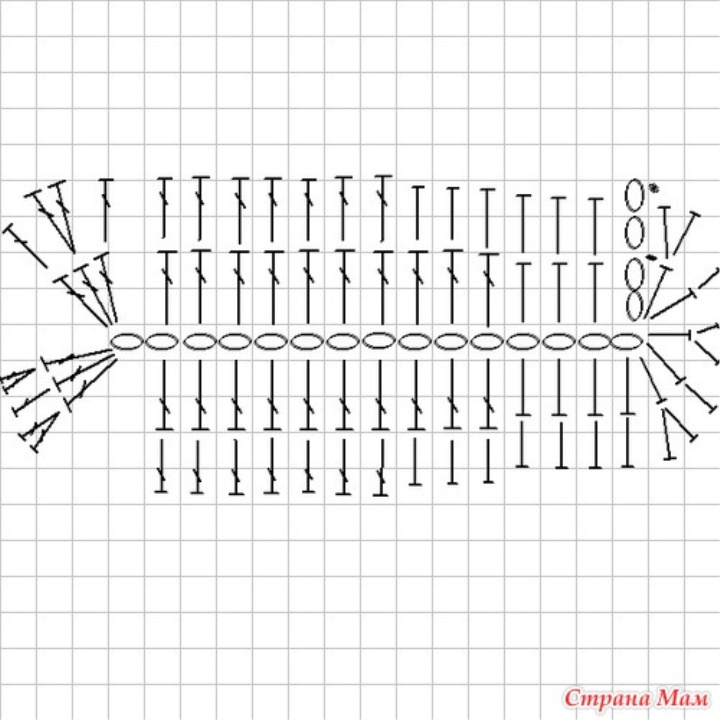
For one blade, we knit 2 parts.
From above, the button for fastening the blade as well as the wheel, we only knit the stb, for both walls of the loop.
Window: a
chain of the right length, now we untangle the form, knit sts, first in each row from each edge (2 st of sleep in one loop), when we reach the desired width, we knit 3-4 rows straight, then in each row from each edge we make a decrease (2 st together), we knit to the desired width, we tie the whole mold around the circle st bn , then still bb already a string of contrasting color, at the corners we sew 3 st bn in one loop.
Gathering ka: we
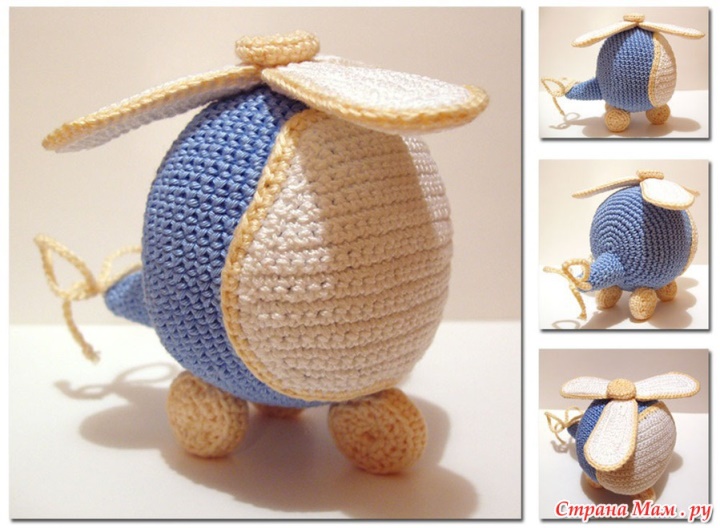
sew 2 details of one blade together along a circle with a string of contrasting color, laying rustling sachets between the blades
We sew the tail, we sew it to the cabin, we sew the window to the cabin, we sew the chain to the cabin, we knit the chain from the bottom, we pirish it to the tip of the tail and we tie the bow. We sew it on the knitted
circle, the size of the mug does not exceed the "button" from above, then we sew the blades and the button on the cab, several times with one thread, so that the blades rotate. The
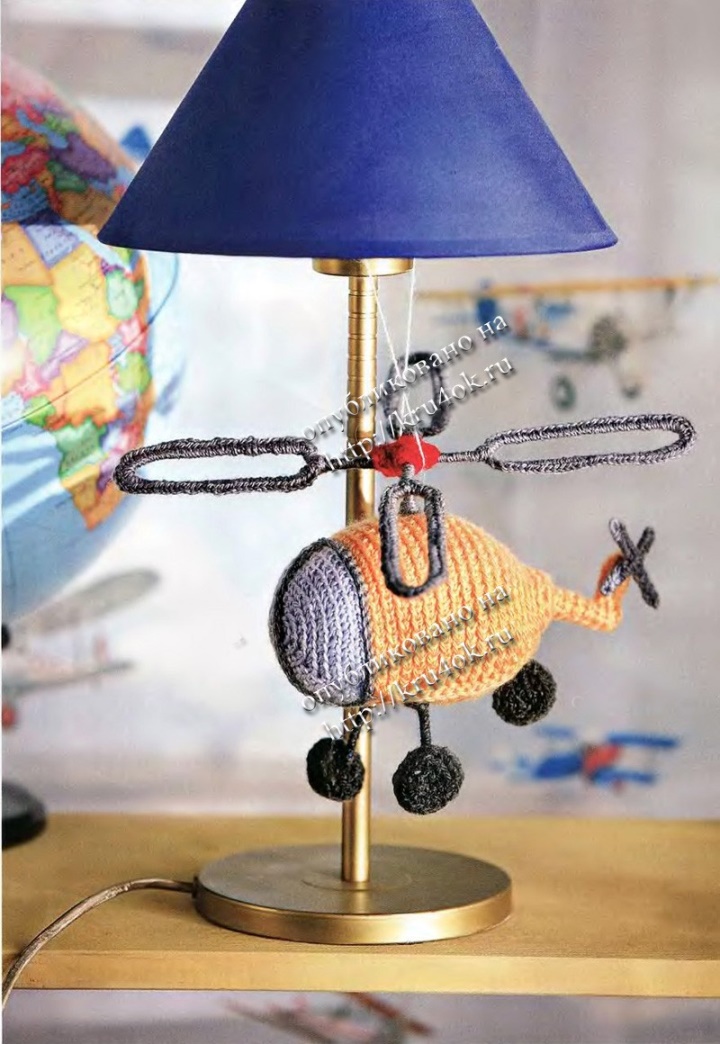
helicopter is ready!
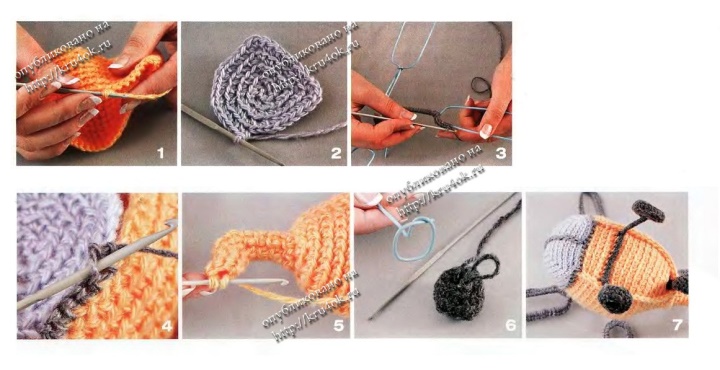
You will need the following materials: thread for knitting of different colors, thick wire in braid and sintepon.
Tools: nippers, round nose pliers, hook No. 3
1. Start knitting the helicopter from the main body - the hull. Type a chain of 40-45 air hinges, close it in a ring and knit in a circle the bars without an on-kida, to make a wide ring. After a while, start decreasing the number of columns so that the part takes an "egg-like" shape.
2. Tie the "glass": dial 4 air loops, close the chain in a ring and continue to knit in a circle, adding posts to make the workpiece flat. Approximately from the third row in any place, from the one loop of the base, tie three bars without a crochet. Spray two more bars, then again, from the same loop of the base, you will remove three bars without a crochet. Continue to knit a flat workpiece, each time tying three more columns from the middle of the three stacked columns without a crochet. The diameter of the workpiece must coincide with the diameter of the wide part of the helicopter body. The last two rows are tied without adding.
3. Using round-nosed pliers and nippers, make a rigid wire from the propeller frame. From the point of connecting the blades, wind a part of the frame with a thread, then tie the blade with the pillars without the crochet, using the wire of the frame as the loop of the base. "Bypassing" the blade along the perimeter, go back to the point of connecting the blades, wrapping the area already wrapped in thread of the frame again. Proceed to the next blade without breaking the thread. Screw the finished screw inside the helicopter housing, passing the wire through the warp cloth. From the inside, form a "petal" from the wire, sew them. Fill the body with the synthepone.
4. Taking a string of contrasting color, connect the body of the helicopter with the "glass", "sewing" the details with columns without a crochet. Before you finish the connection, report the sintepon in the toy so that it is packed tightly enough.
5. Tie the tail of the toy - for this, from the narrow part of the body, circle about 7 pillars and tie about 7 rows. Then make a decrease and complete the horizontal part of the tail. Without cutting the thread, type in a circle 6 columns without a crochet to tie off the vertical part of the tail. Make a skeleton for the small tail propeller, tie it and attach it to the tail part.
6. Tie the wheels - small (proportional to the body of the helicopter) balls. From the wire, make a chassis frame with a fastener, insert the frame into the bonded workpiece and secure it. To make the wheel flat, sew the workpiece through and through. Fasten the thread tightly.
7. Tie the bottom of the helicopter body with a chain of columns without a crochet to give it a shape. Fix the chassis as shown in the picture, "tie" them to the bottom with a hook.