Click For Crochet Abbreviations List
This time I have enough thin threads, the owl turned out small, but very soft and pleasant to the touch. For making such an owl you will need:
Thread (I have yarn Adelia "Natali" acrylic 100%)
Pair of eyes (or a pair of chance with 4 holes)
Little White felt
Contrasting thin threads
Sinelnaja Wire (This is a wire, the artificial fur)
Glue
Filler
Hook № 1.5, needle, scissors
I recently love the combination of yellow and violet colors in knitting toys, so this time I chose purple yarn and for the contrast of the owl will be yellow paws and drawing on the chest.
Knit head + Torso:
1st row: Make the ring Amigurumi, dial 6 loops (6)
2nd row: Raise in Each loop (12)
3rd row: (1 PRS, 1p) * 6 times (18)
4th row: (2 PRS, 1p) * 6 times (24)
5th row: (3 PRS, 1p) * 6 times (30)
6th row: (4 PRS, 1p) * 6 times (36)
7-th row: (5 prs, 1p) * 6 times (42)
8-th row: (6 prs, 1p) * 6 times (48)
9-th row-13th row: 48 PRS (48)
14th row: (7 PRS, 1p) * 6 times (54)
15-th row: (8 PRS, 1p) * 6 times (60)
16-th row: (9 PRS, 1p) * 6 times (66)
17th Row-20th row: 66 PRS (66)
21-th row: (9 prs, 1u) * 6 times (60)
22nd row: (8 prs, 1u) * 6 times (54)
23rd Row: (7 PRS, 1u) * 6 times (48)
24th row: (6 prs, 1u) * 6 times (42)
25th Row: (5 prs, 1u) * 6 times (36)
26th row: (4 PRS, 1u) * 6 times (30)
27th Row: (3 PRS, 1u) * 6 times (24)
28th Row: (2 prs, 1u) * 6 times (18)
29th row: (1 prs, 1u) * 6 times (12)
Fill the part with the filler, pull and carefully sew the hole, hide the thread
Wings:
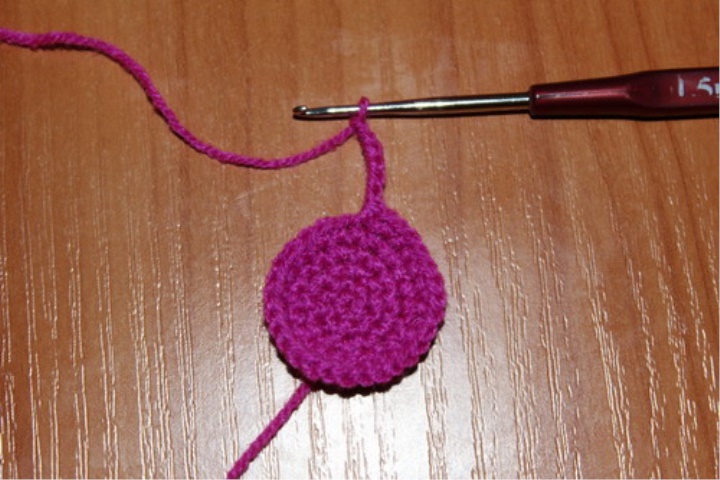
1st row: Make the ring Amigurumi, dial 6 loops (6)
2nd row: Raise in Each loop (12)
3rd row: (1 PRS, 1p) * 6 times (18)
4th row: (2 PRS, 1p) * 6 times (24)
5th row: (3 PRS, 1p) * 6 times (30)
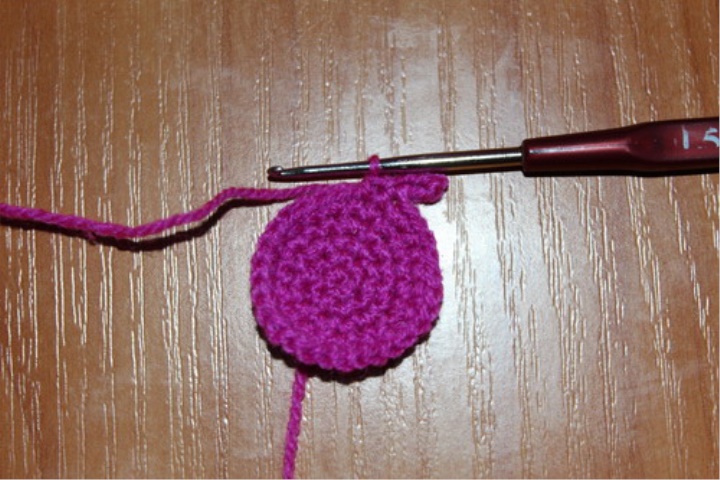
Next:
We make 1 PRS, and we dial a chain of 6 air loops.
After that we make 1 connecting column in the same loop from which our chain of air loops began. The result is a small loop that goes from the wing.
Knit through the next loop of the series 1 PRS, and dial a chain of 8 air loops. Also lock 1 connecting column.
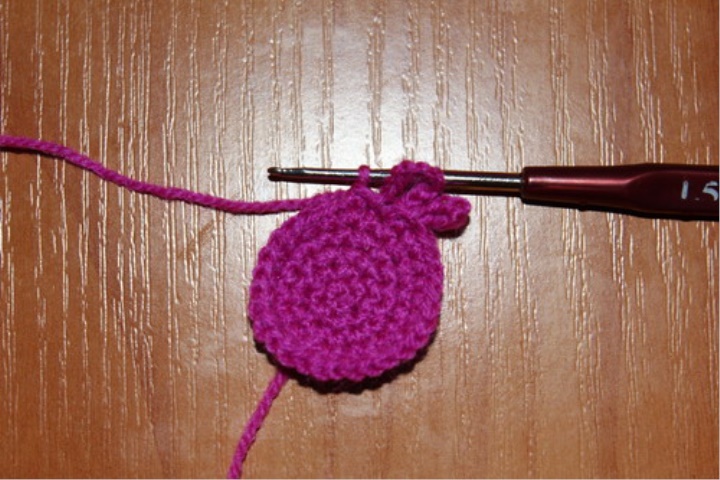
Repeat the process 2 more times, making chains of 10 air loops.
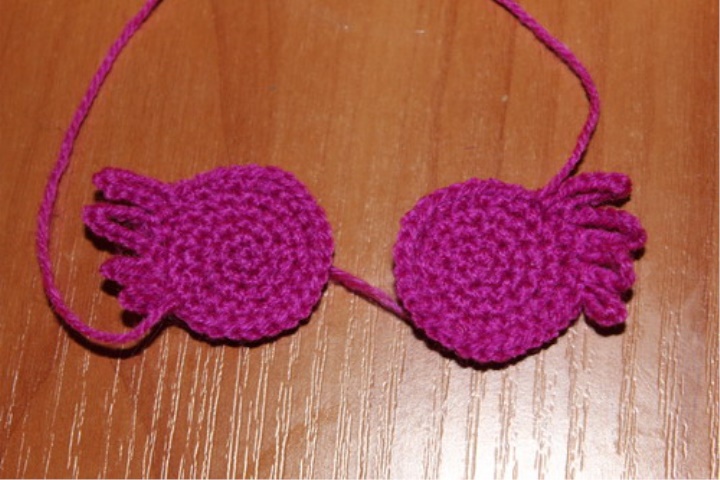
Finishing knitting details with a single connecting column, leave a long thread to sew the wing to the torso.
The basis of the second wing of Fit is similar, but "feathers" do in reverse order – first two "feathers" on 10 air loops, then 8 and in the end 6. Thus, 2 symmetrical wings are obtained.
And it remains to tie ears.
Ears:
1st row: Make the ring Amigurumi, dial 6 loops (6)
2nd row: (1 PRS, 1p) * 3 times (9)
Then knit 12 PRS, finishing knitting 1 connecting column.
That's how the ready details of the owl look.
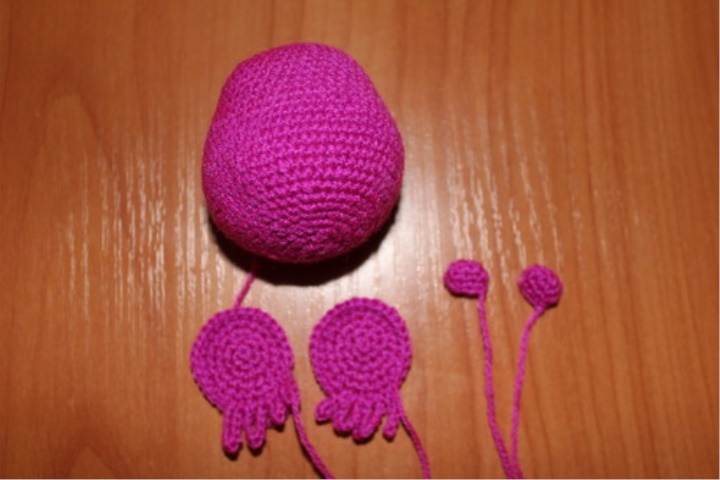
Start assembling the toy.
Sew ears and wings, under the wings add a little filler for relief.
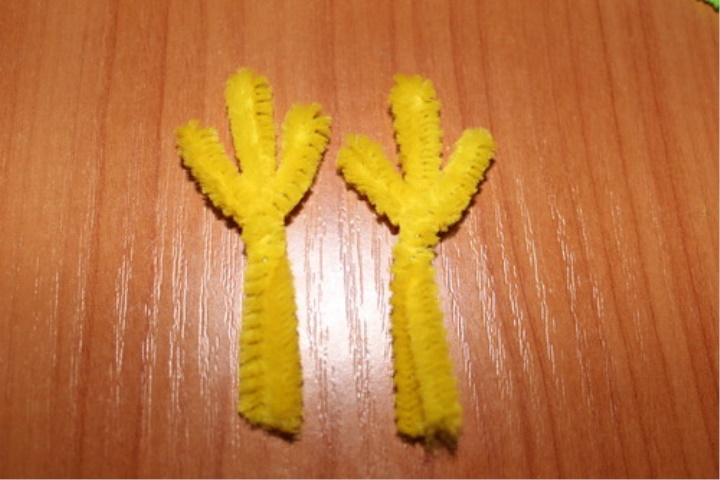
From a wire make 2 paws, leaving at them a basis a couple of centimeters that it was possible to stick them in a toy. I took this wire from a set for children's creativity, but it is sold and separately in Beadwoven stores)
We cut out small circles from felt. If you have eyes for a toy with a safe fastening, it is necessary to make a hole in the felt in advance, so as not to crush it with eye fastening.
Glued felt, strong eyes.
Embroider the beak.
Embroider on the chest drawing with contrasting threads.
Uh! The Owl is ready!