Click For Crochet Abbreviations List
Let your mobile phone turn into a fun giraffe in the summer. Spotted, with ears and horns. Such a giraffe will not be for anyone!
Knitted cover for a mobile phone with a bulk application. Internal button.
Materials: wool (or cotton) brick-brown, orange, white, black thread for
embroidery, button, a small piece of green yarn, "grass", button.
The cover is crocheted 1.8 mm.
Master Class:
Legend:
VP - air loop
SBN - column without a crochet
CIH - column with 1 crochet
C2H - column with 2 nakidami
* ... * - rapport
1. We knit the basis . The principle of knitting (description) of the cover can be found here .
2. Head. The basis.
We knit a chain of 10 EIs. We tie this chain around the RLS. Next, we knit the RLS in a circle, making increments at the extreme points of the detail. Additions: we untype from 1 column of the previous row 2 RLS.
1 p. (brown): RLS, at the extreme points, we add 1 SCN
2 r: SBN, at the extreme points we add 1 SCN
3 r: SBN, at the extreme points we add 2 scs
4 r: SBN, at the extreme points we add 2 RV
5 - 7 r .: SBN
8 r .: SBN, we subtract at the extreme points of 1 RVN (we tie 2 columns together)
9 r .: SBN
10 - 12 r.: RLS, we subtract 1 RLS at the extreme points (we are tying 2 columns together)
13 r .: SBN
14 r .: SBN, we subtract at the extreme points of 1 RLS (we tie 2 bells together)
15 r. (orange): RLS, we subtract at the outermost points of 1 RV (we tie 2 columns together)
16 - 18 r .: SBN, we subtract 1 RLS in the extreme points (we tie 2 columns together)
19 р .: СБН
20 r .: SBN, we subtract at the extreme points of 1 RLS (we tie two bars together).
We insert a small piece of green yarn - "grass" », sew the remaining hole.
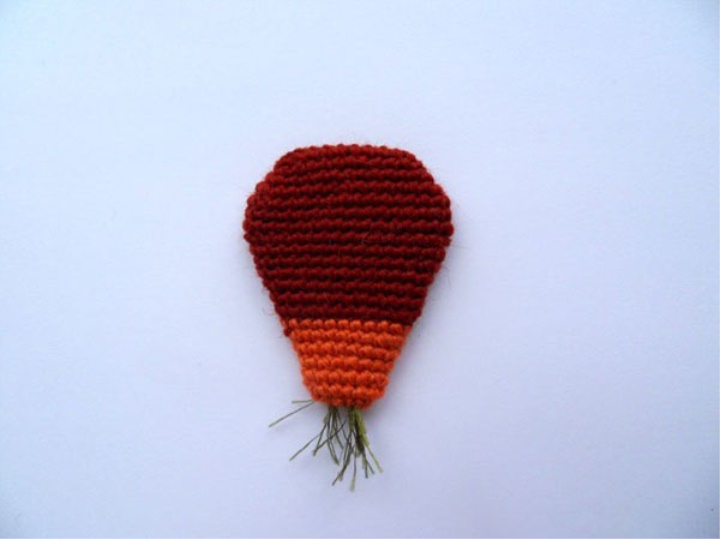
If you want to make the head more voluminous, put some filler in during the mating process.
3. Ears (2 parts):
We knit a chain of 7 VP, rotation, СБН, С1Н, С2Н, С2Н, С2Н, СНН
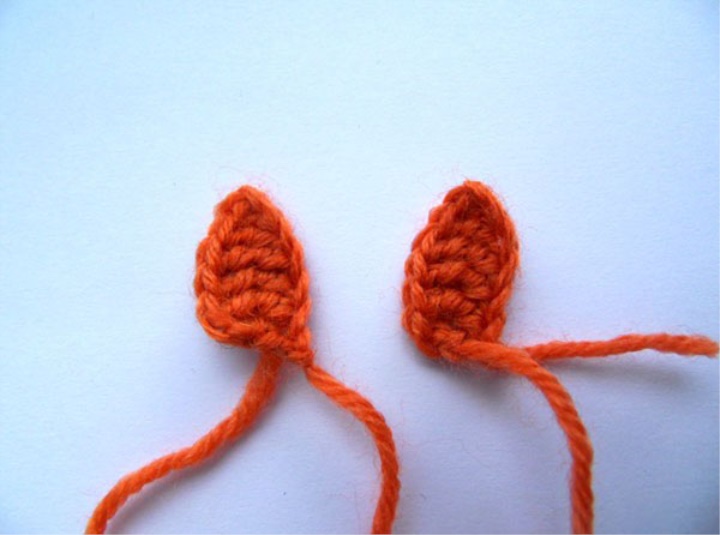
If the yarn is thin and the ears are too small, tie them around the RLS circle.
4. Horns (2 parts):
We close into the ring 3 VP. We knit in a circle.
1 р .: * 2 СБН * - 3 times = (6)
2 р .: СБН = (6)
3 р. (change the color): * 2 loops together (decrease), 1 scs * - 2 times = (4)
4 p. and further: RLS.
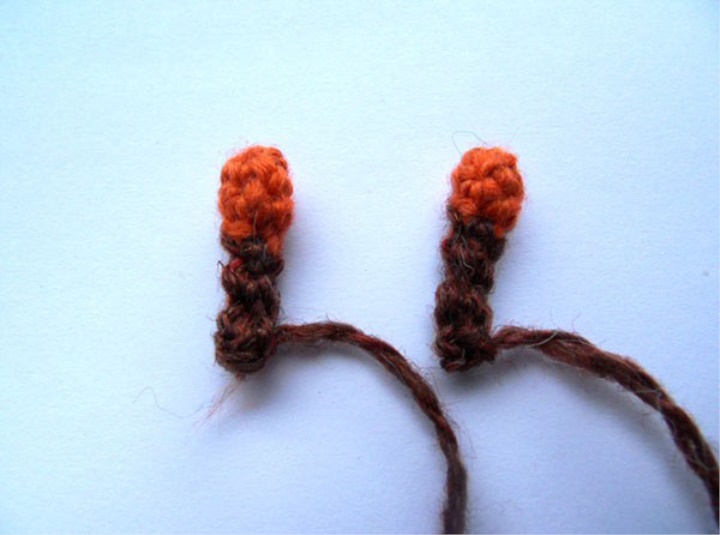
The length of the horns determine for yourself, by measuring them with the ears.
5. Eyes (2 parts):
Close the 4 VP in the ring. We knit in a circle.
1 r .: 2 sc in each loop = (8)
2 r .: * sc, 2 sc in the loop of the previous row * - 4 times = (12)
3 r .: SBN = (12)
4 r .: * 2 loops together (decrease) * - 6 times = (6)
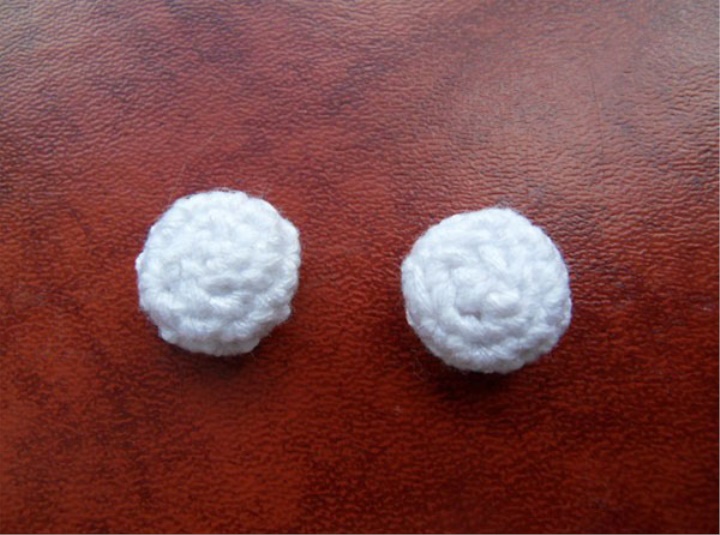
From the wrong side, put a little filler in the remaining hole (cotton wool, sintepon).
6. Assembly and decoration of the head.
Sew to the head of the ears, horns, eyes. In front of your eyes, embroider with black threads the pupils (you can sew beads, beads), you can use ready-made eyes for toys. Embroider your nostrils.
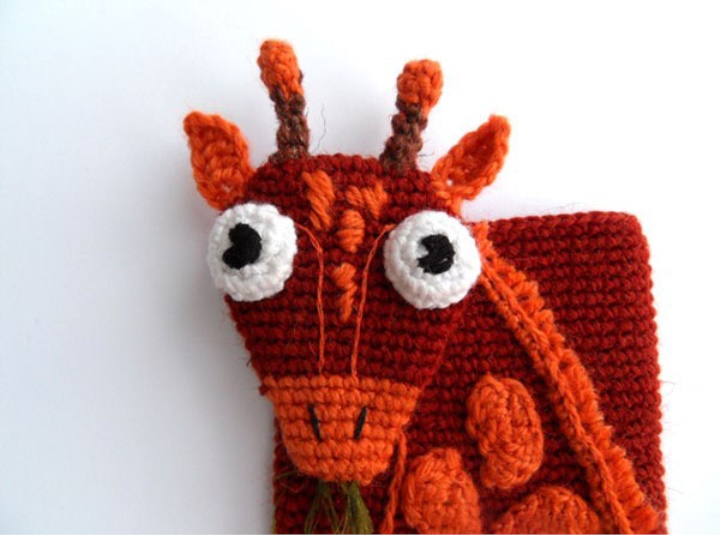
You can additionally embroider a few "spots", and also emphasize the elongated silhouette of the muzzle with vertical strips (stem stitch).
Sew our head to the base of the cover.
7. Feet (4 pieces).
We close 3 VP in the ring.
1 r .: 7 sc in the center of the ring = (7)
2 r .: * sc, 2 sc in one loop * - 3 times, sc = 10 (10)
3 r: * sc, 2 scs in one loop * - 5 times = (15)
4 р .: * 2 loops together, СБН * - 5 times = (10)
5 р. (other color): * 2 loops together, СБН * - 3 times, СБН = (7)
6 р. and further: RLS.
The length of the legs you choose on your own.
7.
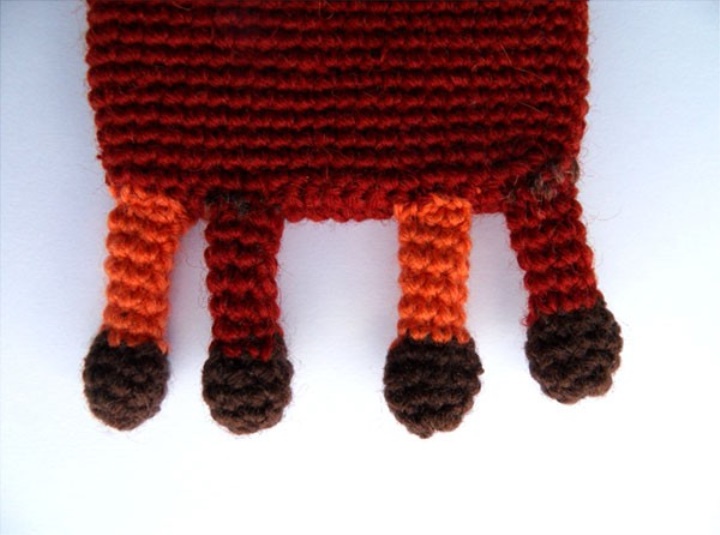
You can make your feet multi-colored. Of course, this is not entirely realistic, but fun!
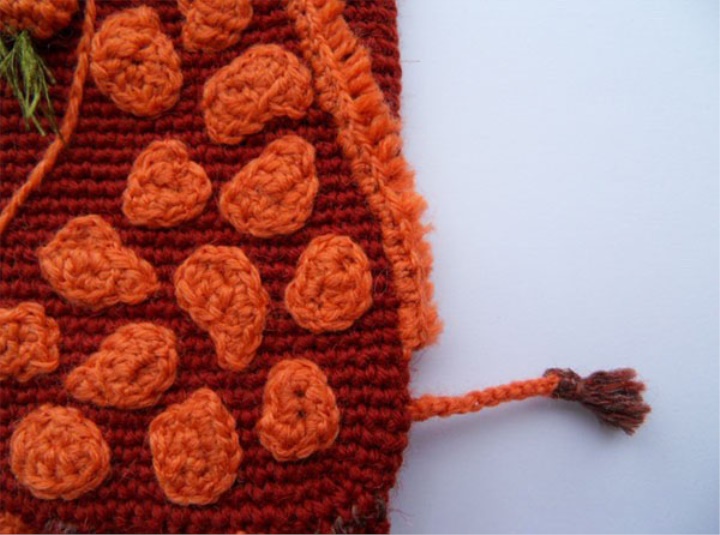
8. "Spots" (7-13 items)
Spots knit fantasically, without a certain pattern. Combine RLS and CIH. You can also sew stains, cut from felt, knitted fabric, dense fabric.
8.
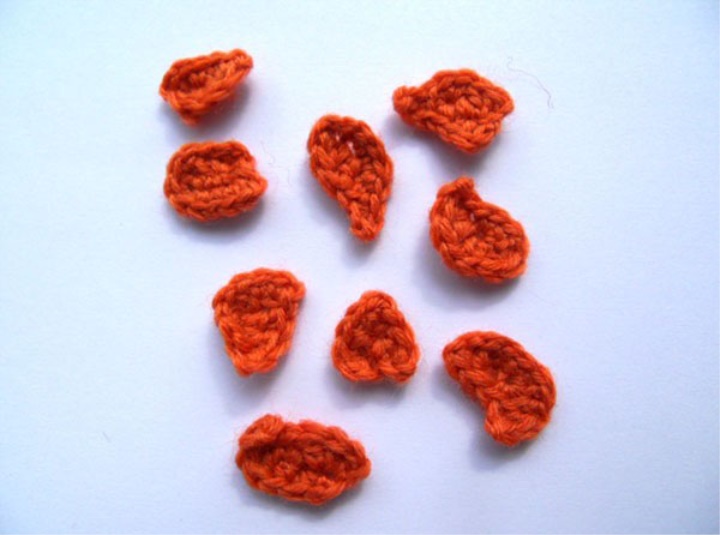
"Spots" can be of different sizes, different shapes - this is even welcomed.
Sew stains to the base.
9. Tail and mane.
Tie the tail to the side. This is a chain of VP, at the end we make a brush of yarn of a different color.
We make the mane like an ordinary fringe, for reliability, we sew the mane along the entire length with a stalk seam.
9.
At the end of the work, the mane should be cut short enough.
10.
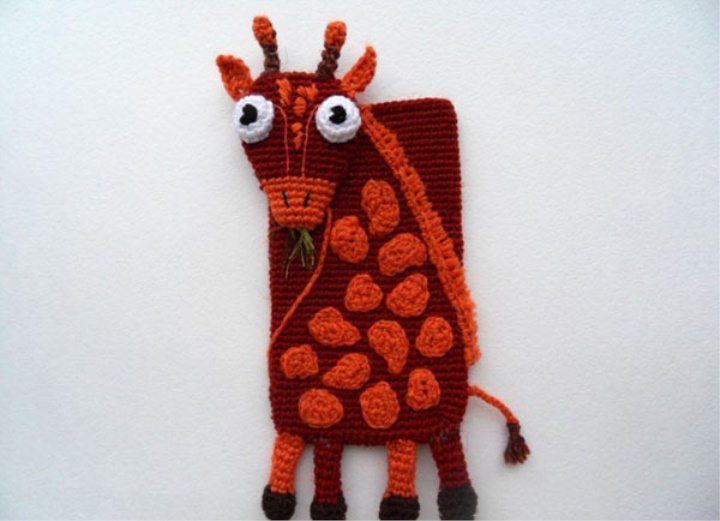
The final touch is that we embroider the neck bend with the stalk seam. Sew the inner button.