We will knit the character of the popular game "Cut the rope" - frog Om Nom (or
Am Nyama) and his candy on a string. As a result, we get a comfortable bed -
casket and a sea of positive.
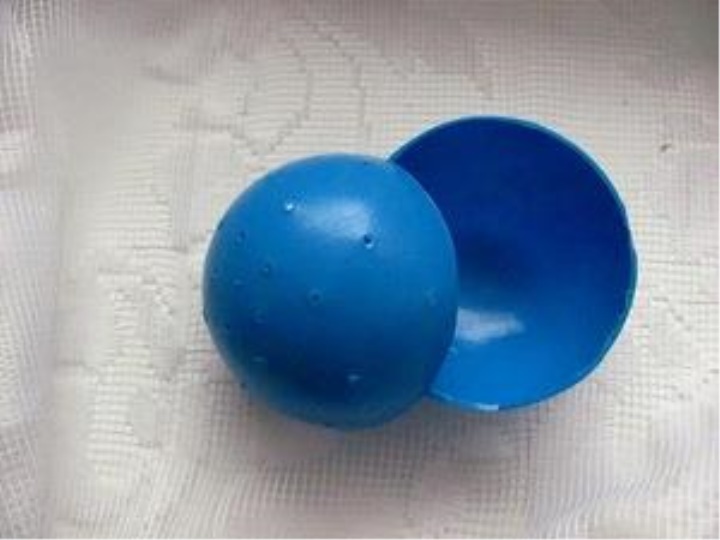
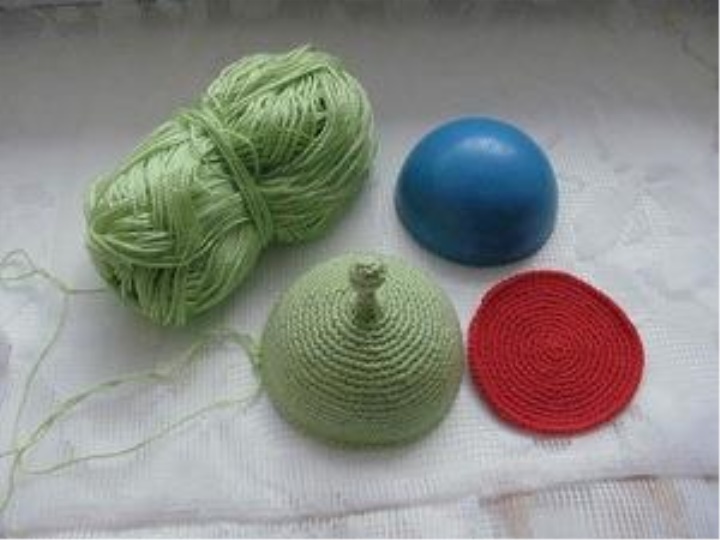
- the basis is a plastic ball. I have this ball diameter of 6 cm, bought in the store
origin and numbers to which all toys are connected. It seems that numbers 2 and 1.5.
But I can not vouch.
We begin work by cutting the ball into two halves. The upper part is a needle bed,
the bottom - the bottom of the box. In the lower part
rose. I do four rows of 5 punctures.
The lower part is the bottom of the box.
Red thread.
1 row: in the ring 6 сбн = 6
2nd row: 6 arr = 12
3 series: (sb, prib) x6 = 18
4 row: (2 sb, prib) x6 = 24
5 series: (3 sb, prib) x6 = 30
6 row: (4 sb, prib) x6 = 36
7 row: (5 sb, prib) x6 = 42
8 row: (6 sb, prib) x6 = 48
9 row: (7 sb, prib) x6 = 54
10 row: (8 sb, prib) x6 = 60
11 series: (9 sb, prib) x6 = 66
12 series: (10 sb, prib) x6 = 72
A circle with a diameter equal to the diameter of the ball
Next, knit without adding 6 rows. In order not to
get off, I put a "marker" - a thread of a different color
(although this may be a clip, and some
other device).

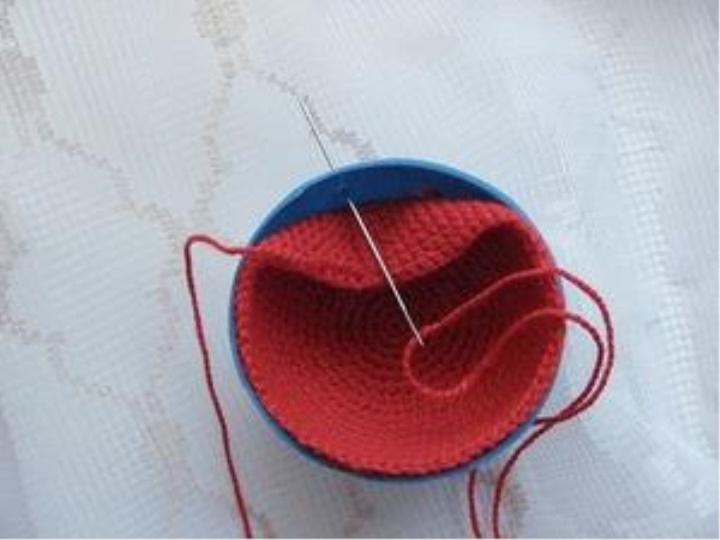
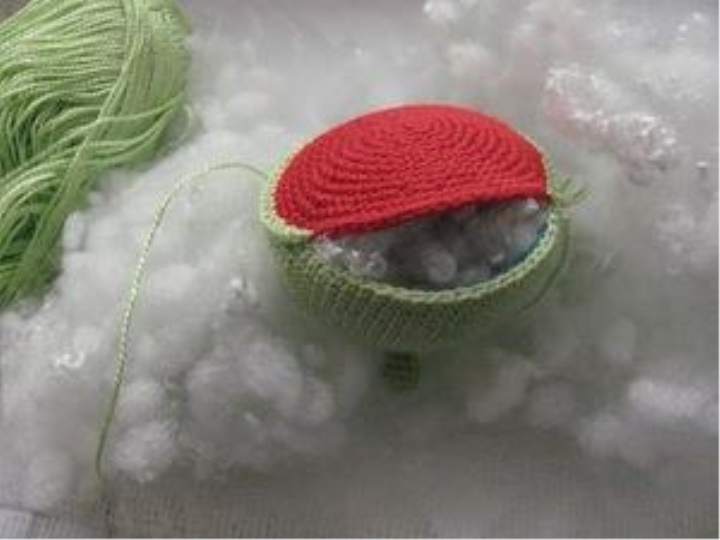
We get a knitted hemisphere, which is well placed inside the halves
ball. We cut the thread, leaving a long end, with which we will fasten the part to the base.
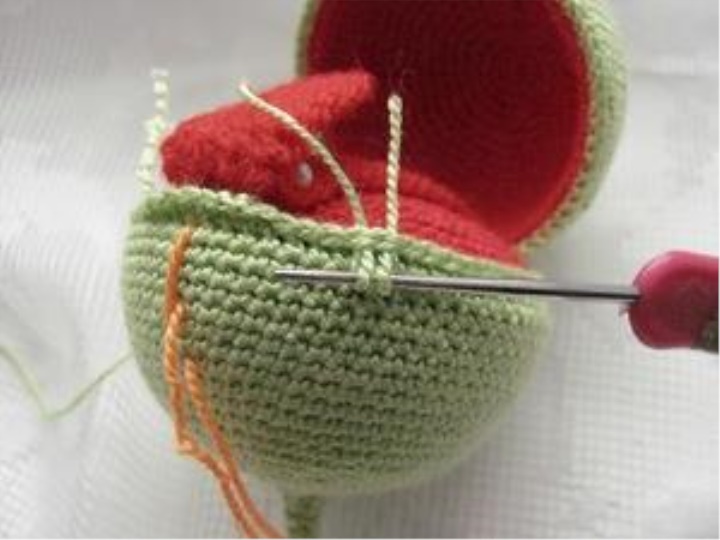
Output the thread on the underside of the part, put the part in the base and output the thread to one of the
upper holes.
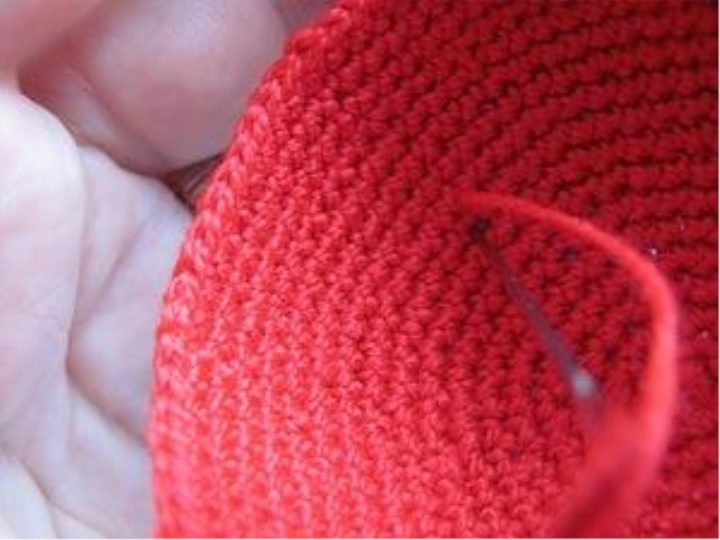
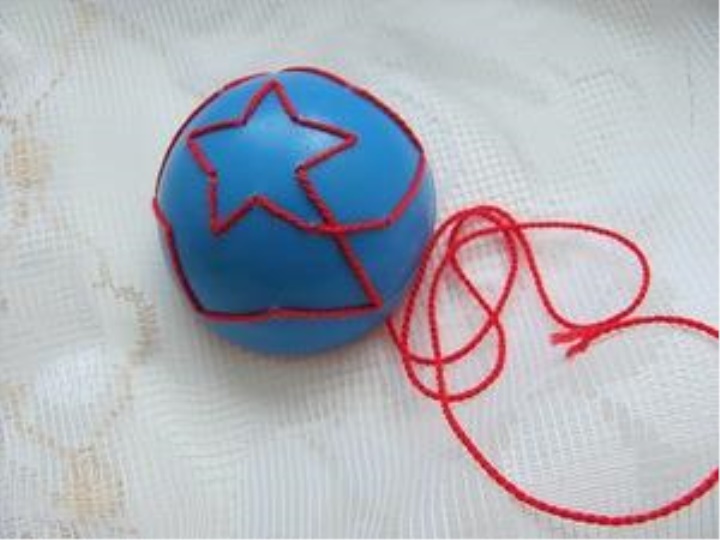
Next, arrange stitches as you like - anyway
it will not be visible. I do zigzags - it's more beautiful.
The eye rejoices and works nicely
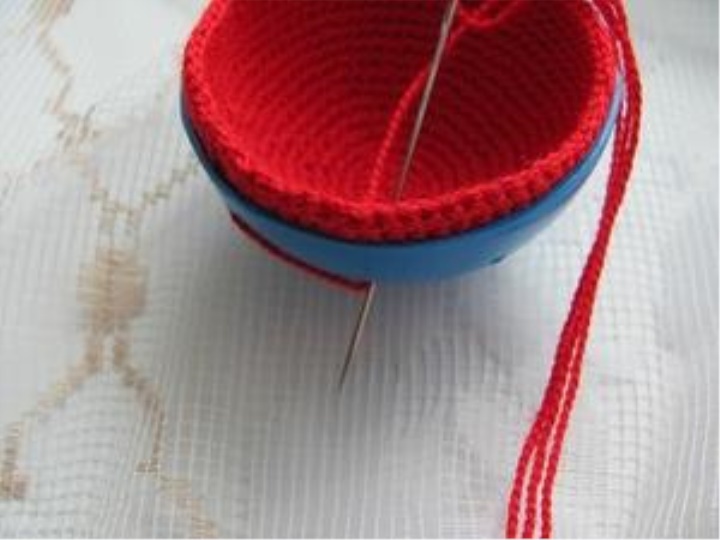
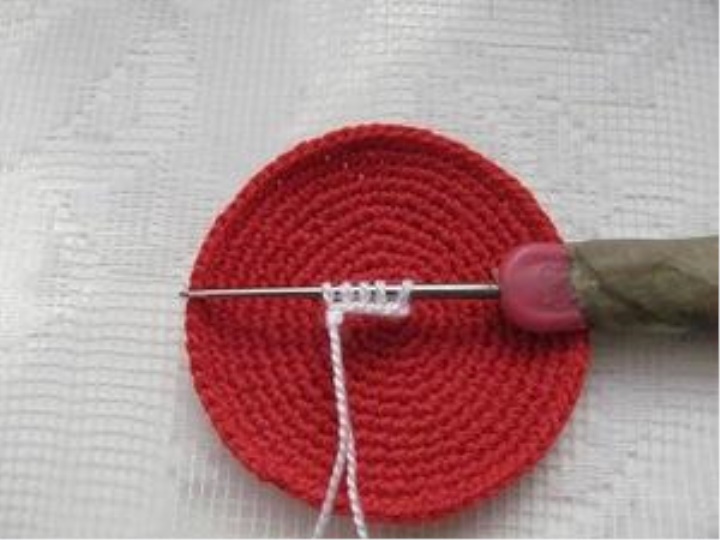
Enter the needle into the next hole. We follow that,
so that the needle is at the bottom of the column. Pull out the thread and carefully insert the needle over the
column. We output in the same hole.
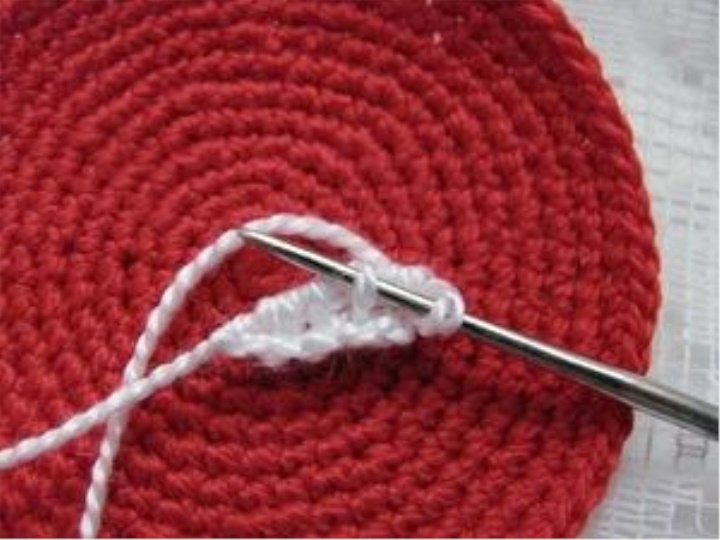
Take care that the thread does not overtighten the part. We just need to take it, but
not pull. We continue the work - we make a new stitch.
And so on. At the end I got this
star. We deduce a thread inside (between a basis and
detail), fix and cut.
Green thread.
1 row: in the ring 6 сбн = 6
2nd row: 6 arr = 12
3 series: (sb, prib) x6 = 18
4 row: (2 sb, prib) x6 = 24
5 series: (3 sb, prib) x6 = 30
6 row: (4 sb, prib) x6 = 36
7 row: (5 sb, prib) x6 = 42
8 row: (6 sb, prib) x6 = 48
9 row: (7 sb, prib) x6 = 54
10 row: (8 sb, prib) x6 = 60
11 series: (9 sb, prib) x6 = 66
12 series: (10 sb, prib) x6 = 72
Then knit without adding 9 rows.
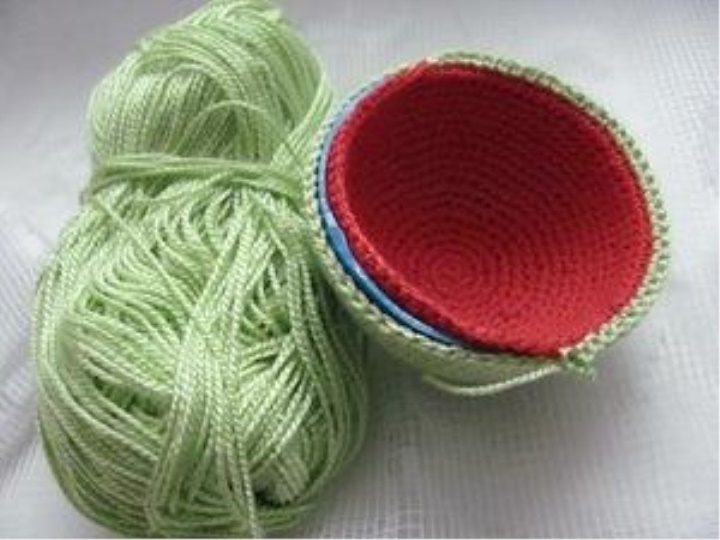
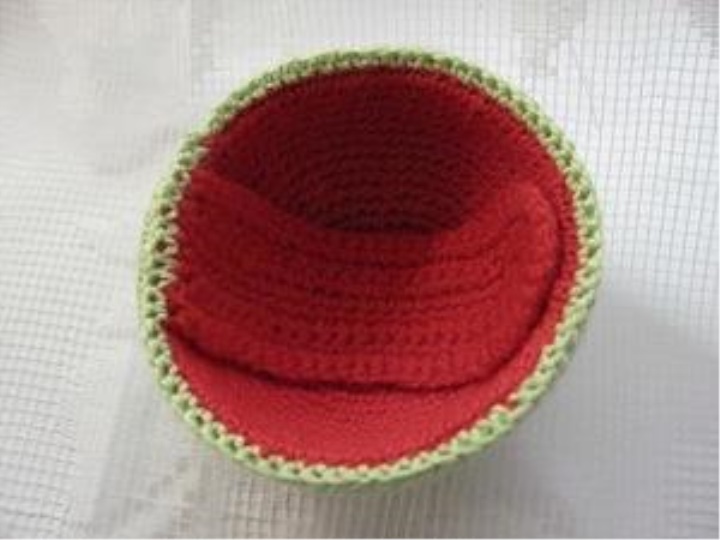
We collect the "sandwich" and connect the red and
green details next to the posts without a crochet.
the last 10 loops are not yet tied,
we put it aside.
Language (I knit from thicker yarn).
We dial a chain of 25 air loops.
1 row: With the 2nd from the loop hook we knit 23 sb, in the last loop 3 sb, on the reverse
side of the chain 24 sb, air lift loop, turn
2 rd: 23 sb, (sb, prib) x3, 24 sb, the air loop of the lift, turn
3 rd: 23 sb, (2 sb, prib) x3, 24 sbn, air lifting loop, turning
4 ranks: 23 sbn, (3 sb, prib) x3, 24 sb.
Thread the thread and trim.
Attach the language and connect all three parts together with columns without a crochet on
the remaining 10 loops.

The upper part is the head-needle bed.
Red thread.
1 row: in the ring 6 сбн = 6
2nd row: 6 arr = 12
3 series: (sb, prib) x6 = 18
4 row: (2 sb, prib) x6 = 24
5 series: (3 sb, prib) x6 = 30
6 row: (4 sb, prib) x6 = 36
7 row: (5 sb, prib) x6 = 42
8 row: (6 sb, prib) x6 = 48
9 row: (7 sb, prib) x6 = 54
10 row: (8 sb, prib) x6 = 60
11 series: (9 sb, prib) x6 = 66
12 series: (10 sb, prib) x6 = 72
In case you are going to make a needle bed, tighten the thread and trim it. If, however, Am
Nyamchik will be just a casket, then knit a red detail, to ak for bottom and then
just attach to the second half of the ball.
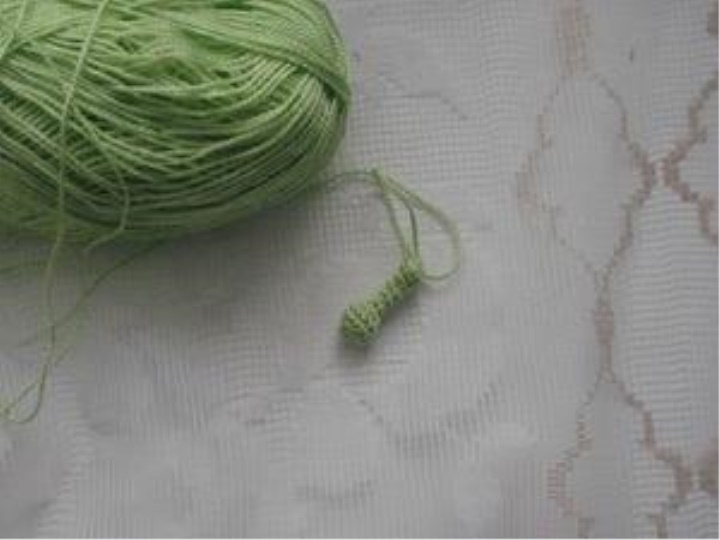
Green thread.
We knit a pimp
In the ring amigurumi we knit 6 seb
2 row: (prib) x 6 = 12 sbn
3-4 series: 12 sbn
stuff a pimp
5 series: (уб) х6 = 6 сбн
6-7 series: 6 sbn
8 series: (sb, prib) x3 = 9 sbn
9th row: 9 sbn
10 series: (2 sb, prib) x3 = 12 sbn
11 series: (sb, prib) x6 = 18 sbn
to stuff a leg of a pimp
12 series: (2 sb, prib) x6 = 24
13 series: (3 sb, prib) x6 = 30
14 row: (4 sb, prib) x6 = 36
15 series: (5 sb, prib) x6 = 42
16 row: (6 sb, prib) x6 = 48
17 series: (7 sb, prib) x6 = 54
18 series: (8 sb, prib) x6 = 60
19 series: (9 сбн, приб) х6 = 66
20 series: (10 sb, prib) x6 = 72
The next 9 rows to knit without a raise. Do not cut the thread.
Attach the green part to the top half of the base, attach the red part and
to connect a number of columns without a crochet, filling the future bed with filler.
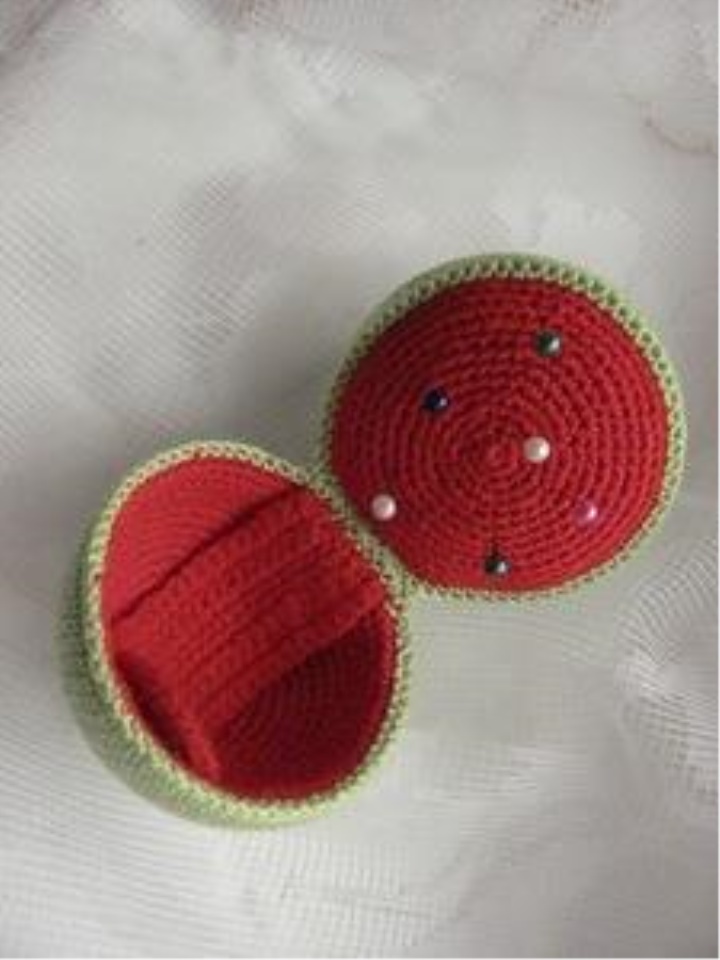
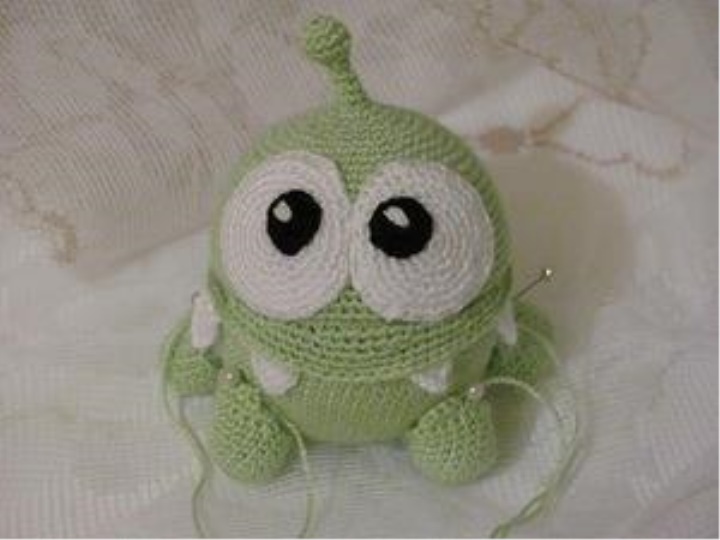
Sew to the bottom of the Am Nham at the place of attachment of the tongue.
It turned out that such a thing. You can already stick pins :)
At this stage, you need to tighten the tongue and attach it to the "palate" of Am Nyamchyka, so that
sew eyes and teeth in the right places.
We attach the language.
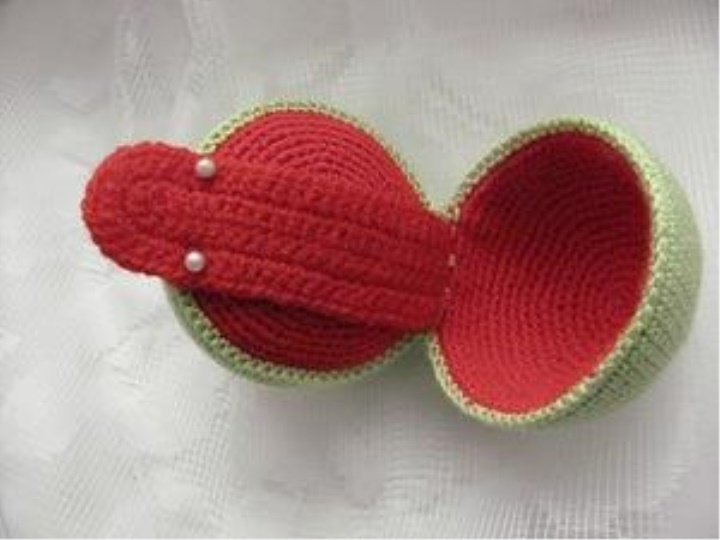
He's already teasing :)

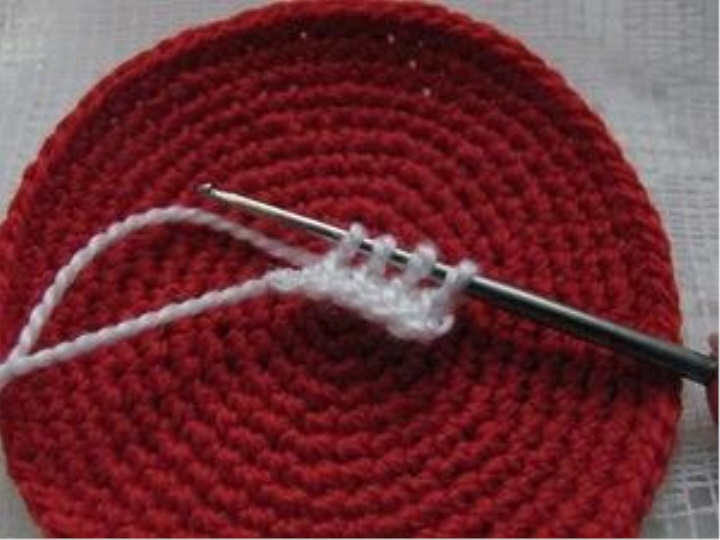
Now we will knit the upper lip.
I tried to do it in turning rows - it turns out ugly. therefore
I suggest a little pozamorachivatsya.
Mark the middle of the upper part and count back 4 loops.
1 row. Pull the loop of the new working thread. Pull the loop out of the base
the next column. We wire both loops on the hook. Next, we knit 5 sbn and
close the row with a connecting post. The beginning is better to hide during knitting.
The end can be left and hidden by the columns of the next row.
2 row. From the beginning of the first row back we count 5 loops. We start the series the same
way, like the first - pull the loop from the bottom of the next column,
We sew both loops on the hook. Next, we knit 15 sb and close the series with a connecting
column.
3 row. From the beginning of the second row we count 5 loops. We start the series the same way -
pull the loop out of the base of the next column, tie both loops on
hook. Next, we knit 25 sb and close the row with a connecting post.
4 and 5 series are knitted equally - without any increase in the length of the entire upper edge (excluding
the place of sewing the upper and lower halves of Am Nyama).
Pupils (2 parts) knit with a black thread.
1 row: in the ring amigurumi 6 сбн
2 series: (приб) х6 = 12 сбн
Thread the thread and cut off, leaving the end for sewing.
The whites of the eyes (2 parts) are a white thread.
1 row: 6 sbn
2 series: (приб) х6 = 12 сбн
3 series: (sb, prib) x6 = 18 sbn
4 series: (2 sb, prib) x6 = 24 sbn
5 series: (3 sb, prib) x6 = 30 sb
Proteins have the form of a drop - a little stretched upwards. Therefore, in the following series
one of the sectors of the circle is knitted with half-columns with a crochet. Polustolbiki should
be placed one above another
6 row: 4 sb, prib, pssn, pri pssn, (4 sb, prib) x4 = 36
7 series: 5 sb, prib, psn, pri pssn, (5 sbn, prib) x4 = 42
Cut the thread, leaving a long end for sewing (I have the same thread before
I embroider the glare on the pupils).
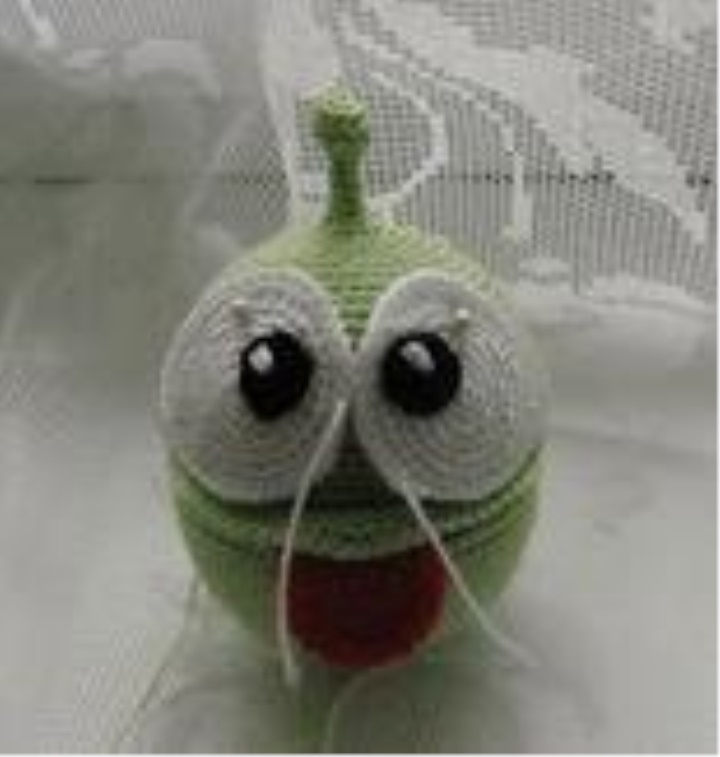
Now you can try to attach eyes. Place, orienting yourself on
pictures and own taste.
First we sew the pupils to the squirrels, then embroider
white thread flare to revive the muzzle, after this
sew ready eyes to the head.
The next stage is teeth.
At Am Nyama there are six of them - four above and two below.
I knitted using the Tunisian knitting technique. So you get a beautiful triangle with
sharp top and stitches in the base.
We type a chain of 5 air loops
Starting from 2 loop from the hook, from each loop of the chain stretch along the loop -
we get 5 loops on the hook.
We transmit them in pairs in 4 divided doses.
We type three loops for the next row
On the hook 4 loops
We send them in pairs in three steps.
We type TWO loops for the next row. On the hook 3 loops - we sew them
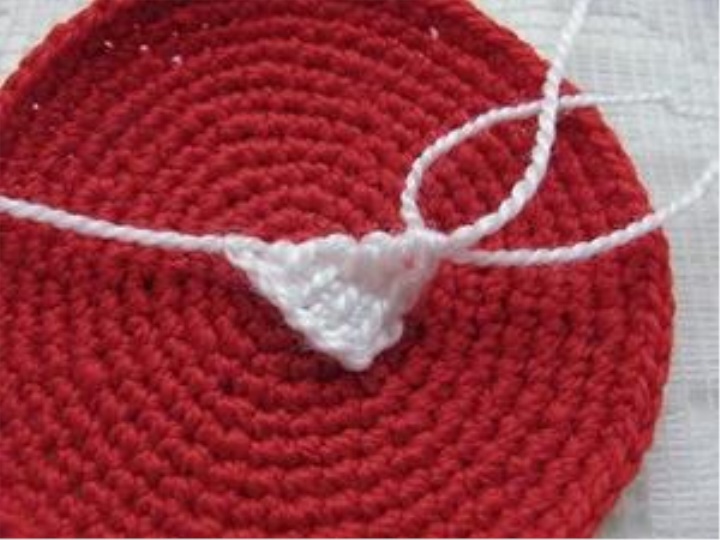
Here such triangles we knit six pieces.
The teeth are arranged like this: two below, four above.
Sewing is convenient for the loops that are formed when knitting. This is the most dreary
part of work.
In principle, they can be molded from plastic, and cut out of something, and then
paste.
But I always try my toys to make all the details knitted, that's why I'm fooling around
To ensure rigidity, you can impregnate PVA teeth and allow to dry.
Hind feet (2 pieces)
1 row: 6 sbn
2 series: (приб) х6 = 12 сбн
3 series: (sb, prib) x6 = 18 sbn
4-8 series: 18 sbn
9th row: 11th turn, turn
Next, each row is knit without lifting loop
10 series: 9 sb, turn
11th row: 7 cbn, thread tighten and cut off. Leave the end for sewing.
Front paws (2 pcs)
1-11 row: like the hind legs, turn
12 row: 5 sb, thread tighten and cut off. Leave the end for sewing.
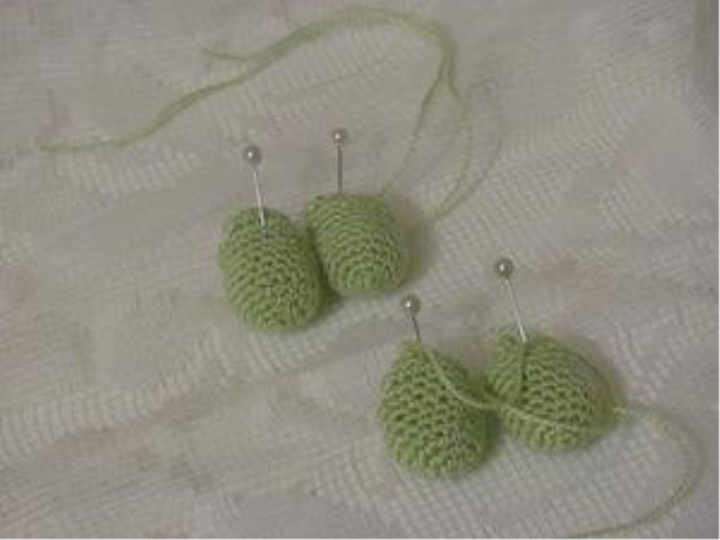
Choose the position of the feet and sew them.
Sweets
Am Nyama has a yellow-orange candy in the game. Apparently, orange :)
I knitted and her, and purple-pink (blackberry? Or plum?)
Today I'll knit mint :)
For her, I took a string of two shades of green: light green (NW) and dark-
green (TK)
IMPORTANT!
When changing the color, we begin the column with one thread, and end with the thread of the other
colors.
All the increases are made in the LAST column of the sector.
Detail 1.
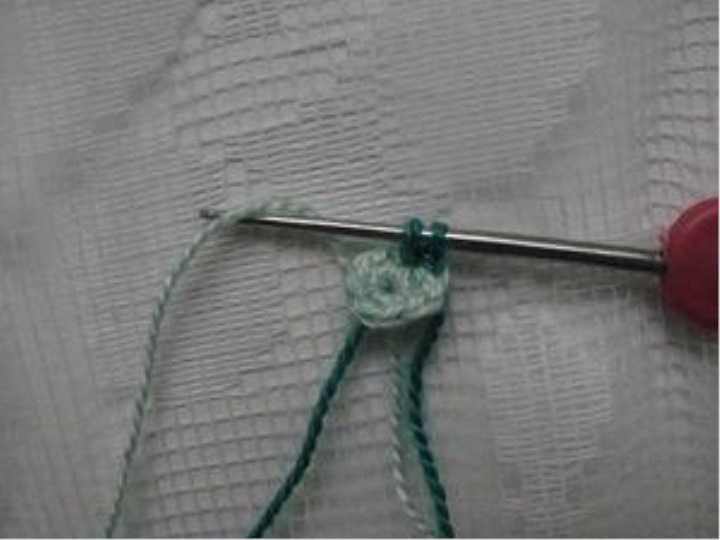
We begin knitting with a light thread.
1 row: WS in the ring 8 sbn
2 series: sb SZ, prib TZ, prib SZ, prib TZ, prib SZ, prib TZ, prib SZ, prib TZ = 16
sbn
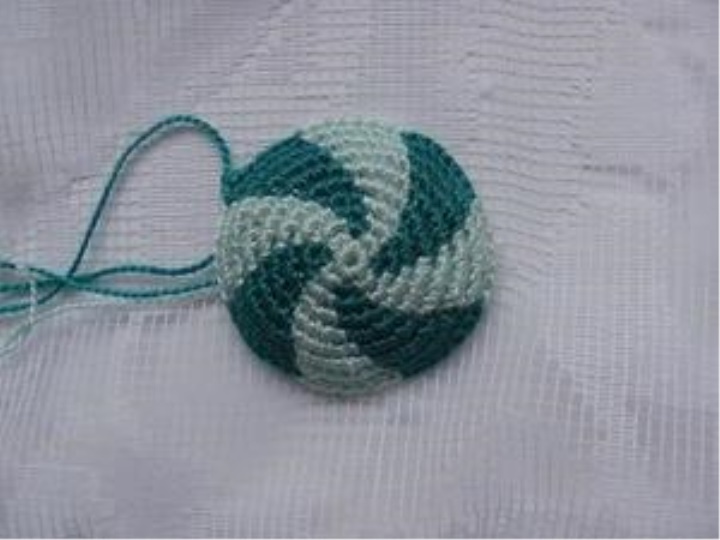
It turns out that's the kind of thing.
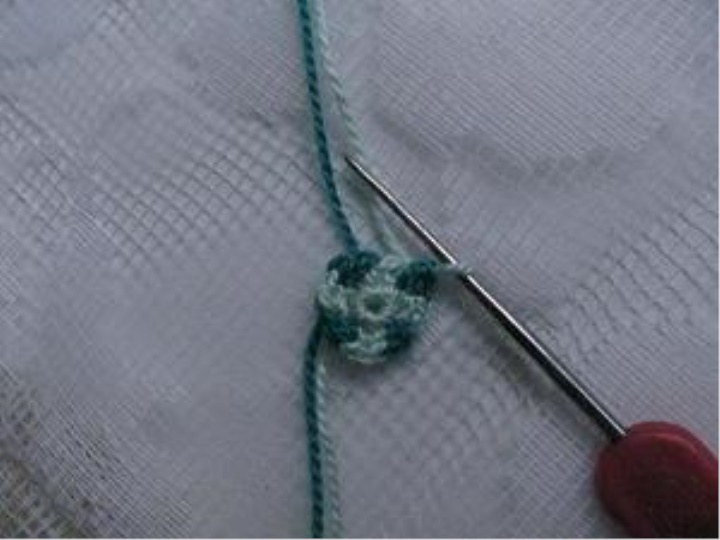
Continuing knitting, we perform the increments in the last loop of each sector.
At the beginning of the second row, we did not make an increase (to provide
twisting sectors in a spiral), so the third row begins immediately with an increase
3 series: (prib S3, sb SZ, prib T3, sb TZ) x 4 = 24 sb
4 series: (Sb SZ, Prib SZ, Sb SZ, Sb TZ, Prib TZ, Sb TZ) x4 = 32
Here begins to "manifest" the twisting
5 series: (2 сбн СЗ, приб СЗ, сбн СЗ, 2 сбн ТЗ, приб ТЗ, сбн ТЗ) х4 = 40
6 series: (3 сбн СЗ, приб СЗ, сбн СЗ, 3 сбн ТЗ, приб ТЗ, сбн ТЗ) х4 = 48
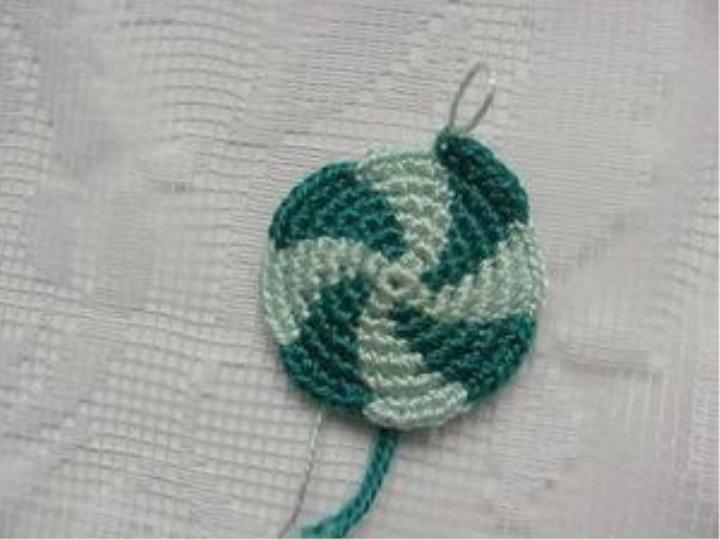
7 series: (4 sb NW, pr SZ, sbn SZ, 4 sb TZ, prib TZ, sb TZ) x4 = 56
Thread and tighten the threads.
This is the kind of candy we have.
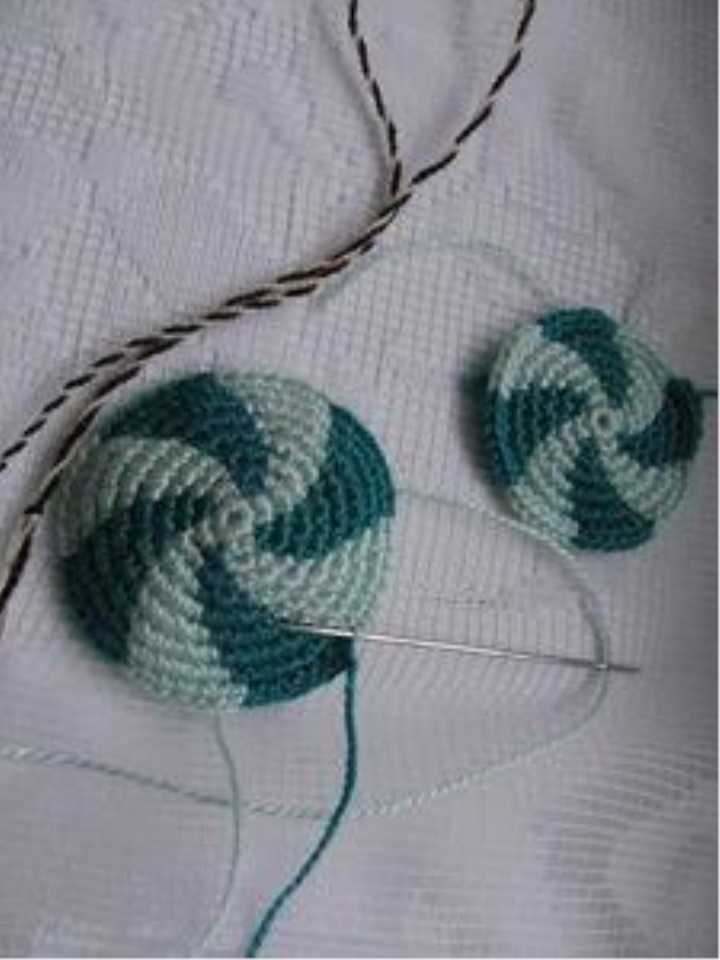
Detail 2.
1-7 row: same as for part 1
Next, knit without increments and displacements of 1-2 rows (I knitted two), positioning the color above
color of the previous row. Thread and tighten, leaving the ends for stitching.
We make a string. I took the cream and brown threads and twisted them.
At the ends of the rope knotted knots.
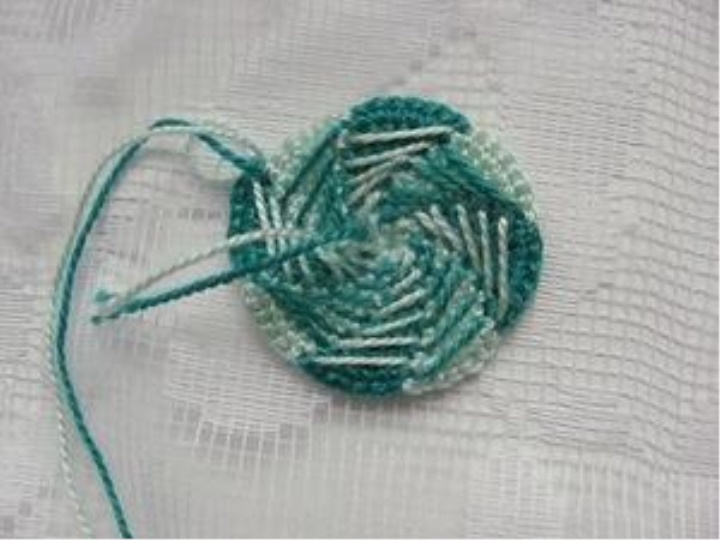
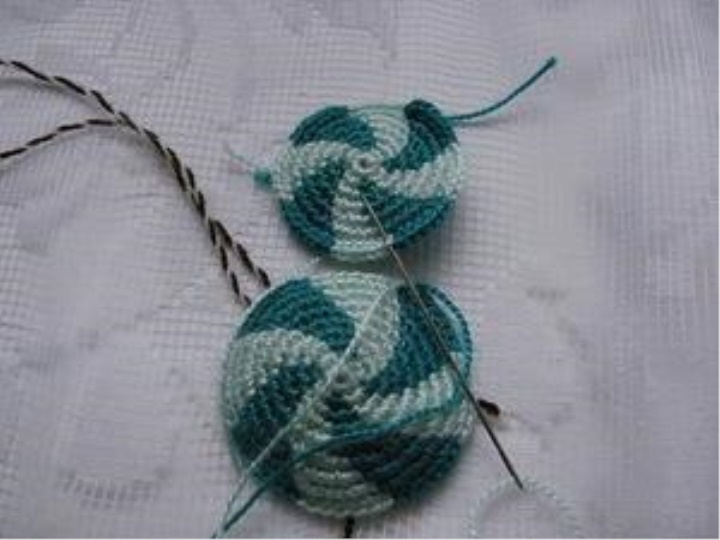
Assembly of candy.
Fold the halves of the candy with the wrong side to each other, combining in colors.
We deduce a thread in the front half loop of one part, we introduce the needle from the logo into
the front half loop of another part.
One end in one stitch, the other end into the next stitch. If the thread is tightened
well, then the rope does not pop out. But for the sake of confidence you can tie the ends
rope from the wrong side.
We fill, we sew all sectors and we get such a nice candy.
Thus, the loop to the loop stitches the entire sector of the same color.
We lower the thread down, we pull out a thread of a different color over it from the inside.
We continue to sew the same sector according to the same principle.
When tightening the thread, insert the rope knots inside the candy.