4-step method of knitting crochets: a training course with detailed instructions and diagrams.
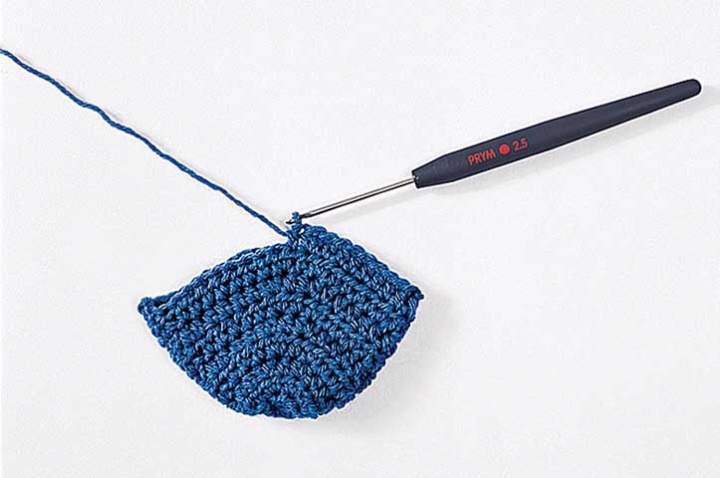
Beginning knitting is always the same. For the thread ring, connect the 8 half-columns and close the row with a connecting post made in the 1st loop.
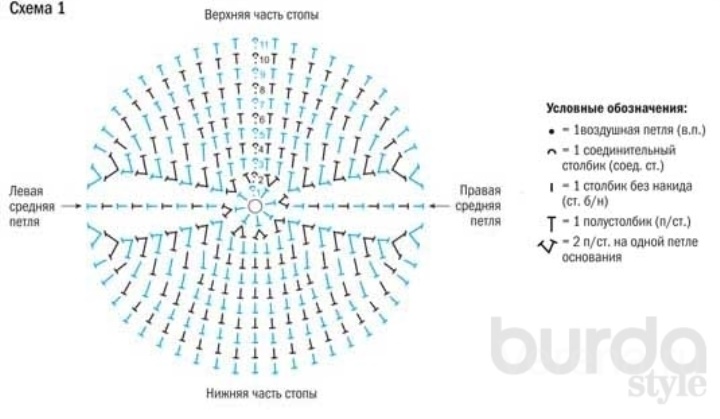
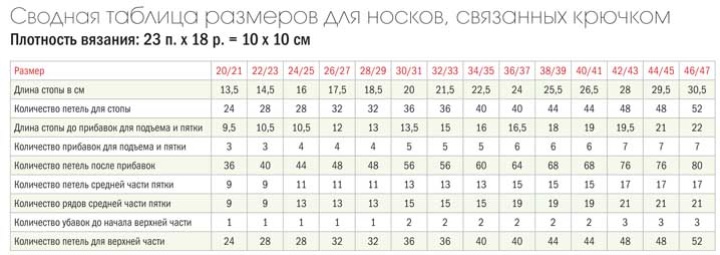
According to scheme 1, perform the number of rows in a circle corresponding to the size.
In the second row, the number of loops doubles = 16 loops.
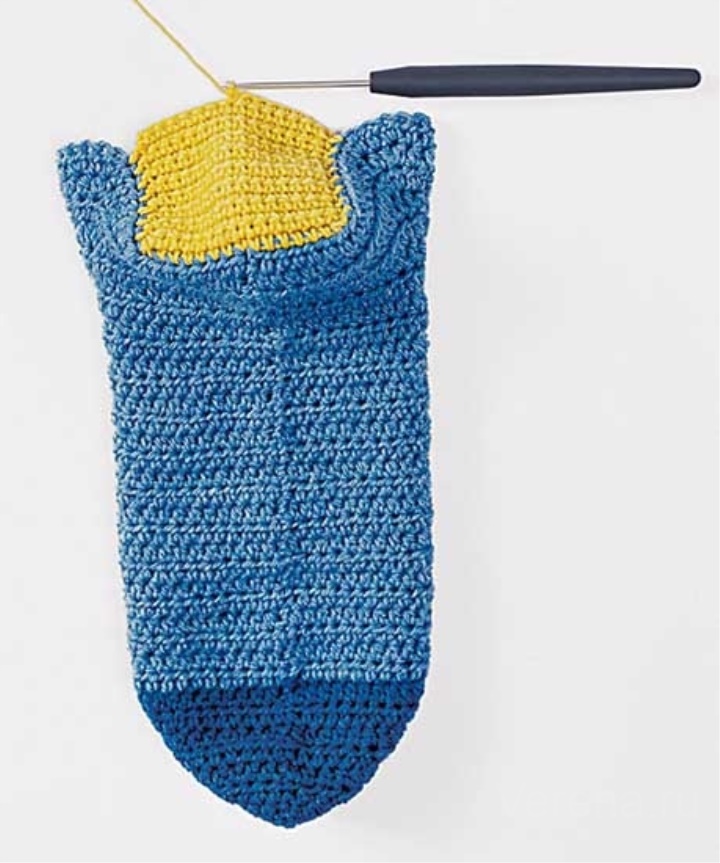
Starting with the 3rd row, 4 loops are added in each row of circular knitting.
Work continue in rows in the forward and backward directions, that is, after the connecting column, the work is rotated so that the beginning of the circular row does not move and passes along the line of the middle of the lower part of the foot. If necessary, mark the right and left middle loops with a contrasting thread.
STEP 2. STOP, STAIN AND STROKE
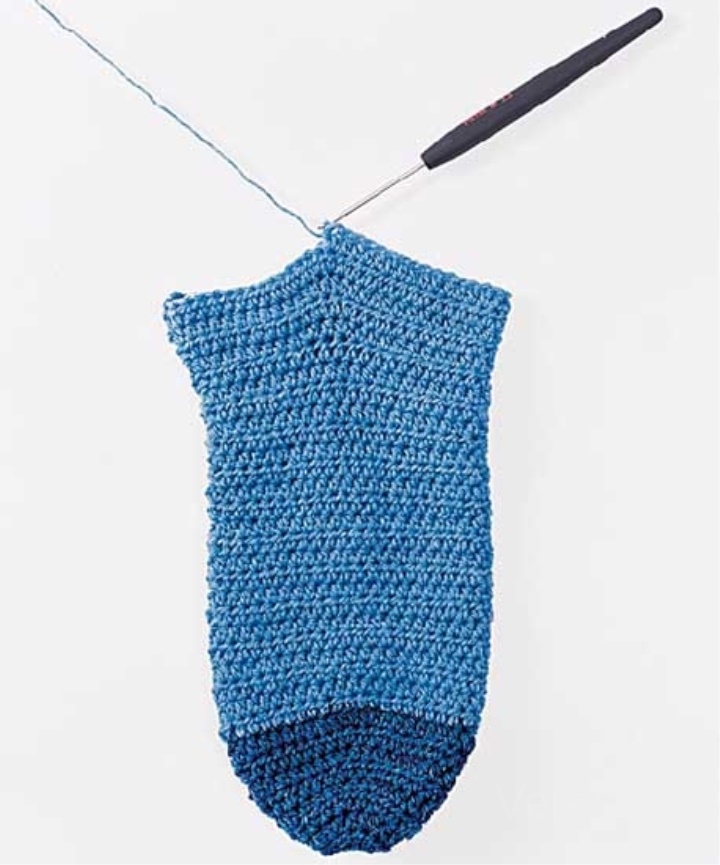
For the foot, knit half-loops without loops and perform as many rows in a circle as indicated in the table below or in the instructions for the model. The transition from row to row continues to be marked with a contrasting thread, moving it upwards.
Then in each row begin to add loops to raise the foot and heel: before and after the right middle loop, and before and after the left middle loop, perform 2 half-columns. The number of rows with increments is indicated in the instructions to the model or is determined by the table:
STEP 3. WALL STAIN
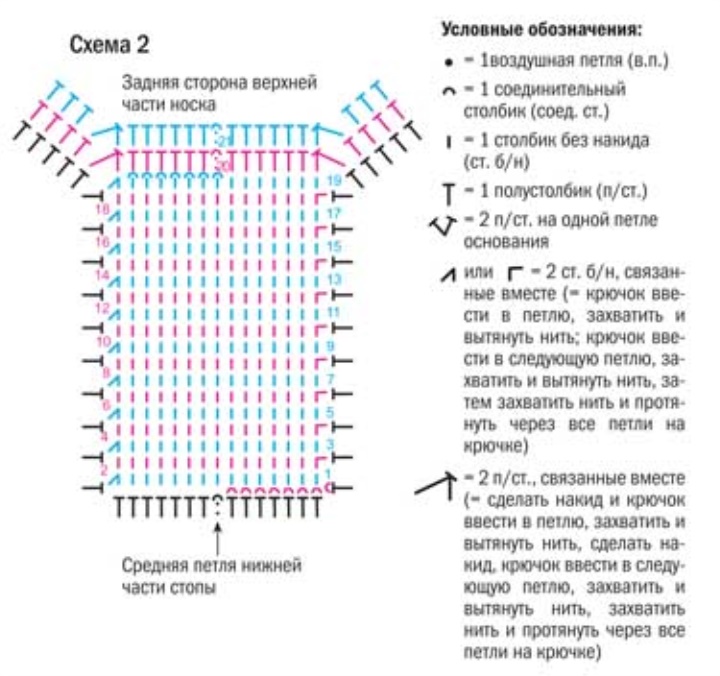
For the heel wall, knit sticks without a crochet according to Scheme 2 (shown below). If the last row with the increments was obverse, after turning, as shown in the diagram, with the help of the connecting bars go to the edge of the heel wall, tie the extreme loop of the heel, turn and continue the work according to the scheme. If the last row with the additions was the wrong one, first go through the connecting posts to the edge of the heel wall and tie a loop from the lateral edge of the heel, turn and
continue the work according to the scheme.
In the 1st row of the heel wall, at the beginning and at the end, perform 2 posts without a crochet, connected together. In the remaining rows, the reception is performed only at the end of each row. To do this, hook into the last loop of the heel wall, grab and pull the thread, then hook into the next loop of the lateral edge of the heel, grab and pull the thread, then grab the thread and stretch through all the loops on the hook. Then turn the work and immediately, as shown in the diagram, to the last loop received, perform 1 bar without a crochet.
Continue the work according to the scheme. On the diagram, the heel wall is knit on 15 loops (according to the table, it corresponds to the sizes 36-41). For smaller sizes, the number of loops on both sides of the middle loop of the lower part of the foot decreases, respectively, and increases for larger sizes (see the table in Step 2). The number of rows for the heel wall is different for different sizes, these values are also determined from the table.
STEP 4. UPPER SQUARE
The upper part of the sock starts from the upper edge of the heel (here the 19th row of the circuit 2) and
knits in a circle. To narrow the upper part of the sock, depending on the size, according to the instruction to the model or in accordance with the table, additional adjustments are made, as shown in the 20 th and 21 rd rows of Scheme 2 (see above, in "Step 3"). As a result of the discounts in the circular series, the same number of loops should be obtained, as was originally for the foot.
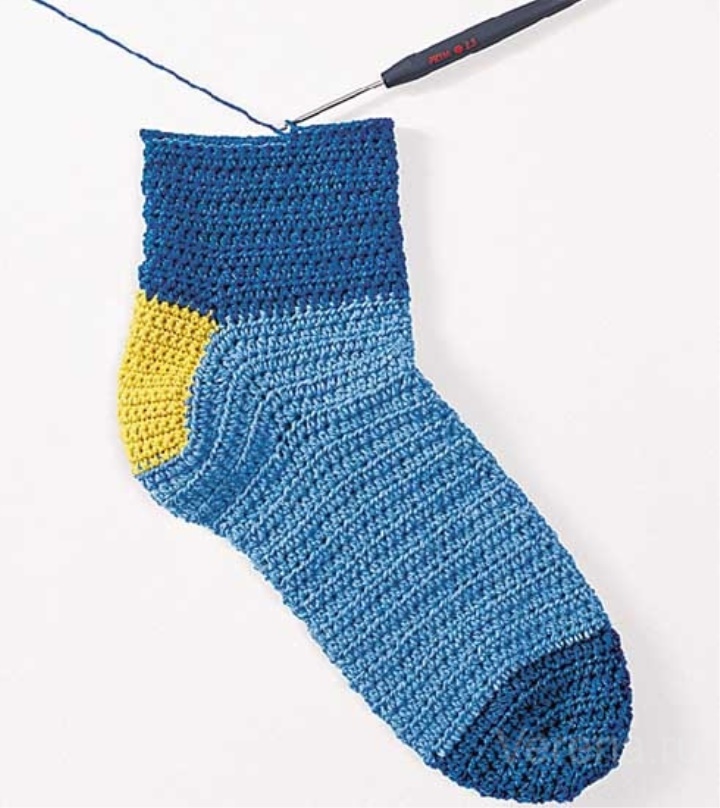
Tie the upper part of the sock to the appropriate length.
The second sock knit similarly. For models with lateral patterns on the top of the toe, the
loops after the heel wall should be distributed symmetrically in both directions.