Click For Crochet Abbreviations List
Legend:
Ka ring amigurumi
RLS - column without crochet
PS-polustolbik
SS N-column with crochet
SS - connecting post
PR - increase (2 sb in one loop)
6PR-increase in a row 6 times
UB - reduction (2 sbn tie together)
Materials:
* yarn-acrylic or half-wool, thickness 400-450m / 100g, orange, about 50-70 gr,
* A bit of brown and white yarn of the same thickness as the main yarn
* hook N 1.75-1.9;
* filler
* a little white felt for the eyes: the eyes are in the form of a curved drop, at a length of 20 mm, the height of the wide part is equal to the size of the half-beads for pupils (about 8 mm), for a cup under the eye (milk color) - 20-23 mm; flat pupils of running eyes, diameter 7-8 mm or half-beads of the same size.
* A piece of wire-fit floristic length of 40 cm and a piece of adhesive plaster.
* Glue Moment-crystal or similar.
With these materials, the size of the toy is about 17-18 cm.
Note! I knit my toys on the wrong side-this is my individual hand. In the world of amigurumi, this knitting is considered wrong, so I do not encourage anyone to follow my example. Therefore, the binding on your toy will be different from the one on the photo. All descriptions are for the "right" side.
Description of work: (All parts are knitted in a spiral).
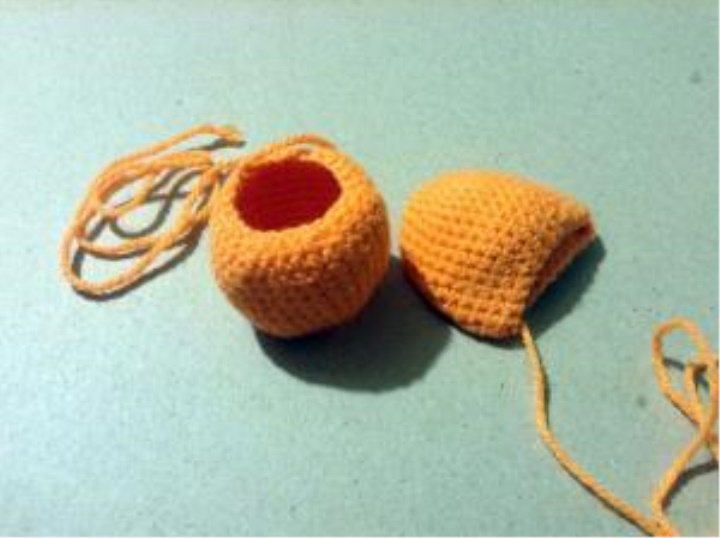
Head and body - knit one detail, orange yarn.
1 row: 6 scales in the spacecraft
2 series: 6 pr (= 12 sb)
3 row: (pr, 1 sb) x6 times (18)
4 row: (pr, 2 sb) x 6 times (24)
5 row: (pr, 3 sb) x6 times (30)
6 row: (pr, 4 sb) x6 times (36)
7 row: (pr, 5 sb) x6 times (42)
8 row: (pr, 6 sb) x6 times (48)
9th row: (pr, 7 sb) x6 times (54)
10 row: (pr, 8 sb) x6 times (60)
11th row: (pr, 9 sb) x 6 times (66)
The diameter of the circle at this stage is 7.5 cm.
12th row: 66 sb for the rear wall of the loop.
13-27 row (15 rows): knit unchanged (66)
I advise you to cut out a plastic or foamed material around the diameter of the bottom and sew it for greater stability and to avoid protrusion of the bottom.
28 row: (9 sb, ub) x6 times (60)
29 row: (8 sb, ub) x6 times (54)
30 row: (7 sb, ub) x6 times (48)
31 row: 6 pr, (6 sb, pr) x6 times (60)
32 row: (pr, 9 sb) x6 times (66)
33-41 row (9 rows): knit unchanged (66)
Now the part is like a jug.
42 row: (ub, 9 sb) x6 times (60)
43-49 rows (7 rows): knit unchanged (60)
50 series: (8 sb, ub) x6 times (54)
51 -52 rows: knit without change 54 sbn
53 series: (7 sb, ub) x6 times (48)
54 series: knit unchanged (48)
55 row: (6 sb, ub) x6 times (42)
To knit approximately 3 offset loops to align the row. To determine the number of offset loops, fold the part in half. On one side, the fold divides in half the place in row 31, where we tied in succession 6 increments. That is, this place is the inclination of the head, it must be located at the edge , and not in the middle. Look at how many loops you need to tie up to this fold. From here, the next row will begin-this is the middle of the ear.
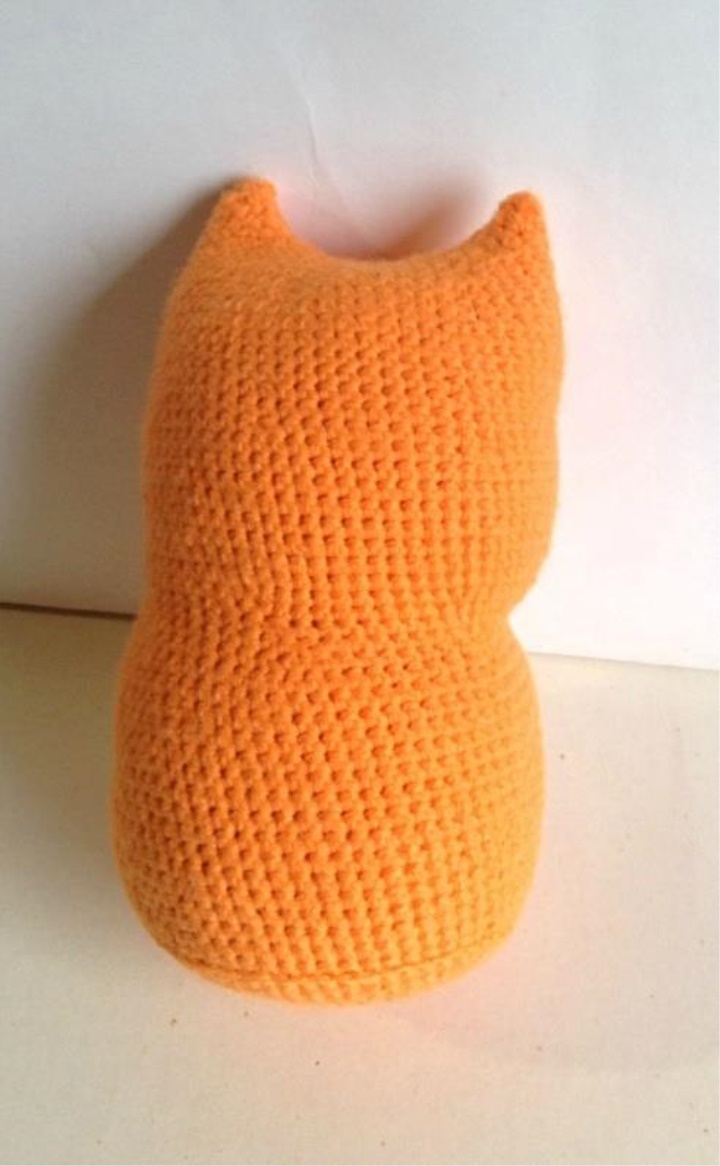
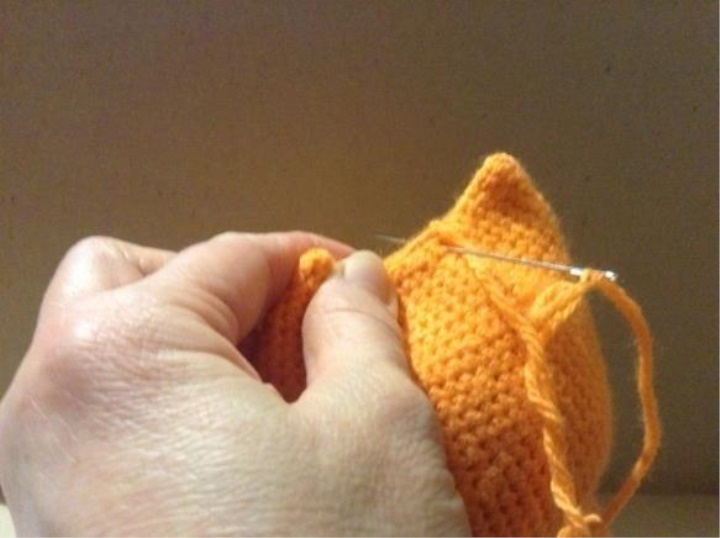
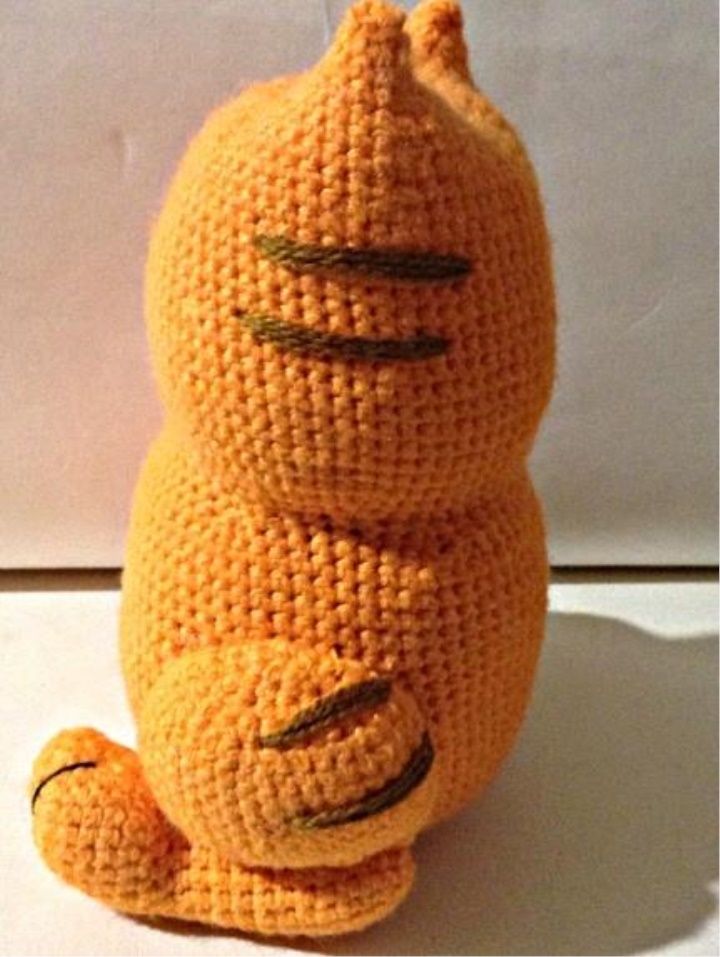
56 series: 2 ssn, 2 ps, 13 sb, 2 ps, 4 ssn, 2 ps, 13 sb, 2 ps, 2 ssn, finish with a connecting post. To fix, but not to detach. The combination of columns with a crochet and polustolbikov forms whole lugs . The nail should be filled. The nail should be fairly tight. The ready-made part should not be elongated, but consist of almost identical spherical heads and bodies. The nuts can not be stuffed, but make sure that they are not empty. Remember the detail in your hands to give it the desired shape. The head should be flat and stitched with a needle (you can tie it, but the seam with a needle is more imperceptible).
The finished part should look like this:
Front paws (2 parts):
start white yarn
1 row: 5 scales in the spacecraft
2 row: 5 pr (10)
3 row: (pr, 1 sb) x5 times (15)
4-7 series: 15 seasons
8 row: Change the thread to orange, (4 sb, pr) x3 times (18)
9-13 series: unchanged (18)
14 row: (pr) x6 times, 12 sbn (24) - the bending of the front foot is obtained
15-21 ranks: 24 sbn
22 row: (2 sb, ub) x6 times (18)
23 row: (1 sb, ub) x6 times (12)
24 row: ub 6 times (6)
Hole to tighten, not forgetting to fill the paw. It is not tight to tighten the shoulder. It is analogous to tie the second paw. To make the fingers tighten, to embroider the claws with black thread. You can immediately make the weft black thread and claws then do not embroider-there are options for your taste.
Hind legs, hip-orange yarn, 2 parts:
1 row: 6 scales in the spacecraft
2 row: (pr) x6 times (12)
3 row: (pr, 1 sb) x6 times (18)
4 row: (pr, 2 sb) x6 times (24)
5 row: (pr, 3 sb) x6 times (30)
6 row: (pr, 4 sb) x6 times (36)
7-13 row (7 rows): 36 sb
14 row: (4 sb, ub) x6 times (30)
15 row: (3 sb, ub) x6 times (24)
Leave the thread for sewing. Tie the second thigh.

Hind legs, foot-orange yarn, 2 parts:
orange yarn.
1 row: 6 scales in the spacecraft
2nd row: pr-6 times (12)
3 row: (pr, 1 sb) x6 times (18)
4 row: (pr, 2 sb) x6 times (24)
5-8 rows (4 rows): 24 sbn
9 row: 12 sb, (ub) -6 times (18)
10 row: 12 sb, (ub) 3 times (15)
11-22 rows (12 rows): 15 scales.
Step nabit, knit two loops together before closing. Leave thread for sewing. Tie a hundred feet. If desired, you can make a tightening of the fingers and embroider the claws, or make the weft black thread, as on the front paws, and do not embroider the claws separately.
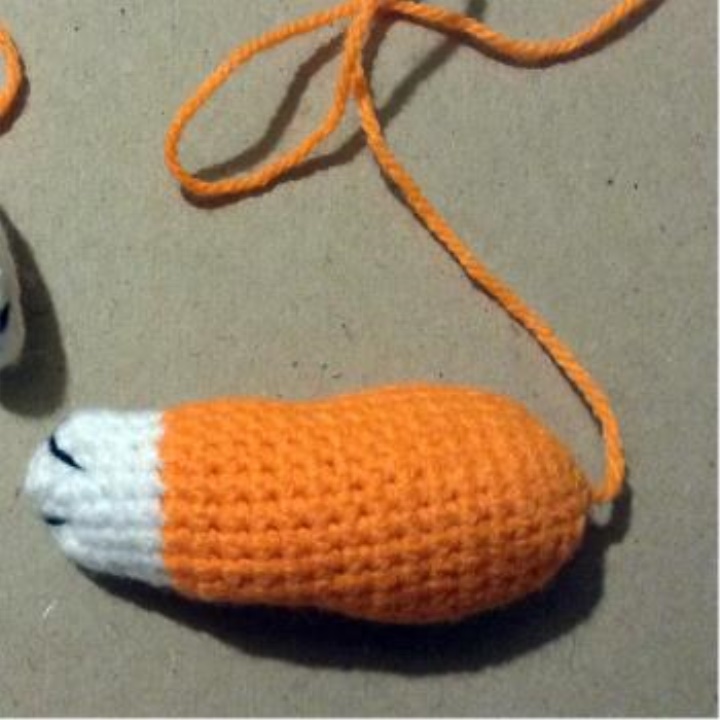
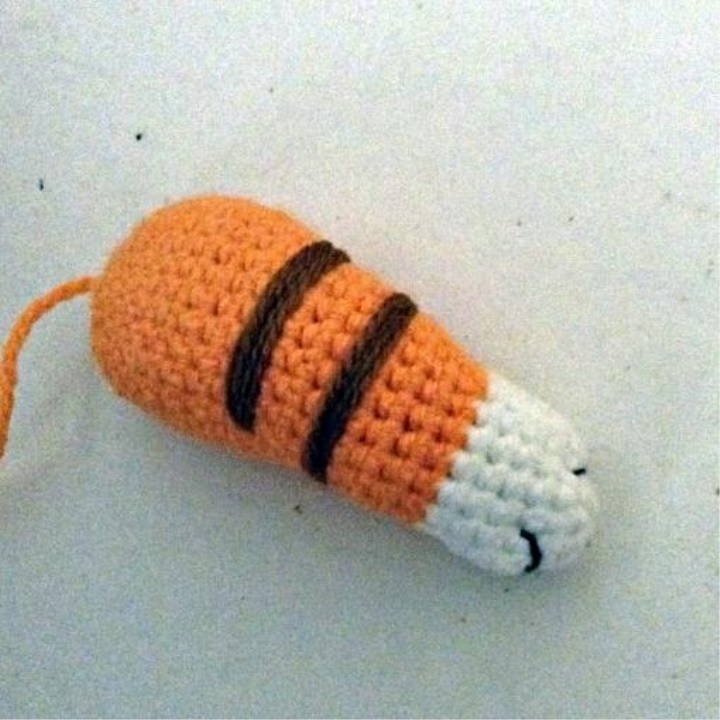
Tail, orange and brown, 1 detail:
Start with brown yarn
1 row: 6 scales in the spacecraft
2 row: (pr) x6 times (12)
3 row: (pr, 1 sb) x6 times (18)
4 row: (pr, 2 sb) x6 times (24)
Next, knit unchanged 6 rows. Add orange yarn and knit one color, then another, each of 3 rows. All five bands tie brown (not counting the tip of the tail) and 5 bands orange. Finish knitting orange yarn-6 rows.
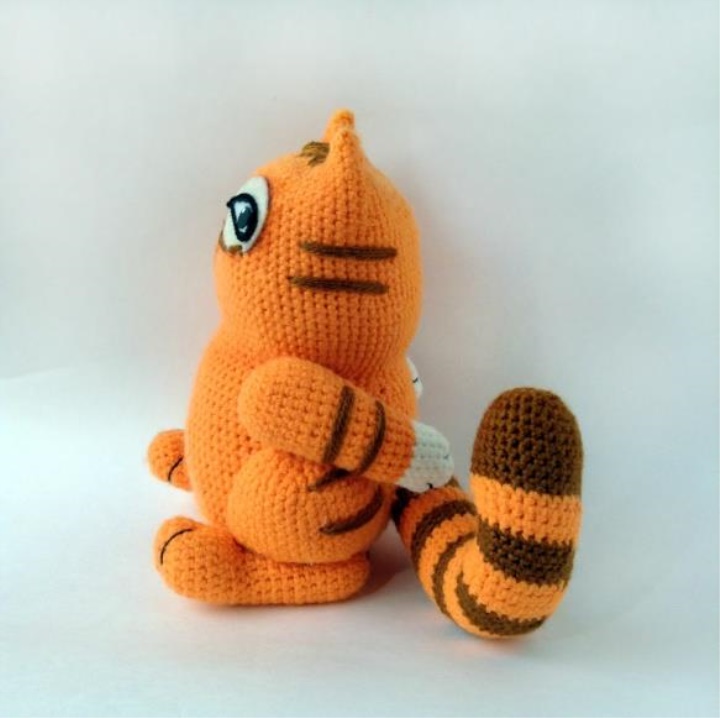
Assembling and decoration.
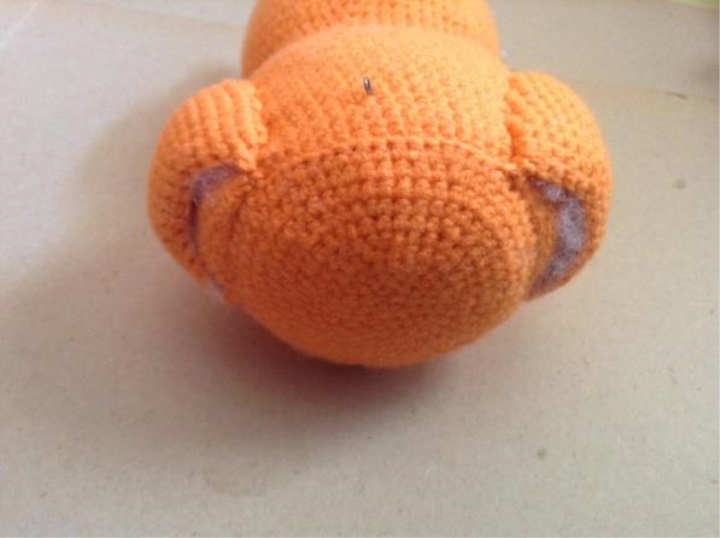
Make the markup. Turn the part of the cephalic to itself side and mark with the pins the side line. The same on the other side. Mark the same way, where you will have the muzzle, and where the nape.
Fold the thigh in an opening with a hole downward and mark its middle (amigurumi ring, apex). Attach this part to the trunk, aligning the middle of the thigh and the middle line of the lateral part. Then slide the femur 2 hinges towards the muzzle. The lower thigh line touches the row that we knit for one wall of the loop.
Sew a detail of the hip along the contour. Looks like a pocket with a hole down. Write similarly to the second thigh. Fill the filler, but not too much, look at the photo. The hips should not be strongly bristled.
Sew the feet. The sutures pass along such lines: the line along the narrow part of the part, in the middle + the unadulterated edge of the thigh; line along the narrow part of the part, edge + row, which we knit by one wall of the loop (and to which the thigh is sewn).
Stripes.Variantov mnogo.Mozhno impregnate strips of wool, embroider a stalk or stitching seam, you can tie the strip crochet directly over the finished toy or even paint with oil or acrylic paints. I sometimes tilt, sometimes I embroider. The easiest way is to twist the thread into the needle more thickly and just to embroider the strip. First make the markings, marking the beginning and end of the strip with pins, then we embroider.
On the head. We mark the middle between the ears, then downwards by 5 rows. This is the central strip. From the central strip to the right and left, we retreat to 3 loops, this will be two more strips, their length is 4 rows. The stripes on the head are approximately 11 and 16 rows below the seam connecting the ears. The length of the strips is 10 loops. On the head stripes are embroidered like noses from beasts: first along the contour, after all they are wide enough, and then with a few stitches the seam "loop" from the corner to the wide part.
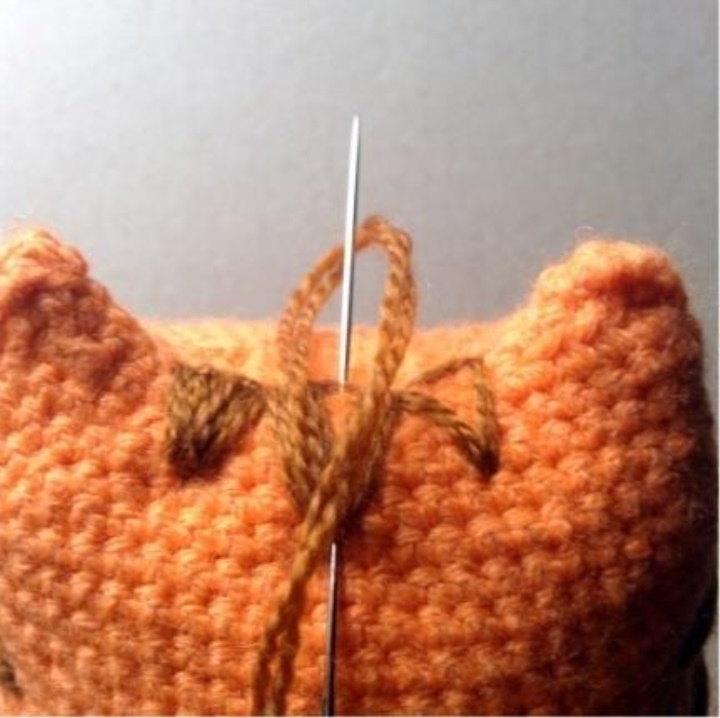
Lateral bands on the head are outlined in the 11th row from the top, we do not count from the tips of the ears, but from the row connecting the ears. Another strip is lower by 5 rows. The length of the bands is 10 loops.
On the hips. From the beginning of the knitting of the hip (amigurumi rings), to retreat along the center approximately 4 rows down, this is the first strip. Second, below the first by 3 rows, it needs to be shifted by 1-2 loops towards the tail. The strips can be continued on the trunk, and you can not continue.
On front paws, in 11 and 14 rows of description (or 4 and 7 rows, when the thread was changed to orange).
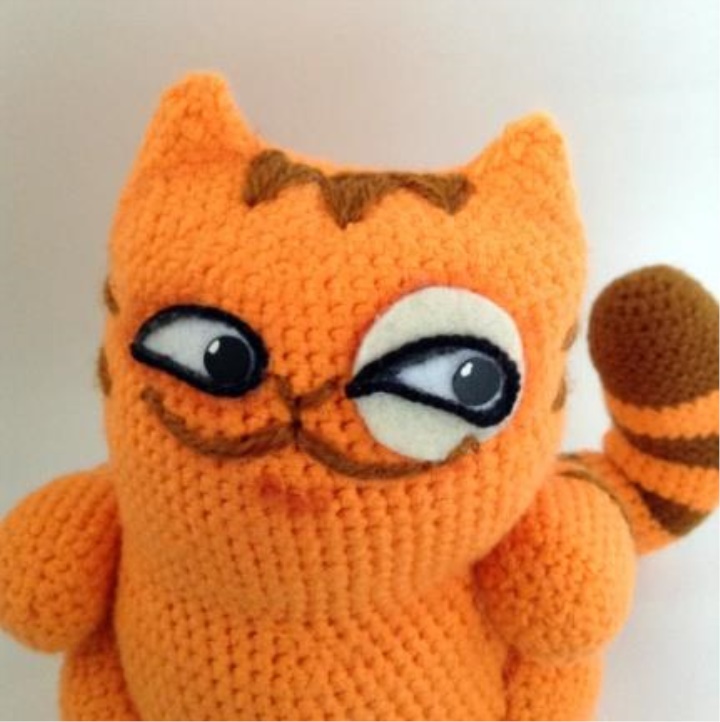
Muzzle. Attention! The sizes of a mug under the eye, of proteins and pupils are indicated for a toy in the size of 17-18 cm. If your hook size or yarn is thicker, mating is weaker, then please choose other eye sizes proportional to your product. For a spot on the eye, cut a circle of white or milky color Felt with a diameter of 20-23 mm. Cut the eye proteins in the form of arched droplets made of white felt. I take pupils from the running eyes (pupil size 7-8 mm) or use half-beads. Pupils are glued to the eye proteins, left eye is glued on to the circle, on the contour with a black or brown thread. Focusing on the photo and stripes on the head, glue the eyes in place, sew on the contour of the second eye. You can simply glue the eyes together. You can just stick the nose, smile. Do not forget to put a glare on the pupils. Paint the chalk with a chin.
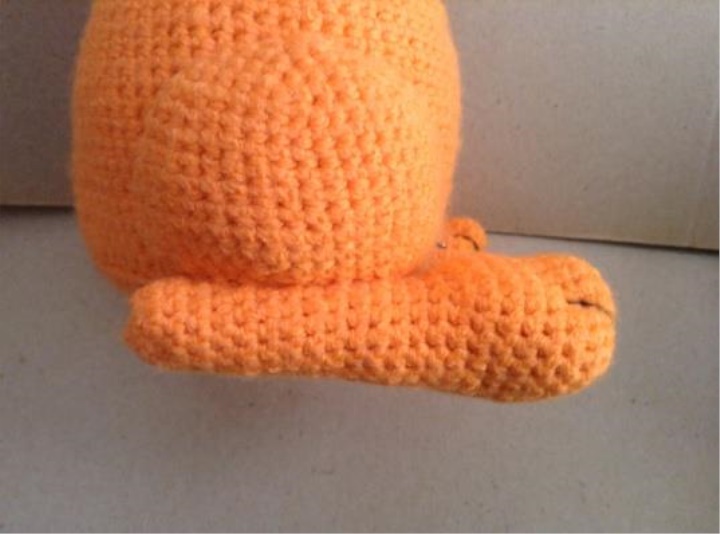
Sew on the front paws, focusing on the photo of the finished cat.
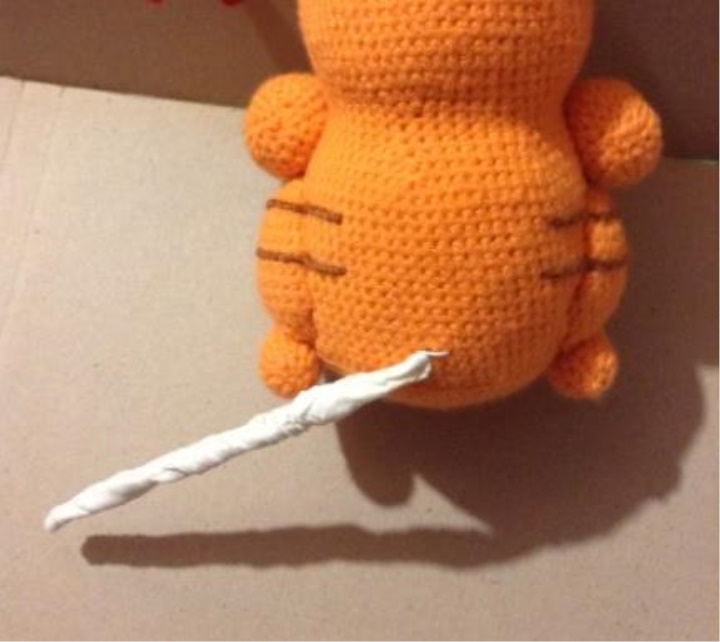
Tail. Mark the middle of the back and place for the tail (about 4 rows up from the hinge looped). Next to this point, thread the wire, pull it out through a pair of loops. The ends are twisted and bent to the size of the tied tail. To coil the wire with a piece of adhesive plaster. Insert the wire into the tail, fill it (do not stuff the tail of the tail) and sew, slightly pulling the last row. To bend as in the photo. You can sew a tail with a few stitches to the trunk so that it does not move aside.