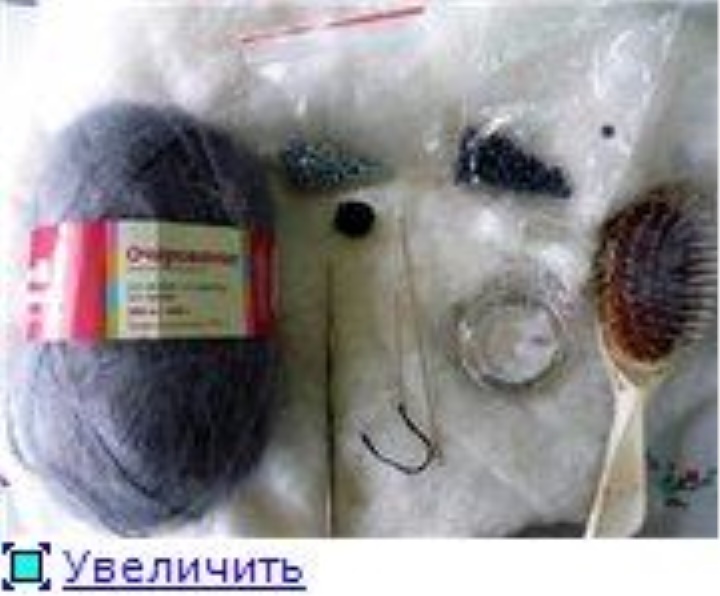
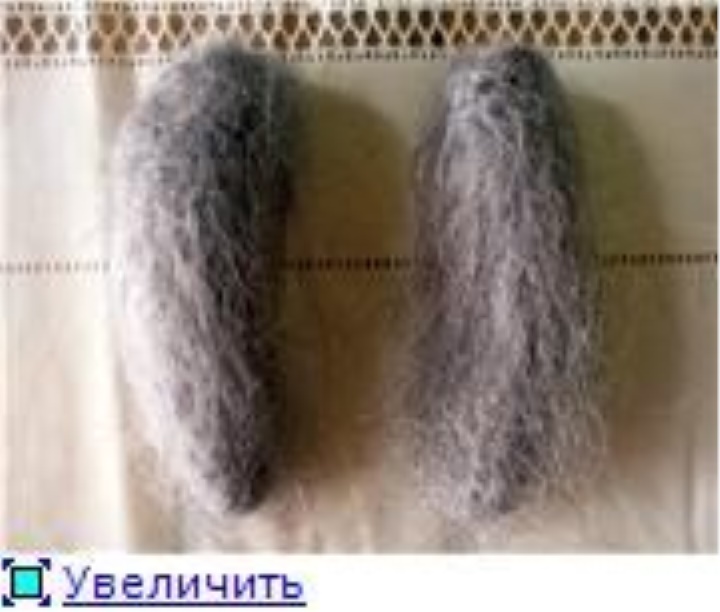
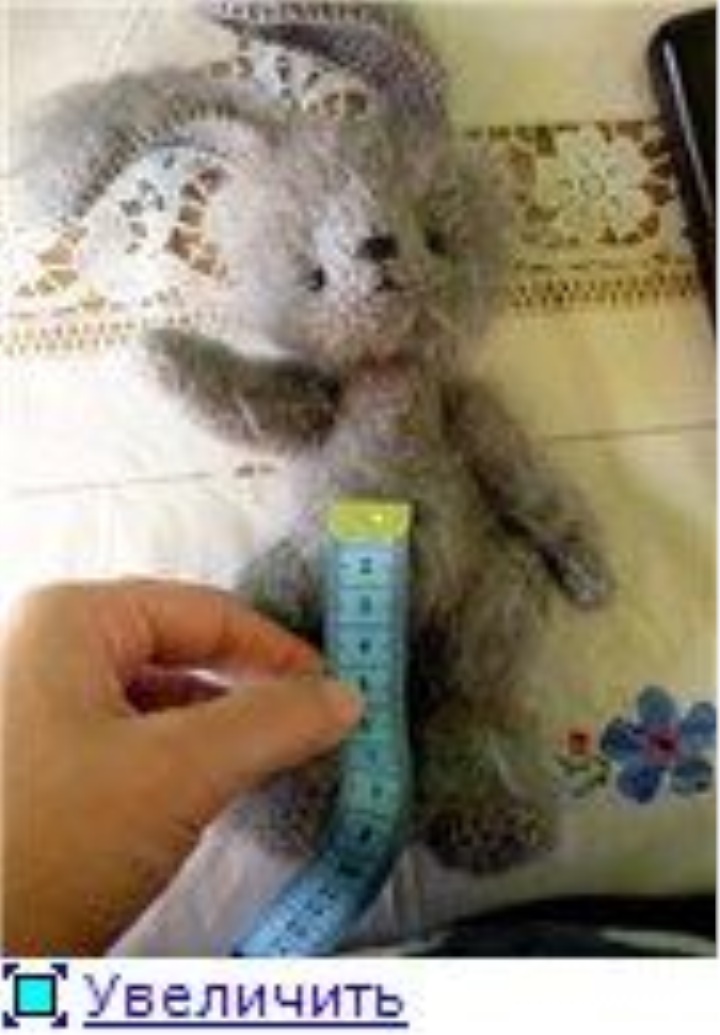
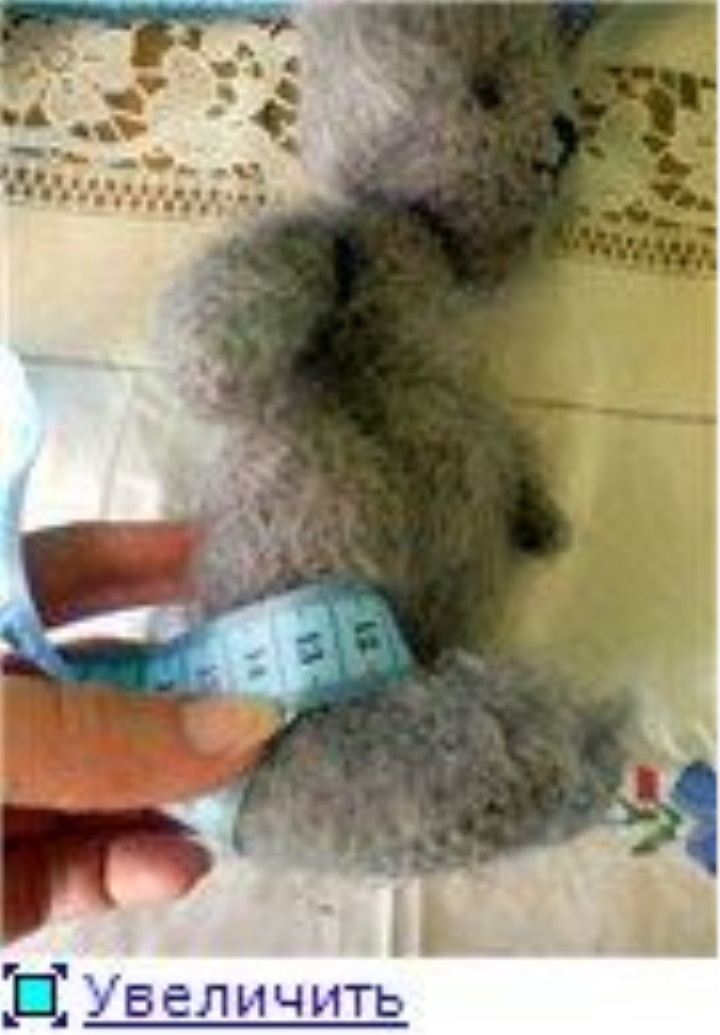
Yarn with mohair content. I have the Trinity "Charm" 300m * 100g 35%
mohair, 15% wool, 50% acrylic. I knit in two strands. The bunny is grown by 18-20
cm (without taking into account the ears) and one hun- dred hound is a hare and one more
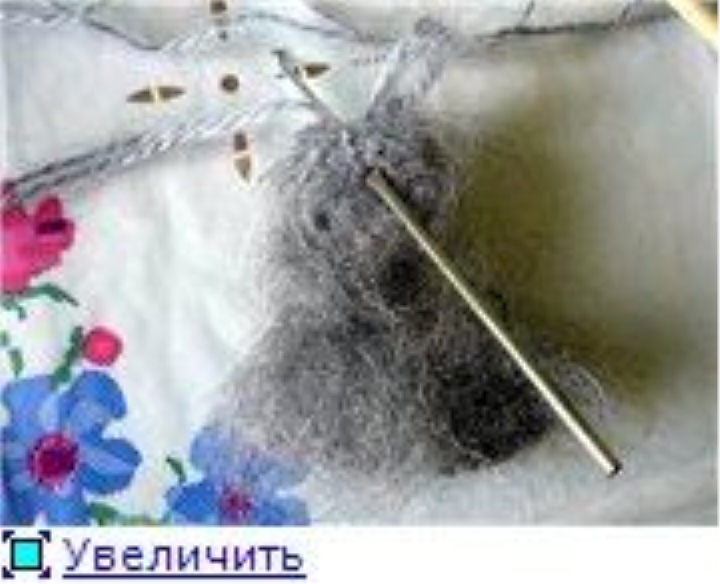
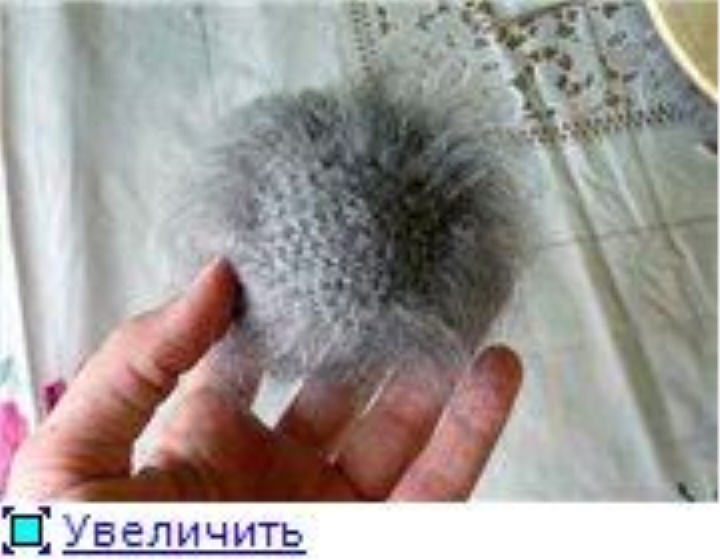
Brush for combing the fur (you can use a regular massage)
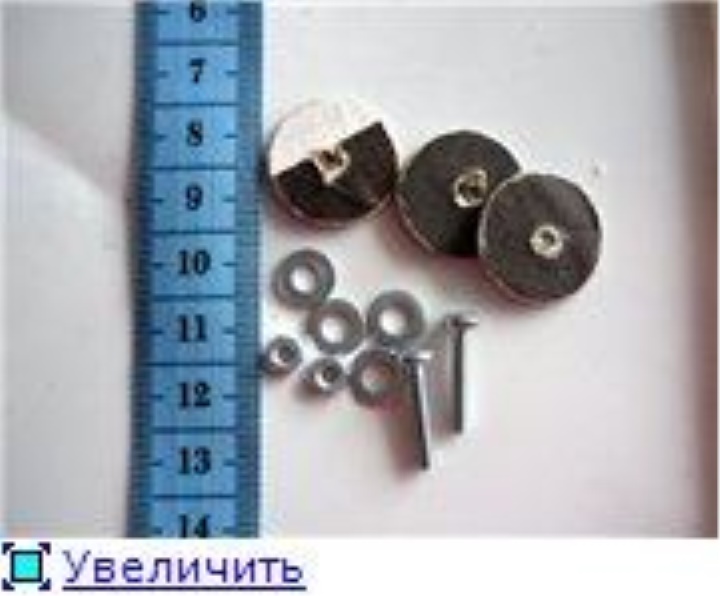
And the cogs are closer. I cut the discs from the side of the cover from the shoe
boxes, where there are more layers of paper. You need one more cut and walk
sandpaper on them
To begin with, a few words about knitting "fluffy" yarn:
1. The wrong side will have a "face" for details, since the knitting pattern
almost always get fuzzy
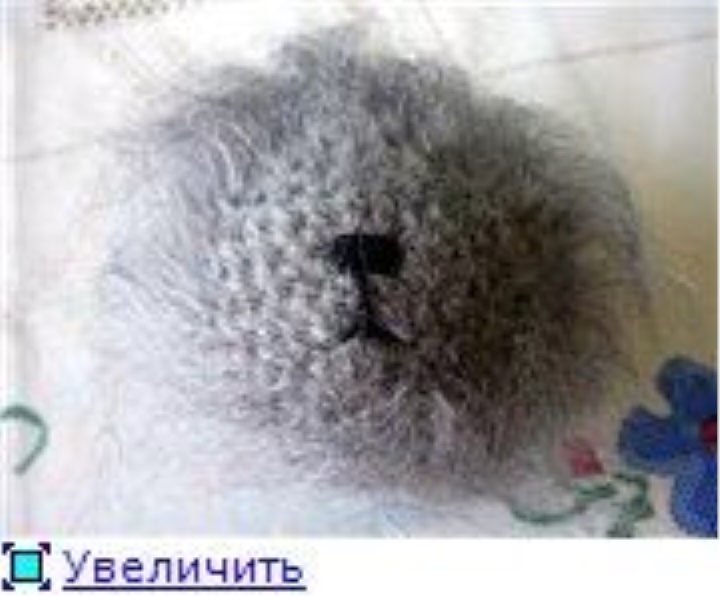
2. Fluffiness of the product can be achieved by simply scratching the finished product
detailing, and loosening the thread in the process of knitting. To do this, by capturing
thread the thumb and forefinger of the left hand (or right if you are left-handed :)
) and one or two times to hold it "against the wool"
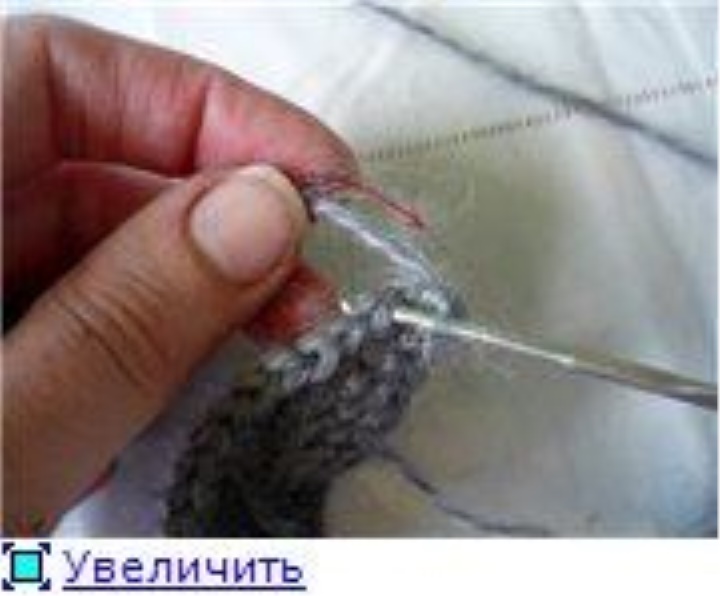
Swell the thread before EVERYONE loosening the column. Process
knitting takes more time, but the result is significantly
better: more long fibers are released and the toy turns out more
fluffy and soft. Then I'll just have to comb the animal
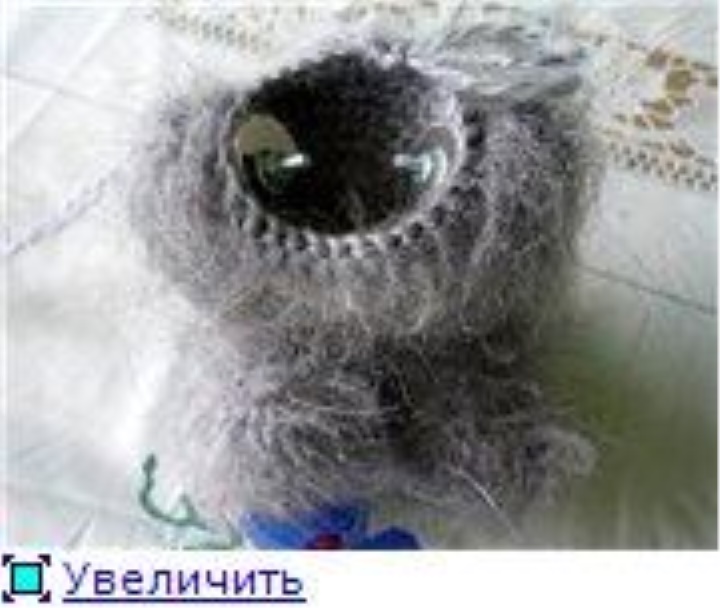
HEAD:
1. 2bn, 6stbn into the second b, we enclose in the ring
2. Prib * 6 = 12
3. (prib, 1stbn) * 6 = 18
4. (prib, 2 bar) * 6 = 24
5. (prib, 3 stbn) * 6 = 30
6. (prib, 4 bar) * 6 = 36
7. (prib, 5 stbn) * 6 = 42
8. (prib, 6 stbn) * 6 = 48
9. Straight = 48
10. Straight = 48
11. (уб, 14ббн) * 3 = 45
12. (уб, 13ббн) * 3 = 42
13. (уб, 12стбн) * 3 = 39
14. (уб, 11стбн) * 3 = 36
15. (уб, 10стбн) * 3 = 33
16. (yb, 9stbn) * 3 = 30
17. (уб, 3стбн) * 6 = 24
18. (уб, 2стбн) * 6 = 18
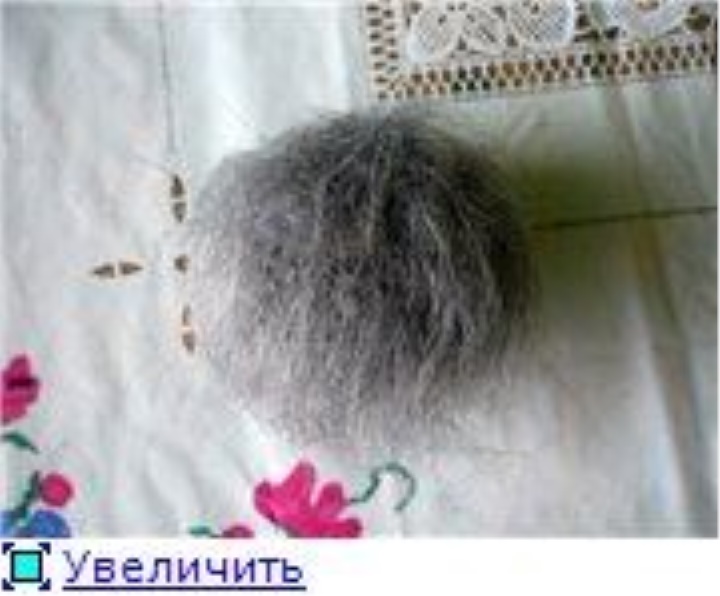
Fill the bead with sintepon
19. (yb, 1stbn) * 6 = 12
add more sintepona
20. уб * 6 = 6
It turns out that this is a ball
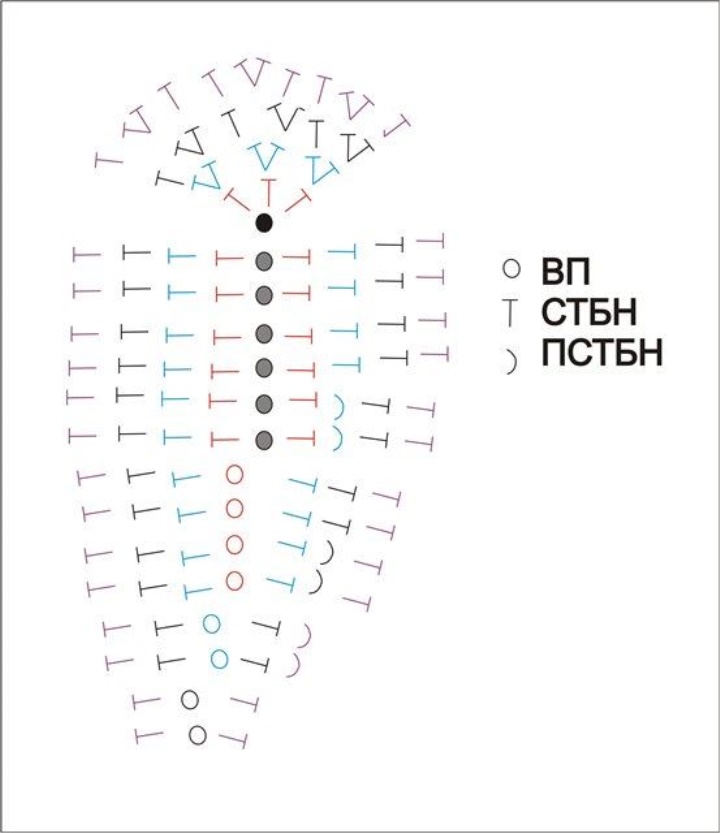
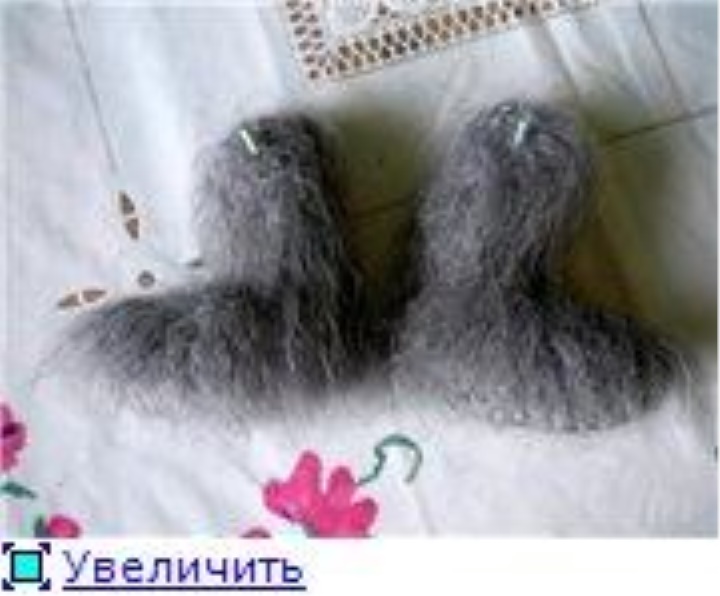
EARS:
1. 10in
2. Begin to knit in the second EaP.
2stab in the first step, 8stbn, 4in. = 14
3. Turn the work "upside down" and knit in the "legs" of the previous
series (in the chain of air loops)
4stbn, 2pstbn, 7stbn, 3stb per trace loop, 13stab, 4in = 33
4. 4stbn, 2pstbn, 11stbn, prib * 3, 17stbn, 4in = 44
5. 4stbn, 2pstbn, 15stbn, (prib, 1stbn) * 3, 20stbn, 3stb in the last stage. = 53
6. Begin to tie the wire. We knit as usual, just putting it on
previous row. Tip the tip so it does not pop out.
3stbn in the first stage, straight, tying the wire = 55
And here is the ready ear. It remains only to hide the tip of the thread, which we stick out
in the center
Hence we knit further
Today, we will need not only a hook and thread, but also all the "iron" that
We are stored for the legs
We begin to knit the legs, not fluffing the thread.
(+1 = tie one knot to level the knitting)
1. 7Vp
2. 6stab, 3stb in the last crochet. (We turn the work "upside down" and knit
in the "legs" of the previous series along the chain of air loops) 6bb, 4in. = 19,
turn "upside down"
3. 4stbn, 2pstbn, 4stbn, prib * 3, 10stbn, 2in = 28
4. 2stbn, 2pstbn, 6stbn, (prib, 1stbn) * 3, 12stbn, 2in = 33
5. 2stbn, 2pstbn, 11stbn (prib, 2stbn) * 3, 13stbn = 40
+1
Let's start fluffing the thread
6. 40star
7. 14stbn, (yb, 1stbn) * 4, 14stbn = 36
8. 12stab, (yb, 1stbn) * 4, 12stbn = 32
9. 10stbn, (yb, 1stbn) * 4, 10stbn = 28
10. Уб, 6стбн, (уб, 1стбн) * 4, 6стбн, уб = 22
11. 5stab, (yb, 1stbn) * 4, 5stbn = 18
12. 5stab, уб * 4, 5stbn = 14
13. 14stbn
14. 14stbn
+1
15. 6stbn, prib, 7stbn = 15
16. 7stab, prib, 7stbn = 16
17. 7stbn, prib, 8stbn = 17
18. 8stbn, prib, 8stbn = 18
19. (8stbn, arr) * 2 = 20
20. 20 stb
21. 20stbn
22. (yb, 8stbn) * 2 = 18
23. (7stb, yb) * 2 = 16
24. (2stb, yb) * 4 = 12
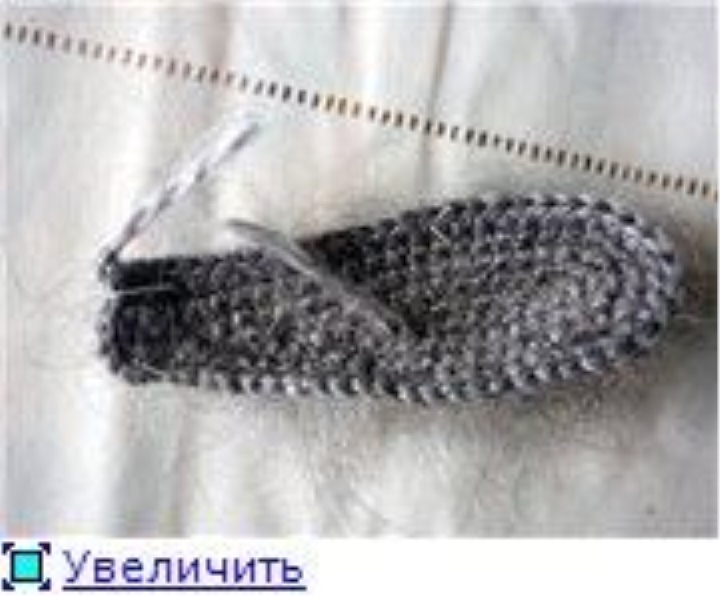
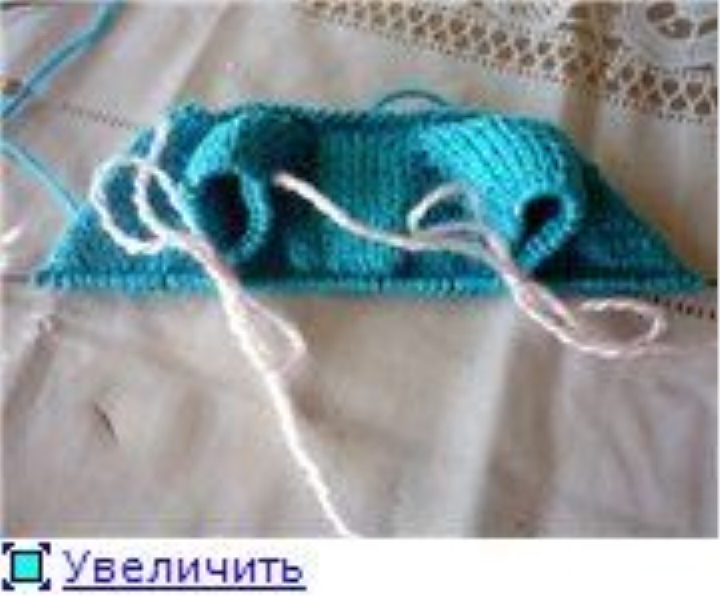
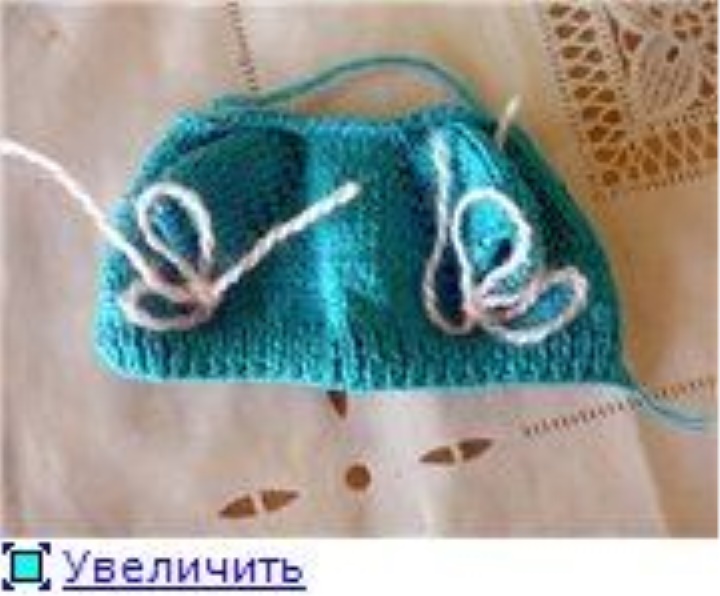
Fill tightly the foot and a small part of the shin. We begin to insert the screws.
For this, we straighten out the leg in front of you and find the middle
hips Count the two rows down and expand the hole between the posts.
You can just use the hook
We put on the screw a metal washer, and then a cardboard disc and insert all
this, from inside our leg, into the hole

Fill the leg to the end
25. Vb * 6 = 6
Pull the hole with a thread
We do not forget that we insert the screw into the second leg symmetrically!
BODY:
1. 2bn, 6stbn in the second bn = 6
2. Prib * 6 = 12
3. (prib, 1 stbn) * 6 = 18
4. (prib, 2 bar) * 6 = 24
5. (prib, 3 stbn) * 6 = 30
6. (prib, 14stb) * 2 = 32
7. Straight = 32
8. Straight = 32
9. 10stbn, ub, 8stbn, ub, 10stbn = 30
10. Directly = 30
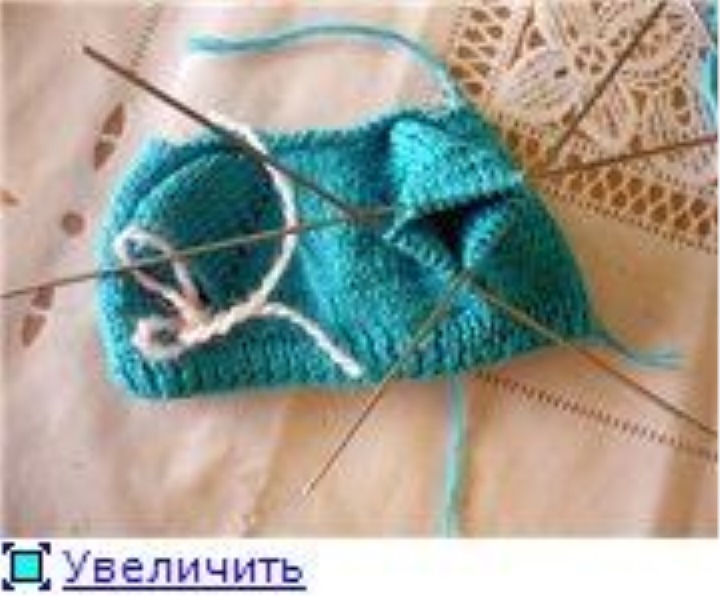
Our hook with a loop is on the back of our zai. We find its "sides" and
expand the holes between the posts symmetrically between 5 and 6 rows.
We insert into the hole the screw of our foot (make sure that the leg was directed
forward), we put on a screw a cardboard disk, a metal washer and
we twist the nut. You can twist both the wrench and the pliers with
narrow tips (me pliers are more convenient). We follow that the "fur" of our
the hare did not get in the thread, otherwise it will not turn out to tighten the nut. If the screw
scrolls together with the nut, you can take a small screwdriver,
accurately insert it between the posts in the leg and, puncture the sintepon,
hold the screw. Well tighten the nut, but without fanaticism
The same is repeated with the second leg.
To the nut does not loosen during the operation of the toy, we take a string and
wind it on the screw very close to the nut. Screwed, tied, and now
We take PVA glue (or acrylic lacquer, or what you have near at hand, but all the same
preferably not smelly) and carefully, so as not to drop on the zayu, we drip on the thread.
Leave for a few minutes to dry. That's what's before and is drying.
Is it dry? Then we continue to knit:
11. 9stbn, ub, 8stbn, ub, 9stbn = 28
12. 9stбн, уб, 6стбн, уб, 9стбн = 26
13. 8stbn, уб, 6стбн, уб, 8стбн = 24
14. 8stbn, уб, 4стбн, уб, 8стбн = 22
15. 8stbn, уб * 3, 8stbn = 19
16. Ub, 17stbn = 18
17-21. Straight = 18
We stuff a puziko, making sure that the butt is well stuffed, because the sticks
inside the screws are a great hindrance to the process.
22. (yb, 1stbn) * 6 = 12
We fill the body to the end
23. уб * 6 = 6
We pull the hole thread.
We remove the surplus of wool on the legs so that it does not hang below the sole and
a bit of milling, so that there are no clear cuts.
On the torso between the legs, too, a long woolen "tail" was formed. Its we
just a little pinch your fingers and that's it.
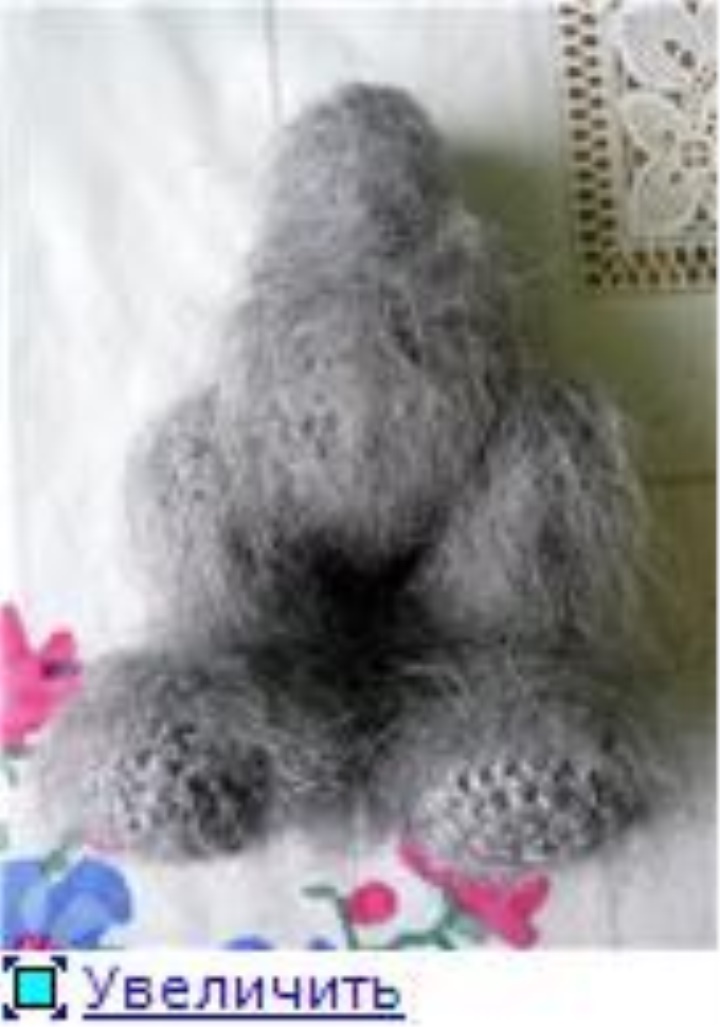
We get here such a semi-finished product
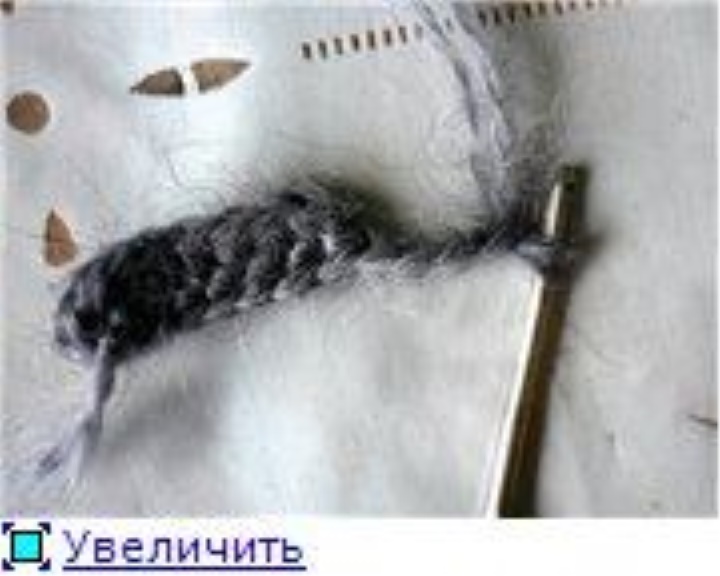
FALSE:
Paws begin to knit without fluffing the thread
1. 2bn, 6stbn in the second bn = 6
2. 6stbn
3. (app., 2stb) * 2 = 8
4. 8stbn
5. (app., 3stb) * 2 = 10
6. 10stbn
We begin to fluff the thread during knitting
7. 10stbn
+ 1stbn
8. 3stab, 4pstbn, 3stbn = 10
9. 3stabn, 4pstbn, 3stbn = 10
10. 3bn, 4pstbn, 3stbn = 10
11. 10stbn
+ 1stbn
12. (4stab, prib) * 2 = 12
13. (5stbn, arr.) * 2 = 14
+ 1stbn
14. 14stbn
15. (6stbn, prib) * 2 = 16
16. 16stbn
17. 16stbn
18. Ub, 14stbn = 15
19. 13stбн, уб. = 14
20. (yb, 5stbn) * 2 = 12
21. (yb, 4stbn) * 2 = 10
We fill the paws, making sure that the "palms" and the folds of the paws are also stuffed
22. Vb * 5 = 5
Pull the hole with a thread
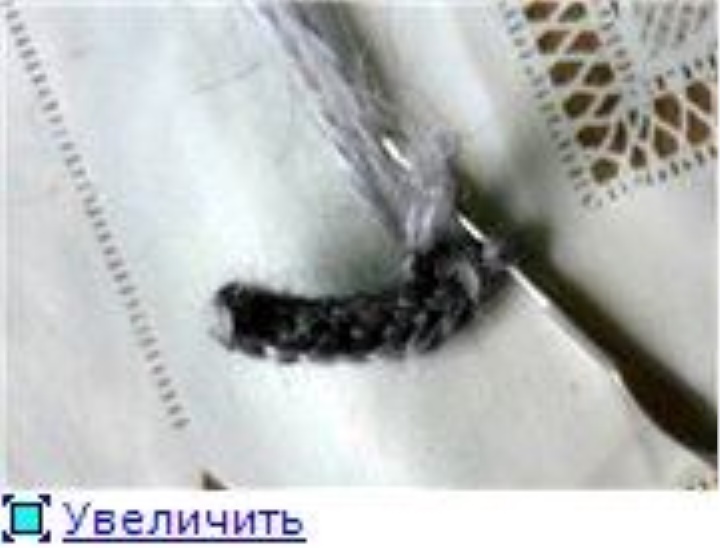
TAIL:
TAIL:
1. 2in, 6stb in the second
2. Prib * 6
3. (Prib, 2stb) * 4
4. 16stbn
5. (Уб, 2стбн) * 4
Leave the thread for sewing the tail
Head:
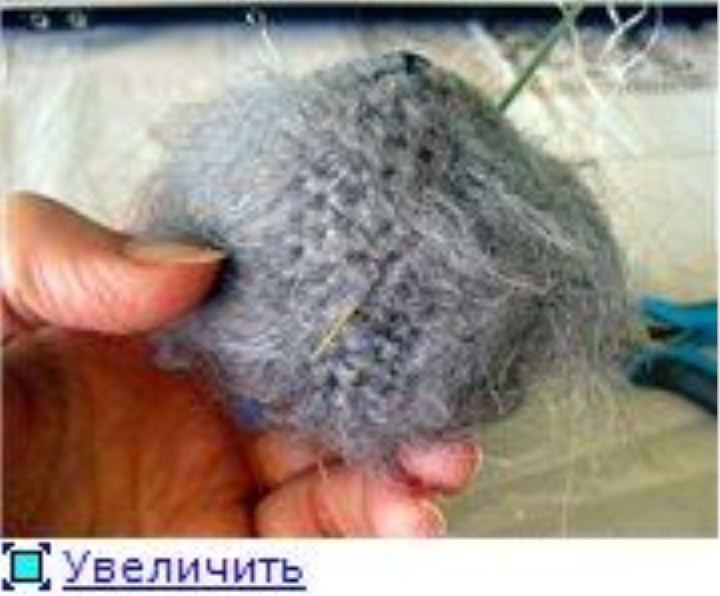
We grope one of the three corners on the head. On it we will have a spout.
We cut out the "corner" with scissors and a small area around it - we make
muzzle.
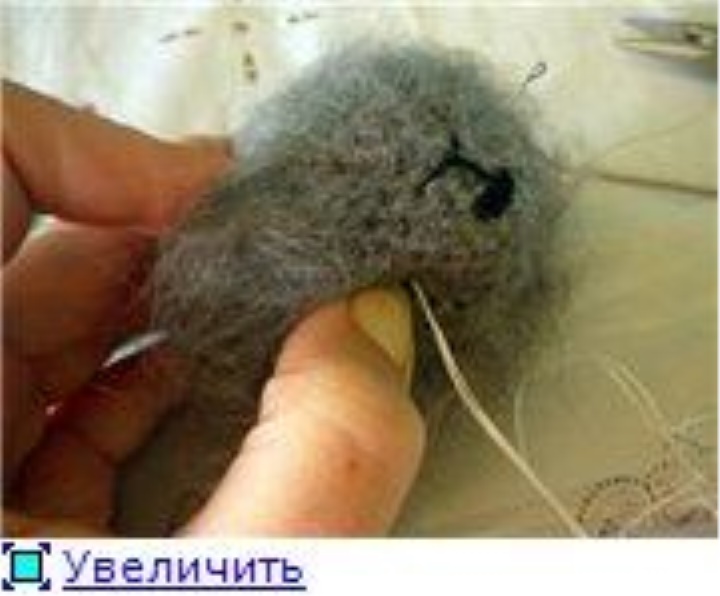
We take the mulina in several additions (4-6) and embroider the spout and mouth. The nose can be
varnished or waxed.
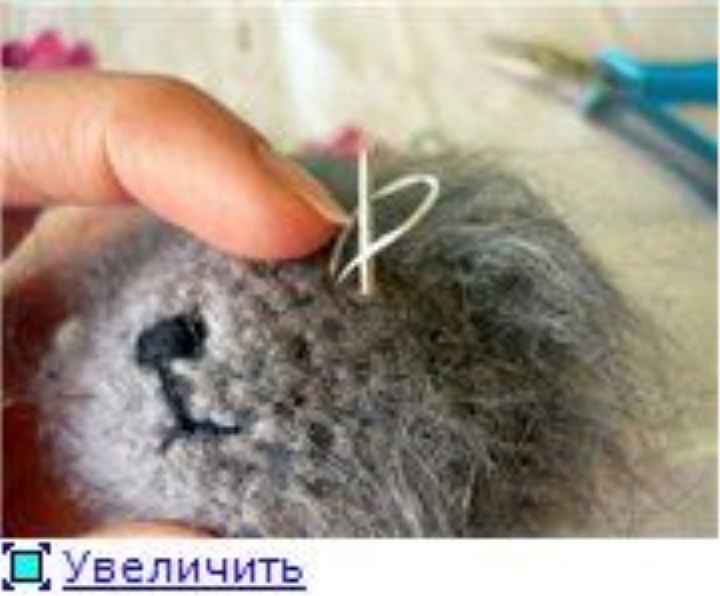
We mark out the location of future peepholes. We stick pins on
level of the nose, at a distance of 3-5 columns from the edge of the spout in both directions.
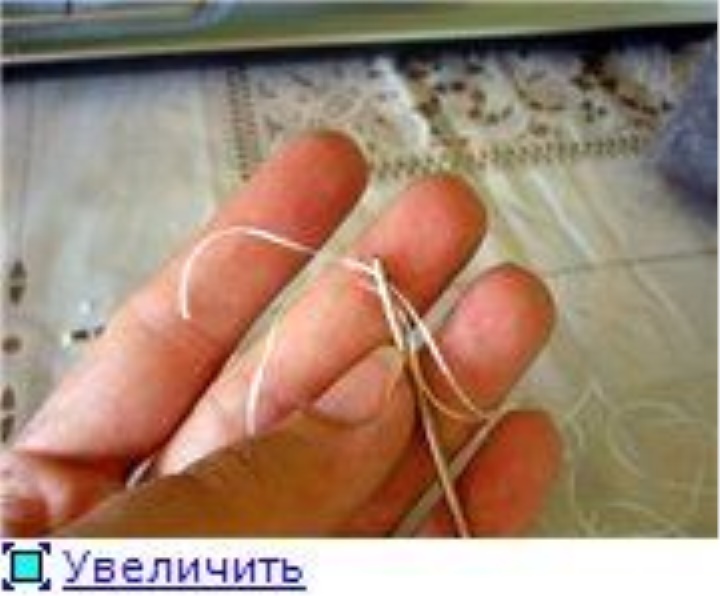
Now we need to pull the muzzle away. For this, we cut a strong thread long
100-120 cm. We fold it in half and put it into the long needle.
We make a puncture from the place of the future eye down. But not where we ended up
knitting, and a little closer to the "chin" (2-3 rows).
If piercing is very difficult to take pliers. Stepping back from the place
exit the needle a little way, insert the needle and drive it in the opposite direction.
We deduce it near to a place of the first input of a needle, on distance of one column.
We inserted the thread in the needle with two hooks, so at the other end of the thread we have
a loop was formed. Here in this loop, we also needle the needle.
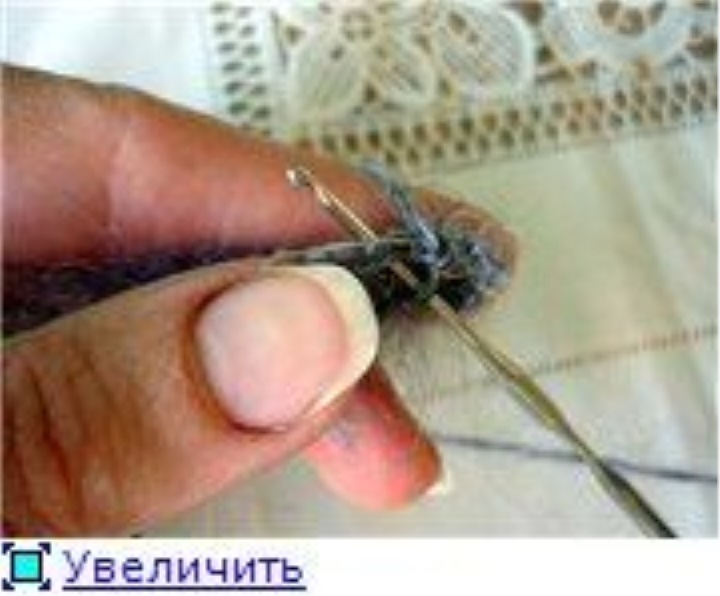
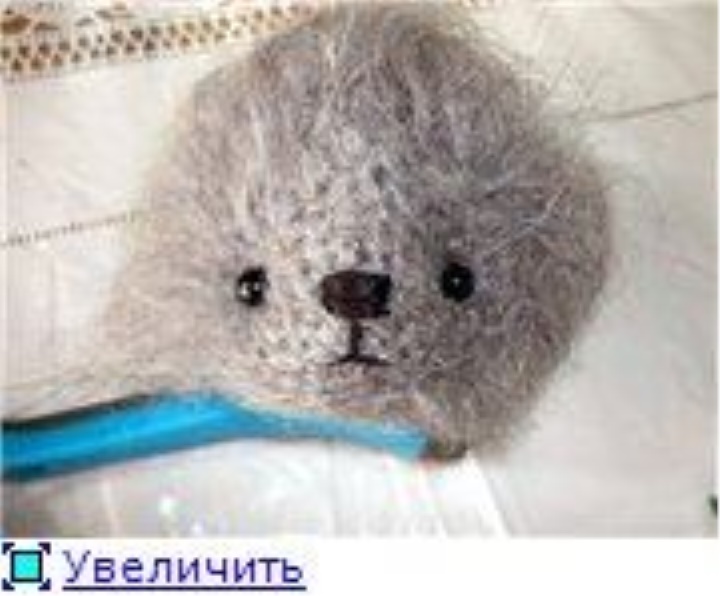
We tighten the thread as tightly as possible, using fingers to help flatten the head and press the eye socket into it.
Puncture back to the chin. After each puncture, tighten the thread from the
all the forces!
Now pierce from the chin to the other eye and back. We tighten it.
We repeat this procedure again with both eyes for reliability. Do not forget
each time tighten the thread! We try to make eye sockets the same !!!
We deduce a needle in the center of the depression formed from below and we tie a pair
nodules. We do not cut the thread, we still need it to sew the head.
In a long needle, we thread a strong thread into the eye color. Sew our eyes through
head - from the eye sockets to the chin. Thread the tie and hide the end inside
heads.
Use the pins to find the desired position of the ears. I sew my ears a bit
at an angle to the muzzle: the outer edges are slightly farther than the inner edges.
Found the right position. From our ears, we have wires. We take them and carefully
we enter into the head. Sew our ears to the head.
Feet:
With the help of pins, we find the position of the paws, which is the most important for us
like
We take a long needle and insert a dental floss into it (or another
A strong thread, but one that can be tied and a knot on which
will dissolve randomly)
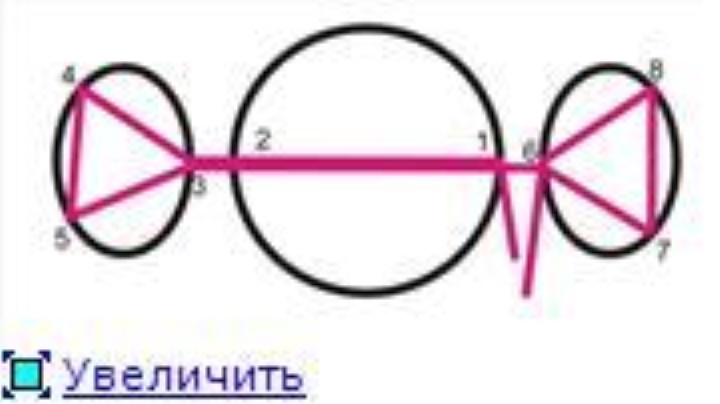
We introduce the needle into the trunk at the first attachment point and deduce from the other side in
point 2.
Now we insert the needle from the inside of the foot (into the armpit) and display it
between the posts on the shoulder, but not in the center, but by moving forward or backward (points 3
and 4). Now the needle is taken to the same point from which we just brought it out and
we carry out in m 5 (m 5 is symmetric 4 with respect to 3). Withdrew? And now again we enter
Needle in t 5 and bring to the armpit (t 3). Such a paw press does not make on the paws
huge dents, similar to cellulite, just need a little
Straighten the knitting bars at points 4 and 5
Again, pierce the body through in the "old" places and do
with the second foot the same procedure as with the first. Now you can tie the ends
thread a knot, or you can, for reliability, walk a thread once more.
Tie a knot must be VERY hard, almost kicking your foot into our animal!
Well, do not forget about the tail of the navel
We take a little sintepon, roll into a ball and put it in the tail. We find
he needs the right position and sew.
You can embroider claws on paws and legs, especially if you have a light suit.
On dark gray zaih I do not use tinting, but the light is very cool
the girls were toned. This can be done with acrylic paints, pastels, shadows
for eyelids, etc.
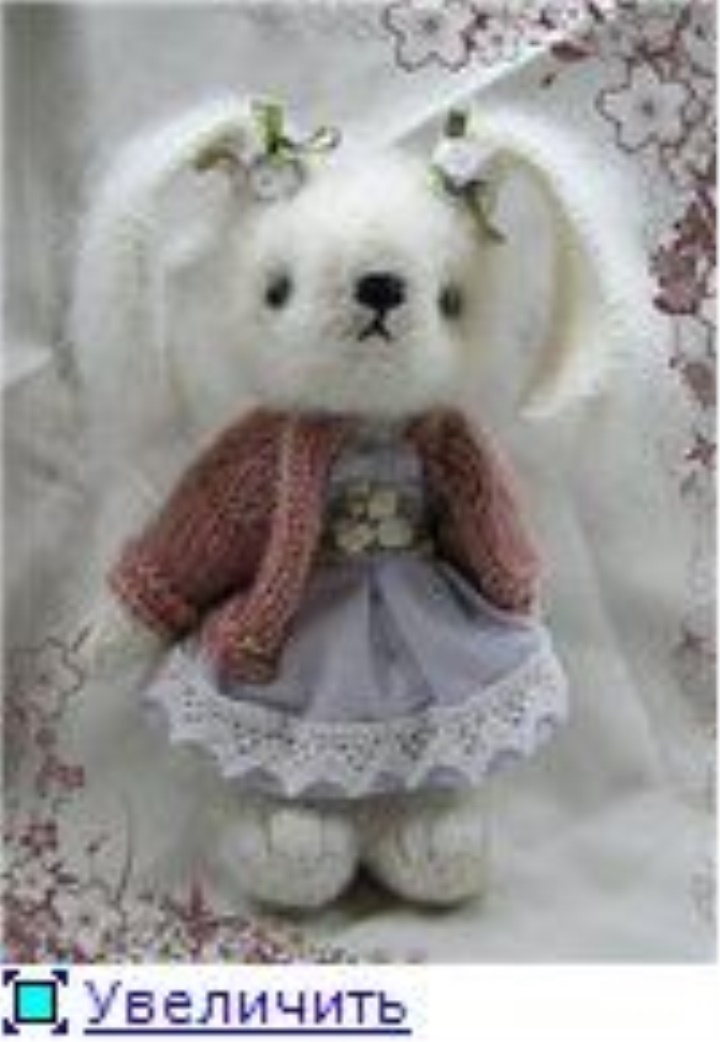
That's all, our Zaya is ready!
Now it must be dressed. We can tie him a blouse.
We make clothes.
To measure our zayu will be in the process of construction. The benefit of the customer is not cranky,
can and wait next to the cutter. Yes, and we will build a very
simple scheme.
All measurements must be recorded at once, so as not to do all the work
twice.
Panties:

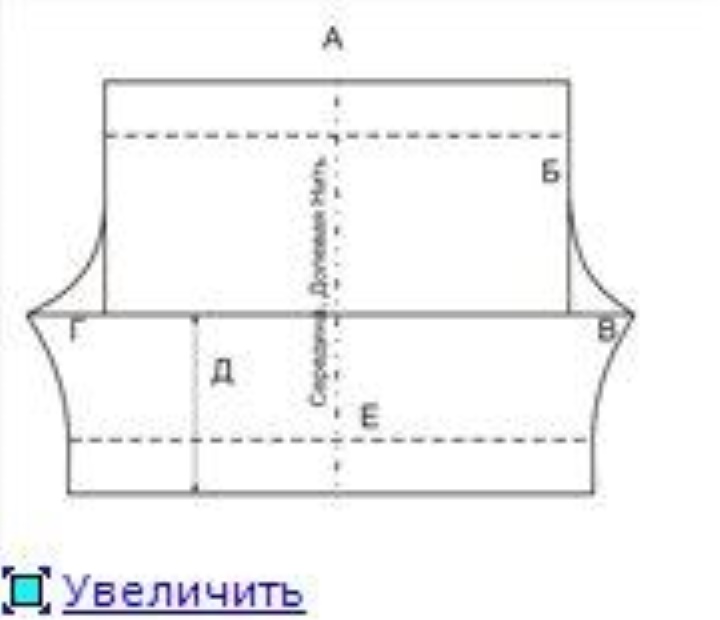
We find the widest place. He needs to know in order to panties
freely dressed.
Depending on the distribution of the packing, the widest place can be
or Girth of the hips (do not forget to grab the tail), or Girth of both feet.
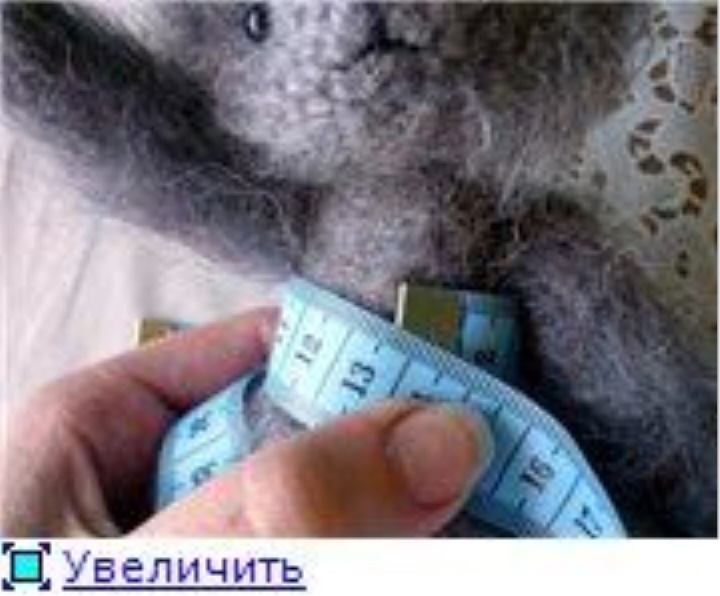
Measured. In my case, this is the girth of the feet. It is equal to 25 cm.
We add a small increase in free fitting (PS), so that
I had to pull up panties with soap and 25 + 1 = 26 cm
This value is divided in half (because we will draw one leg) and
we obtain 13 cm - A
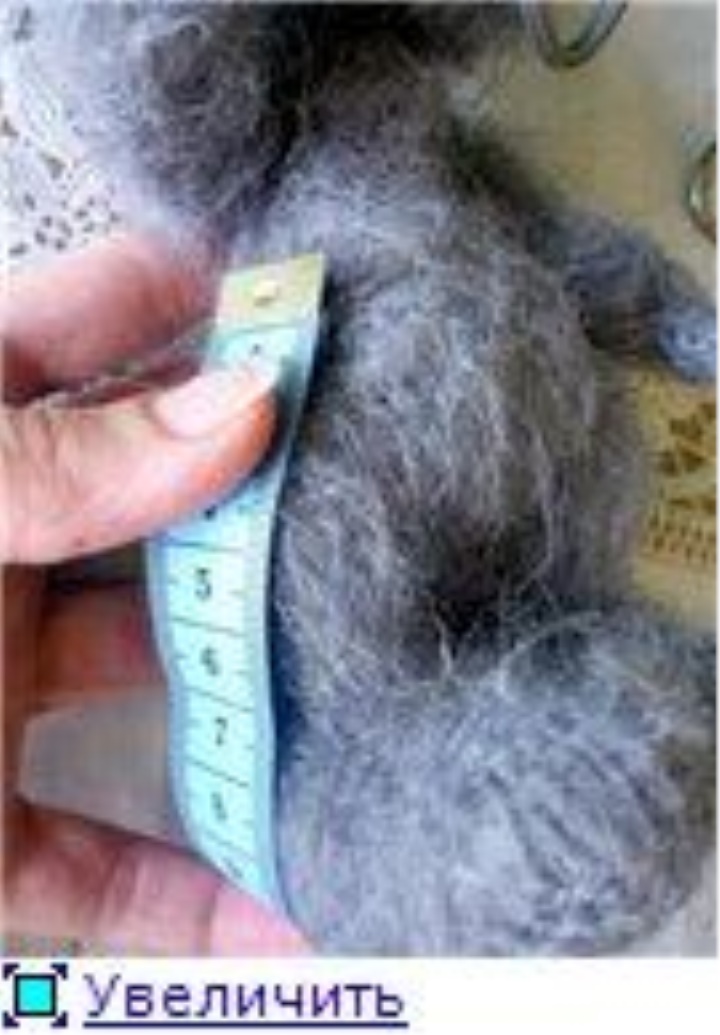
We measure the height of the seat.
AT
In my case this is 4.5 + PS = 5cm. At once we add 1-1,5см on a kulisk 5 + 1,5 = 6,5см
- B
We measure the diameter of our legs at the top
In my case, this is approximately 4 cm. We divide this value not in half, but one part
we do slightly more than the other B = 1.8, r = 2.2
Measuring Foot Length

In my case, this is about 3 cm + PS + allowance for the kuliska at the bottom of the trousers
= 3 + 0.5 + 1.5 cm = 5 cm - F
Measure the circumference of the foot through lifting. Less than this value, we can not
do the width of the panties down, because the leg just does not fit into the leg.
At me this size makes 13 sm + ПС 13 + 1,5 = 14,5см - Е
We design the construction with smooth lines, making sure that ALL CORNERS
COMPOSED 90 DEGREES !!!
To cut out two details, adding allowances for seams 0,5-0,7 cm in all sections, except
those where we have already added allowance for the kuliska (top and bottom)
Assembly:
1. Stitch the step seams (those that go along the legs)
2. We sweep the allowances of step seams
3. Stitch the middle seam of the panties
4. We sweep the allowances of the middle seam
5. We sweep the allowances for the hem of the bottom and the allowance for the top of the panties
6. Fold down the allowances of the bottom and make a line close to the edge of the allowance,
leaving a small section unshielded.
7. Fold the upper allowance and lay a stitch close to the edge of the allowance,
leaving a small section unshielded.
8. We put in the necessary length of the rubber in the cuffs of the top and bottom of the panties.
If desired, panties can be fitted with a little bag. Lyamo can be sewn back
to the wrong side of the panties, and in front to sew the velcro, button or sweep
loop and fasten it to the button.
Consider another case: our application was born a girl!
Dress-apron:
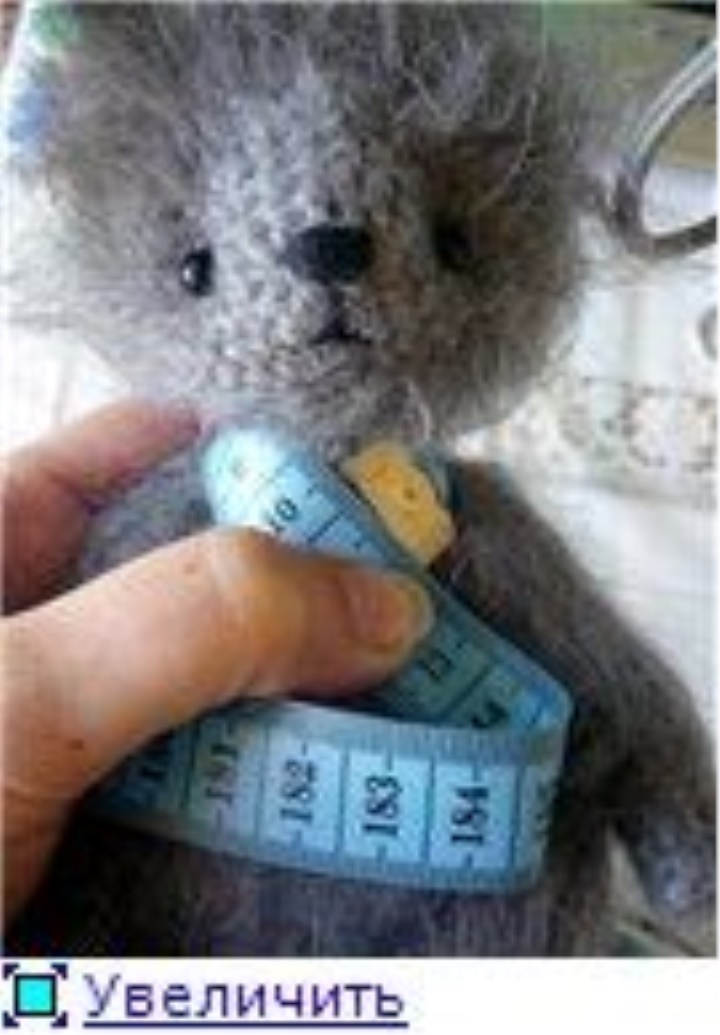
To build a dress-apron, you first need to measure the girth
waist
I have this 12 cm + 0.5 (PS) = 12.5 cm - A
We measure the height of the prospective breastplate of the bodice from the waist line

In my case this value is 2 cm - B
Measuring the breadth of the chest
In my case this is 3 cm - B
We estimate the height of the bodice at the back - 0,5-0,7 cm (this depends on the distance from the line
Waist to the "armpit") - G
We decorate the bodice with flowing lines.
We measure the hip circumference (do not forget to grab the tail)
I have this 22 cm "Yubochka" we build as a rectangle, the width of which is the Circumference of the hips + PS
(22 + 2 = 24cm), and the height is the desired length of our skirt.
We cut out two details of the bodice and one detail of the skirt, adding the allowances to the seams
0.5-, 07 cm in all sections, except for the lower cut of the skirt. Bottom of the skirt
add an additional allowance - 1-1,5 cm
Assembly:
1. Fold the details of the bodice face to face and stitch along the sides and
top.
2. Cut off the allowances in the fillet points and cut the corners of the allowances close to
line in the corners.
3. Unscrew the bodice, straighten and iron.
4. Wrap the side and bottom sections of the skirt.
5. Fit side skirts of the skirt and detach
6. Turn the lower cut of the skirt and turn it off
7. Pull the upper edge of the skirt with a thread or lay on the skirt folds, giving
the upper cut of the skirt is the length equal to the length of the lower cut of the bodice.
8. Fold the bodice and skirt face to face and stitch it.
9. Cut off the cut off of the bodice and skirt
10. Press ironing apron dress
Ljamochki it is possible to make of a satin ribbon, and it is possible to fasten on пуговичку and
hinged loop.
I will show a simpler blouse for a small size rabbit.
We need:
Yarn remains and hosiery knitting needles.
To begin with, we link the pattern of the pattern of the pattern that we assume
use. Tied a few centimeters, measured the length of the sample,
counted the loops.
Knit we will neck down. To find out the number of loops of the first row,
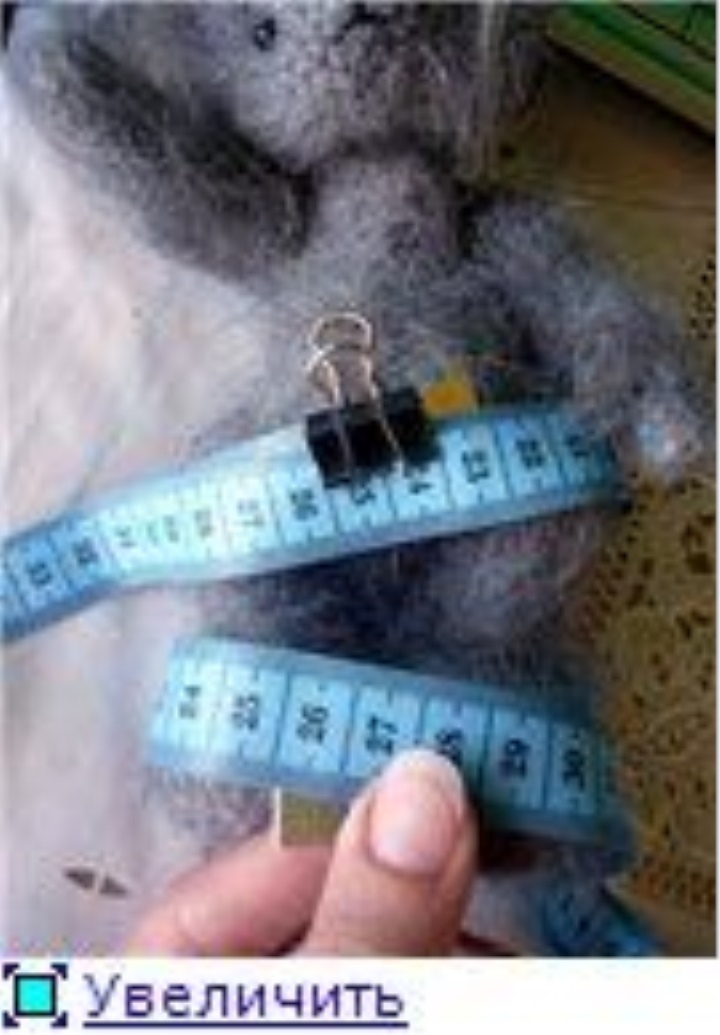
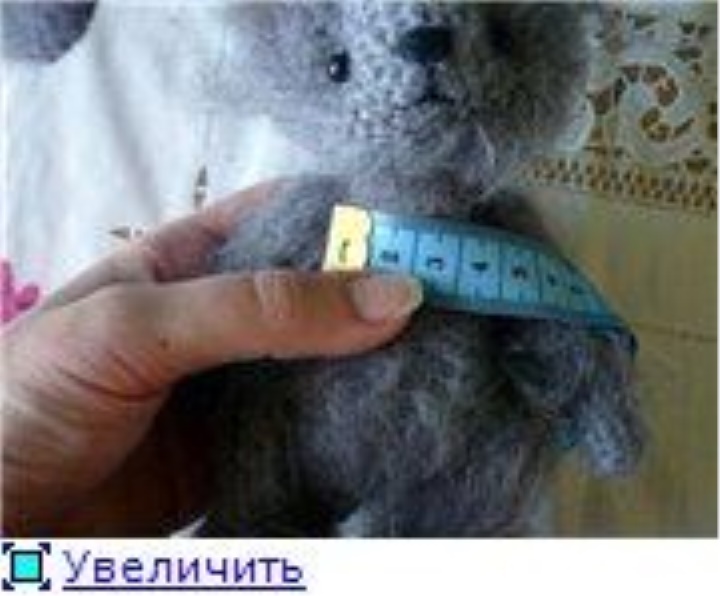
We must measure the Neck Girth of our animal.
My Zai has an OS of 10cm. Now we can calculate how many loops we need for
neck (look at the sample).
In my case, 39 loops fit into 10 cm. We need 4 loops for
it is ravaged. I add them during the mating process, so that the throat is
rather than stretched. So 39-4 = 35 loops.
I will show an example with a facial smoothness.
The first row is knitted by purl.
Now you need to consider your zayu more closely. My width
The back is smaller than the width of the chest, and the paws are quite bulky. Therefore, loops
on the back will be distributed least of all, and on the paws - more. About
having estimated (on eye), at me it has turned out here such distribution of loops:
7 loops - backrest
16 loops - sleeves (8 loops per sleeve)
12 loops - in front (6 loops per shelf)
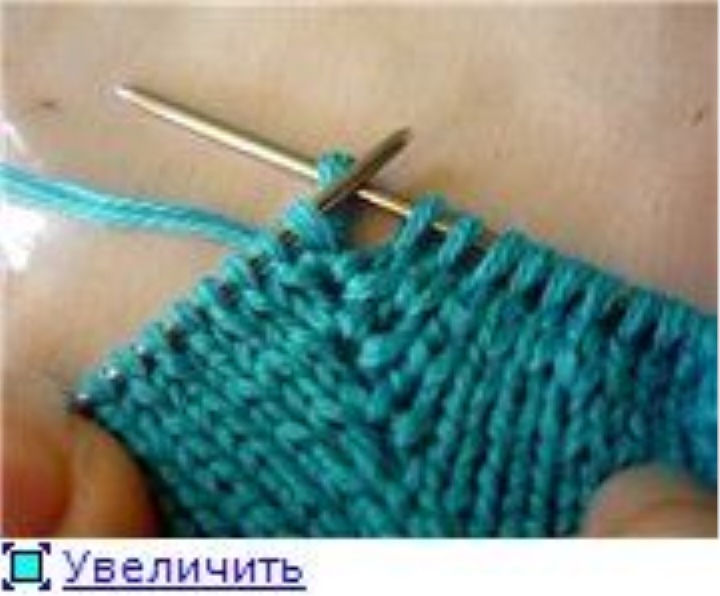
We knit the second row of facial:
6 п, накид, 8п, накид, 7п, накид, 8п, накид, 6п. - we added 4 loops that are not
refer neither to the back, nor to the front, nor to the sleeves, but serve to tie
raglan.
The third row and all the odd numbers are purl
6n, we unbound 3n from one, Sn, we unite 3n from one, 7n, we unset 3n from
one, Sn, we unite 3n from one, 6n. - we unfasten three loops from the same
loops that you added.
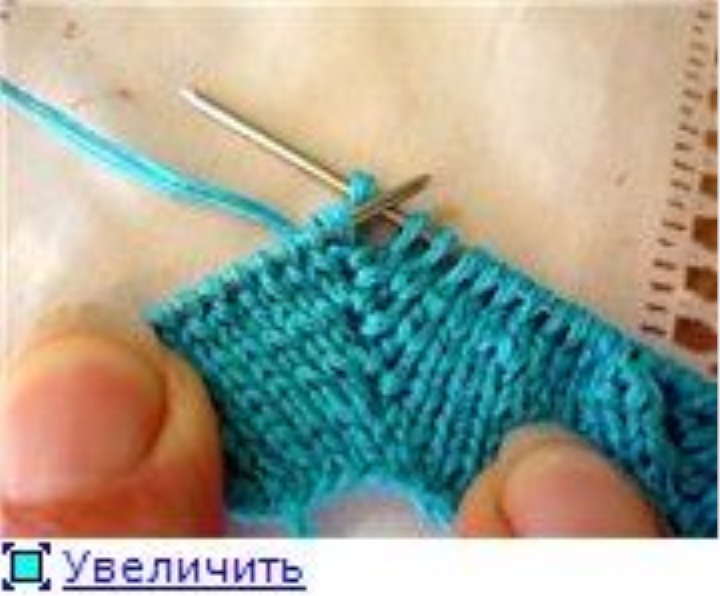
So we knit (in the front rows we loosen 3 loops from one on the raglan lines,
and the purlins are knitted with the wrong loops) until we have reached the end
the lower point of the armhole (up to the armpit). We apply the front row. Then we begin
knit with purl. We reach the line of raglan. We send the first of three
loops, which we have loosened from one loop. Those. the other two will leave in our
sleeve.
We collect the hinges of the sleeves, beginning with the middle of the three and ending with the middle of the
three, a thread.
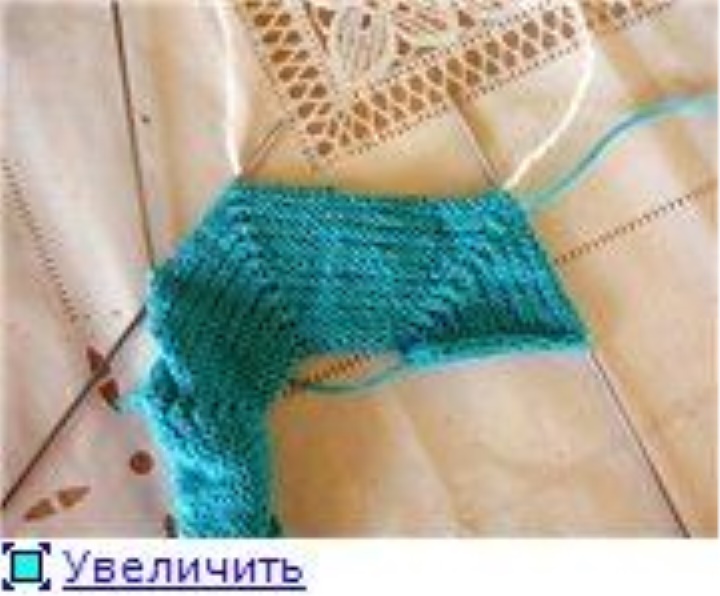
We tie a string and continue knitting with the wrong loops.
We were tied to the next sleeve, did the same procedure with the thread.
We continue to knit with purl. We finished the series.
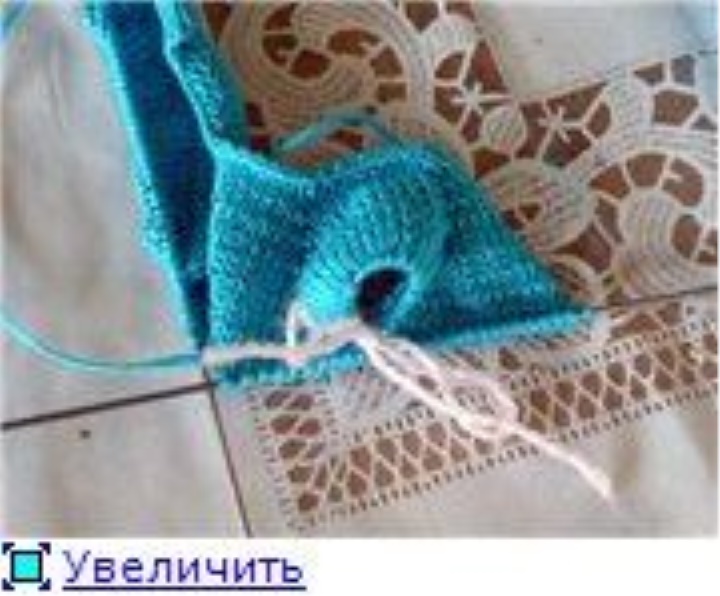
Now we knit the facial smoothness until we tie the blouse necessary
length. I decided to tie several rows of rubber bands 1 * 1, so that the bottom
the blouse did not twist.
Now we take the hinges of the sleeve and insert three spokes into them (it is possible and four, as in
knitting, just in this case the loops on the spoke will be smaller and the spokes can
to fall out).
Knit with facial loops. On my sleeves, I also tied several rows
elastic band 1 * 1.